Best Selling Products
Create a mock up sweatshirts in Photoshop with SaDesign
The process of mocking sweatshirts in Photoshop will help you transform shirt patterns super quickly. You can completely replace images, logos,... on the shirt as you like to create an extremely cool sweatshirt. Let's join SaDesign to see how to make sweatshirt mockups using Photoshop in an extremely simple way through the sharing below.
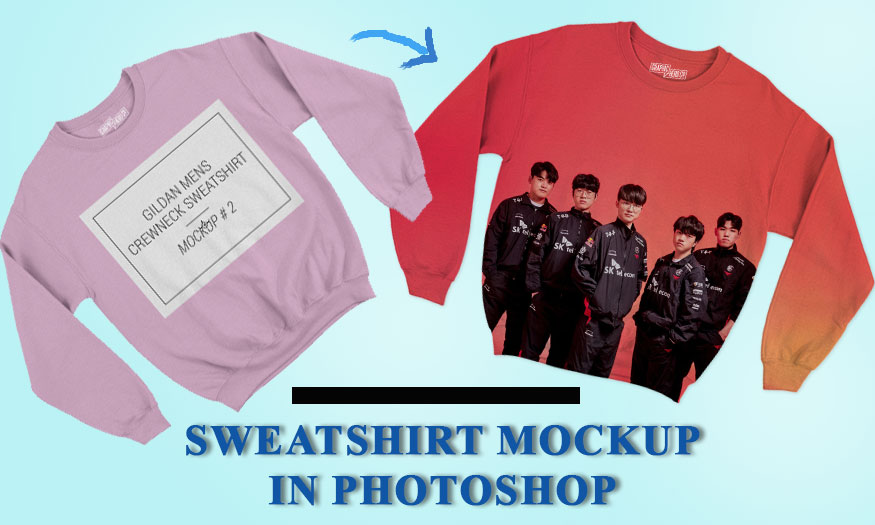
The process of mocking sweatshirts in Photoshop will help you transform shirt patterns super quickly. You can completely replace images, logos,... on the shirt as you like to create an extremely cool sweatshirt. Let's join SaDesign to see how to make sweatshirt mockups using Photoshop in an extremely simple way through the sharing below.
1. How to download a sweatshirt photo mockup
A mockup image is essentially a model for an object, the subject is created based on a specific design with appropriate proportions and sizes. Mockups are prototypes, to test different design ideas on sample products without wasting time and effort. If you can't create your own mockup, use free mockup sweatshirt templates and add your own textures and logos.
You can download sweatshirt mockups from famous sources such as Freepik, Adobe Stock, ShutterStock, Envato Elements,... Then change in Photoshop with the image and logo you want and you will have a completely new sweatshirt.
In today's sharing post, I will download the sweatshirt mockup on Freepik.
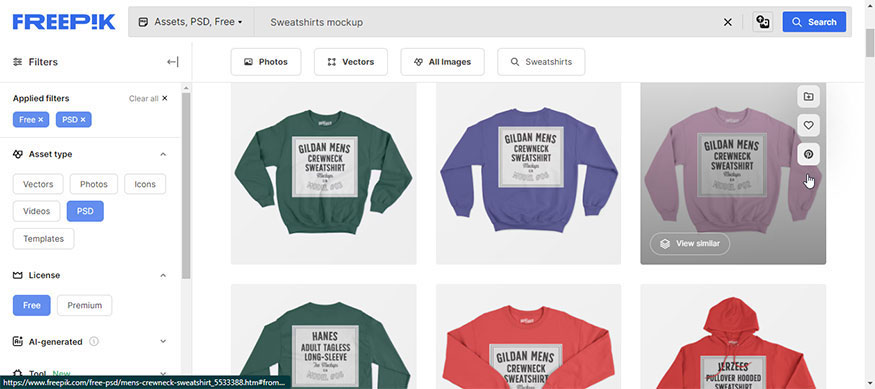
Step 1: First, visit the Freepik website, enter "Sweatshirts mockup" in the search box to find sweatshirt models. In the options, select Free, PSD format to be able to change the shirt pattern in Photoshop.
Step 2: We choose the appropriate mockup shirt model and then download it to our device. Here I used a photo of a purple sweatshirt from graphicheroco.
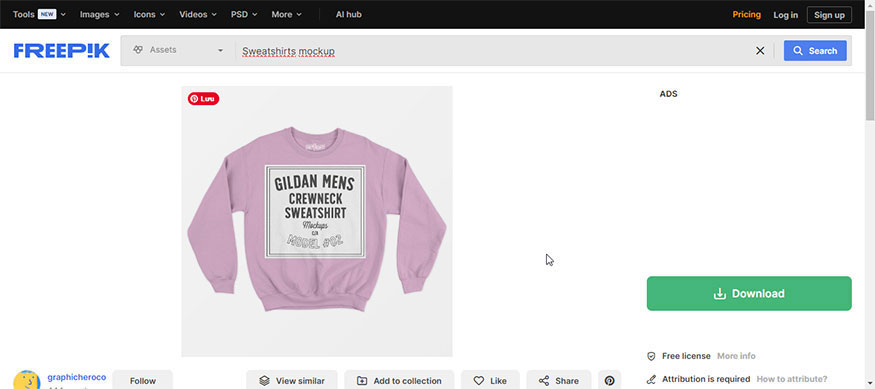
After downloading the template to your computer, unzip the file. Normally, image files on Freepik will have one JPG format image and one PSD file.
Open the image in the PSD file by right-clicking on the PSD file => select Open With Photoshop, to open the image in Photoshop. Then I will proceed to mockup the sweatshirt in Photoshop.
2. Steps to mockup a sweatshirt in Photoshop
After opening the mockup sweatshirt image file in Photoshop, you will see that this design is divided into many layers and many different groups. Usually, there will be a layer named “your work”, edit here or design here with a highlight color. We will mock up sweatshirts in Photoshop by replacing our images and patterns into this layer. If you don't see this layer, open each group to find it.
Step 1: At your work layer, edit here or design here depending on the file you download, right-click and select Edit Contents. Now a dialog box will appear, click OK.
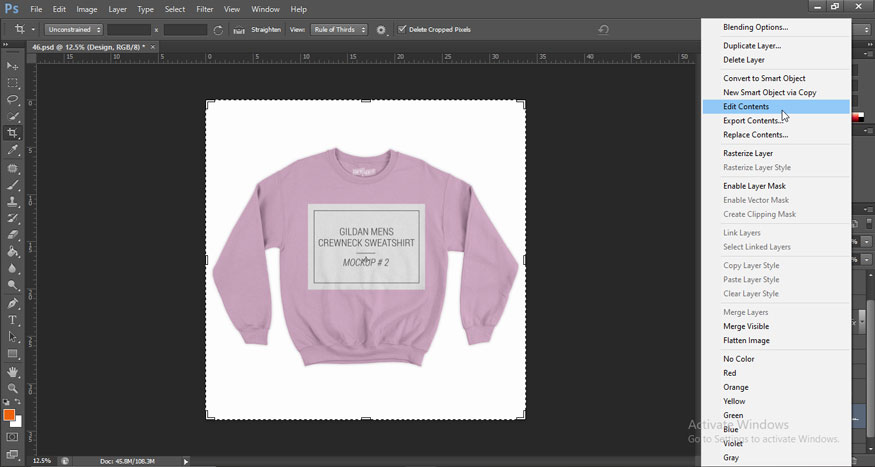
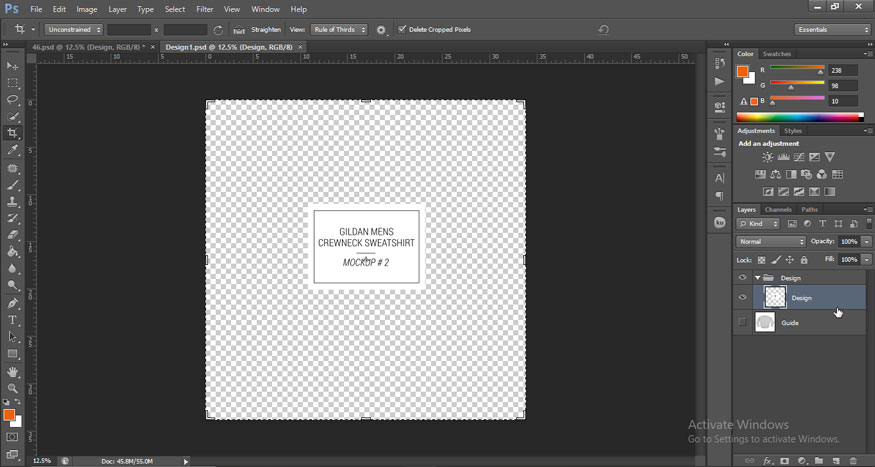
The workflow will automatically switch to a new area. Now you will proceed to mockup the sweatshirt in Photoshop in this area.
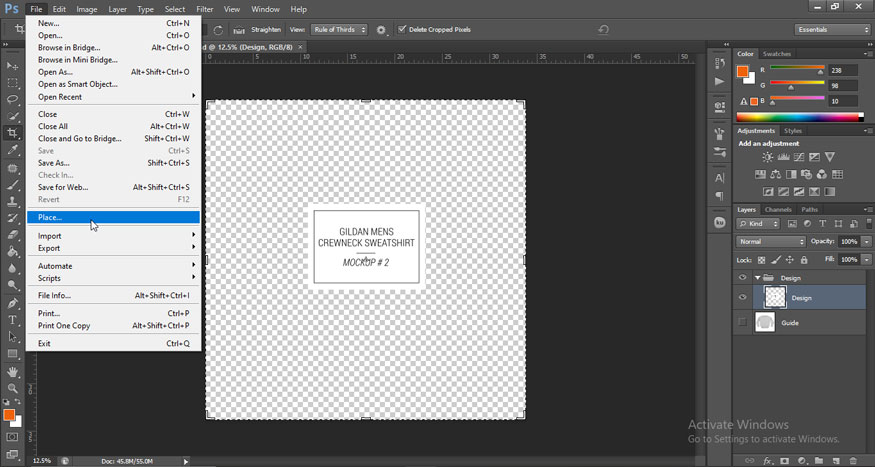
Step 2: Then in the menu bar, select File => Place Embedded, select the image you want to insert into the shirt and then click Place.
Here I want to insert the image of the T1 team of Esport League of Legends into the shirt.
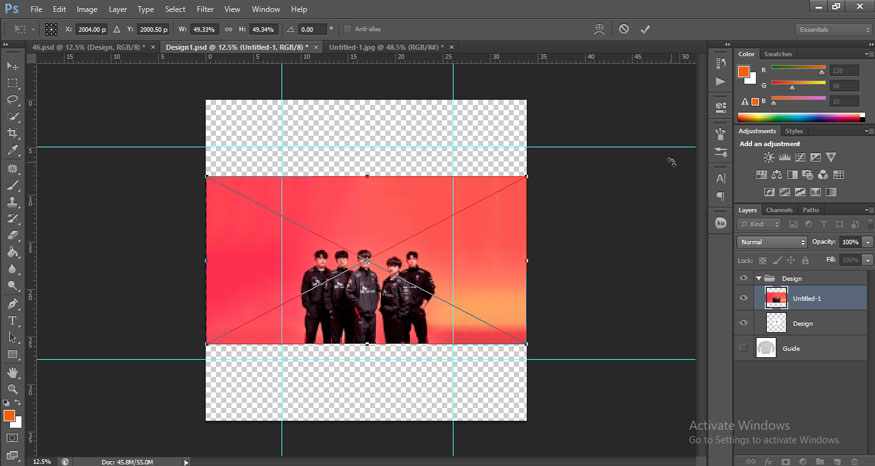
Step 3: Continue, we use the key combination Ctrl + T to adjust the image size to the center. Click the white anchor points above the image to resize it.
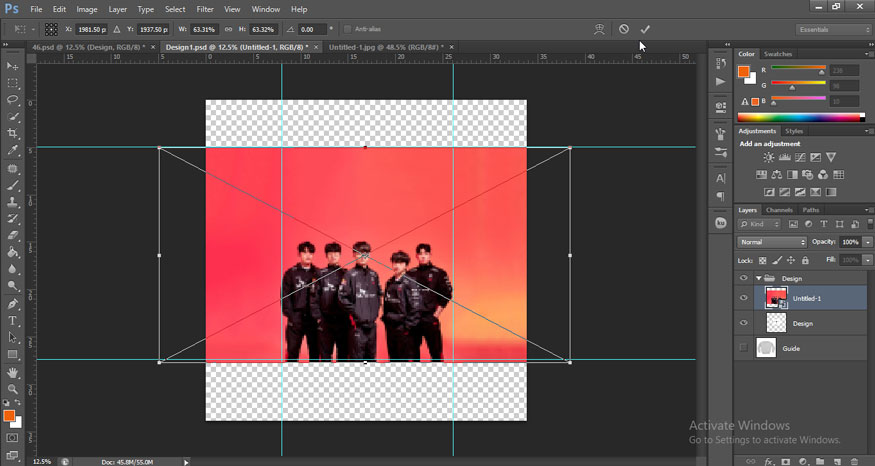
Step 4: In this case, I want the image to cover the entire shirt, so I just align it so that the image is as wide as the shirt. If you only want images of players, you can use the Quick Selection Tool to create a selection of objects.
Step 5: Go to the menu bar and select File => select Save to save the design.
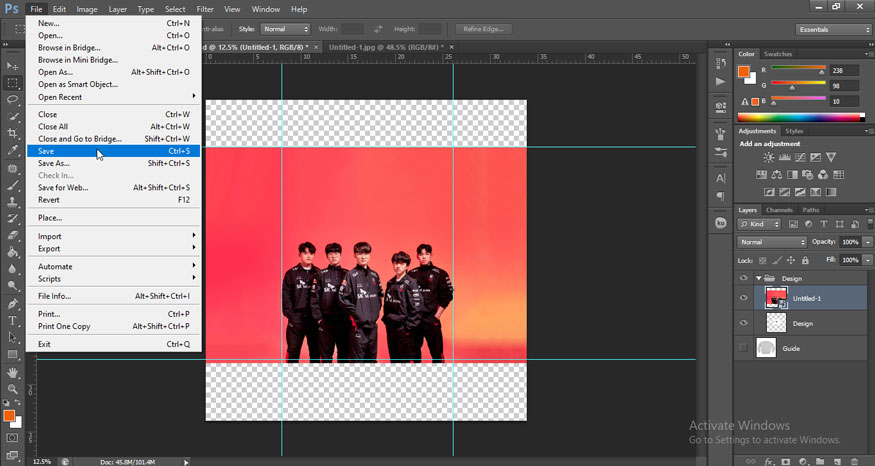
Wait a few seconds to save the image, then return to the main work area (original mockup shirt image) and the result will be a sweatshirt with T1 team motifs and a completely new red background.
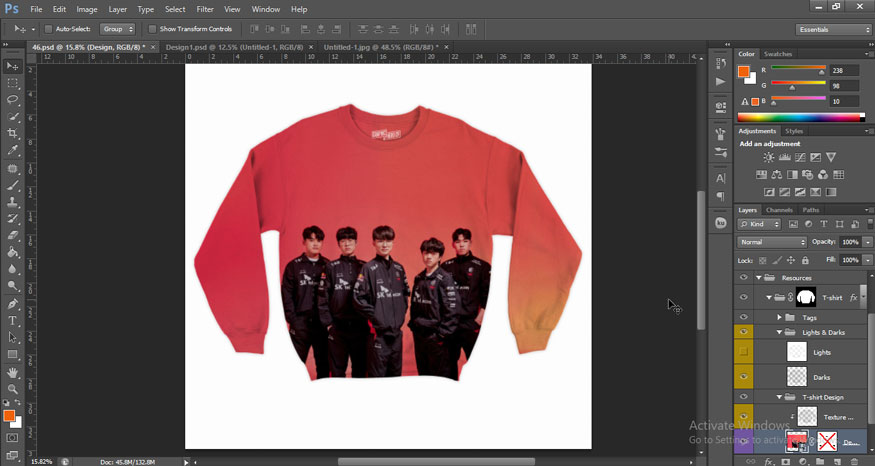
So the steps to mock up sweatshirts with Photoshop have been completed, very simple and fast. You can completely follow the instructions. Try it now to test the surprising results.


