Best Selling Products
How to Create a Grand Theft Auto VI action effect in Photoshop
Nội dung
Grand Theft Auto VI action effect in Photoshop is one of the perfect actions for designing flyers, posters,... You can completely turn your image into a Grand Theft Auto style with the following instructions from SaDesign.

Grand Theft Auto VI action effect in Photoshop is one of the perfect actions for designing flyers, posters,... You can completely turn your image into a Grand Theft Auto style with the following instructions from SaDesign.
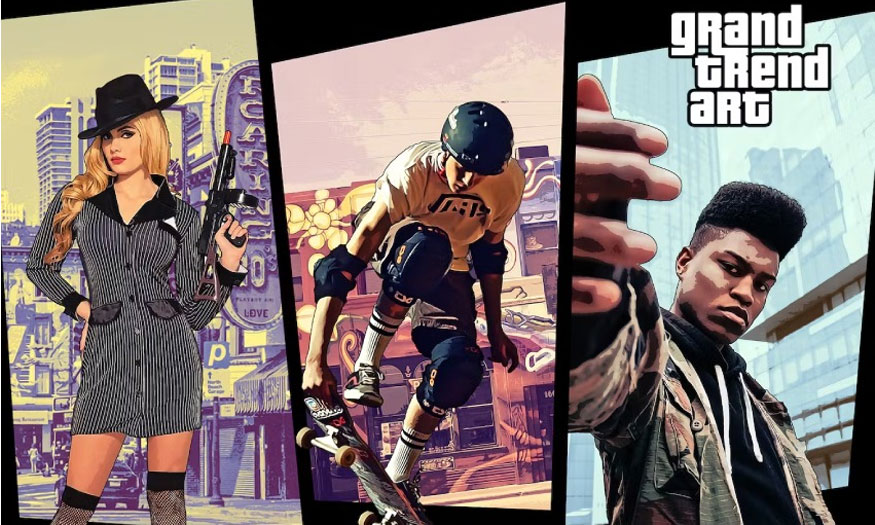
1. Create an automatic Grand Theft filter
To create an automatic Grand Theft filter, follow these steps:
- Step 1: First, you need to open the image you want to turn into a Grand Theft Auto VI image.
Go to File => Open => select the photo and click open.
Please check and ensure the following basic things:
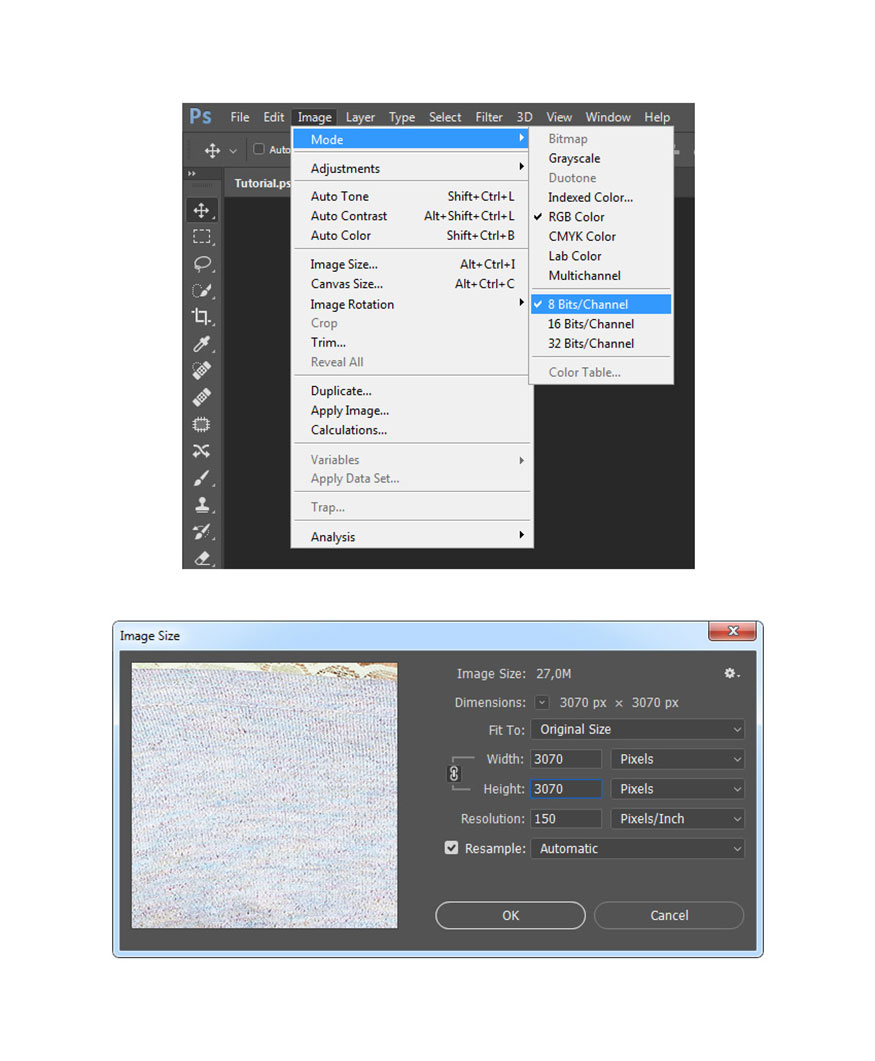
- Your image must be in RGB color mode, 8 Bits/Channel. You go to Image => Mode to check.
- For best results, you should keep the image size 2000–4000 px wide/high. You click Image => Image Size to check.
- Your photo must be Background, otherwise you need to go to Layer => New => Background from Layer.
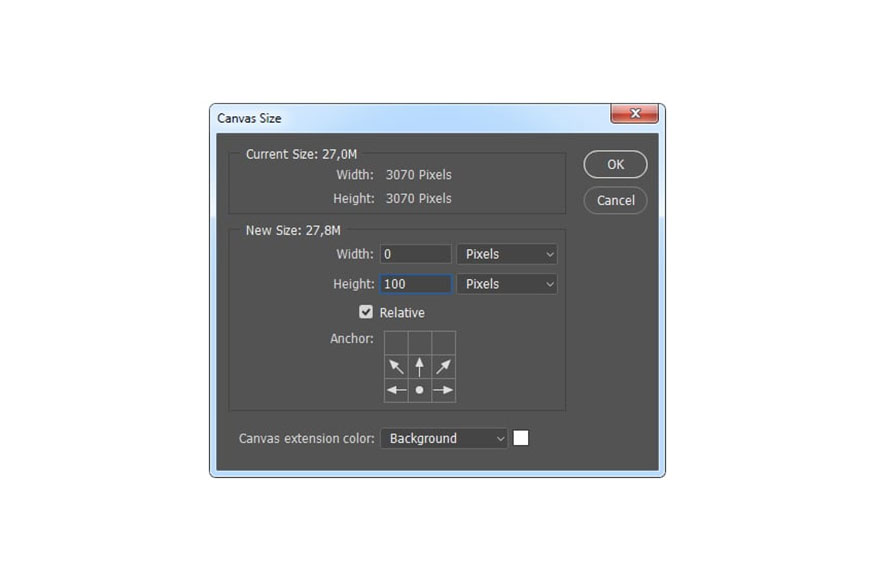
- Step 2: Expand the canvas at the top to get more space around. Go to Image => Canvas Size and apply the settings below:
2. Instructions for choosing a theme for GTA photos.
Steps to choose a theme for GTA photos are as follows:
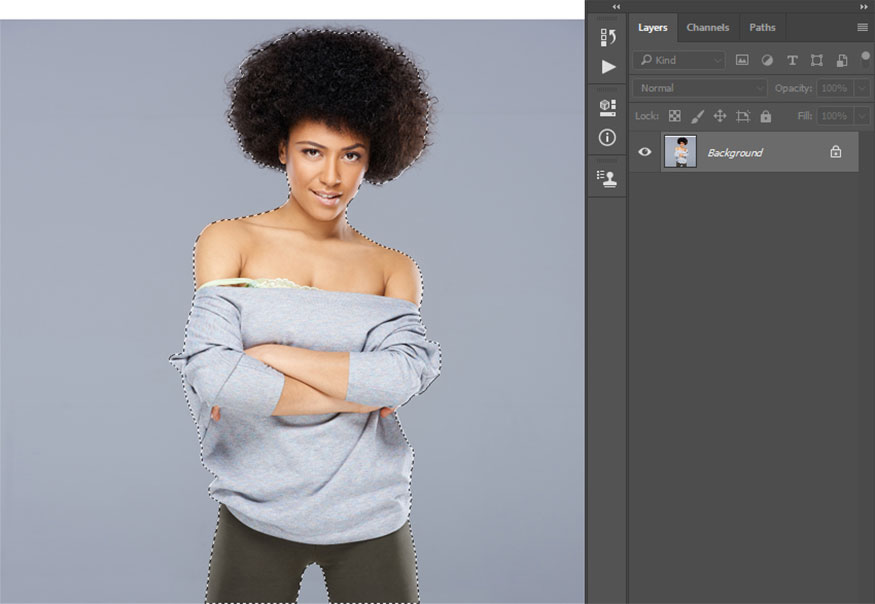
- Step 1: Choose a theme then copy it to a separate layer to create a GTA style picture. Click to select the Quick Selection Tool (W) then click to select the background of the image.
Use the Shift-Alt keys on the keyboard to add or remove areas from the selection. After you have a perfect selection, press Ctrl-Shift-I to invert the selection.
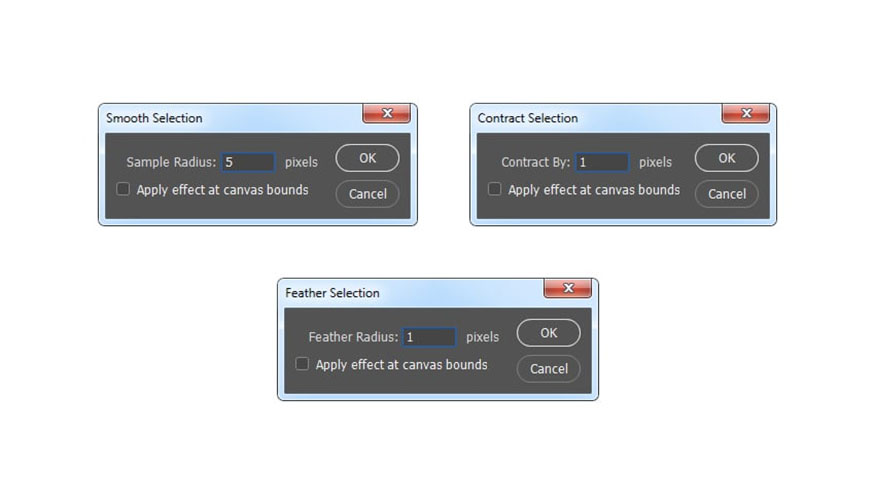
- Step 2: Go to Select => Modify => Smooth and set Sample Radius to 5 px.
Then go to Select => Modify => Contract, set Contract By to 1 px.
Next, go to Select => Modify => Feather, set the Feather Radius to 1 px.
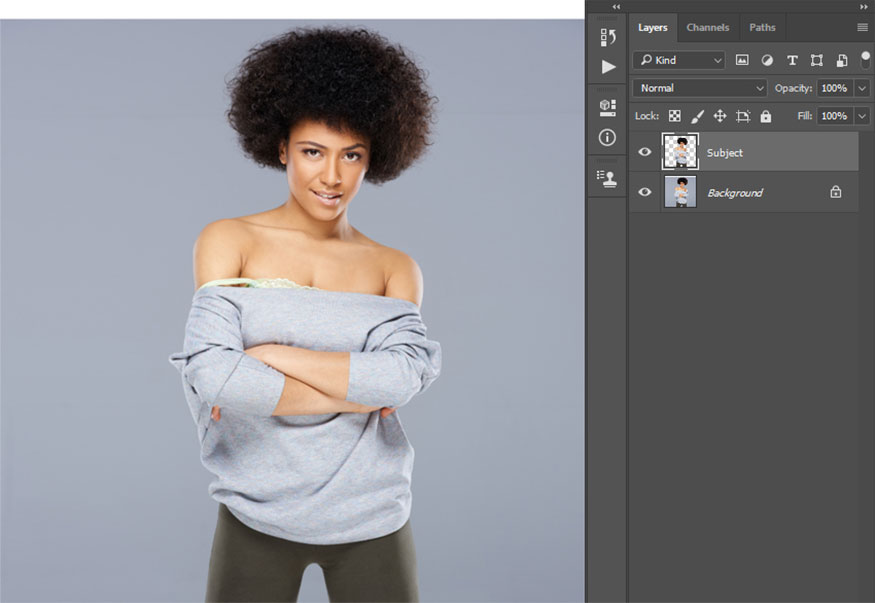
- Step 3: Press Ctrl-J to create a new layer by using the selection and name this new layer “Subject”.
3. How to create a background for the Grand Theft Auto VI effect
To create a background for the Grand Theft Auto VI effect, follow the steps below:
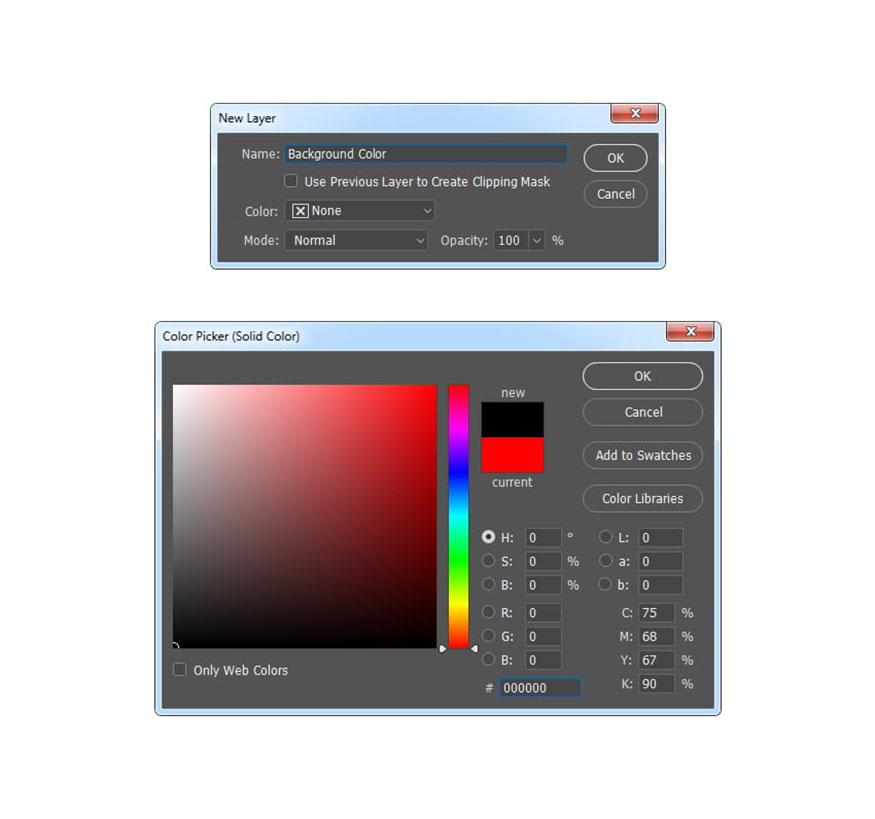
- Step 1: First go into Background => Layer => New Fill Layer => Solid Color to create a new color layer. You name them “Background Color”, choose the color #000000 as shown below:
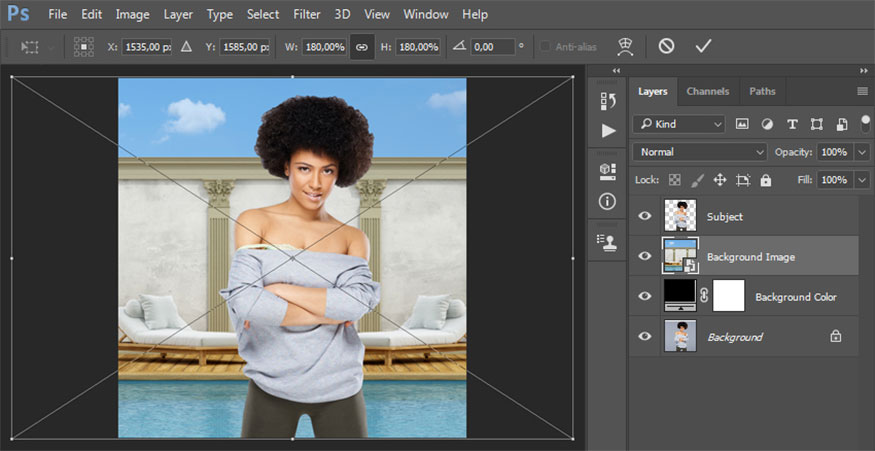
- Step 2: Next, go to File => Place Embedded, select the image from the second available image link and click Place. Next, set the width and height of the texture to 180% as shown below and name this layer “Background Image”.
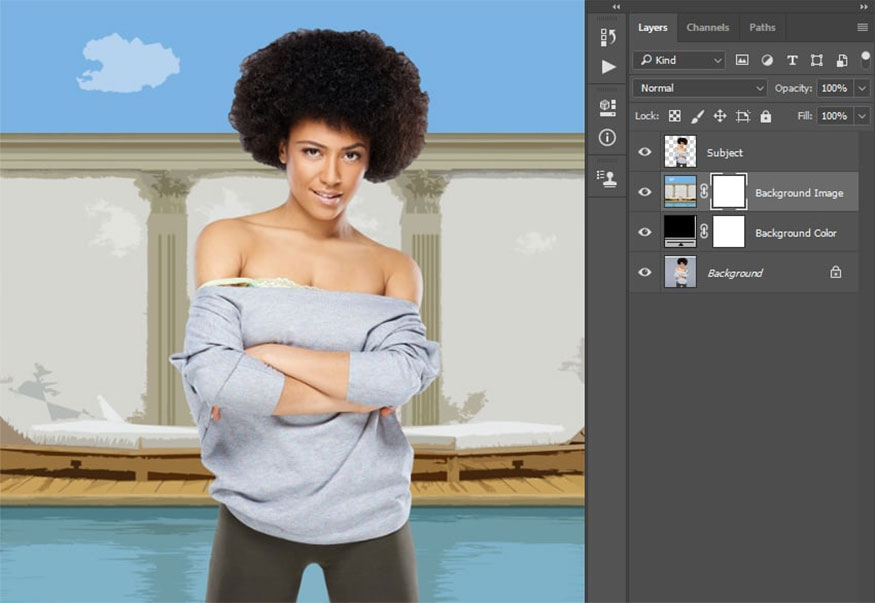
- Step 3: Right-click on this layer and select Rasterize Layer. Next, go to Filter => Filter Gallery => Artistic => Cutout and set Number of Level to 8, Edge Simplicity to 10 and Edge Fidelity to 3.

- Step 4: Press Ctrl-A to make a selection for the entire canvas. Next, go to Layer => Layer Mask => Reveal Selection to add a layer mask for the selected area of the image.
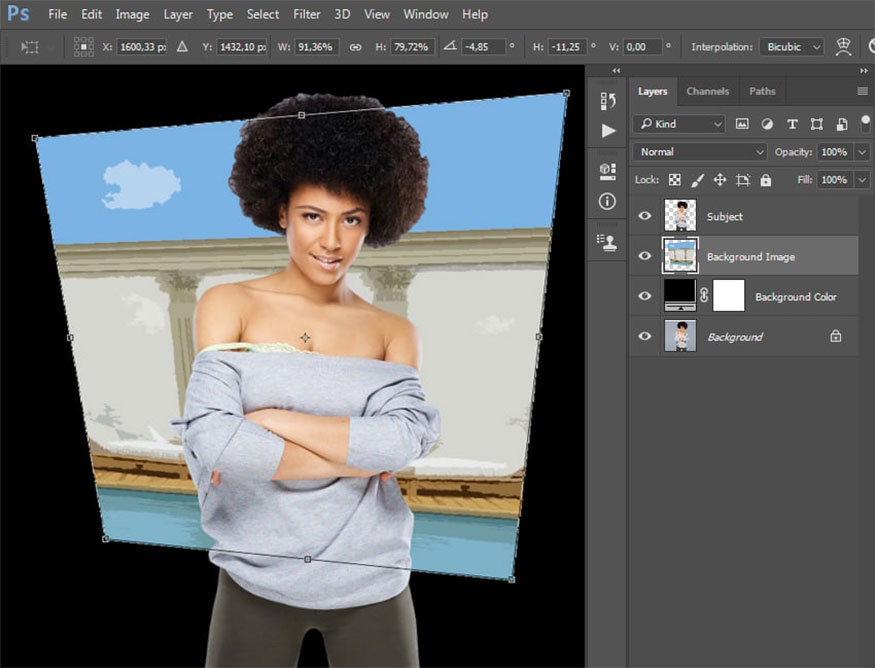
- Step 5: Right click on the layer mask then select Apply Layer Mask => press Ctrl-T => right click anywhere inside of the canvas, then select Distort and transform this layer as shown below:
- Step 6: Go to Layer => New Adjustment Layer => Hue/Saturation to create a new hue / saturation adjustment layer and name it “BI_Saturation/Brightness”.
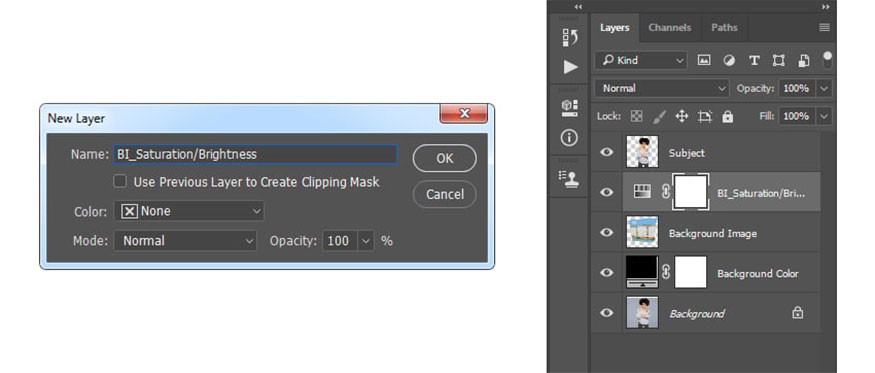
- Step 7: Next, press Ctrl-Alt-G to create a clipping mask, double click inside this layer thumbnail. In the Properties panel, set Saturation to -40 and Brightness to +20:
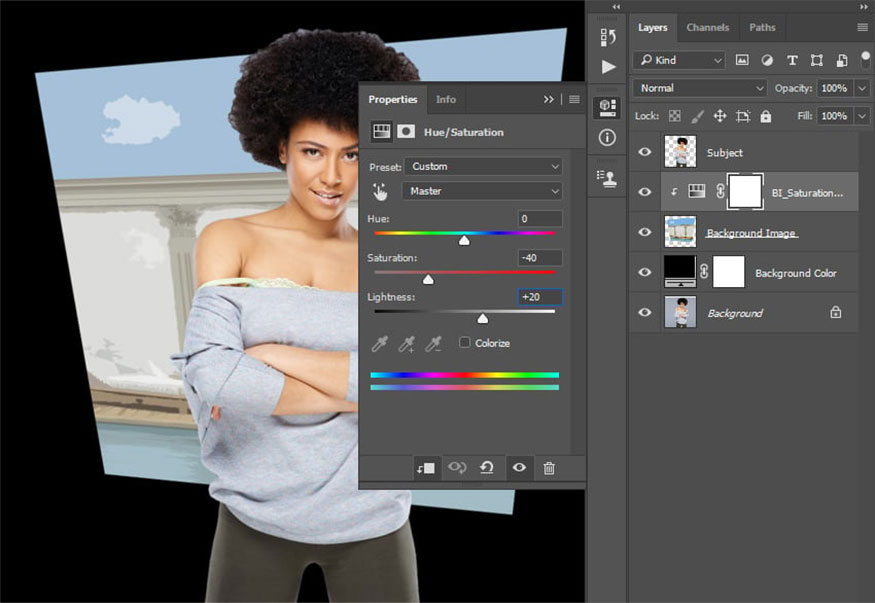
4. Instructions for creating a theme art style
In this content, we will create a theme art style for the Grand Theft Auto VI effect:
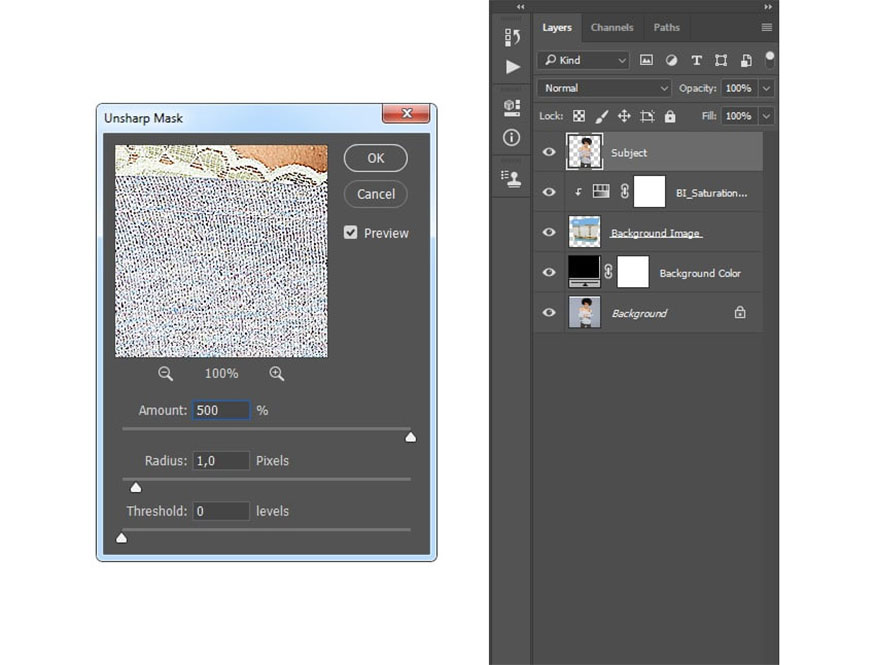
- Step 1: Select the Subject layer, then go to Filter => Sharpen = > Unsharp Mask and set Amount to 500%, Radius to 1 px and Threshold to 0 level.
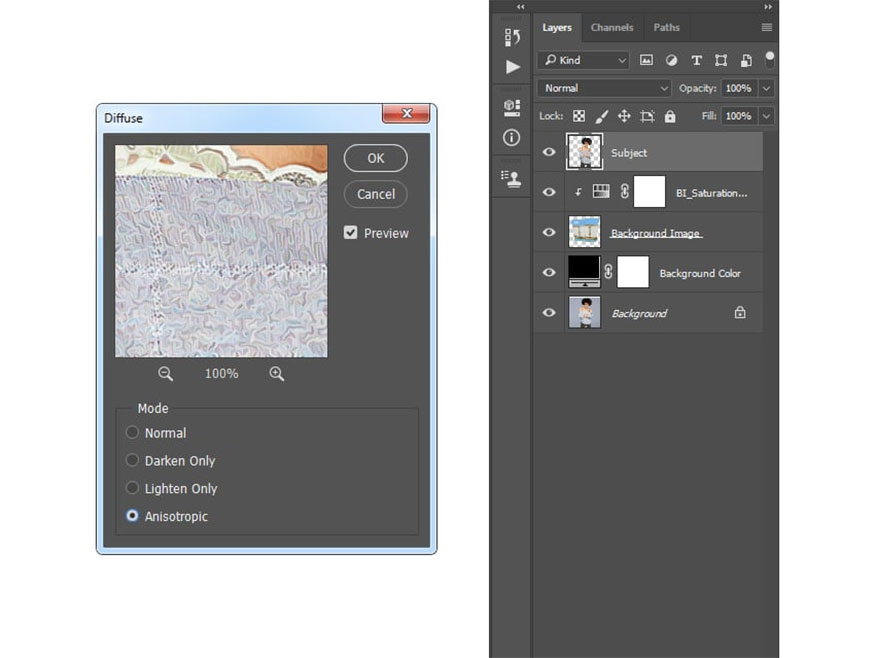
- Step 2: Filter => Stylize => Diffuse and set Mode to Anisotropic.
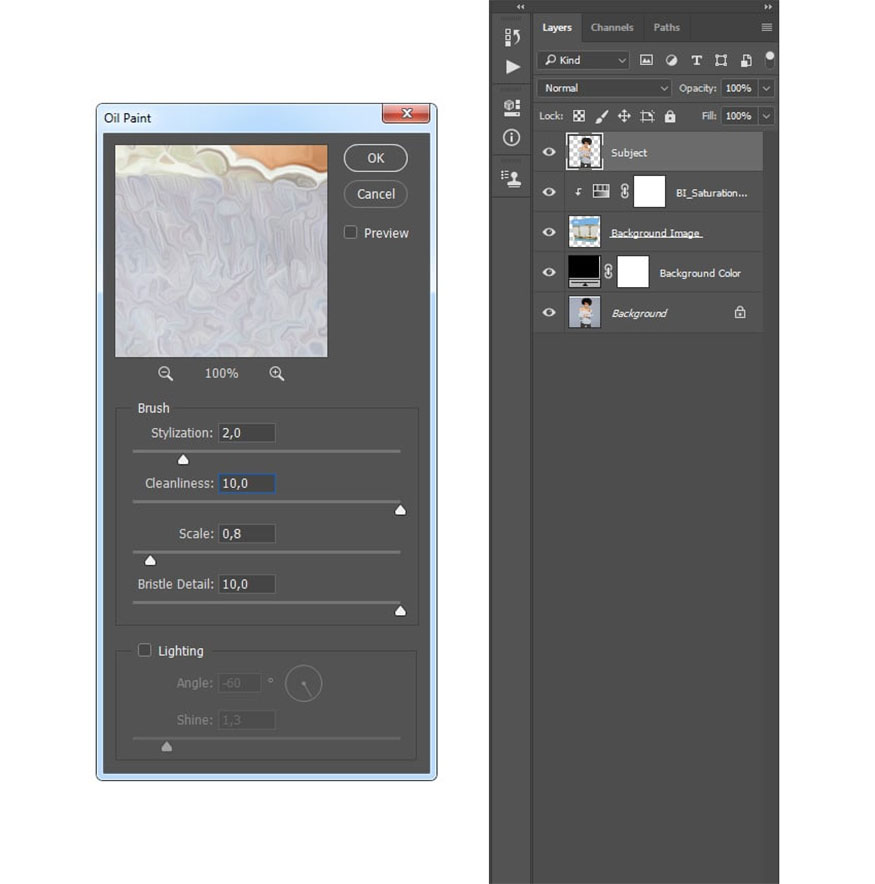
- Step 3: Filter => Stylize => Oil Paint and set Stylization to 2 and Cleaniness to 10, uncheck Lighting.
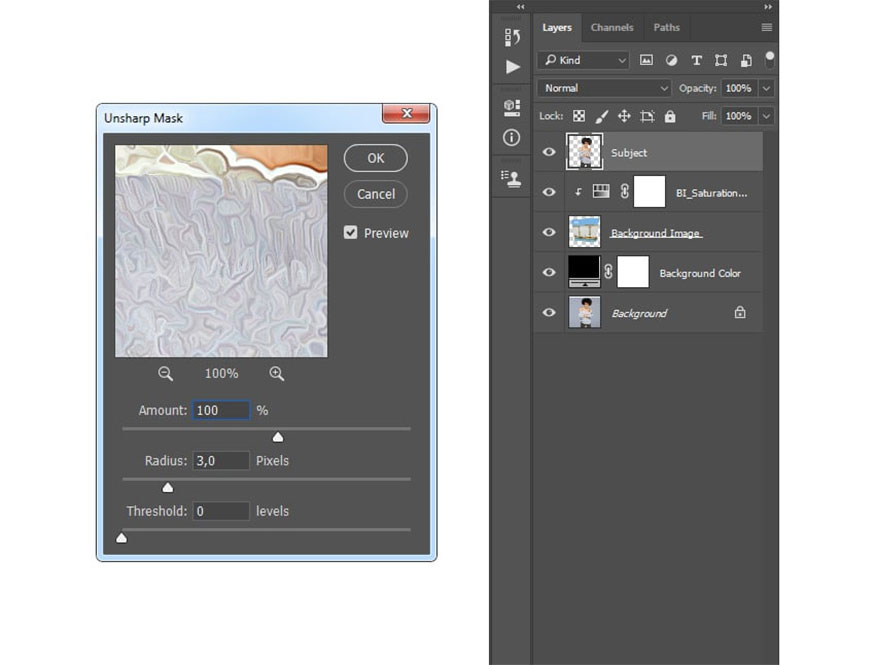
- Step 4: Filter => Sharpen => Unsharp Mask and set Amount to 100%, Radius to 3 px, Threshold to 0 level.
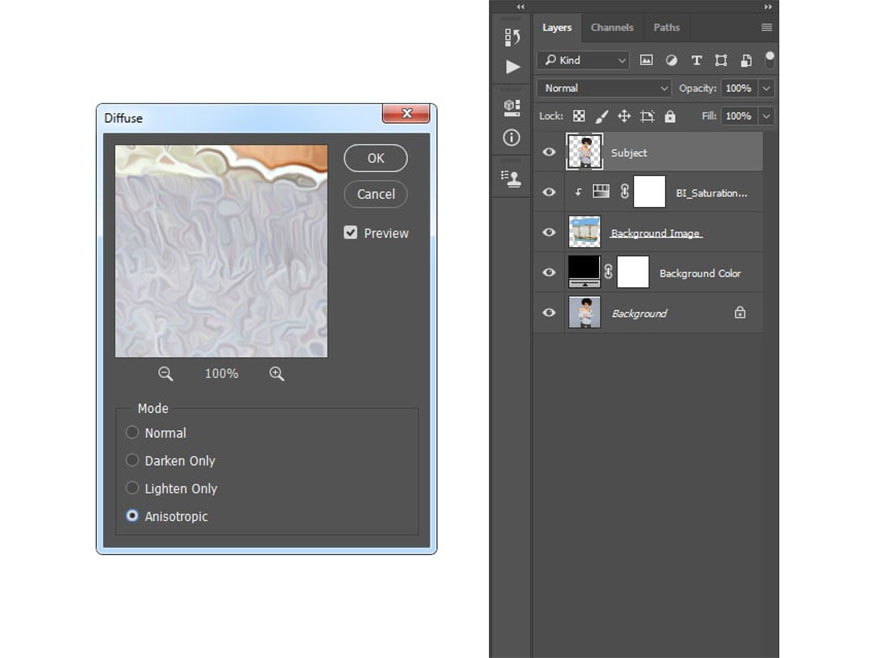
- Step 5: Filter => Stylize => Diffuse and set Mode to Anisotropic.
- Step 6: Filter => Sharpen => Unsharp Mask and set Amount to 100%, Radius to 1 px, Threshold to 0 level.

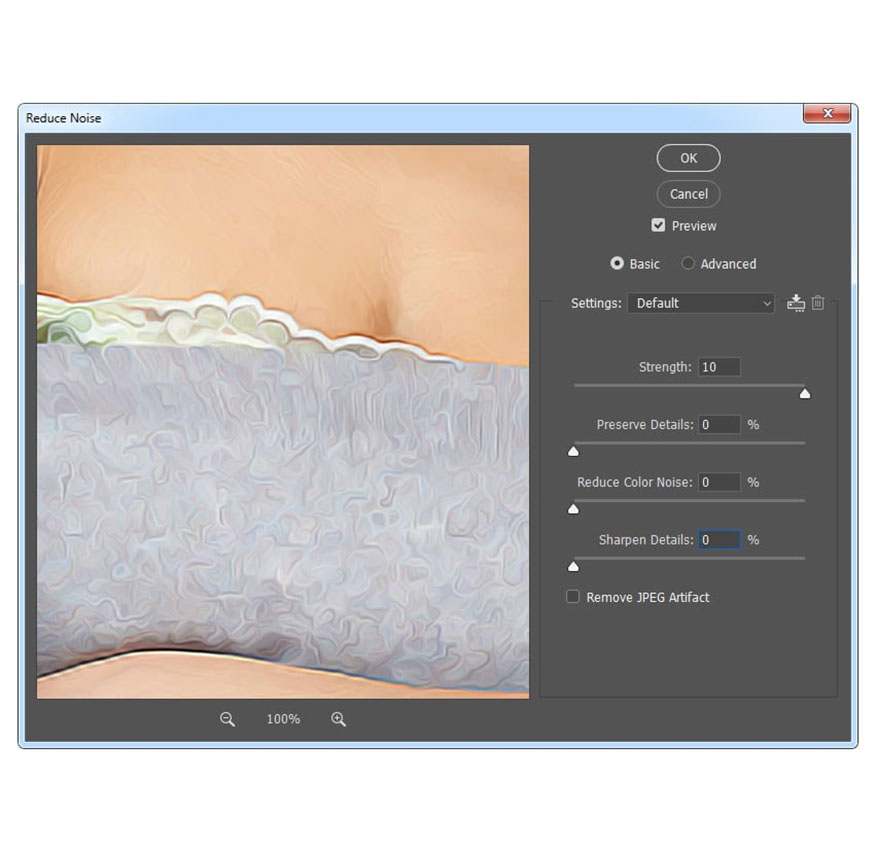
- Step 7: Filter => Noise => Reduce Noise and make the following settings:
- Step 8: Filter => Blur => Surface Blur and set Radius to 2 px, Threshold to 15.
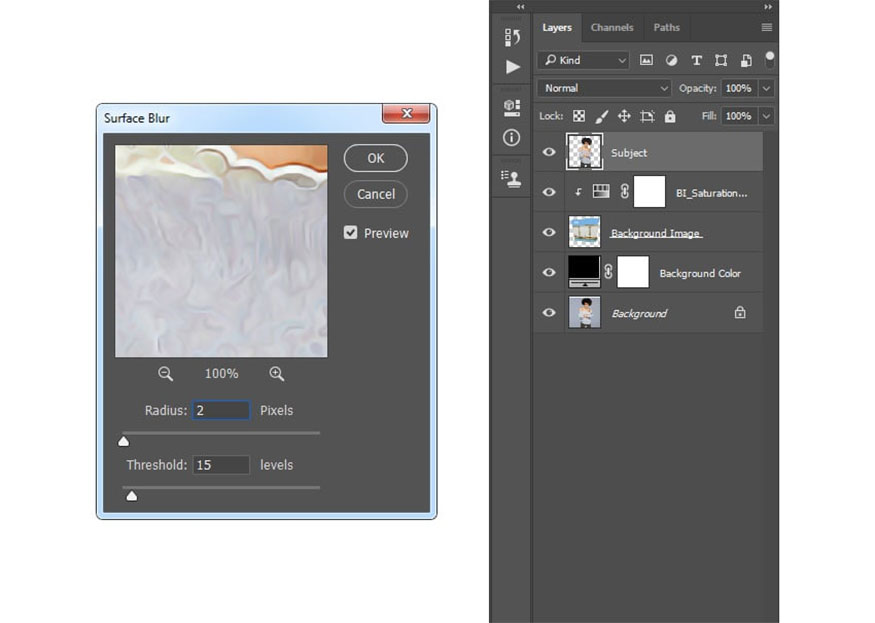
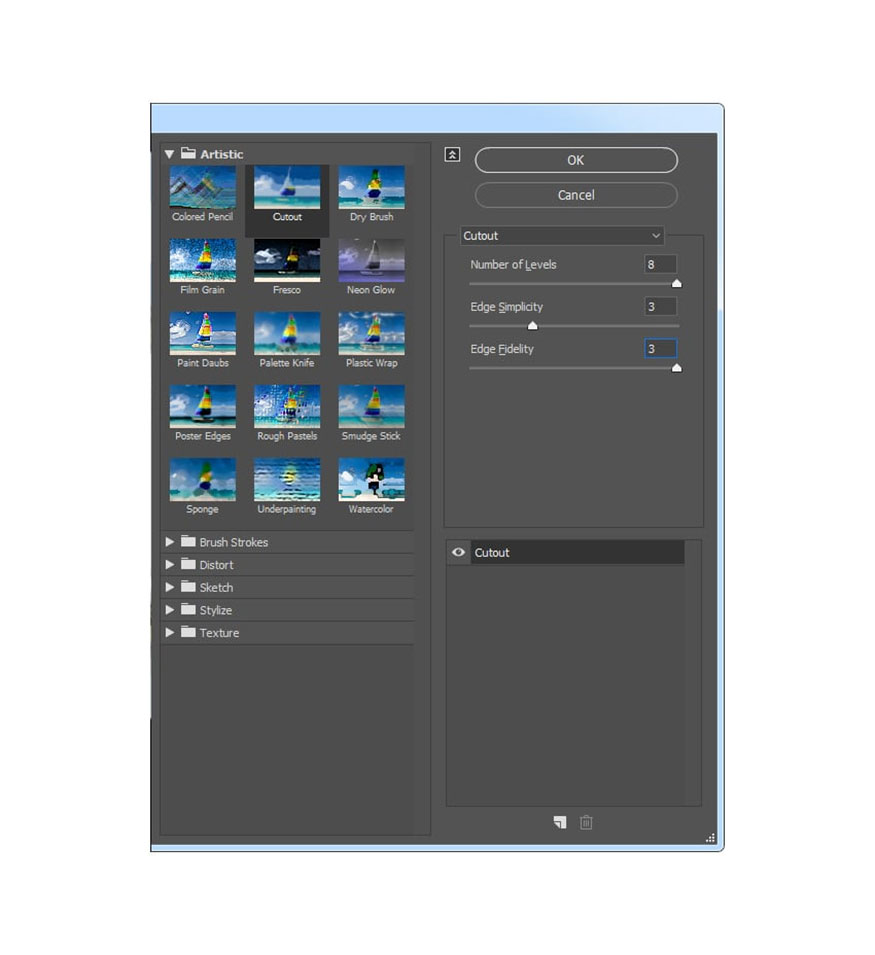
- Step 9: Press Ctrl-J on the keyboard to duplicate this layer, then go to Filter => Filter Gallery => Artistic => Cutout, set Number of Level to 8, Edge Simplicity to 3 and Edge Fidelity to 3.
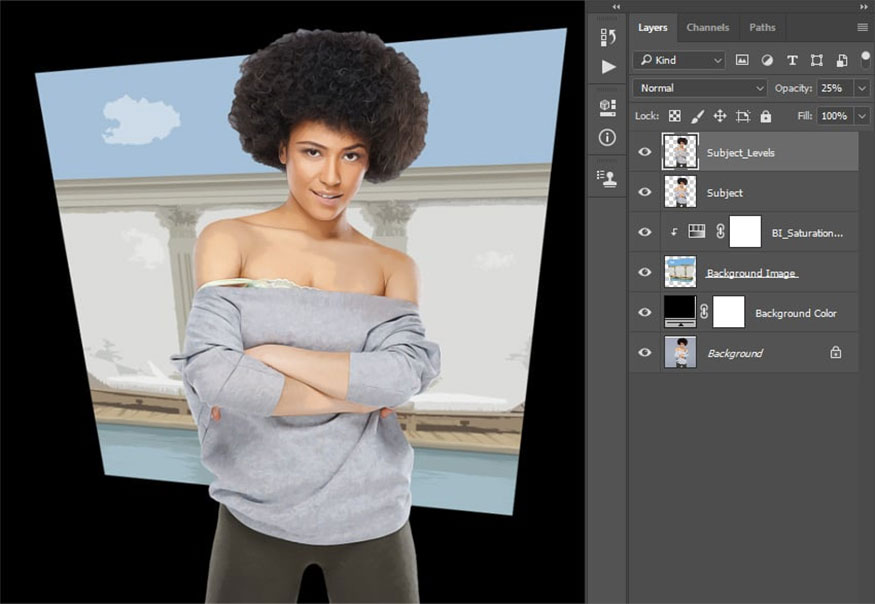
- Step 10: Change the Opacity of this layer to 25% and name it “Subject_Adjustment”.
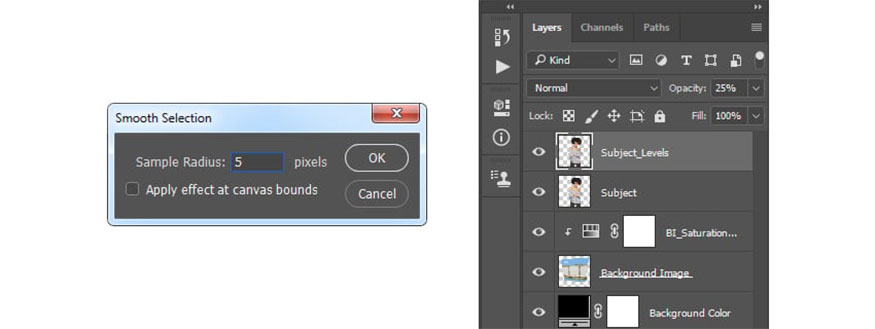
- Step 11: Click on the thumbnail of this layer to make a selection for this layer. Next, go to Select => Modify => Smooth and set Sample Radius to 5 px.
- Step 12: Next, go to Layer => New => Layer to create new layers and name them “Subject Stroke”.
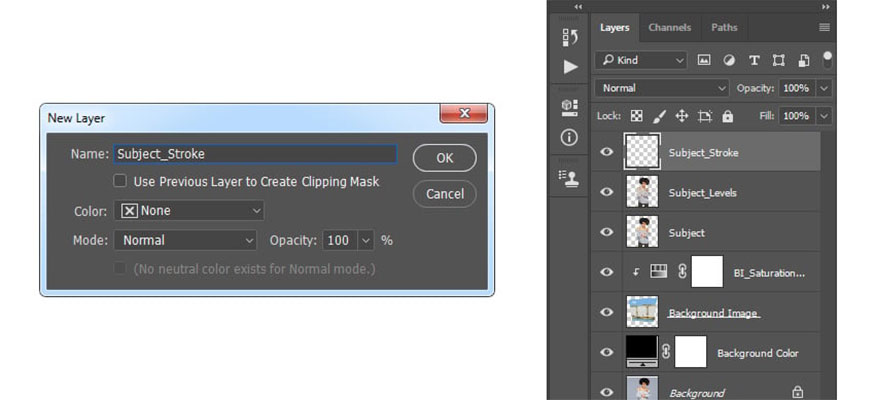
- Step 13: Click on the Rectangular Marquee Tool (M), then set the foreground color to #000000. Then right click on the color anywhere inside the canvas then select Stroke. Set Width to 4 px, Location to Outside, Mode to Normal and Opacity to 100%.
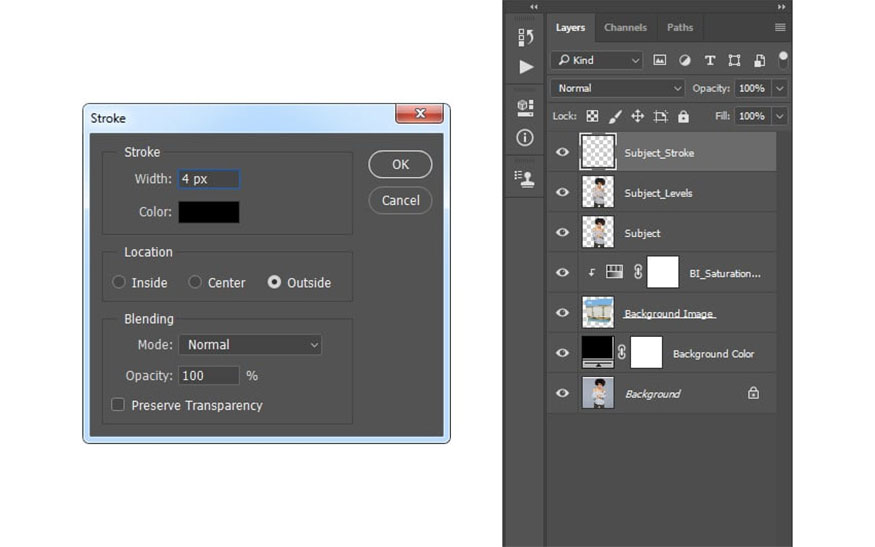
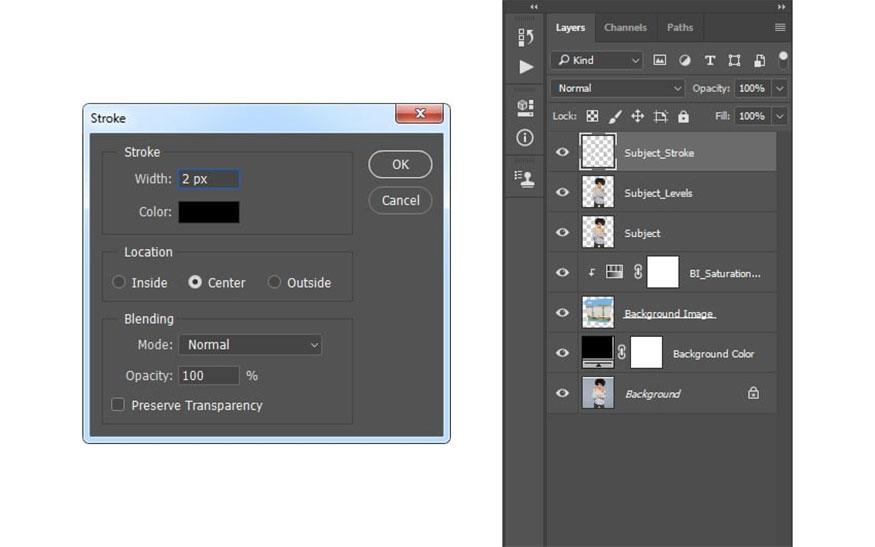
- Step 14: Select the Rectangular Marquee Tool (M) again and set the foreground color to #000000. Right-click anywhere inside the canvas and select Stroke. Set parameters as follows:
-
Width: 2 px
-
Location: Center
-
Mode: Normal
-
Opacity: 100%
- Step 15: Press Ctrl-D on the keyboard to deselect the selection.

5. Final adjustments for GTA photos
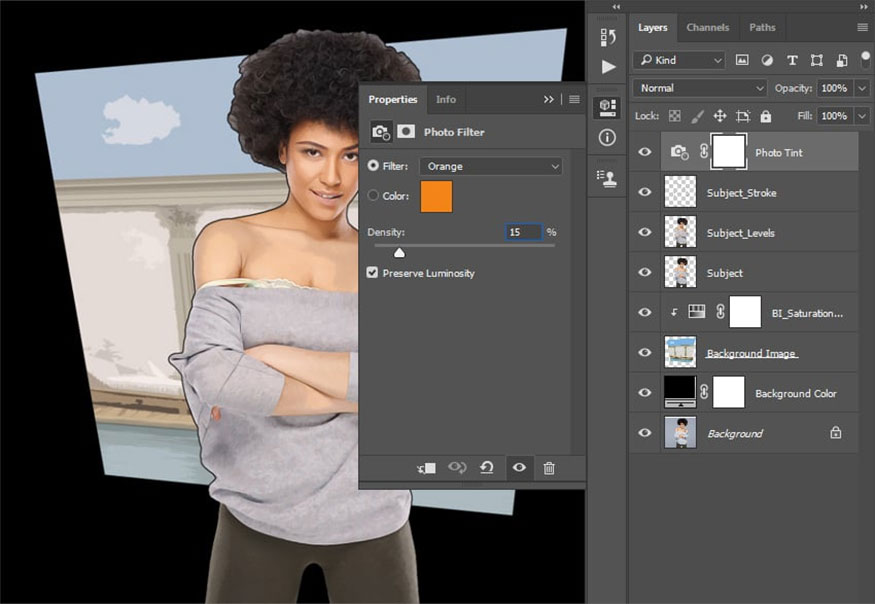
- Step 1: Click Layer => New Adjustment Layer => Photo Filter to create a adjustment layer for new photo filter and name it “Photo Tint”.
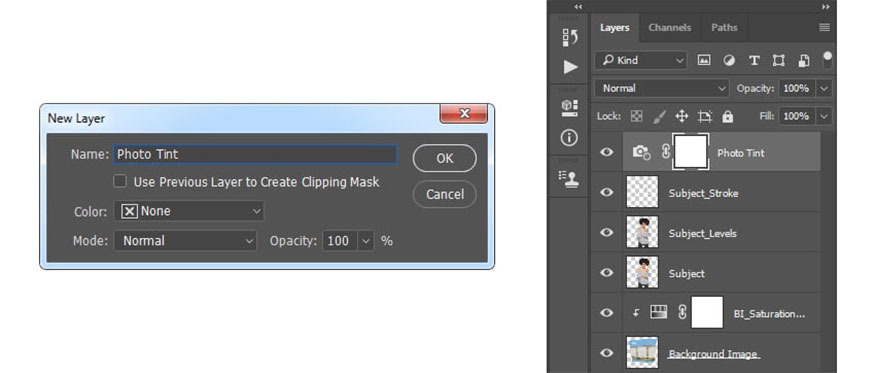
- Step 2: Double click on the thumbnail of this layer and in the Properties panel set Filter to Orange and Density to 15% as shown below:
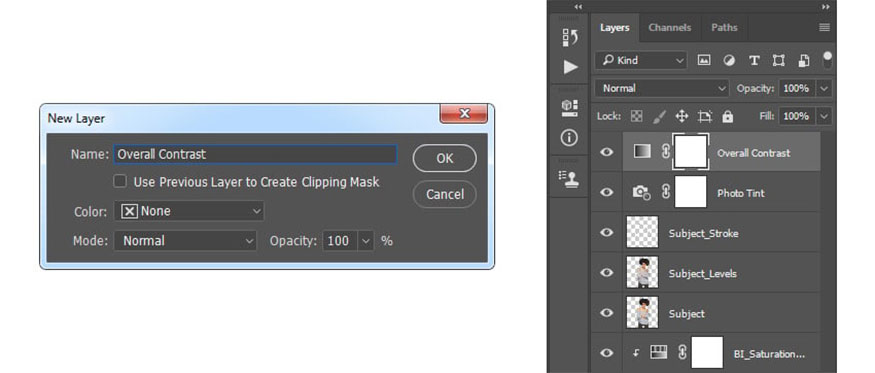
- Step 3: Press D on the keyboard to reset the color model, then go to Layer => New Adjustment Layer => Gradient Map to create new gradient map adjustment layers and name them “Overall Contrast”.
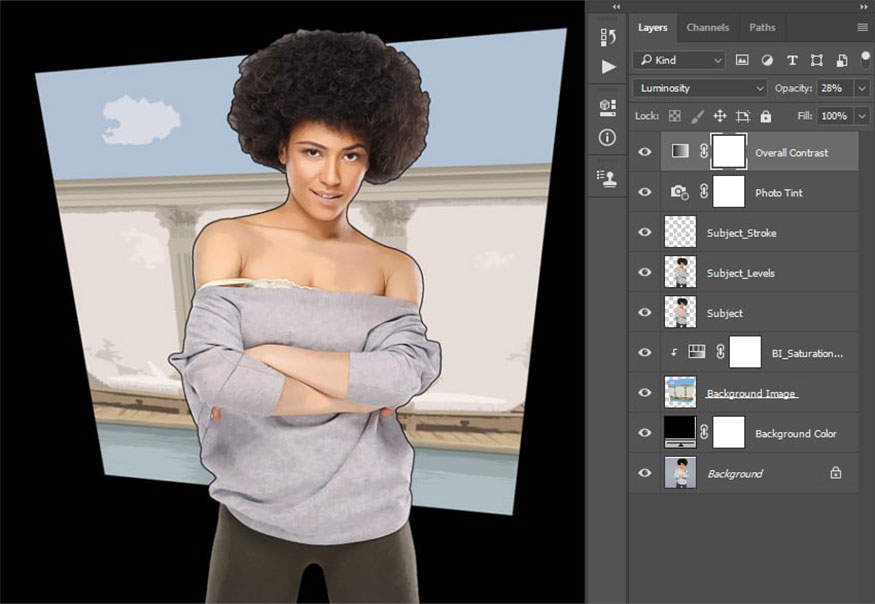
- Step 4: Change this layer's blending mode to Luminosity and set its Opacity to 28%.
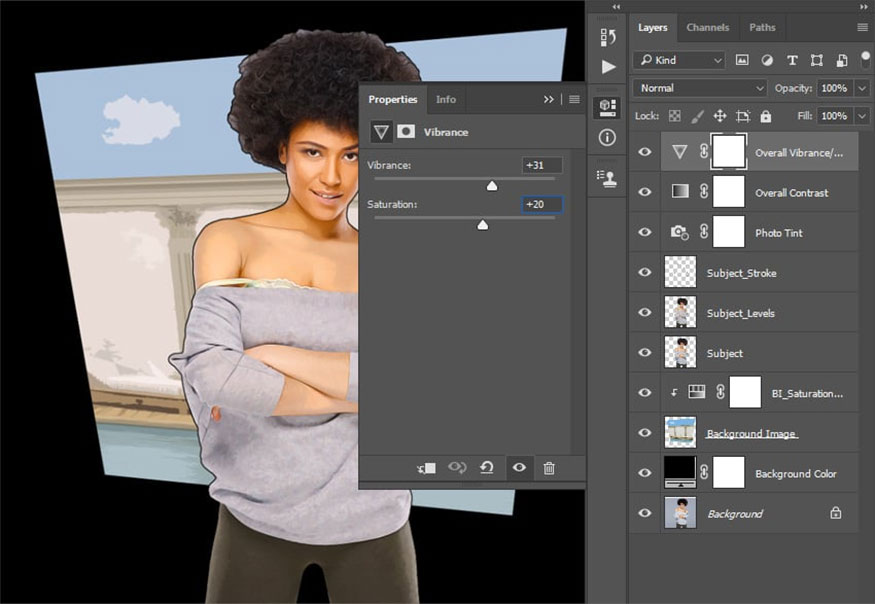
- Step 5: Go to Layer => New Adjustment Layer => Vibrance to create new vibration adjustment layers and name them “Overall Vibrance/Saturation”.
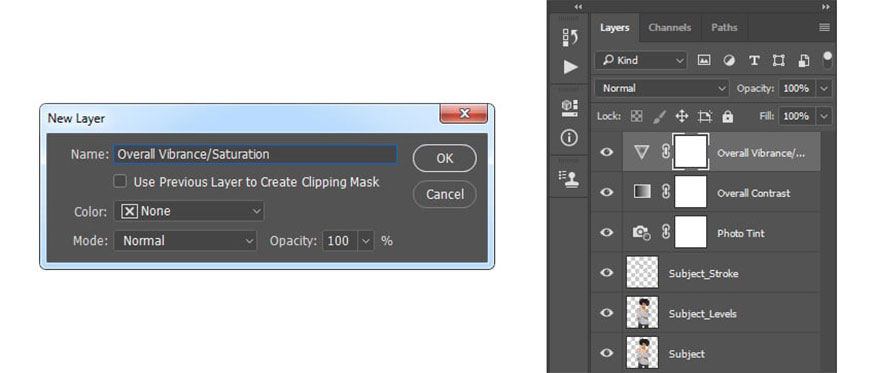
- Step 6: Double click on the thumbnail of this layer, in the Properties panel, set Vibrance to +31 and Saturation to +20.
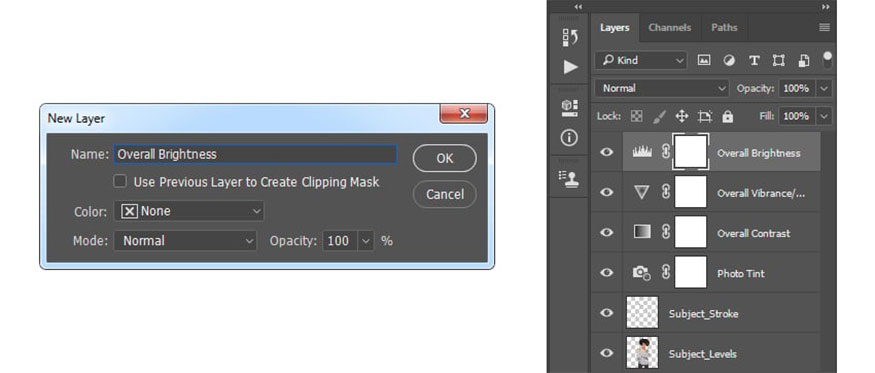
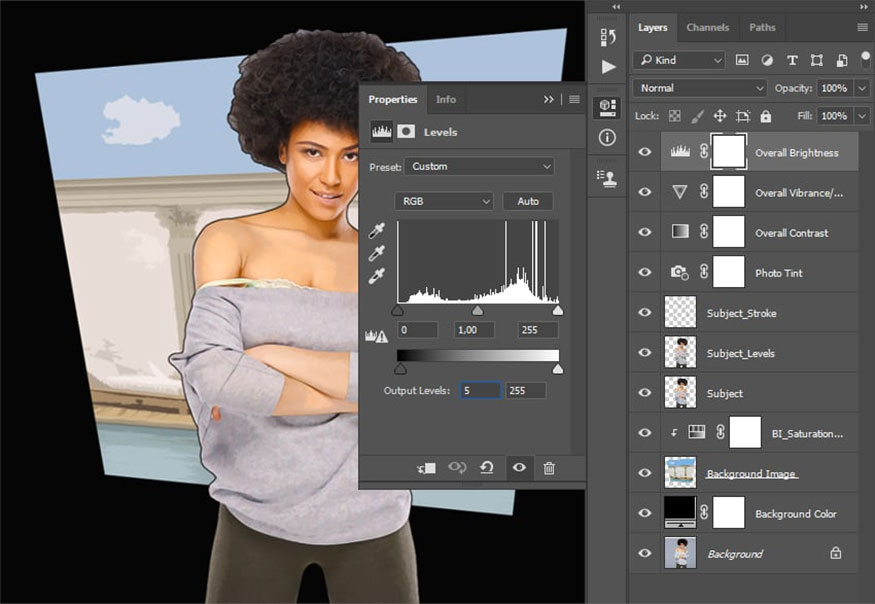
- Step 7: Go to Layer => New Adjustment Layer => Levels to create a new levels adjustment layer, name this layer “Overall Brightness”.
- Step 8: Next, double click on the layer thumbnail, in the properties panel, make the settings as shown below:
- Step 9: Press Ctrl-Alt-Shift-E to create a screenshot, then press Ctrl-Shift-U to desaturate this layer. Go to Filter => Other => High Pass and set the Radius to 2 px.
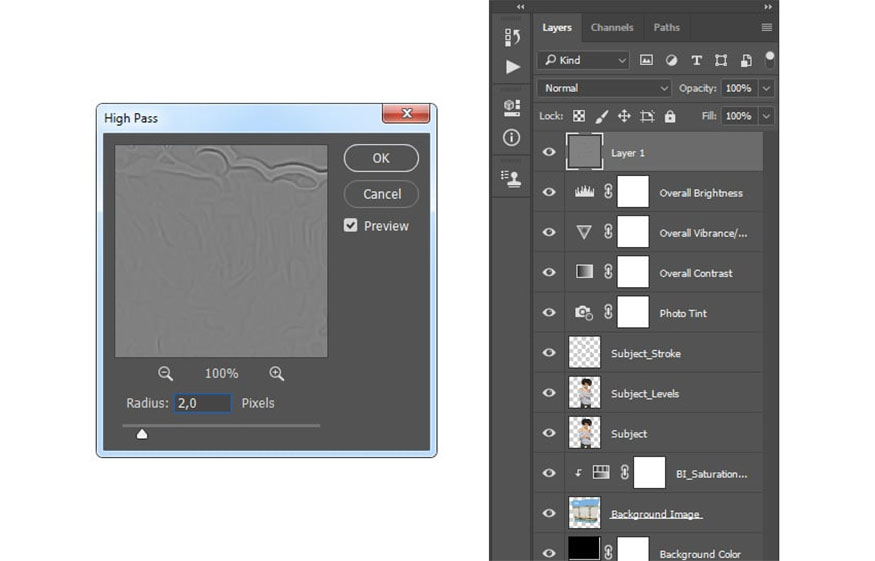
- Step 10: Change the Blending Mode of this layer to Hard Light, name them “Synthetic Sharpening”.
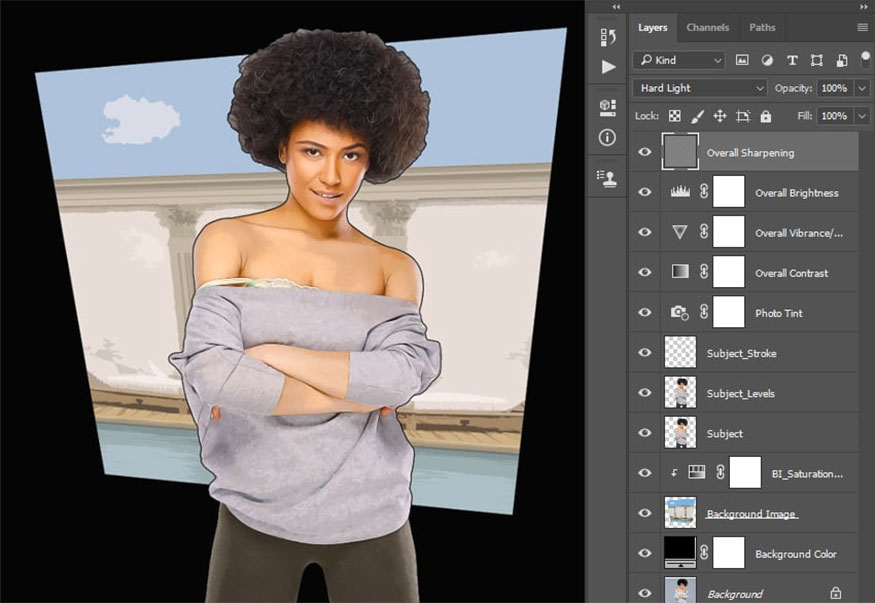
So, we have finished creating images in GTA VI style. Now you can create your own GTA effect with Photoshop with just simple steps.
Wishing you success in creating Grand Theft Auto VI action effects in Photoshop. Please follow us to update many other interesting information!
- How to create GTA style text effects in Photoshop
- Share Free Actions Transform Portraits into GTA Characters


