Best Selling Products
How to turn summer photos into winter in Photoshop
Even though it's summer, you can absolutely have winter photos. With just a few simple steps, you can turn summer photos into winter in Photoshop. Let's see how to do it with SaDesign below.

Even though it's summer, you can absolutely have winter photos. With just a few simple steps, you can turn summer photos into winter in Photoshop. Let's see how to do it with SaDesign below.

Summer photos are characterized by the bright, vibrant colors of flowers, leaves, and plants. Winter is gloomy because of cold, neutral colors, typically black, white, etc. You can completely turn summer photos into winter in Photoshop. You change the color in the image, from bright to cold to get a winter vibe. Let's learn how to turn summer photos into winter through the following basic steps.
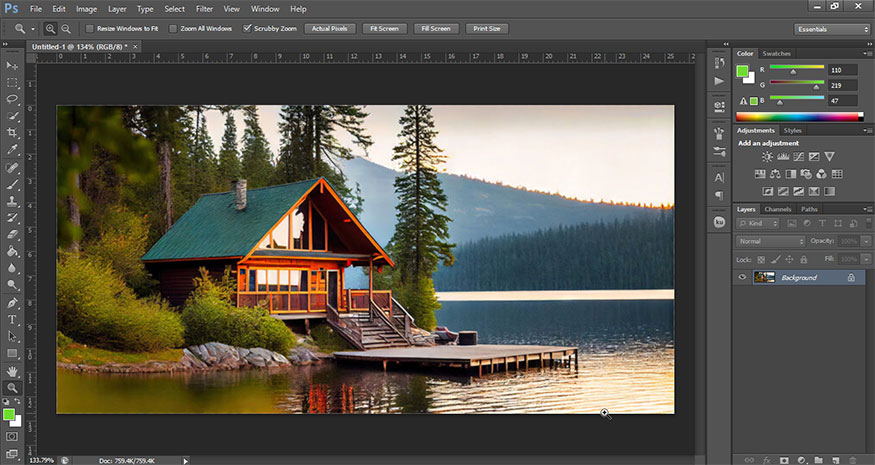
Step 1: First we need to upload the photo we want to turn summer into winter in Photoshop.
On the menu bar, select File => Open => select the appropriate image and then click Open. Here I use a photo with the green color of summer.
Step 2: On the menu bar, select Image => Mode => Lab Color to convert the image to the Lab color system.
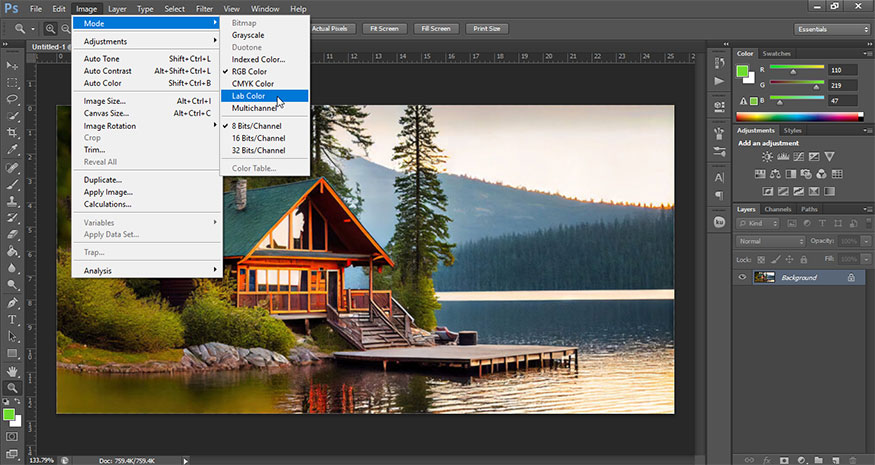
Step 3: Press the key combination Ctrl+J to duplicate the Background layer. At the newly copied layer, switch to the Channels frame.
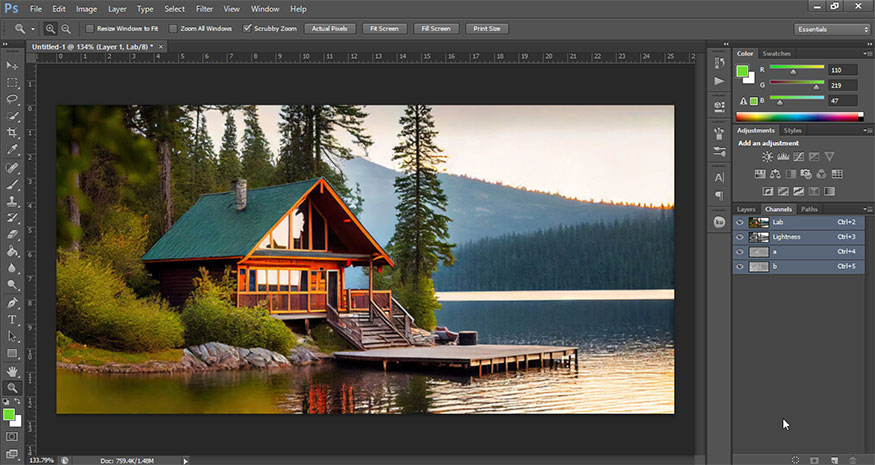
We can see that in the Channels frame there are 4 channels: Lap, Lightness, a and b channels. Please select channel a.
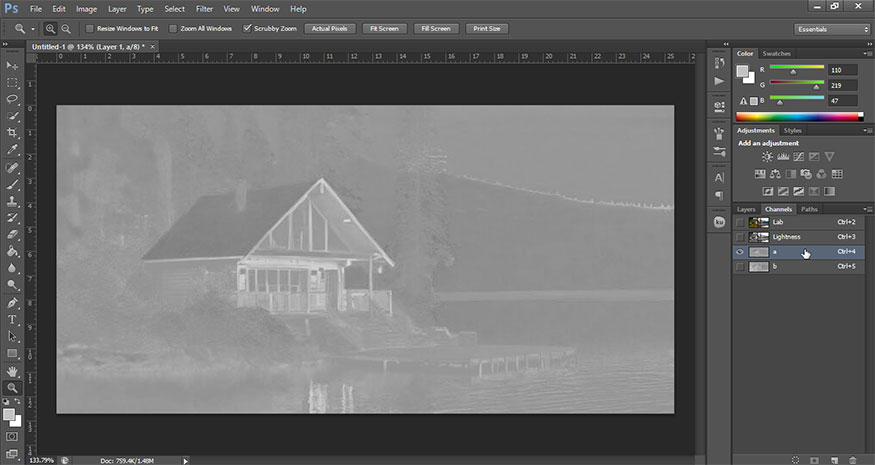
Then press Ctrl + A (Select => All) to create a selection for the entire photo. Continue pressing Ctrl + C (Edit => Copy) to copy the entire channel a.
Select channel b.
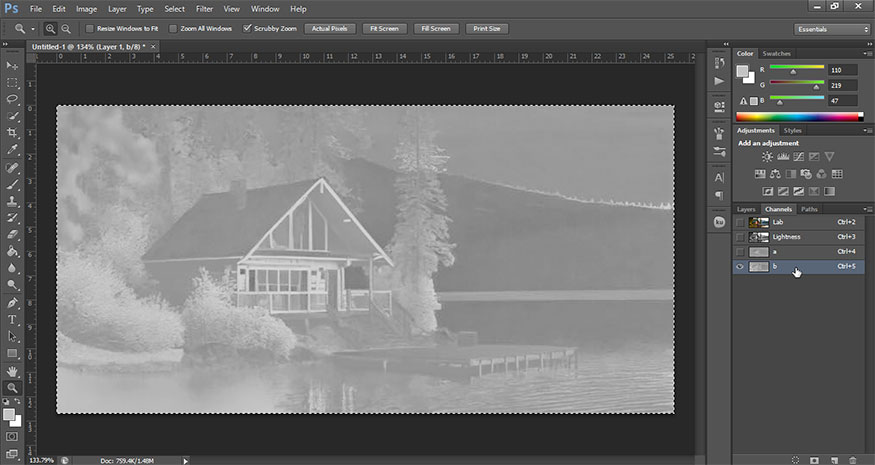
Press the key combination Ctrl + V (Edit + Paste) to paste the entire channel a into channel b. Then press the key combination Ctrl + D to remove the selection. Finally, reselect the Lab channel and return to the Layer frame.
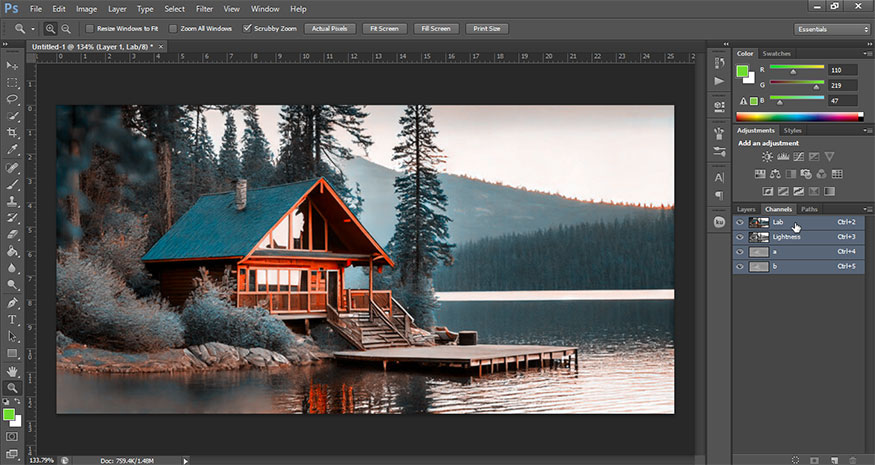
Now, we have the result like this.
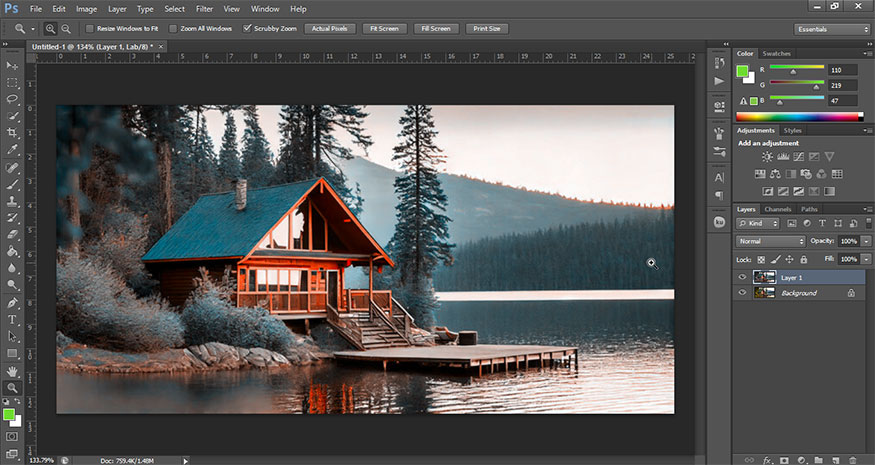
On the menu bar, select Image => Mode => RGB Color to return the image back to the original RGB color system. Now a dialog box will appear, select Don't Flatten.
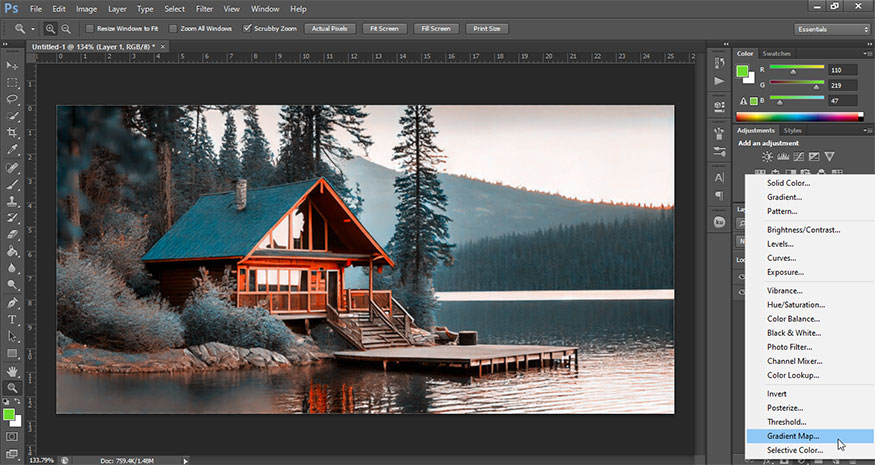
Step 4: In the last corner of the layers panel, select Create new fill or adjustment layer (circle icon cut in half). Select Gradient Map… to create a Gradient Map layer.
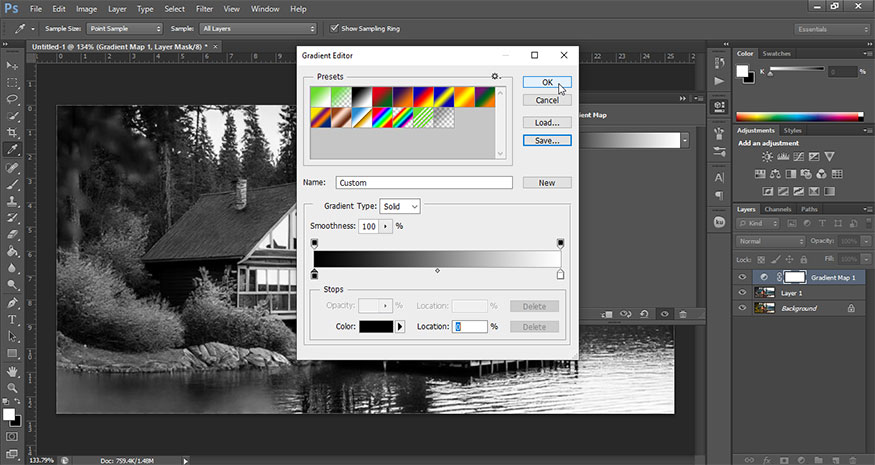
With this Gradient Map, set the left color to black and the right color to white as shown.
Step 5: Continue to select Create new fill or adjustment layer, then select a Hue/Saturation layer.
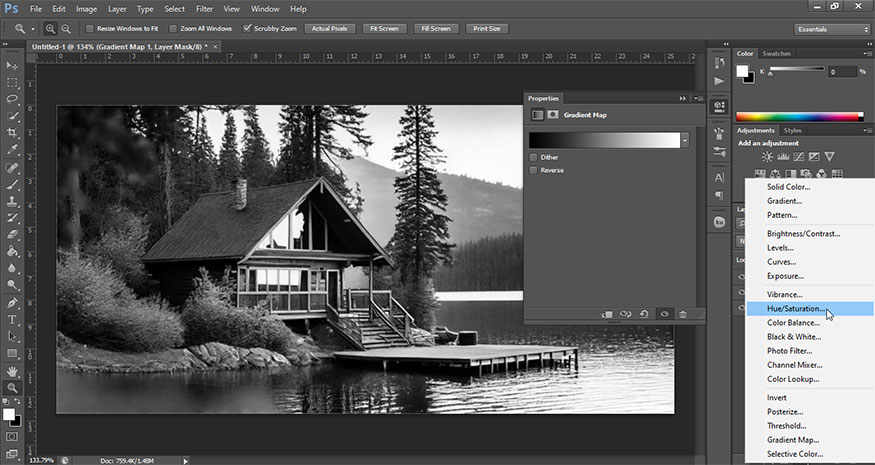
Set the parameters as shown in the image. Or depending on your photo, you will adjust the parameters accordingly.
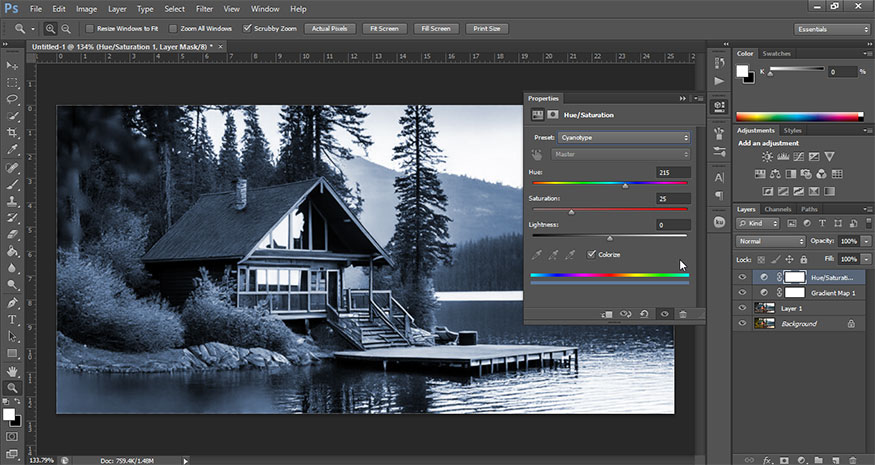
Step 6: Still choose Create new fill or adjustment layer. Then create a Curves layer.
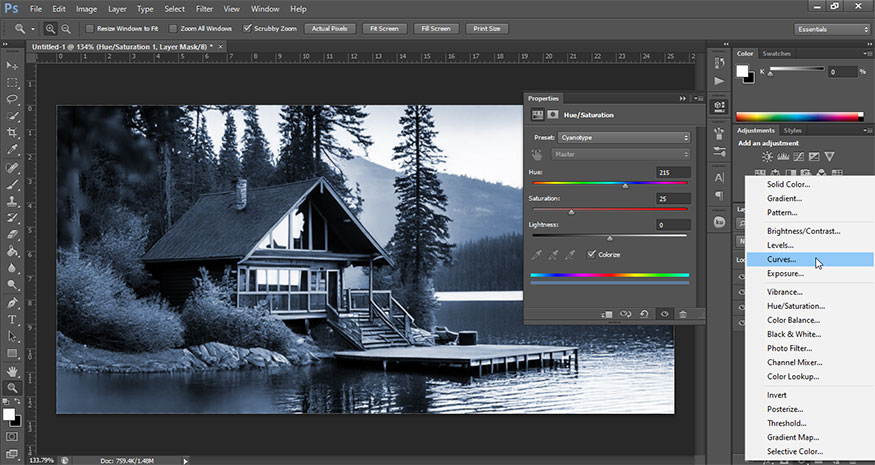
This step is very important because it will create the main effect so that your summer photos look most like winter. Raise the brightness so that snow areas appear without losing key details.
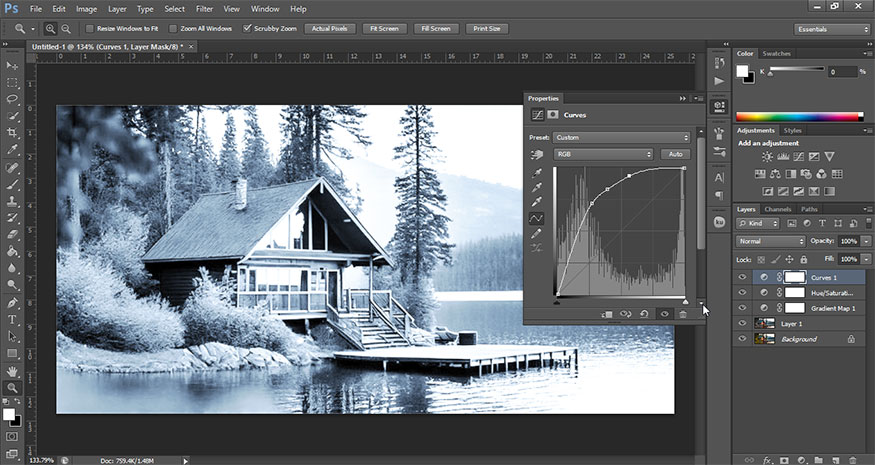
Step 7: Select Create new fill or adjustment layer => Color Balance.
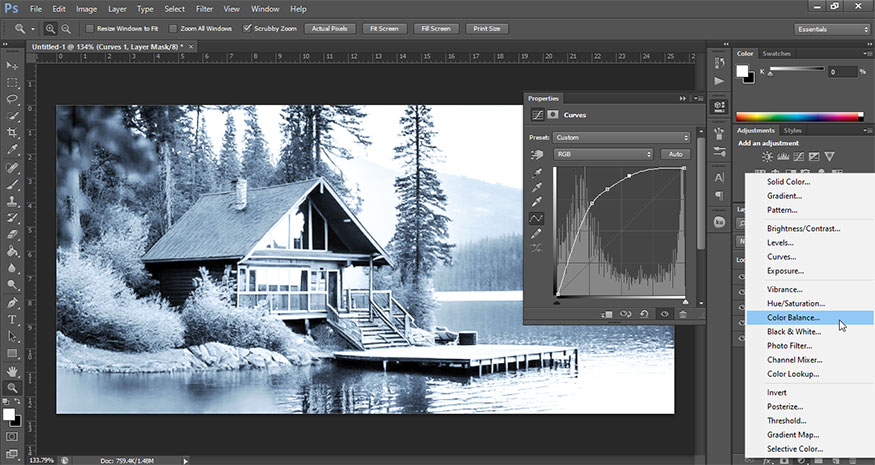
Here you will adjust the parameters as shown in the following pictures. You can also customize the parameters to best suit your photo.
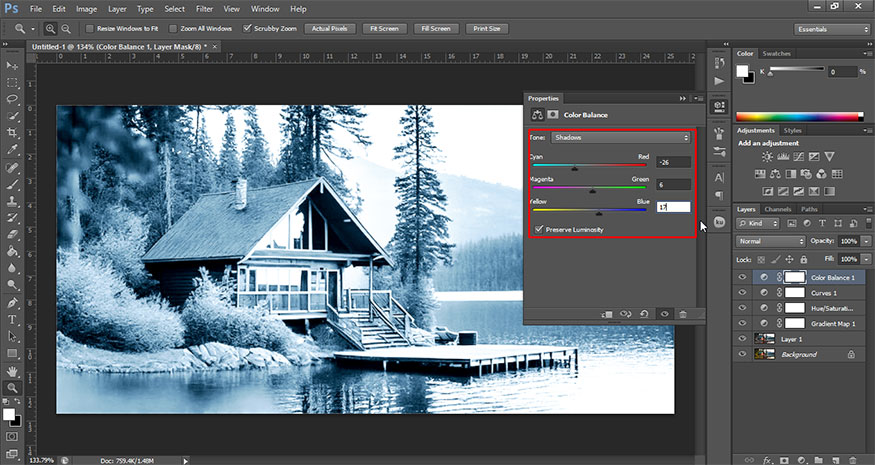
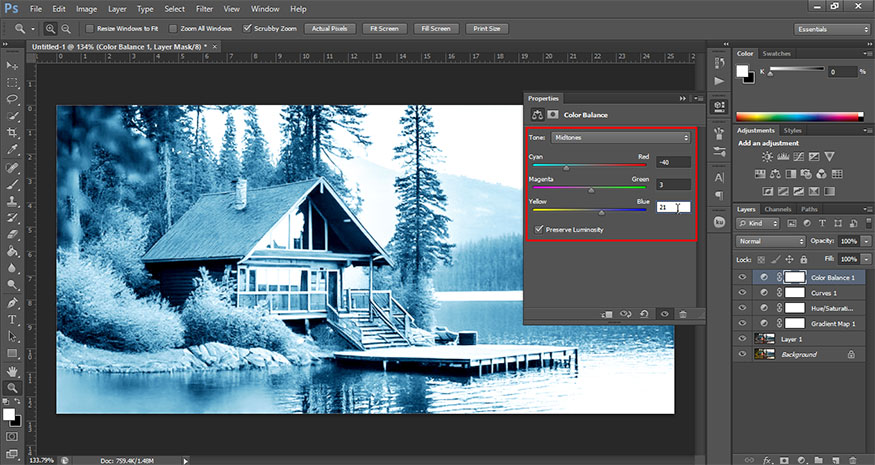
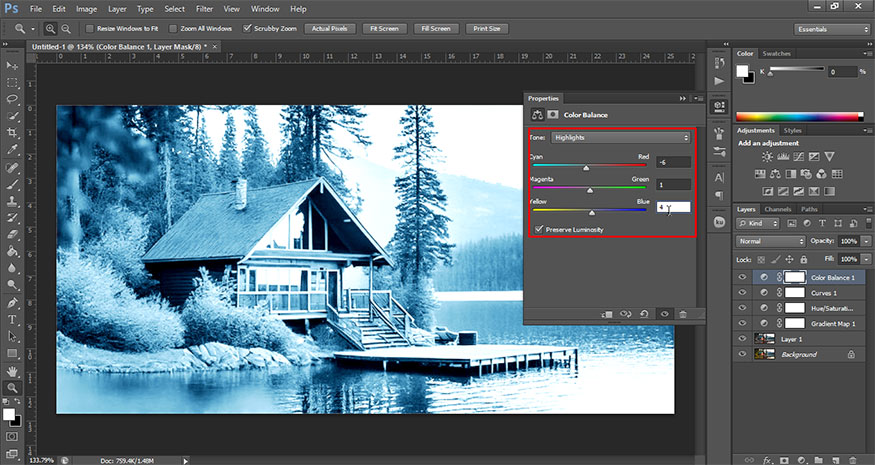
You have turned a summer photo into winter in Photoshop with a cold background as shown below. The photo becomes unique, full of winter breath with cold colors.
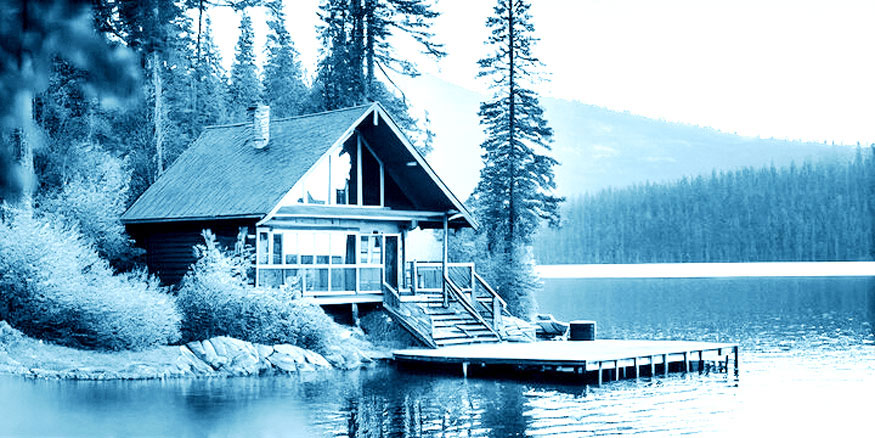
The steps above to turn summer photos into winter in Photoshop are not too complicated. In fact, the way to change the season in this photo is to change the color of the photo. When bright colors are replaced by cold colors, the feeling of winter will rush back. Feel free to change it to get the best results.
See more:


