Best Selling Products
Create a Grain effect in Photoshop with SaDesign
Nội dung
The soul of film photos compared to digital photos is in the noise dots on the image background. Noise dots - Grain effect make photos taken with film cameras more unique. However, now you don't need to have a film camera, you can create photos with amazing Grain effects through Photoshop software. Let's learn with SaDesign how to create Grain effects in Photoshop through the shares below.
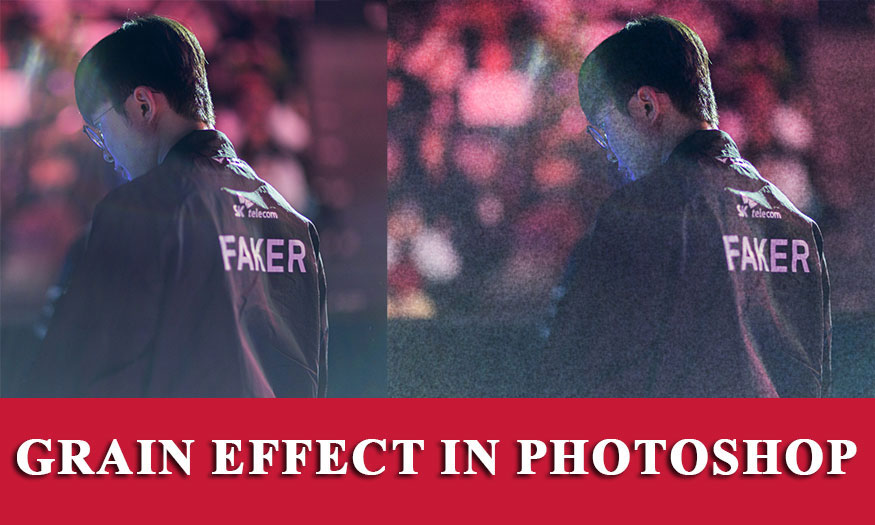
The soul of film photos compared to digital photos is in the noise dots on the image background. Noise dots - Grain effect make photos taken with film cameras more unique. However, now you don't need to have a film camera, you can create photos with amazing Grain effects through Photoshop software. Let's learn with SaDesign how to create Grain effects in Photoshop through the shares below.
1. What is the Grain Effect?
Grain is a term used in film photography. These are tiny noise particles on the surface of film photos. These noise particles appear in any dark or bright areas of the image. Depending on the type of film, the noise particles that appear will be fine or large and small.
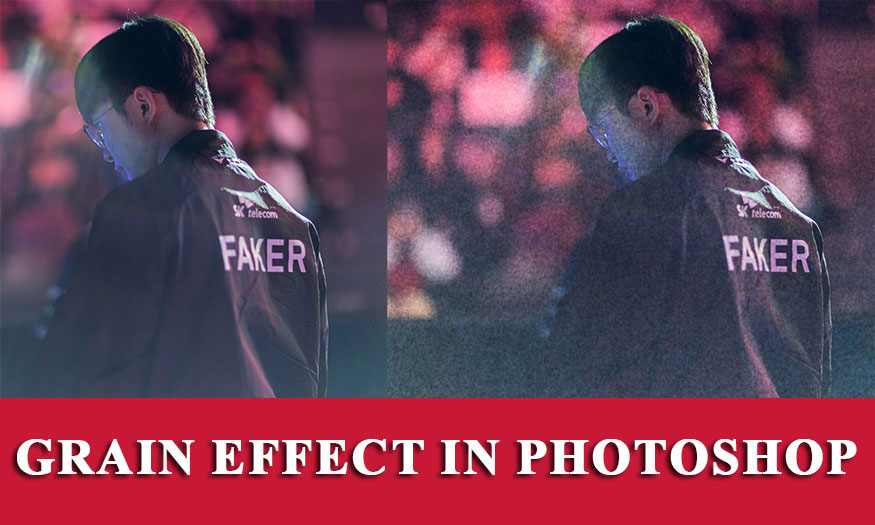
Grain is considered to be the soul of film photos, one of the things that makes film photos different from digital photos. Many photographers even try to create this effect on digital cameras.
In addition, many people have also created Grain effects in Photoshop for regular digital photos. Now, with just a few simple steps in Photoshop, you have a photo covered with film-like Grain particles.
To create a Grain effect in Photoshop for a photo, you can refer to the following steps:
2. Create a layer containing Grain particles
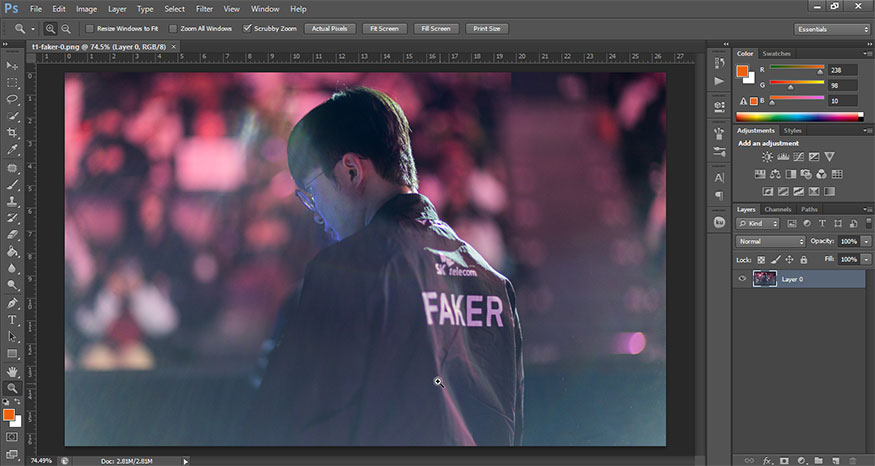
Step 1: The first step is to open the image you want to add the Grain effect in Photoshop.
On the menu bar, select File => Open or Ctrl+O then select your photo and click the Open button.
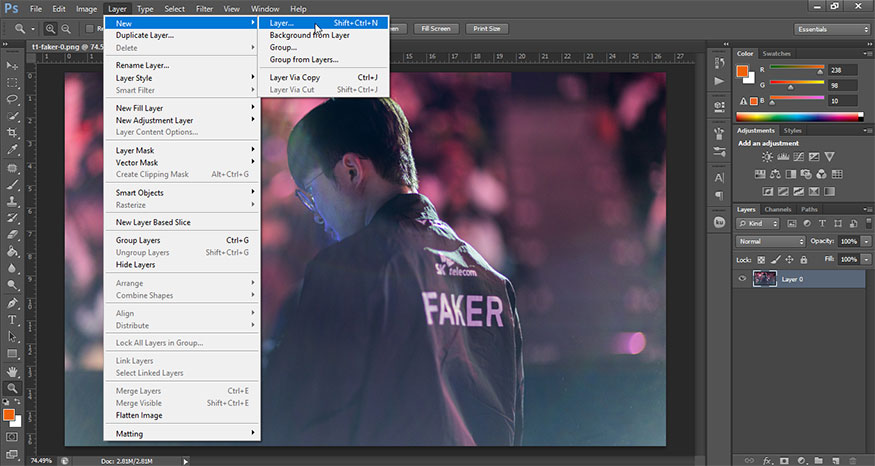
Step 2: Next you need to create a new layer. Press the key combination Shift+Ctrl+N. Or on the menu bar, select Layer => New => Layer.
Step 3: Name the newly created layer "Film Grain". Now choose the following Grain effect Photoshop options for the Film Grain layer:
-
Mode: Overlay
-
Opacity: 100%
-
Check: Fill with Overlay-neutral color (50% gray)
Click OK to close the dialog box, now a new layer named Film Grain will appear. It will be in the Layers panel above the original image.
3. Convert the new layer to a Smart Object
This section will allow us to create a Grain filter in Photoshop. Here's how:
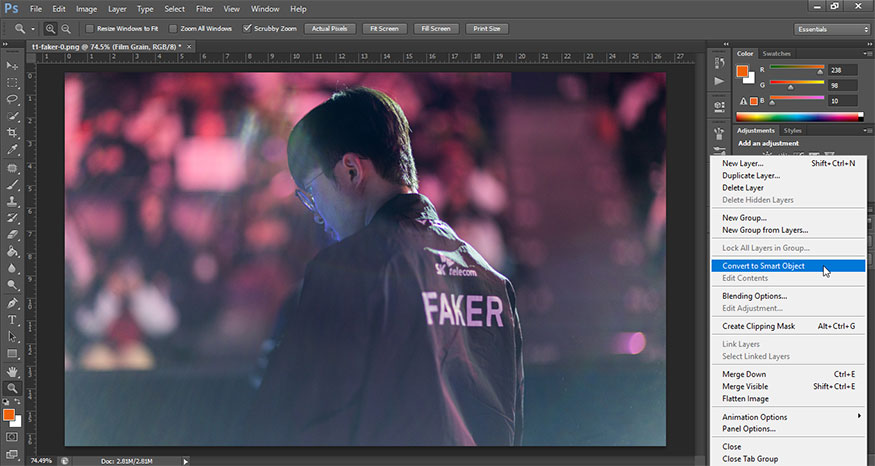
Step 1: Select the Film Grain layer then click the small menu button located in the upper right corner of the Layers panel. A menu will be dropped after clicking the small menu button. Select Convert to Smart Object from the list.
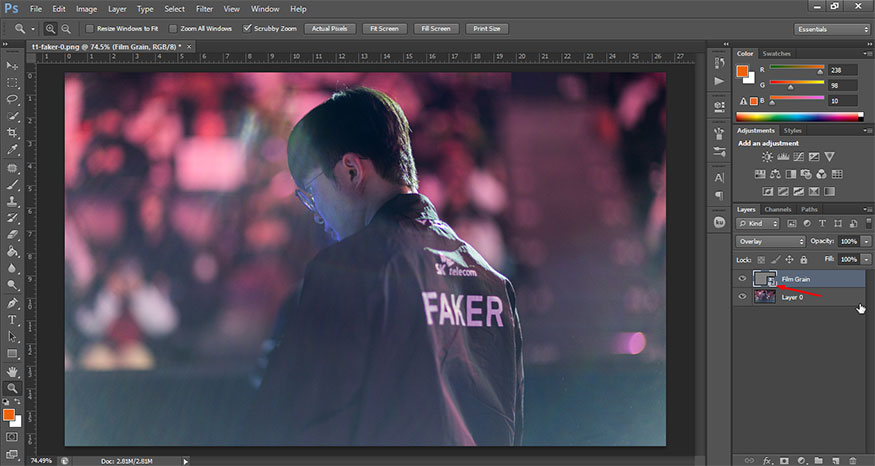
Step 2: A small icon will appear in the lower right corner of the layer thumbnail, indicating that it has been converted to a Smart Object. This allows filters applied to this layer to be edited later.
4. Create a Film Grain Overlay layer in Photoshop
The next step will be to add Grain like in film photos to your photo.
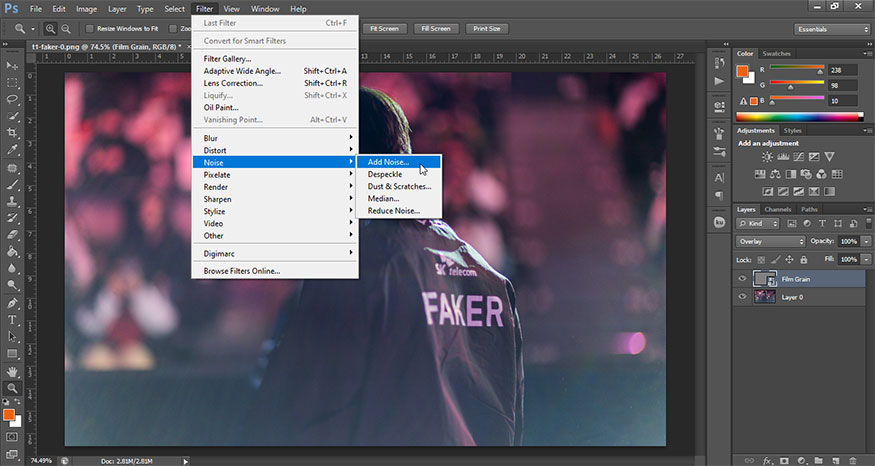
Step 1: On menu, select Filter => Noise => Add Noise.
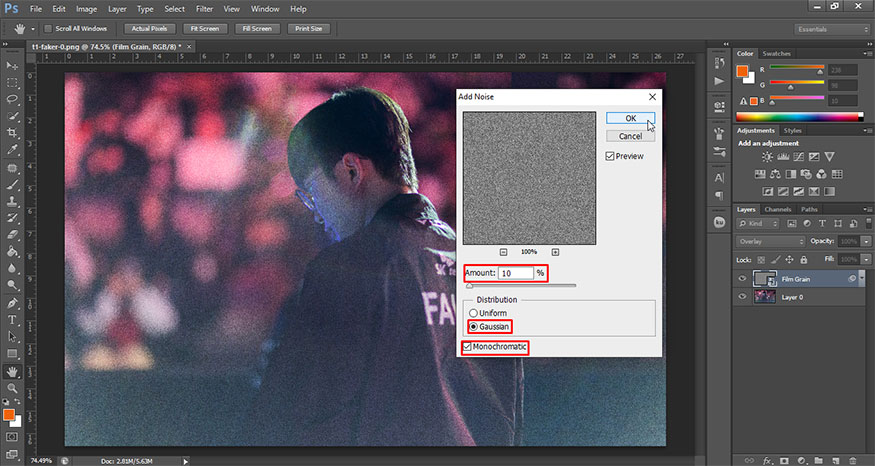
Step 2: In Add Noise box, apply the following settings:
-
Amount: 10%
-
Distribution: Gaussian
-
Monochromatic: Check
Step 3: Still on the Film Grain layer, go to Filter => Blur => Gaussian Blur in the top menu bar.
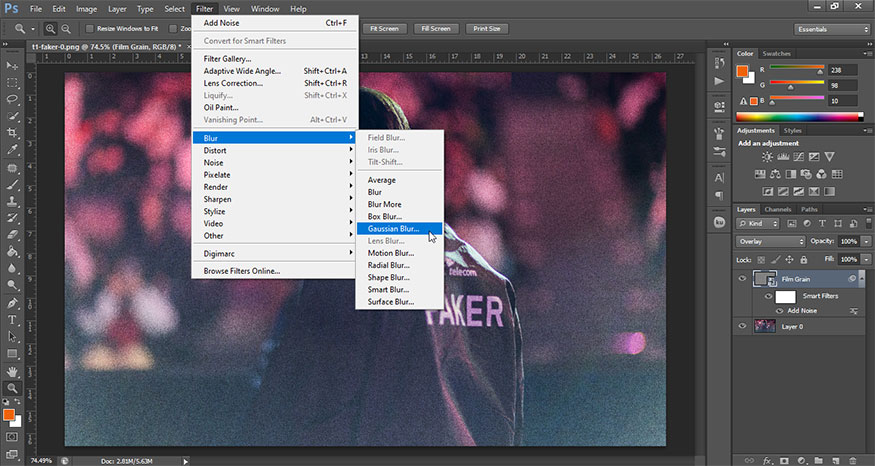
Step 4: This action will open the Gaussian Blur dialog box. Use the settings below to help soften the Grain texture in Photoshop a bit: Radius: 0.5 pixels.
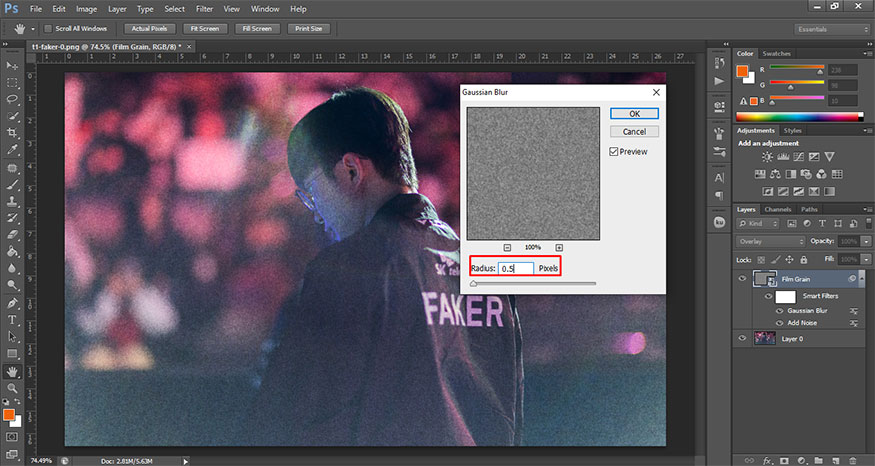
Step 5: Click OK to close the dialog box and apply Gaussian Blur to the layer. You have now successfully added a subtle Grain Photoshop layer to your photo.
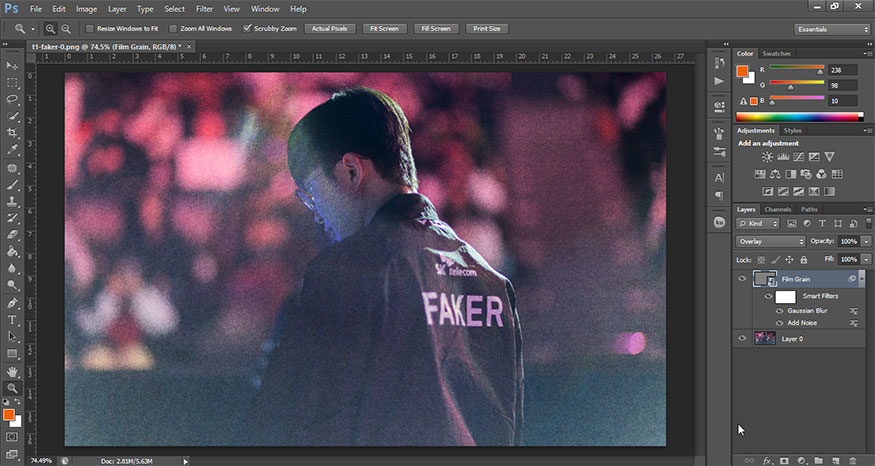
Above are the extremely simple steps to create the Grain effect in Photoshop. The digital photo added Grain particles looks like it was taken with a film camera. Try it out to see surprising results.


