Best Selling Products

Windows 10 & 11 Pro Key
36 USD

Freepik Premium Account
59 USD

Capcut Pro 1 Year
39 USD

ChatGPT Plus Account (GPT-4)
16 USD

Upgrade Duolingo Super
29 USD

Plugin Retouch4me
69 USD

Upgrade Genuine Office 365
49 USD

Genuine Adobe Illustrator account
99 USD

Adobe Photoshop Copyright - Full App
120 USD

Adobe Premiere Pro Account
99 USD

Upgrade genuine Capture One account
120 USD

Copyright Adobe Lightroom Account
59 USD

Autodesk All App Account Copyright
120 USD

Genuine Cheap Canva Pro
39 USD

MidJourney Account
29 USD
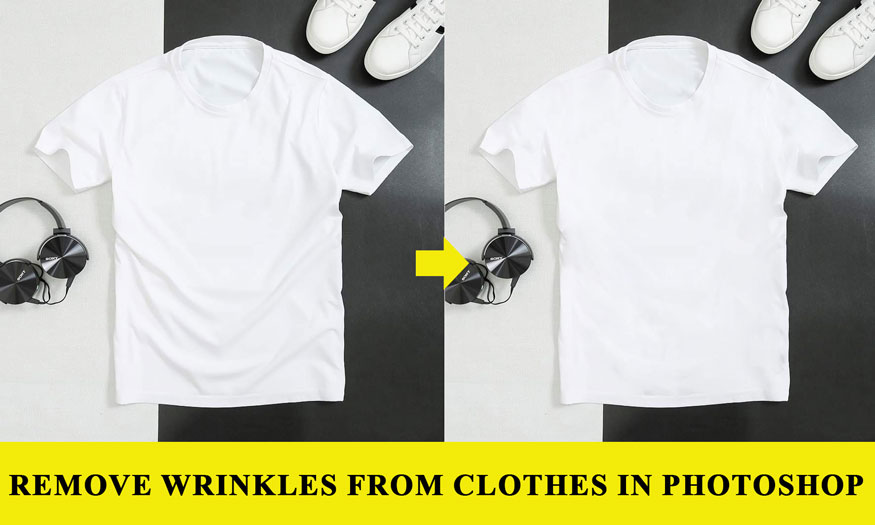
Easy remove wrinkles from clothes in Photoshop with the Healing Brush tool
The iron will help smooth out wrinkles on everyday clothes. But ironing shirts in Photoshop is something you can't do, right? You will need a tool to help the garments in your design flat. And that is the Healing Brush. Let's join SaDesign to see how to remove wrinkles from clothes in Photoshop with the Healing Brush right here.
The iron will help smooth out wrinkles on everyday clothes. But ironing shirts in Photoshop is something you can't do, right? You will need a tool to help the garments in your design flat. And that is the Healing Brush. Let's join SaDesign to see how to remove wrinkles from clothes in Photoshop with the Healing Brush right here.
1. What is the Healing Brush tool?
With a wrinkled shirt in Photoshop, you have many ways to remove wrinkles. But the most commonly used tool is the Healing Brush tool. This is a very useful concealer tool in Adobe Photoshop.

Healing Brush works by copying an area on the image and then pasting it over the selection you want. This tool will help automatically balance the color of the copied area with the effective selection area, making the image more natural and consistent. That's why many people choose to remove wrinkles from clothes in Photoshop using the Healing Brush.
The Healing Brush Tool has many different brushes, but today we will only use the Spot Healing Brush Tool to remove wrinkles on clothes. This tool will automatically sample neighboring image areas and then automatically fill in defects as naturally as possible.
2. Steps to remove wrinkles from clothes in Photoshop
You can "iron" wrinkles on your shirt in Photoshop with just the following basic steps:
Step 1: First, open the image containing the shirt you need remove wrinkles. To upload a photo, on the menu bar, select File => Open => select the appropriate photo => OK.
Or use the keyboard shortcut Ctrl+O and select the appropriate image.
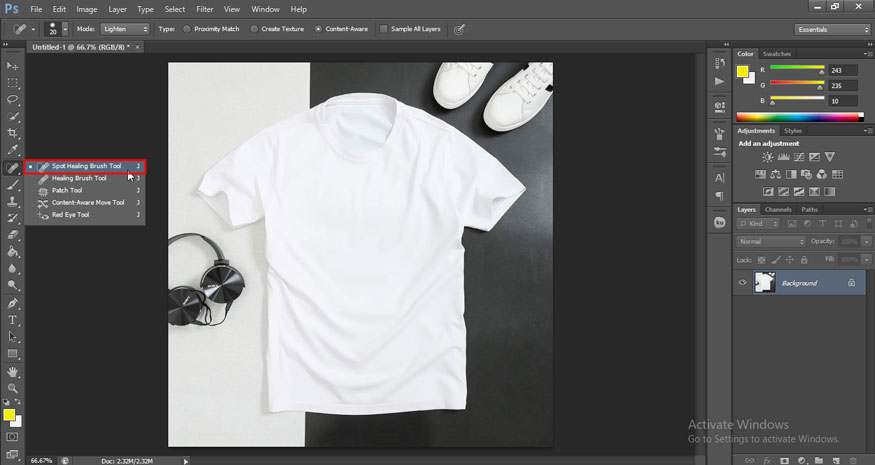
Here I use a photo of a white T-shirt with many wrinkles as shown below.
Step 2: To remove wrinkles from clothes in Photoshop, we will use the Spot Healing Brush Tool of Healing Brush. On the toolbar, select Spot Healing Brush Tool or press J key.
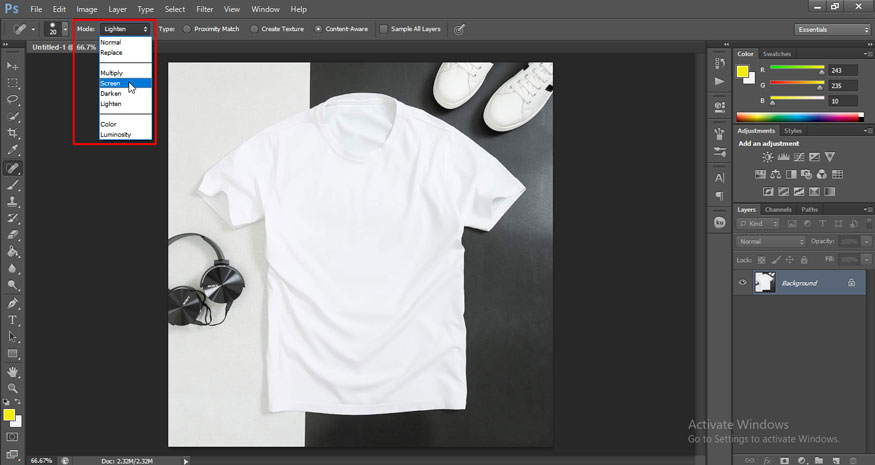
Step 3: Once you have selected the Spot Healing Brush tool, go to the top settings bar and select Painting Mode. By default it will be in Normal mode, but there are a number of options for you to choose from such as Replace, Multiply, Screen, Darken, Lighten, Color and Luminosity.
For example, if there is a wrinkle that is darker than the surrounding fabric color, you will have to select Lighten mode, to lighten it.
Feel free to explore and experiment with modes to get the effect you want.
For this tutorial, I started with Screen mode to achieve a clean ironing effect.
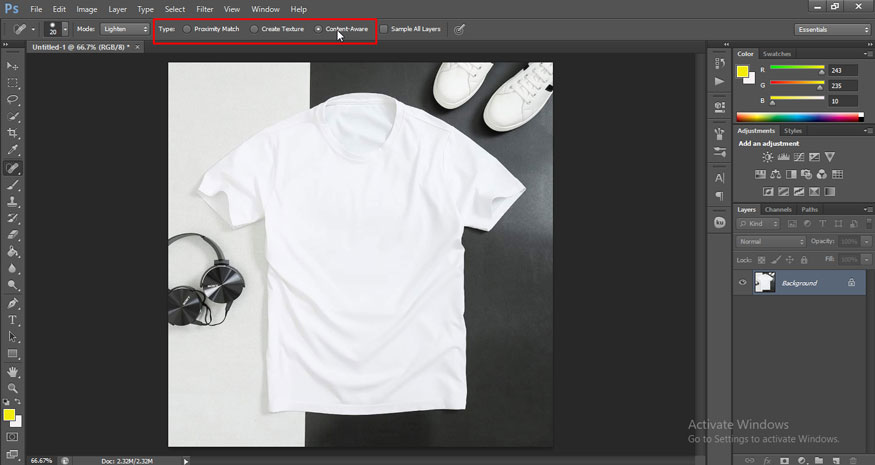
Step 4: Next, you need to set the Healing Type from the top settings bar. Here, you can also test three different options: Content-Aware, Create Texture, and Proximity Match. Each option gives different results.
Choosing Type: Content-Aware is a good choice when you want to duplicate the content and texture of the sample area.
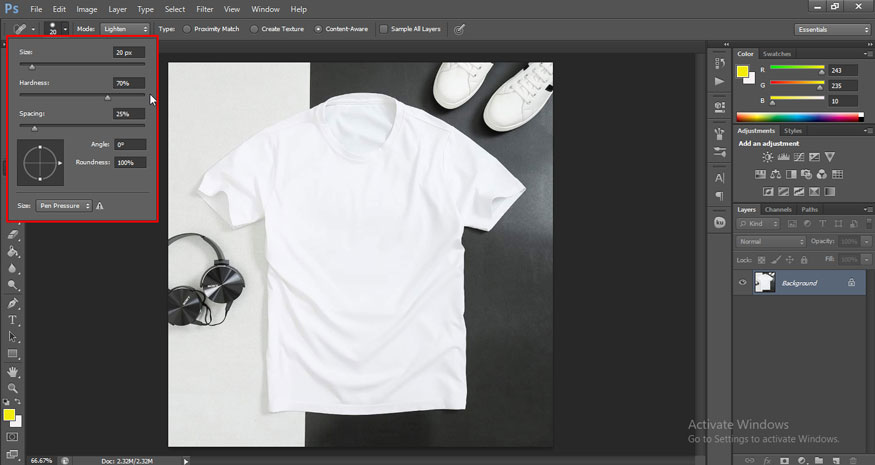
Step 5: After selecting Paint Mode and Healing Type, you can move on to adjusting brush features such as Hardness and Size, under the brush icon from the options bar.
Depending on the size of the area you want to fix, it's always helpful to change the size of the brush. For example, I started with Brush Size set to 20 px, Hardness at 70% and Spacing at 25% to cover the main wrinkles.
Step 6: Now, remove wrinkles from clothes in Photoshop using the adjusted Spot Healing Brush Tool. Zoom in the wrinkle and move the mouse over the wrinkled area. Start with large wrinkles.
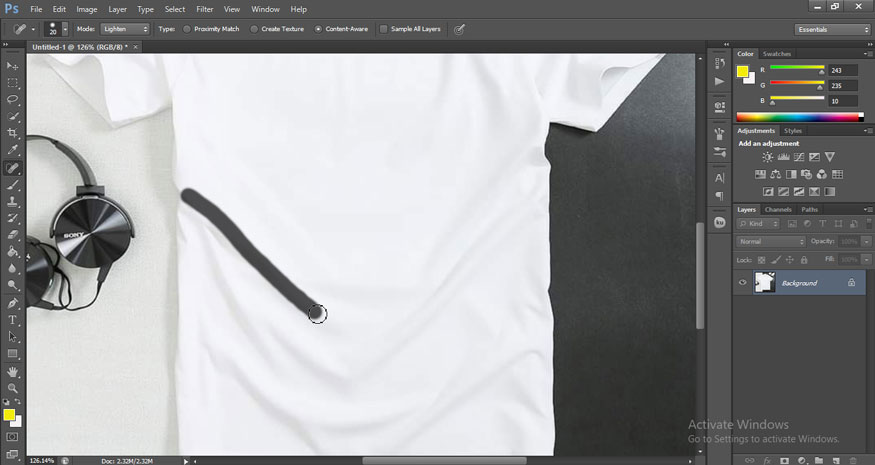
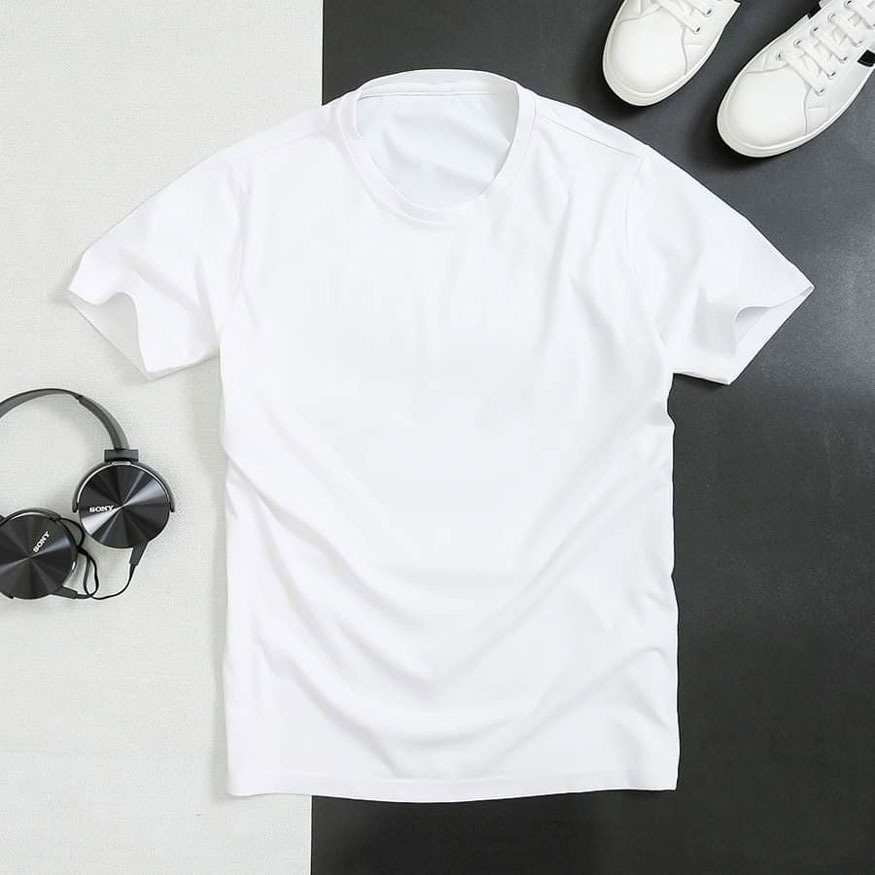
Step 7: Because there are many different large and small wrinkles, you will have to adjust the brush to suit the wrinkles to avoid smudging the shirt. After removing all wrinkles, we get the result as shown.
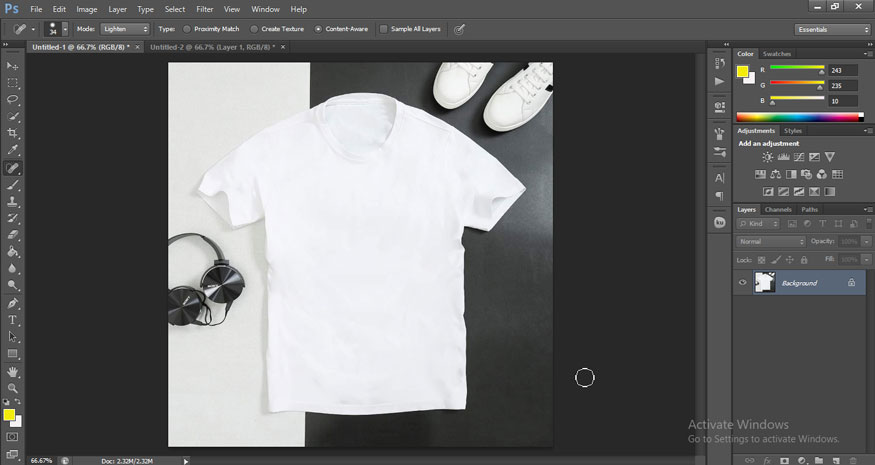
Above is a summary of steps to remove wrinkles from clothes in Photoshop. The method is very simple, with just a few steps your shirt is smooth. Let's do it now to see surprising results.


VIP Products


Best Selling Products
Windows 10 & 11 Pro Key
36 USD
Freepik Premium Account
59 USD
Capcut Pro 1 Year
39 USD
ChatGPT Plus Account (GPT-4)
16 USD
Upgrade Duolingo Super
29 USD
Plugin Retouch4me
69 USD
Upgrade Genuine Office 365
49 USD
Genuine Adobe Illustrator account
99 USD
Adobe Photoshop Copyright - Full App
120 USD
Adobe Premiere Pro Account
99 USD
Upgrade genuine Capture One account
120 USD
Copyright Adobe Lightroom Account
59 USD
Autodesk All App Account Copyright
120 USD
Genuine Cheap Canva Pro
39 USD
MidJourney Account
29 USD