Best Selling Products

Genuine Cheap Canva Pro
39 USD

MidJourney Account
29 USD

Freepik Premium Account
59 USD

Genuine Adobe Illustrator account
99 USD

Upgrade Genuine Office 365
49 USD

Capcut Pro 1 Year
39 USD

Plugin Retouch4me
69 USD

Copyright Adobe Lightroom Account
59 USD

Windows 10 & 11 Pro Key
36 USD

Upgrade genuine Capture One account
120 USD

Adobe Premiere Pro Account
99 USD

Upgrade Duolingo Super
29 USD

Autodesk All App Account Copyright
120 USD

ChatGPT Plus Account (GPT-4)
16 USD

Adobe Photoshop Copyright - Full App
120 USD
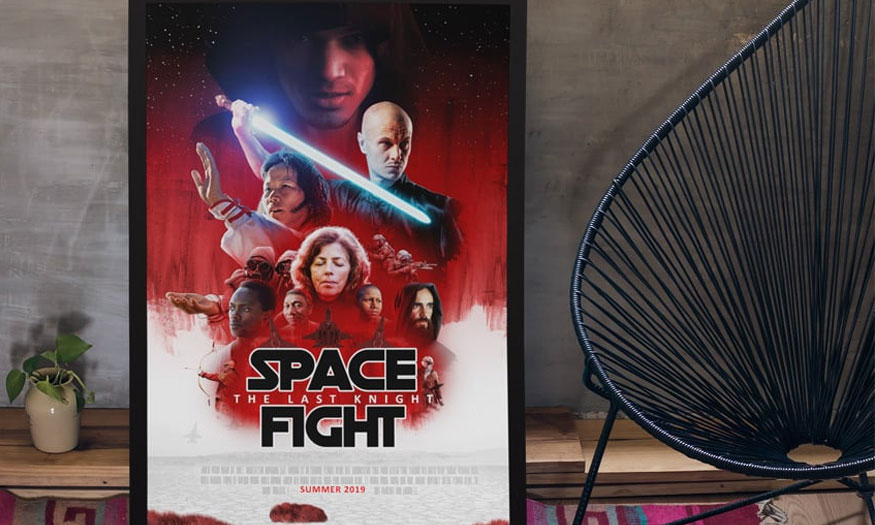
How to create beautiful mockups for posters in Photoshop
Nội dung
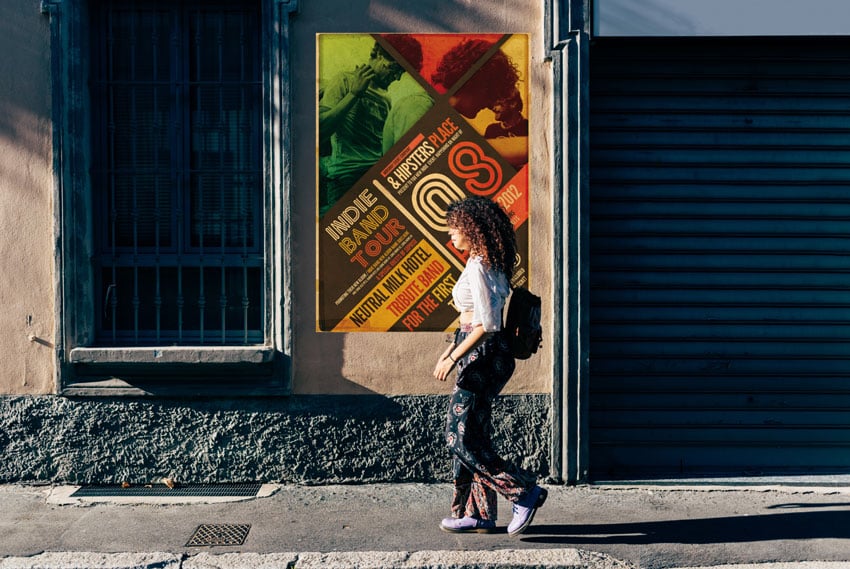
How to create poster mockups in Photoshop will be fully demonstrated in this tutorial. Throughout the poster mockup tutorial, you'll learn in detail how to create a smart object and how to frame a poster mockup. Please follow SaDesign.
How to create poster mockups in Photoshop will be fully demonstrated in this tutorial. Throughout the poster mockup tutorial, you'll learn in detail how to create a smart object and how to frame a poster mockup. Please follow SaDesign.

The tutorial includes the following content:
- How to create smart objects in Photoshop
- How to create poster mockups in Photoshop
- How to create frame poster mockups in Photoshop
1. How to create smart objects in Photoshop
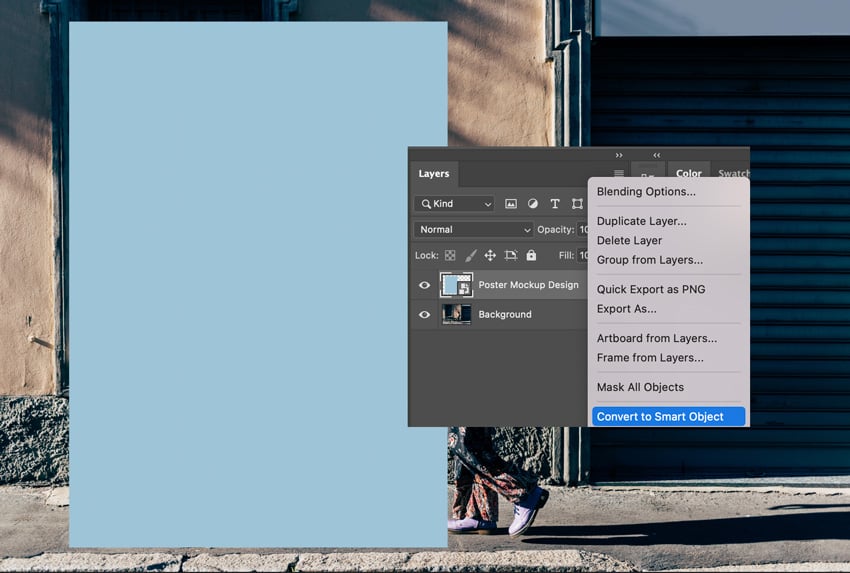
Step 1: Open the closed store photo in Photoshop. Then use the Rectangle Tool (U) and start creating a rectangle with dimensions of 2460 px x 3420 px.

Step 2: Next, rename the rectangle layer Poster Mockup Design. Right click on the layer and click Convert to Smart Object.
2. How to create a poster mockup in Photoshop
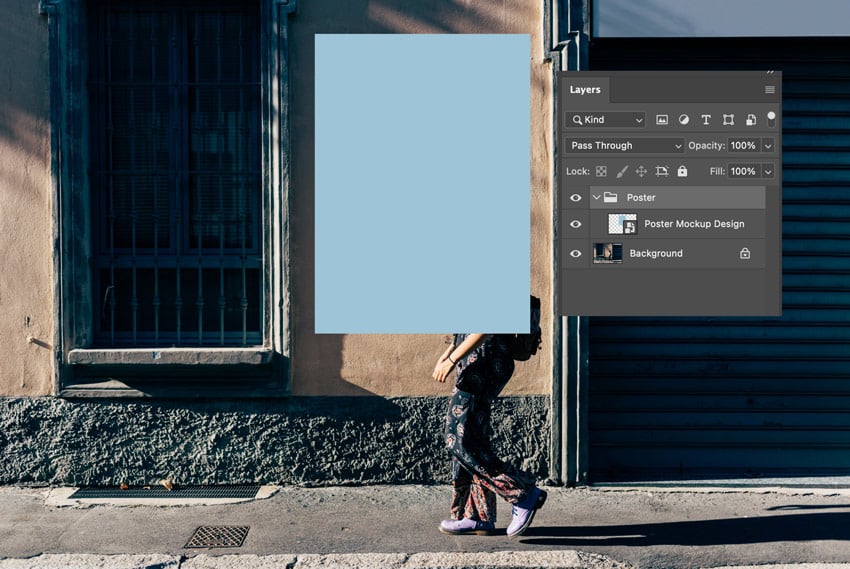
Step 1: Go to Edit => Free Transform to reduce the size by 57% on the Poster Mockup Design layer to fit the wall. Next, place the Mockup Poster Design layer in its own Folder.
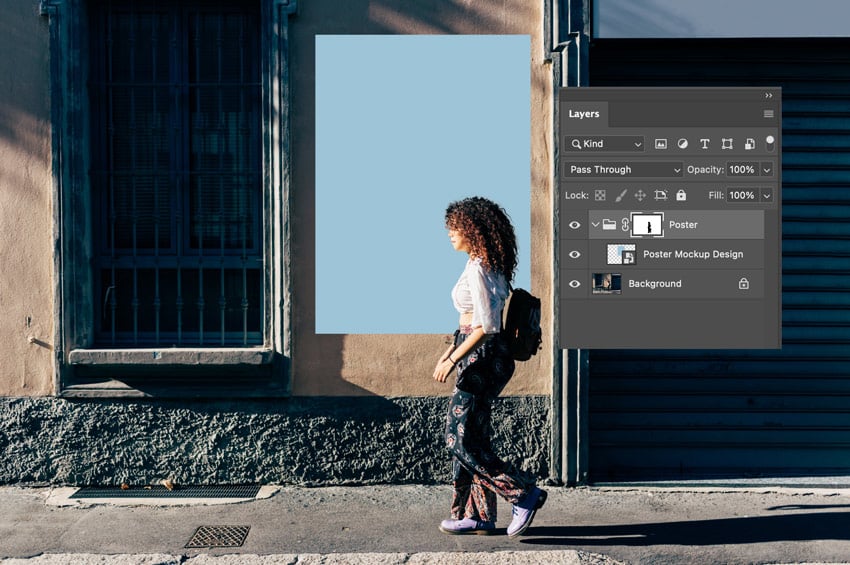
Step 2: Select the Background layer and go to Select => Theme. Then, go to Select => Inverse to invert the selection. So, we have created a mask on the Poster folder layer.
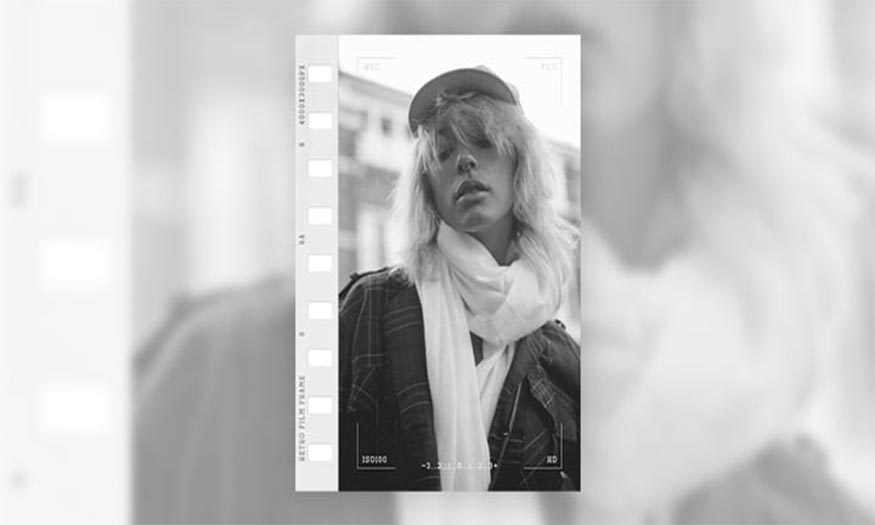
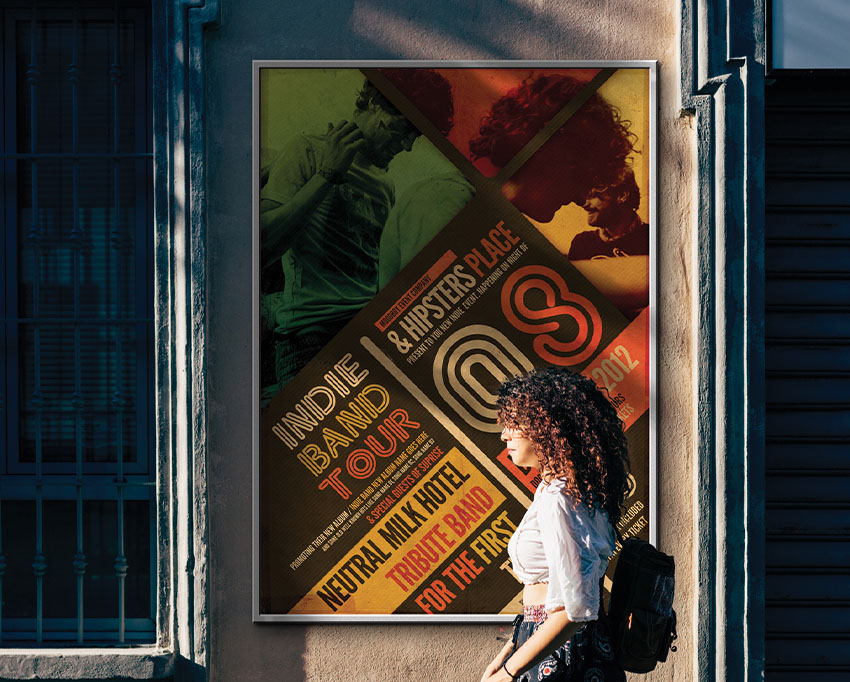
Step 3: Double click on the Poster Mockup Design thumbnail. A new file window will be opened and you place your Indie Festival Poster there. Then, do File => Save.
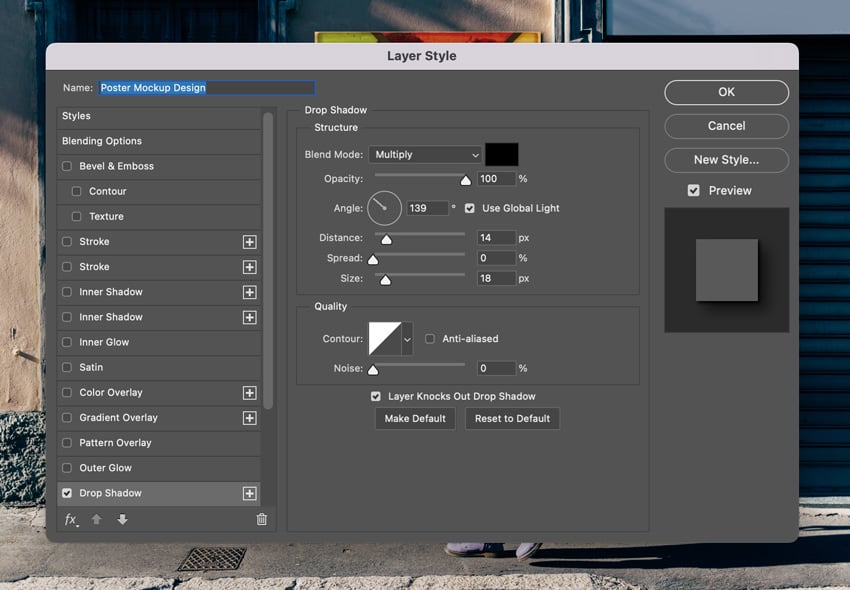
Step 4: Make a double click on the Poster Mockup Design layer. Then add a Shadow using the following settings:
- Blend Mode: Multiply
- Color: #000000
- Opacity: 100%
- Angle: 139
- Distance: 14
- Spread: 0
- Size: 18
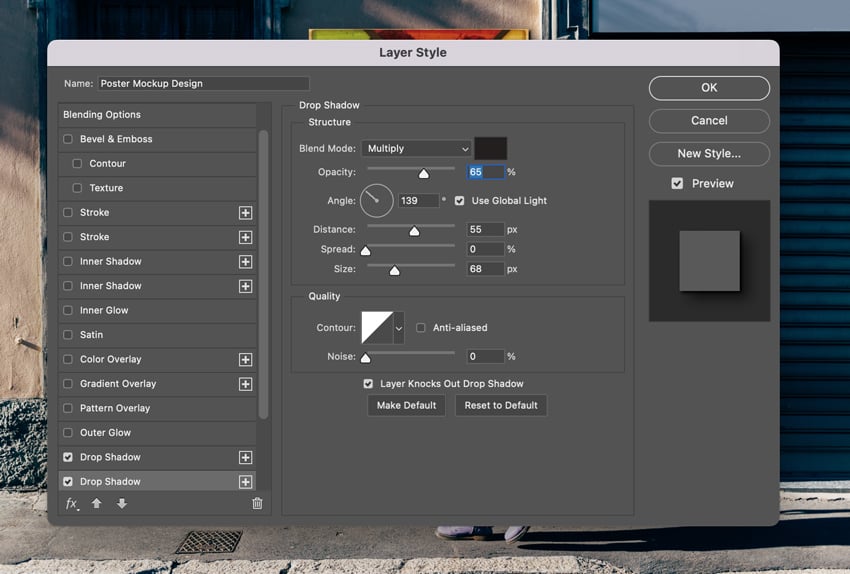
Step 5: Next, use the following settings to add another Drop Shadow layer style.
- Blend mode: Multiply
- Color: #221f1f
- Opacity: 65%
- Angle: 139
- Distance: 55
- Spread: 0
- Size: 68
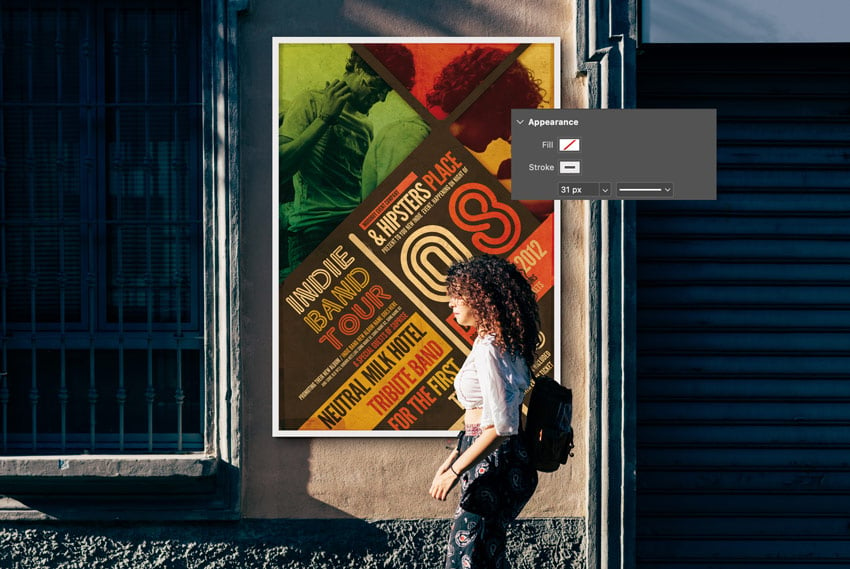
3. How to create a frame poster mockup in Photoshop
Step 1 :Now use the Rectangle Tool (U) to add a frame to the poster mockup. Make changes to the Stroke to 31 px and the color to #ebe9e9.
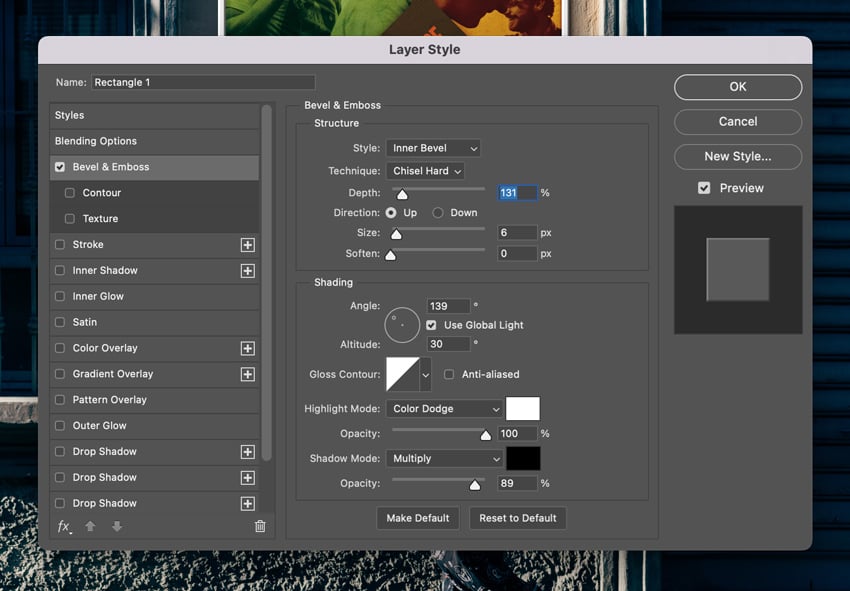
Step 2: Use the settings below to add the Bevel and Emboss layer style to the frame layer:
- Style: Internal Beveled
- Technique: Chisel Hard
- Depth: 131
- Orientation: Up
- Size: 6
- Softening: 0
- Angle: 139
- Height: 30
- Highlights: Dodge |#ffffff
- Highlight Opacity: 100%
- Shadows: Multiply |#000000
- Opacity: 89%
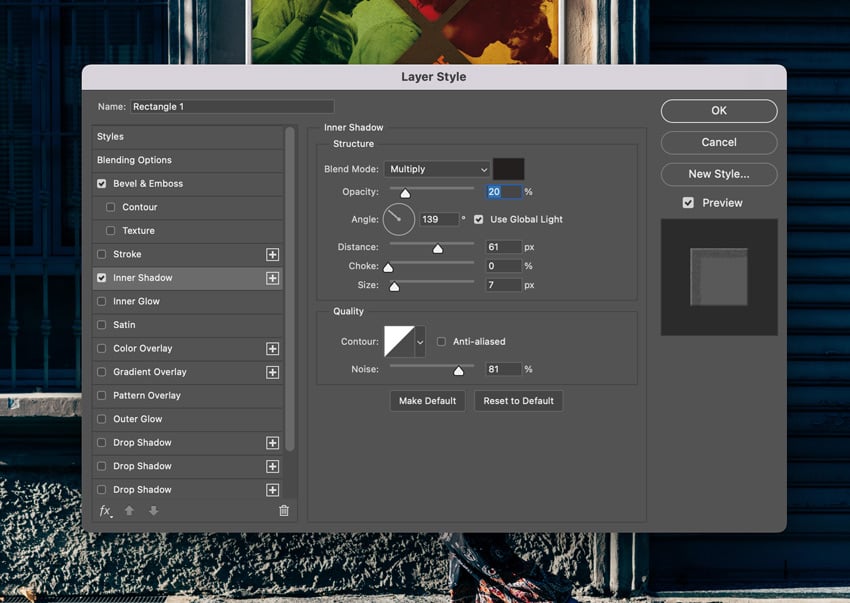
Step 3: Add an Inner Shadow layer style to the frame layer with the following settings:
- Blend mode: Multiply |#221f1f
- Opacity: 20%
- Angle: 139
- Distance: 61
- Choke: 0
- Size: 7
- Noise: 81
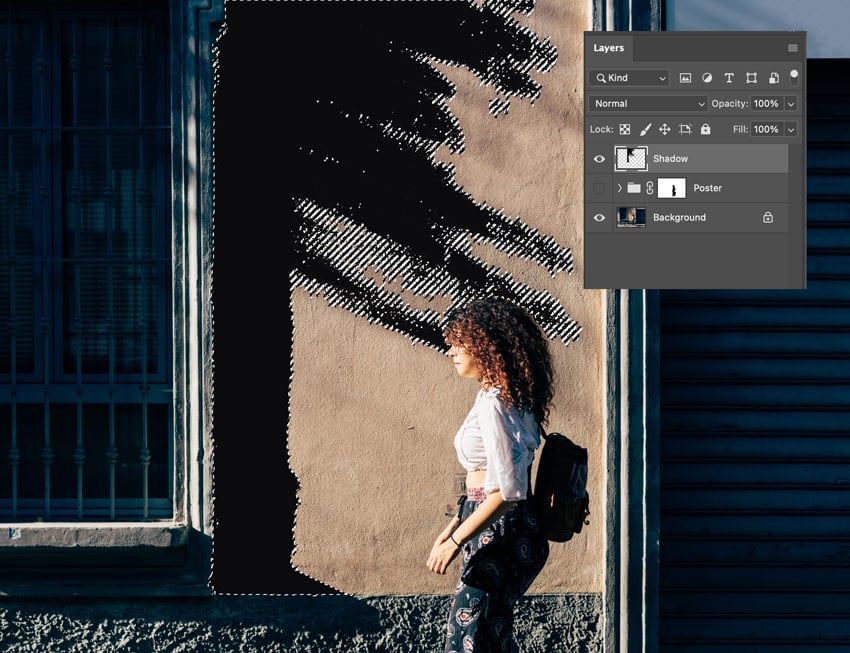
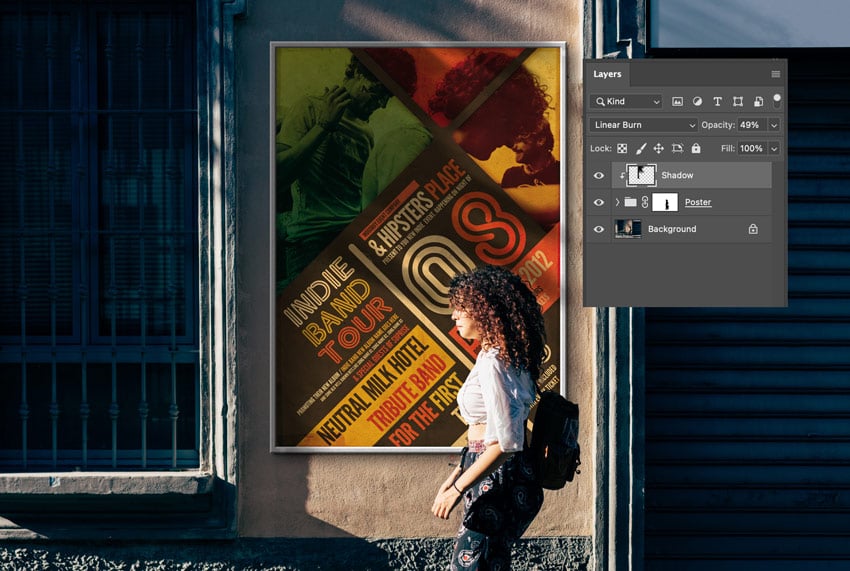
Step 4: Click on the Background layer and hide the Poster folder. Make a selection of tree silhouettes with the Magic Wand Tool (W). Then, create a new layer on top of the Poster folder and fill it with #0b0b0d, name it “Shadow” .
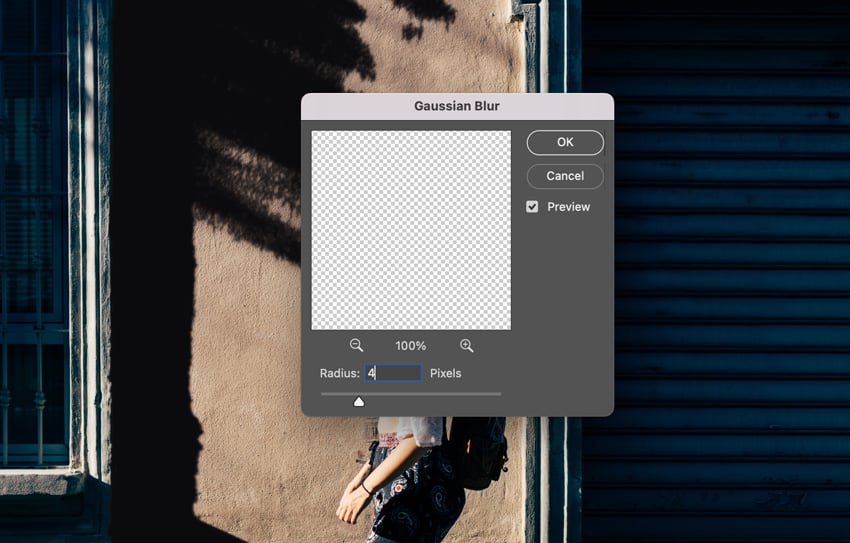
Step 5: Filter => Blur => Gaussian Blur to change the Radius to 4 pixels on the Shadow layer.
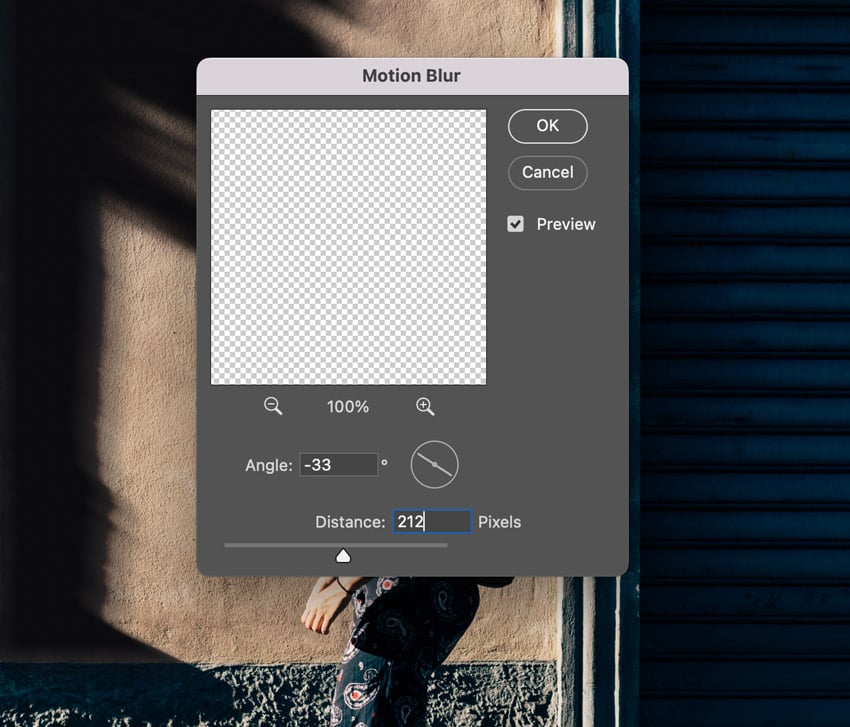
Step 6: Add Motion Blur to the Shadow layer. Then change Angle to -33 and Distance to 212.
Step 7: Display the Poster folder and click to select the Shadow layer. Next, right-click => Create Clipping Mask. You need to change the Shadow layer to Linear Burn and the Opacity to 49%.
Now, you know how to create a poster mockup in Photoshop. Practice and experiment with new techniques until you achieve the best perfect poster mockup. Follow us to update knowledge about Photoshop tools.
- Instructions for creating a mockup on a black hoodie in Photoshop
- How to design a classic movie poster in Photoshop


VIP Products


Best Selling Products
Genuine Cheap Canva Pro
39 USD
MidJourney Account
29 USD
Freepik Premium Account
59 USD
Genuine Adobe Illustrator account
99 USD
Upgrade Genuine Office 365
49 USD
Capcut Pro 1 Year
39 USD
Plugin Retouch4me
69 USD
Copyright Adobe Lightroom Account
59 USD
Windows 10 & 11 Pro Key
36 USD
Upgrade genuine Capture One account
120 USD
Adobe Premiere Pro Account
99 USD
Upgrade Duolingo Super
29 USD
Autodesk All App Account Copyright
120 USD
ChatGPT Plus Account (GPT-4)
16 USD
Adobe Photoshop Copyright - Full App
120 USD