Best Selling Products

Genuine Cheap Canva Pro
39 USD

Capcut Pro 1 Year
39 USD

Freepik Premium Account
59 USD

Plugin Retouch4me
69 USD

Genuine Adobe Illustrator account
99 USD

Copyright Adobe Lightroom Account
59 USD

Upgrade genuine Capture One account
120 USD

Upgrade Genuine Office 365
49 USD

Windows 10 & 11 Pro Key
36 USD

MidJourney Account
29 USD

Adobe Premiere Pro Account
99 USD

Autodesk All App Account Copyright
120 USD

Upgrade Duolingo Super
29 USD

ChatGPT Plus Account (GPT-4)
16 USD

Adobe Photoshop Copyright - Full App
120 USD
Quick Tips to Turn a Photo into an Illustration in Photoshop
Nội dung
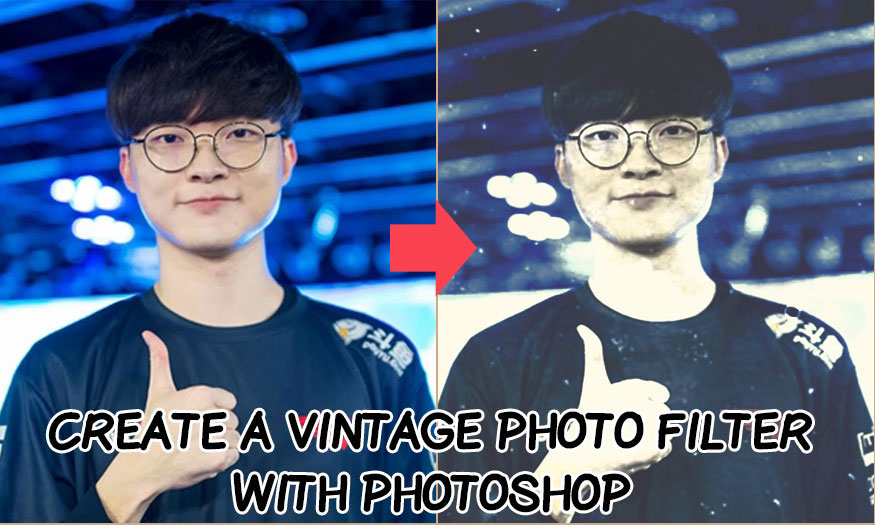
You can completely turn your image into an illustration with Photoshop in just a few simple steps. If you are interested in how to create this impressive effect, let's learn with SaDesign!
You can completely turn your image into an illustration with Photoshop in just a few simple steps. If you are interested in how to create this impressive effect, let's learn with SaDesign!

1. How to get started
First, you need to open the image you want to work with by going to File => Open, then select the image and click Open.
Before we begin, check the following:
-
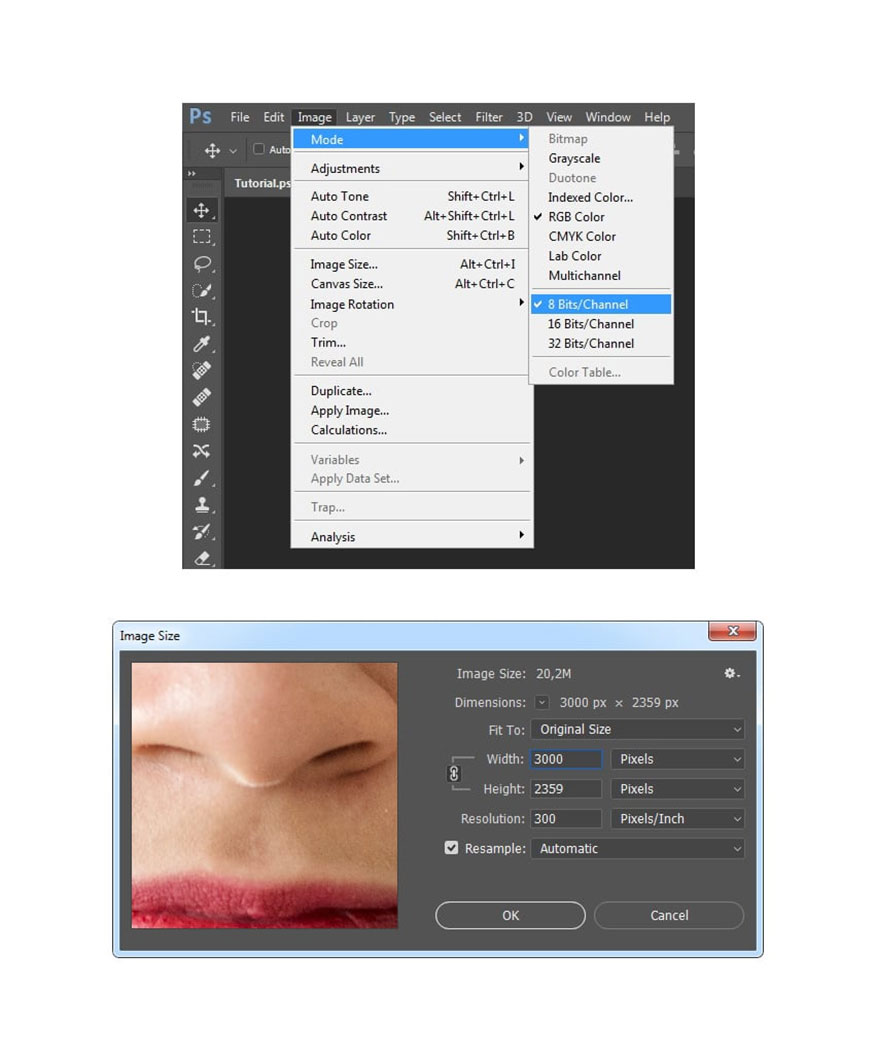
Since we're turning an image into an illustration, it needs to be set to RGB Color mode, 8 bits/channel. To check, go to Image => Mode .
-
Image size should be set to 2000–4000 px width/height. To check, go to Image => Image Size.
-
The image must be a Background layer, otherwise you need to go to Layer => New => Background from Layer.
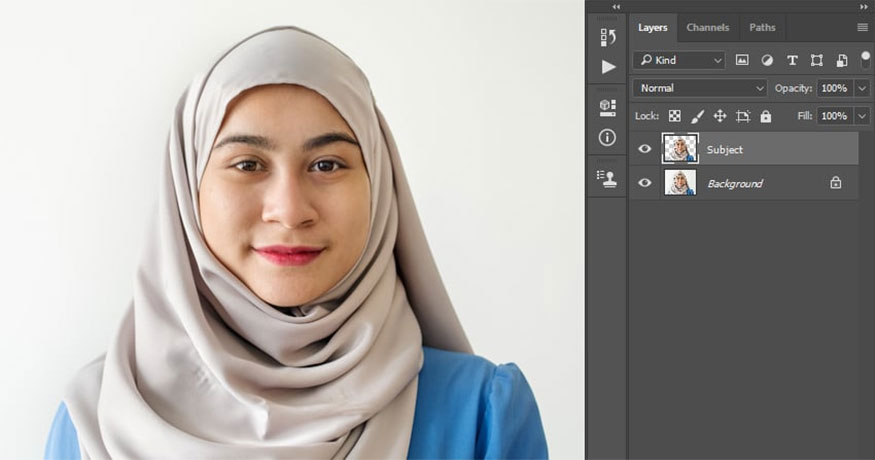
2. How to choose a subject in Photoshop
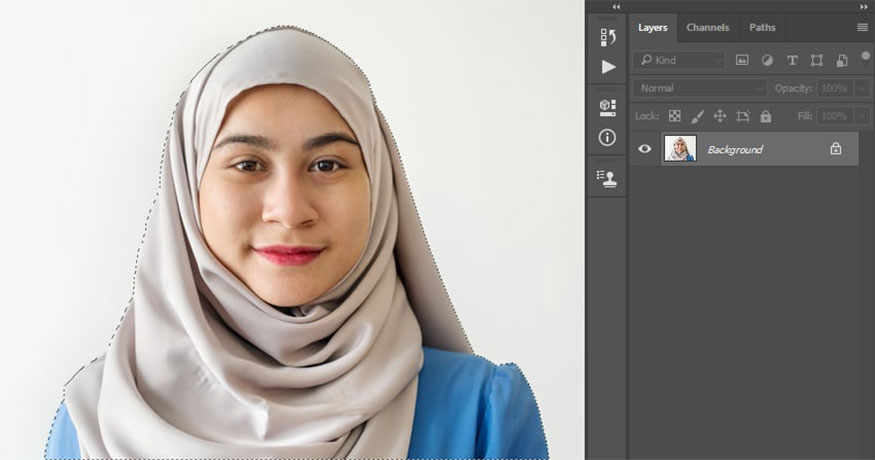
- Step 1: You need to select the object, then copy the object to a separate layer to illustrate the photo. Select the Quick Selection Tool (W) and select the background of the image. Use the Shift-Alt keys to add or subtract from the selection. After selecting, press Ctrl-Shift-I to invert the selection.
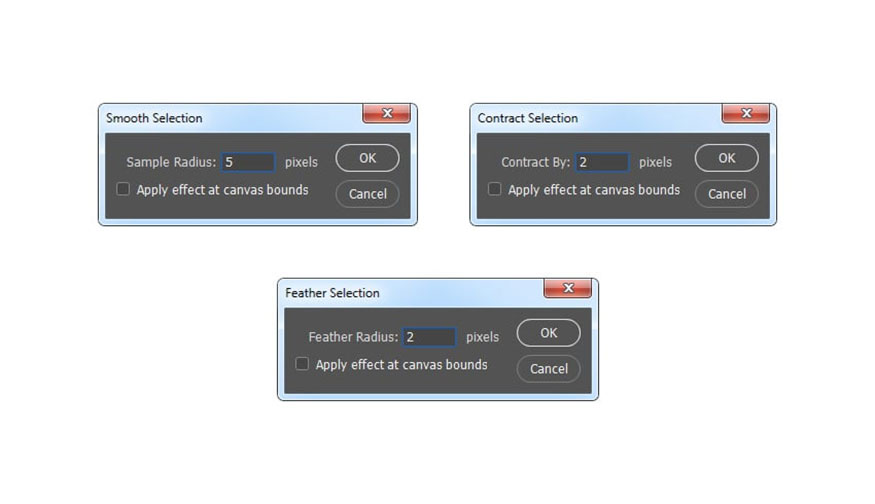
Step 2: Go to Select => Modify => Smooth and set Sample Radius to 5px.
Next, go to Select => Modify => Contract and set Contract By to 2px.
Finally, go to Select => Modify => Feather and set Feather Radius to 2px.
Step 3: Press Ctrl-J on the keyboard to create a new layer, name this new layer “Subject”.
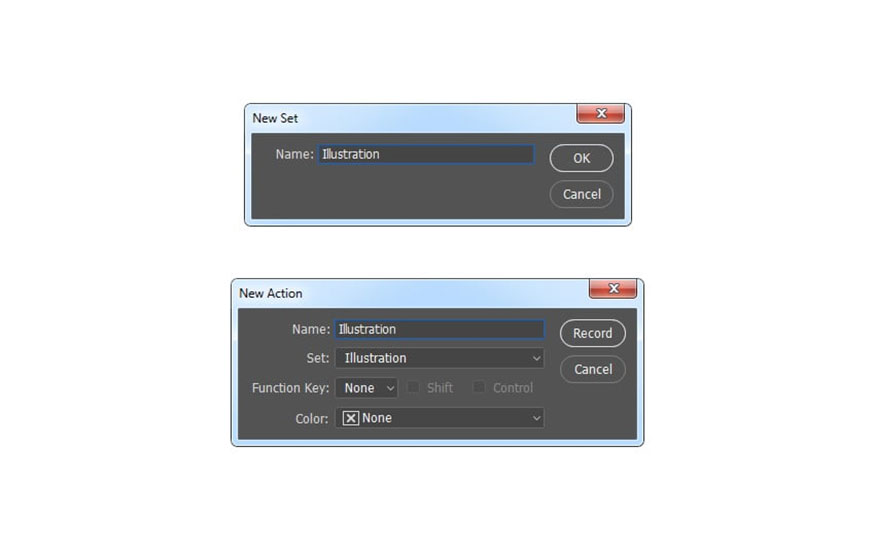
3. How to record Photoshop actions
To record actions you need to go to Window => Actions. In the Actions panel click on the menu icon in the top right corner => select New Set to create a new set and name it “Illustration”.
Then, click the same menu icon again, select New Action to create a new action and name it “Illustration”. This is where the illustration comes from.
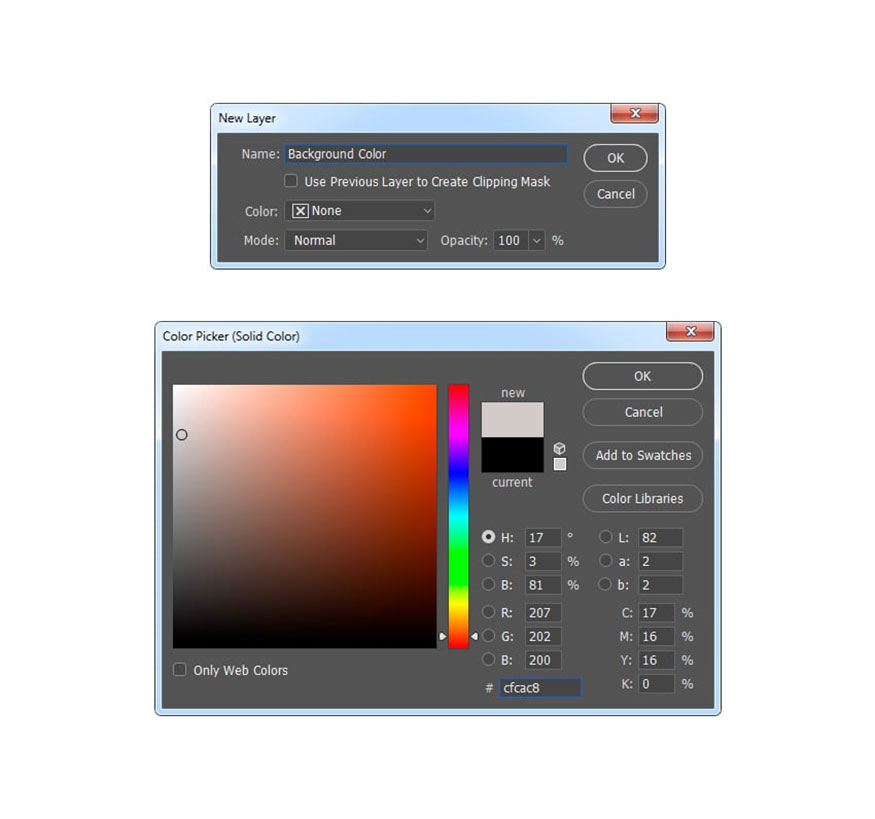
4. How to create an illustration background
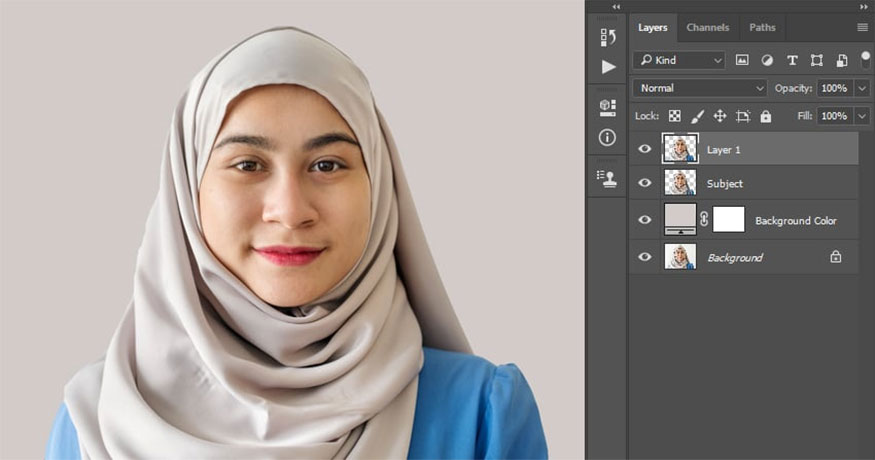
To create an illustration background, you need to select the Background layer, then go to Layer => New Fill Layer => Solid Color to create a solid color fill layer, name them “Background color” and choose the color code #cfcac8 as shown below:
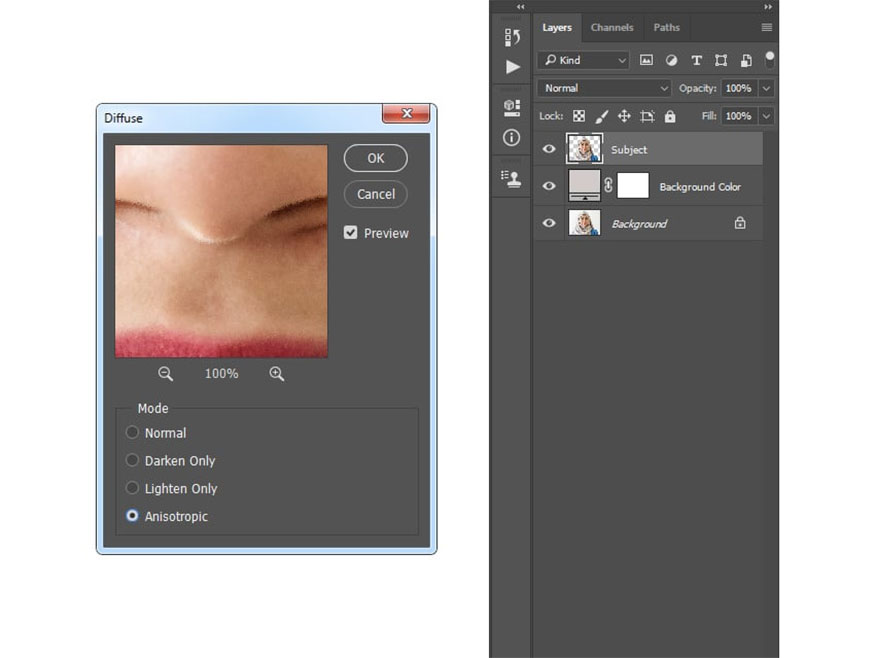
5. How to create an illustrative Photoshop effect
Step 1: Select the Subject layer, then go to Filter => Stylize => Diffuse and set Mode to Anisotropic.
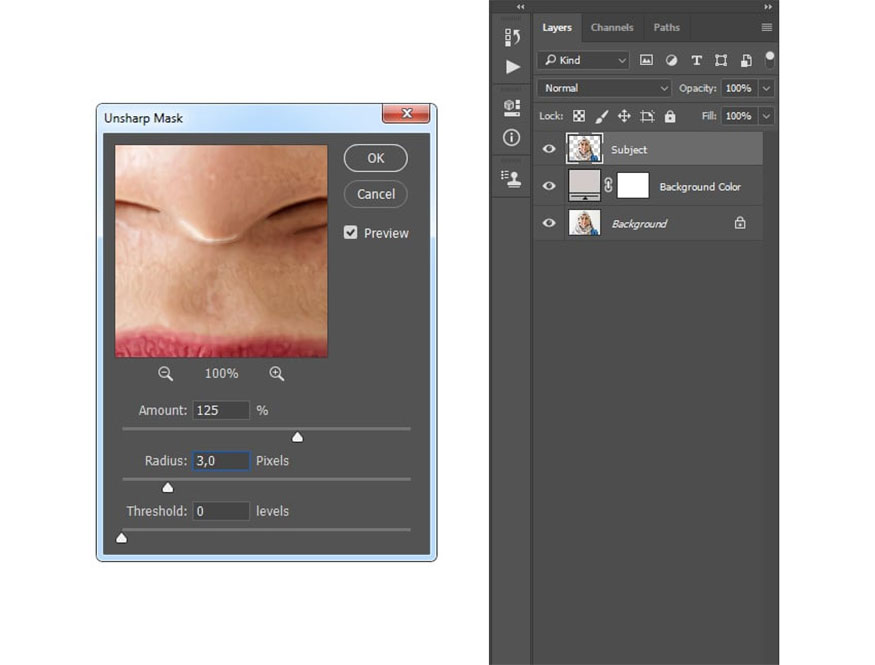
Step 2: Now go to Filter => Sharpen => Unsharp Mask and set Amount to 125%, Radius to 3 px and Threshold to 0.
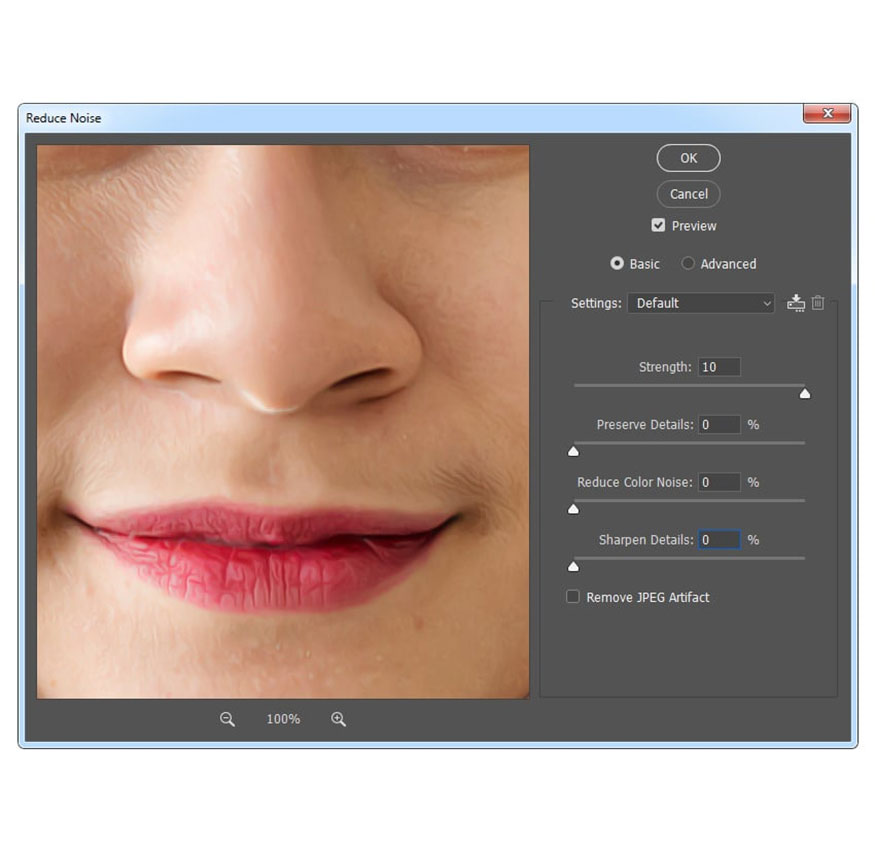
Step 3: Next, you need to smooth out the different textures by going to Filter => Noise => Reduce Noise and using the settings below:
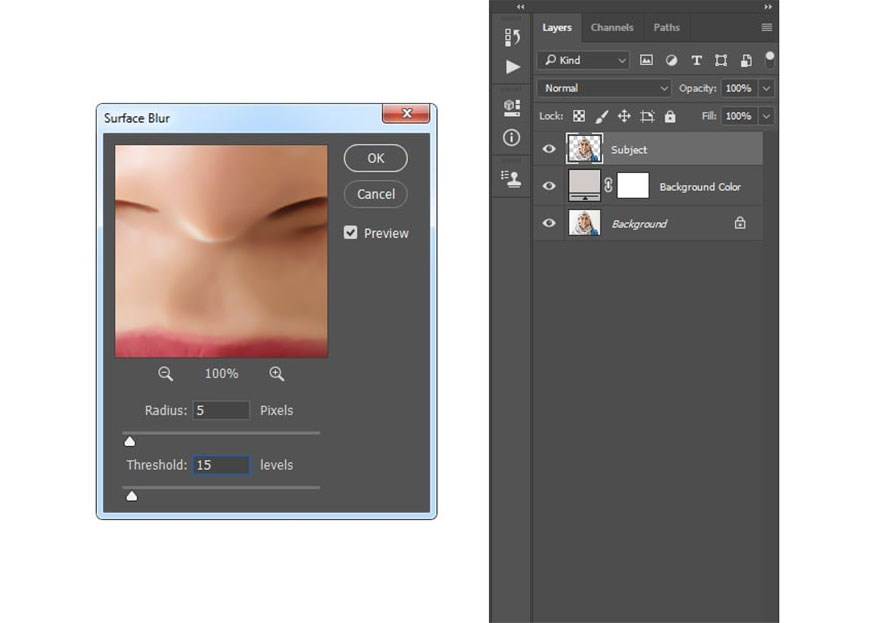
Step 4: Go to Filter => Blur => Surface Blur and set Radius to 5 px and Threshold to 15.
Step 5: Go to Filter => Sharpen => Unsharp Mask and set Amount to 250%, Radius to 3 px and Threshold to 0.

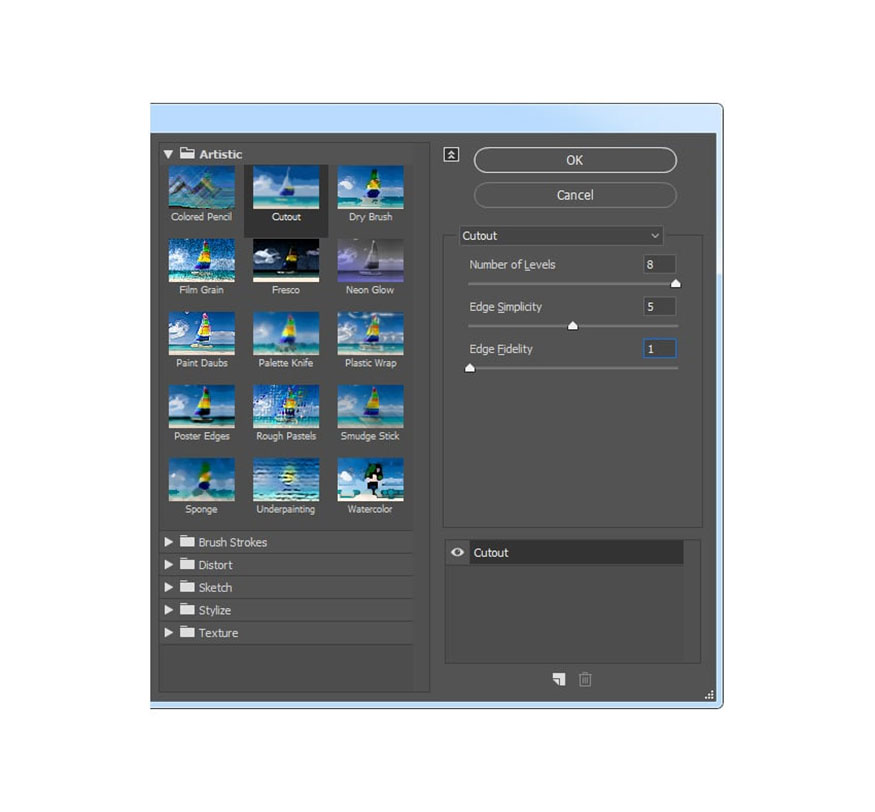
Step 6: Artistic filters will give you a great start to turning your photos into illustrations. Go to Filter => Filter Gallery => Artistic => Cutout and set Number of Levels to 8, Edge Simplicity to 5 and Edge Fidelity to 1. This makes it easier to quickly turn an image into an illustration.
6. How to create a topic outline
Step 1: Click on the Theme layer thumbnail to create a selection for this layer. Next, select Background and press Ctrl-J on the keyboard to create a new layer using the selection. Drag this layer to the top of the layers in the Layers panel.
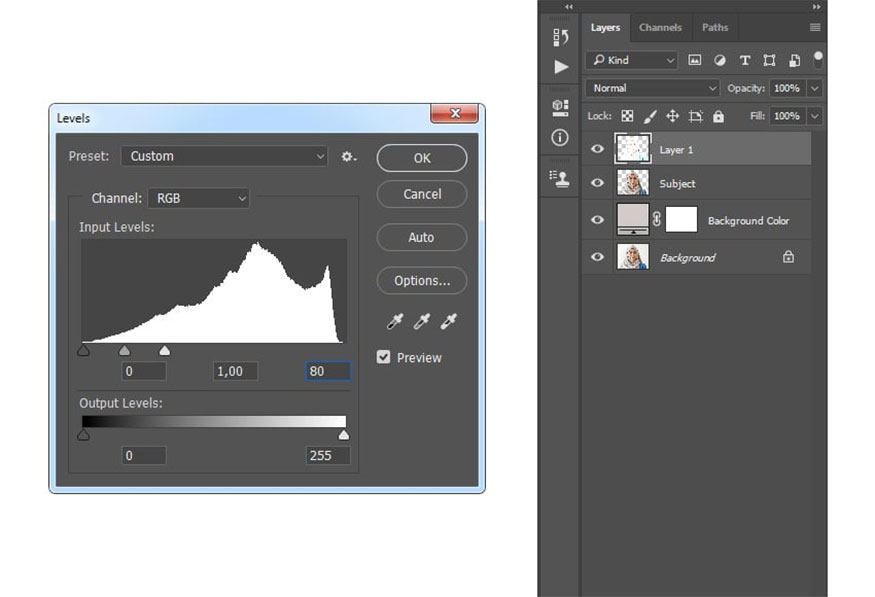
Step 2: Go to Image => Adjustment => Levels and enter the settings below:
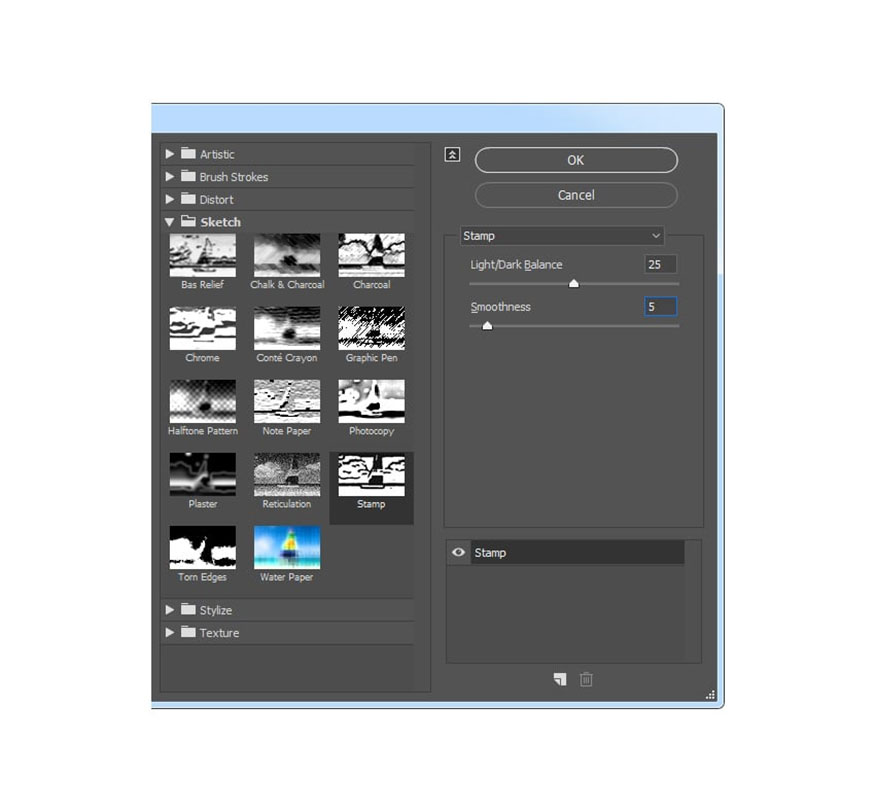
Step 3: Go to Filter => Filter Gallery => Sketch => Stamp and set Light/Dark Balance to 25 and Smoothness to 5.
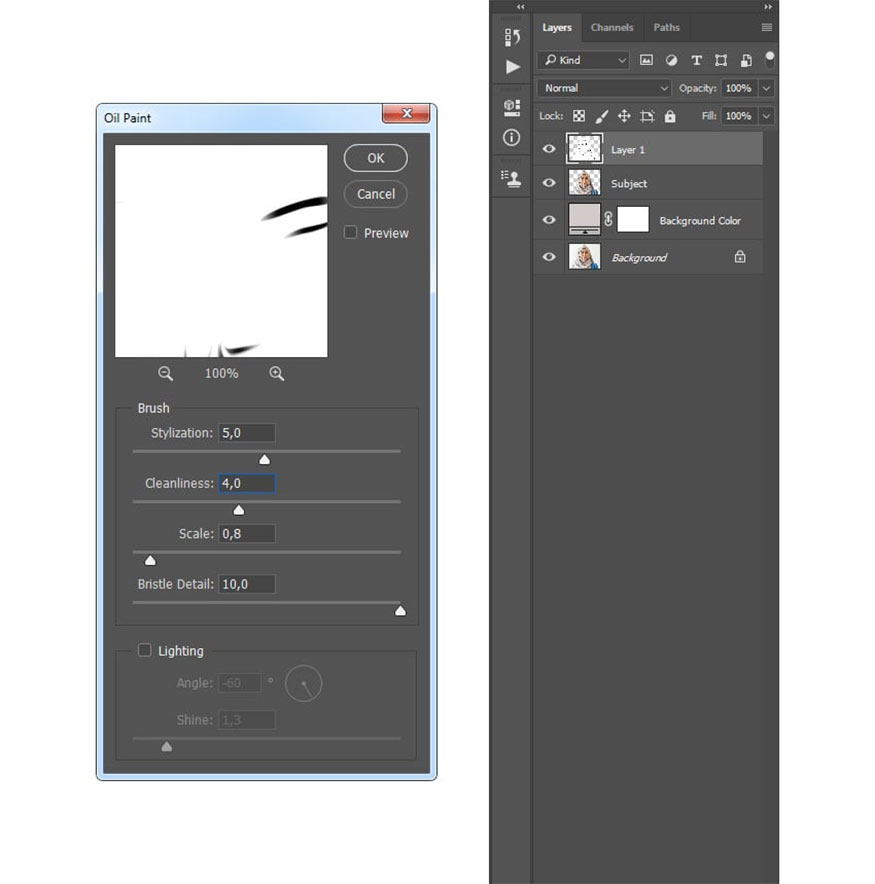
Step 4: Now go to Filter => Stylize => Oil Paint, set Stylization to 5 and Cleanliness to 4, uncheck the Lighting option.
Step 5: Go to Filter => Sharpen => Unsharp Mask and set Amount to 250%, Radius to 5 px and Threshold to 0.
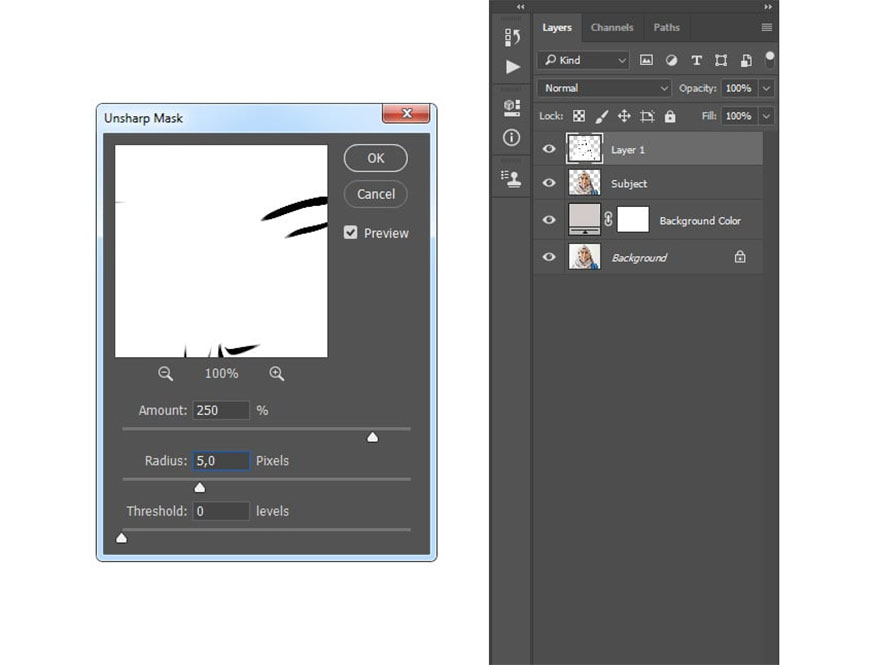
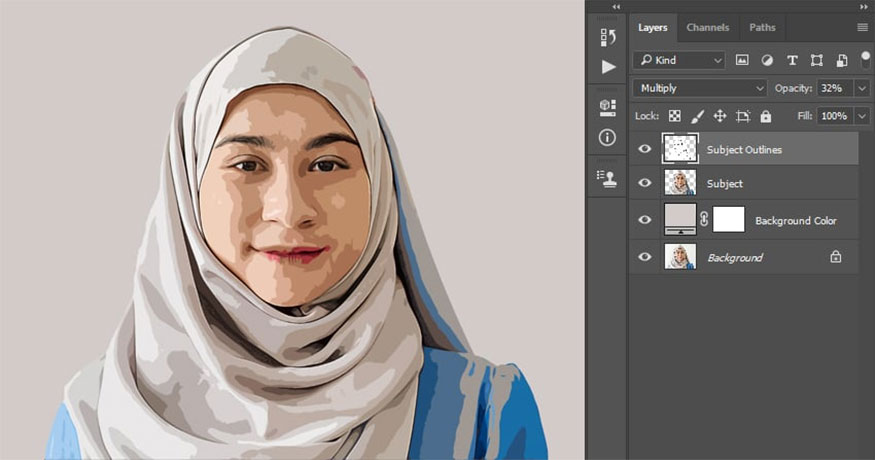
Step 6: Change this layer's blending mode to Multiply and set its Opacity to 32%. Name this class “Subject Outlines”.
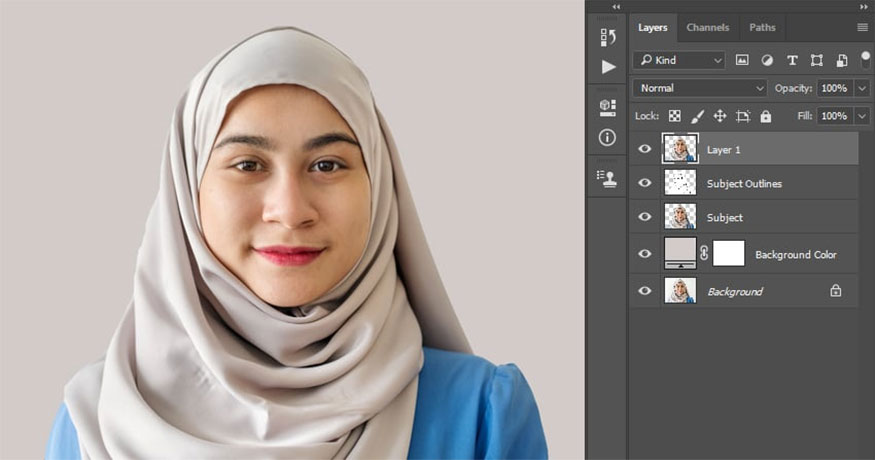
7. How to make final adjustments
Step 1: We need to make final adjustments to the design and save the action for illustration creation in the future. Press Ctrl and click the Subject layer thumbnail to select this layer.
Then, select the Background layer and press Ctrl-J on your keyboard to create a new layer. Drag this layer to the top of the layers in the Layers panel.
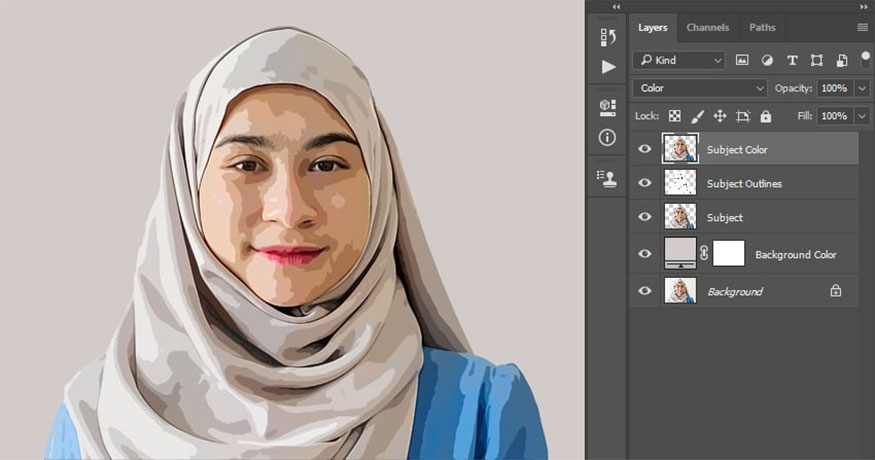
Step 2: Change the Blending Mode of this layer to Color, name this layer to “Subject Color”.
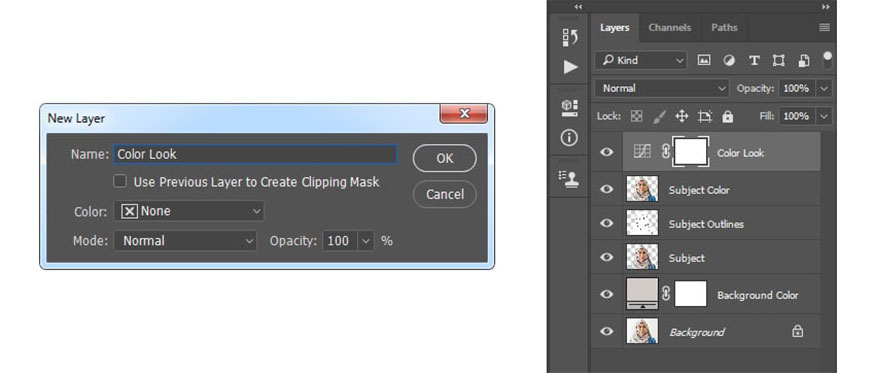
Step 3: Go to Layer => New Adjustment Layer => Curves to create a new curves adjustment layer and name it “Color Look”.
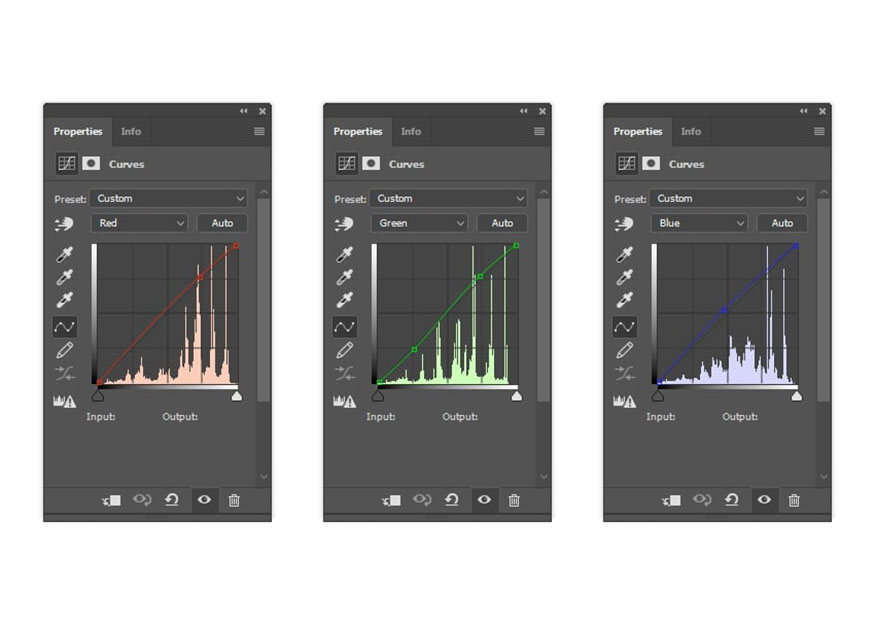
Step 4: Double click on the thumbnail of this layer, in the Properties panel, enter the settings below:
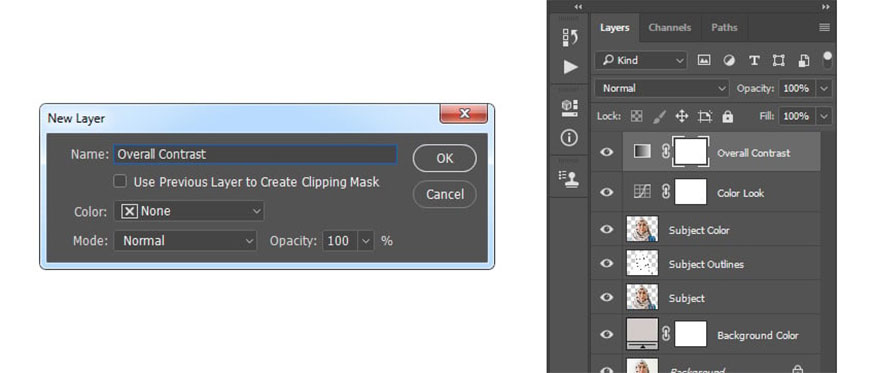
Step 5: Press D on the keyboard to reset the color models. Then go to Layer => New Adjustment Layer => Gradient Map to create a new gradient map adjustment layer and name it “Overall Contrast”.
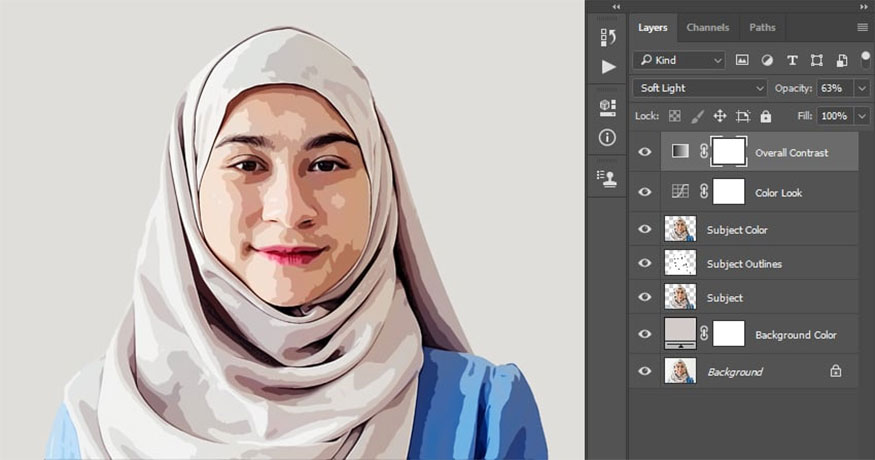
Step 6: Change this layer's Blending Mode to Soft Light and set its Opacity to 63%.
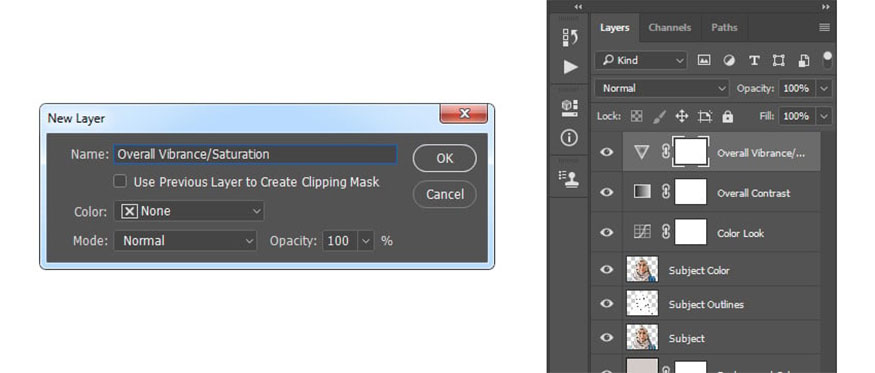
Step 7: Go to Layer => New Adjustment Layer => Vibrance to create a new vibration adjustment layer and name it “Overall Vibrance/Saturation”.
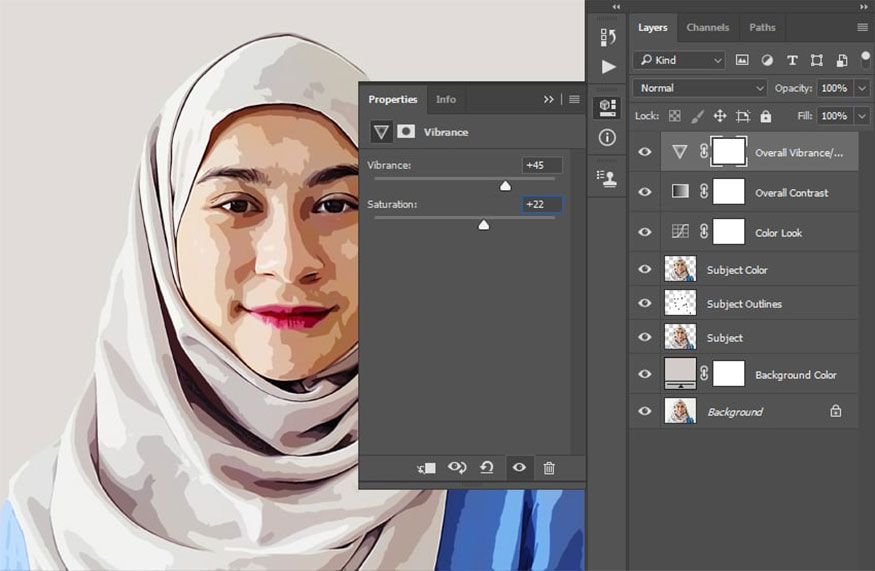
Step 8: Double click the thumbnail of the layer and in the Properties panel, set the Vibration to +45 and Saturation to +22.
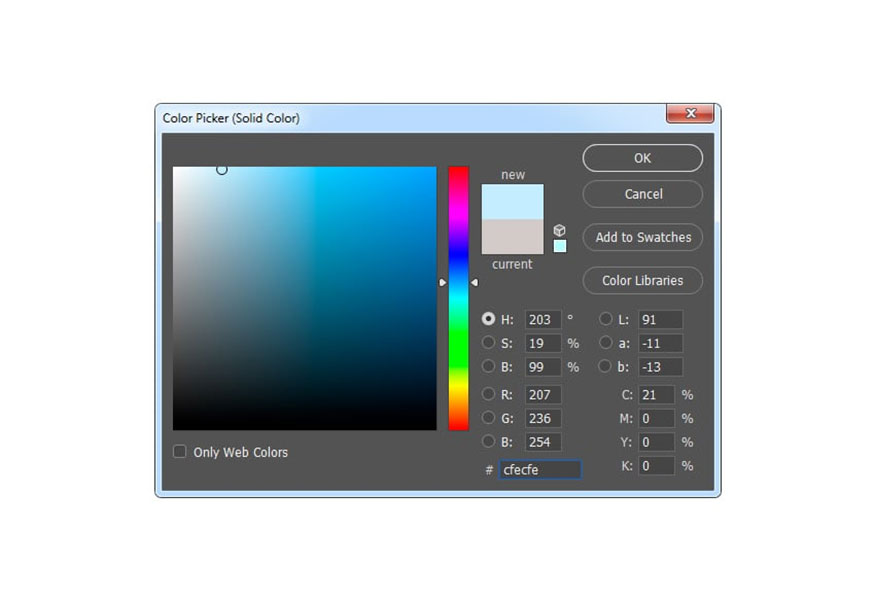
Step 9: Double click on the Background Color layer thumbnail and select the color code #cfecfe as shown below.
Then, go to Window => Actions and in the Actions panel click on the rectangle icon in the lower left corner to stop recording actions. In the same panel, click the menu icon in the upper right corner and select Save Actions.
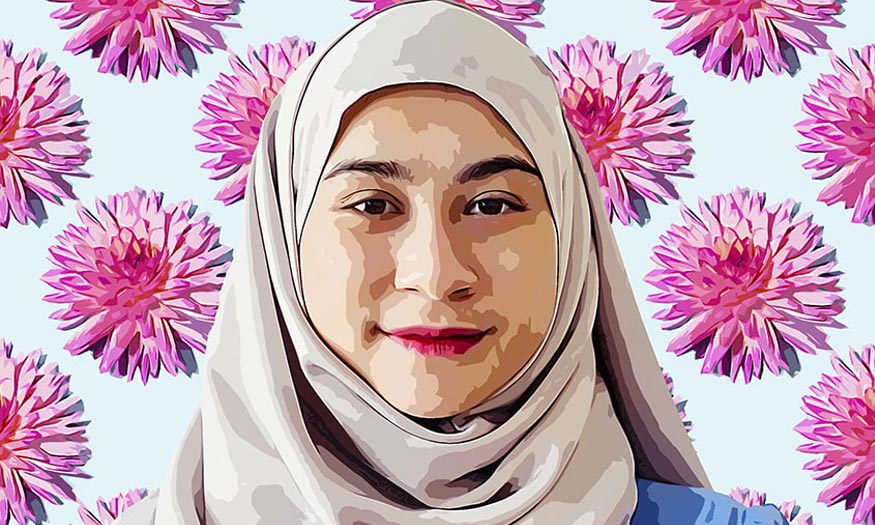
This is the final result:
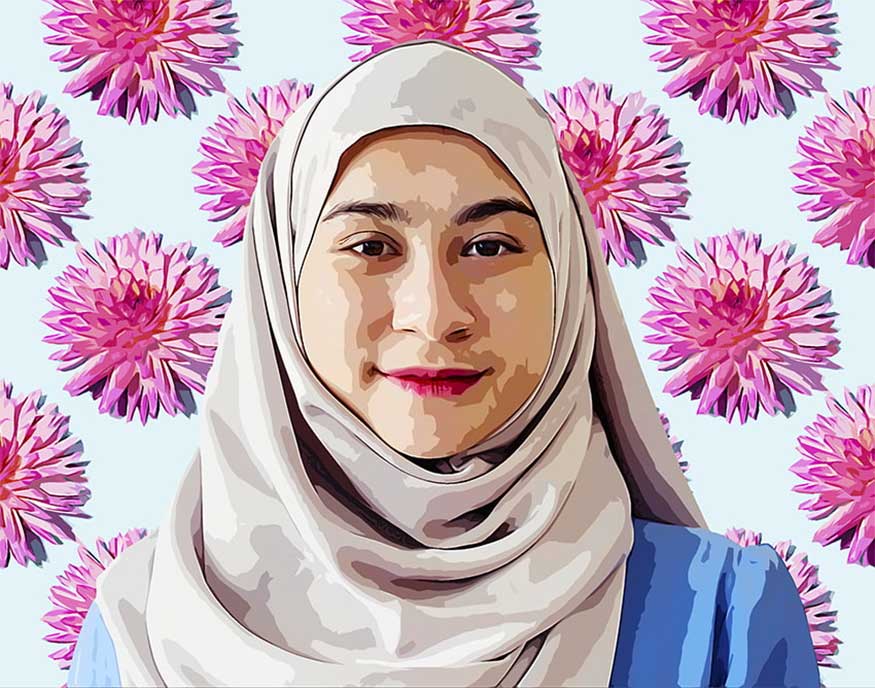
Following the simple steps above, we have successfully completed how to turn a photo into an illustration in Photoshop. Wishing you success in applying Sadesign's above instructions.
See more:
- Guide to making rainbow gradients in Photoshop
- Methods for producing cloud effects in Photoshop


VIP Products


Best Selling Products
Genuine Cheap Canva Pro
39 USD
Capcut Pro 1 Year
39 USD
Freepik Premium Account
59 USD
Plugin Retouch4me
69 USD
Genuine Adobe Illustrator account
99 USD
Copyright Adobe Lightroom Account
59 USD
Upgrade genuine Capture One account
120 USD
Upgrade Genuine Office 365
49 USD
Windows 10 & 11 Pro Key
36 USD
MidJourney Account
29 USD
Adobe Premiere Pro Account
99 USD
Autodesk All App Account Copyright
120 USD
Upgrade Duolingo Super
29 USD
ChatGPT Plus Account (GPT-4)
16 USD
Adobe Photoshop Copyright - Full App
120 USD