Best Selling Products
Create mockup on black Hoodie in Photoshop SIMPLE with SaDesign
Nội dung
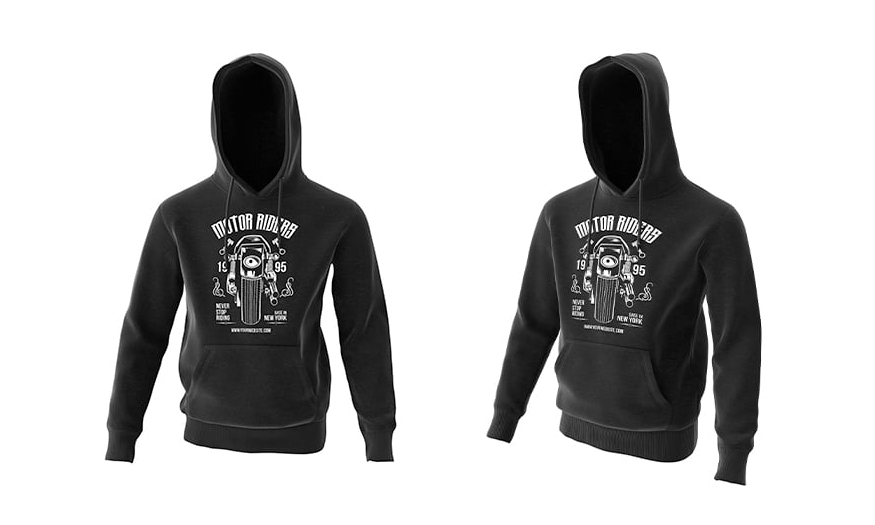
To create impressive design products, we will need to use mockups. However, do you know how to create mockups of black Hoodies in Photoshop? If not, please refer to the detailed instructions that SaDesign brings in the following article!
1. What is a mockup?
A mockup is an image that simulates designs when they appear in real life. Mockups can be used to display a variety of products, from costumes, name cards, standees, banners, packaging, home designs, shopping malls, tourist areas, and more.
For sellers, mockups are an effective way to save time and money when testing designs. They also allow for easy repairs and changes.
create-mockup-on-black-hoodie-in-photoshop-2
For customers, mockup design allows you to see a realistic image of the product without having to go there to observe. Mockup models are often carefully crafted to enhance the product and create an impression of professionalism, thereby effectively promoting sales.
How to start creating a black hoodie pattern
In this section, we will start creating a hoodie model. First, you need a 3D model of a hoodie.
2. How to create a front perspective of a black hoodie model
Here are the specific steps to create a front perspective of a black hoodie mockup:
Step 1: In this part, we need to create a black hoodie model from the front view. To do this, click on View 360 Render to adjust the front view. Then set Download as to PSD and select Download this Angle.
.png)
- Step 2: Now we have the 3D model, next you need to go to File => Open, click on the PSD file you just downloaded and click open. Next, you click on the Shadows layer.
.png)
- Step 3: Select the Subject [Flat] layer then set the foreground color to the color code #ff0000,. Then select the Rectangle Tool (U) => click inside the canvas and drag to create a new rectangle layer with the size covering the front of the hoodie.
.png)
- Step 4: Press Ctrl-T on your keyboard to transform this layer, then set Width and Height to 125%.
.png)
- Step 5: Right-click on this layer and select Convert to Smart Object. Next, press Ctrl-T to convert this layer, set Width and Height to 85%.
.png)
- Step 6: Press Ctrl-Alt-G to create a clipping mask.
.png)
- Step 7: Press Ctrl-T to transform this layer, then right-click anywhere inside the transform box and select Warp and warp layer as shown below:
.png)
- Step 8: Double-click on the thumbnail of this layer, in the newly opened file, hide the Rectangle 1 layer. Then go to File => Place Embedded, select the image from the link and select Place. Transform and position the design as shown below:
.png)
- Step 9: Go to File => Save to save the changes, then close this file. Go back to the mockup file and select the Rectangle 1 layer. Change the Blending Mode of this layer to Lighten and name it Design.
Next right click on this layer and select Yellow to mark them in yellow to make them easier to find as this is the main layer for the model.
(1).png)
Step 10: Now, you need to place the design on the hoodie to make it more realistic, so we need to create a Displacement Map. Next, go to Image > Duplicate to copy this file. In the newly opened file, hide the Design layer and show the Depth folder.
Then select the Mens Hoody 2 Black folder and press Ctrl-Alt-Shift-E on your keyboard to create a screenshot.
.png)
- Step 11: Go to Filter => Blur => Gaussian Blur and set Radius to 5 px. Next go to Image => Mode, change Mode to 8 Bits/Channel. Then go to File => Save As as PSD and close the file.
.png)
- Step 12: Now go back to the simulation file, select the Design layer, go to Filter => Distort Displace and set Horizontal and Vertical to 25, Displacement Map to Stretch To Fit and Undefined Areas to Repeat Edge Pixels.
.png)
- Step 13: Go to Layer => Layer Mask => Reveal All to add a layer mask. Then, set the foreground color to #000000, select the Brush Tool (B), choose a soft brush to brush over the contour parts of the hoodie that you want to design without covering them.
.png)
Step 14: Click the link icon between the layer thumbnail and the mask to unlink them. Next, select the layer thumbnail and press Ctrl-T to transform it again. Right-click anywhere inside the transform box and select Warp. Then warp the layer so that the design matches the outline of the hoodie.
.png)
3. How to create a side view of a black hoodie model
- Step 1: In this content, we will create a black hoodie model from the side view. Click View 360 Render to adjust the view to the side, then set Download as to PSD and select Download this Angle.
.png)
- Step 2: Go to File => Open, select the newly downloaded PSD file and click open. Hide the Shadows layer.
.png)
- Step 3: Follow the same steps as applied in the perspective above the hoodie to create, position, and transform the smart object layer. However, you should pay attention to adjusting the Warp later to match the side view.
.png)
- Step 4: Set the design to some smart objects, select the Rectangle 1 layer, change the Blending Mode of this layer to Lighten, name it Design and set its color to Yellow.
.png)
Step 5: Press Ctrl-T on your keyboard, right-click anywhere inside the transform box, then select Warp. Adjust the warp so that the design matches the outline of the hoodie.
.png)
- Step 6: Replace the design with the same method we applied with the front perspective.
.png)
- Step 7: Go to Layer => Layer Mask => Reveal All to add a layer mask to reveal the entire layer. Set the foreground color to #000000, select the Brush Tool (B), choose a soft brush and brush over the shirt's border.
.png)
- Step 8: Click the link icon between the layer thumbnail and the mask to unlink them. Select the layer thumbnail, press Ctrl-T to transform this layer, right-click anywhere inside the transform box and select Warp. Next, readjust the warp so that the design fits perfectly on the hoodie.
.png)
Above is full information on how to create a mockup on a black Hoodie in Photoshop. Wish you success in applying it to create impressive designs!


