Best Selling Products
Create sun rays in photoshop
Nội dung
There are many pictures that you see online with beautiful shimmering sunlight, and you do not know how to get that beautiful light. So in today's article, we will show you how to create beautiful sunlight in photoshop to make the photo more vivid.

What is a ray of light?
Ray of light is a term used by photographers to describe a beam of light that passes through dark areas, creating a beam of light that is more intense than the surrounding light source. This is also a beautiful type of light in the photography industry and it is also a highly appreciated effect in all types of images.

However, it is not always possible to capture light rays, because it also depends on weather conditions and many other external factors such as: smoke, dust, fog, ... and the natural light of the sun is the strongest light. In this article, we will guide you on how to create sunlight rays to make the photo more special and vivid.
How to create sun rays in photoshop
By photoshop
Create sunlight effect
In this article, SaDesign will create a ray through the beach image as follows.

Step 1 : Open the image in Photoshop by going to File>Open>select image. Step 2 Go to Layer>New Fill Layer and add a Gradient adjustment layer.
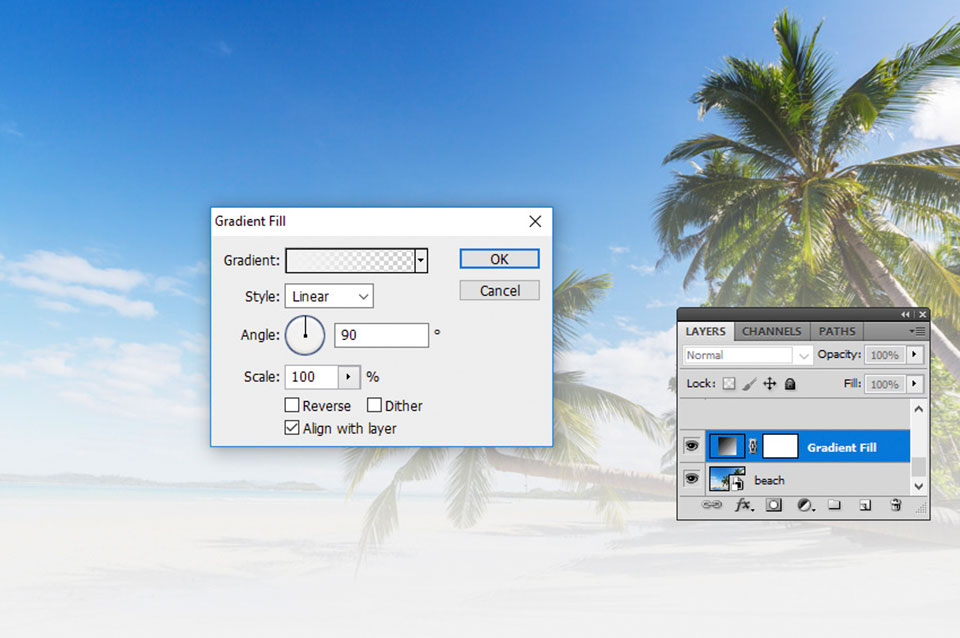
tep 3 create sunbeam
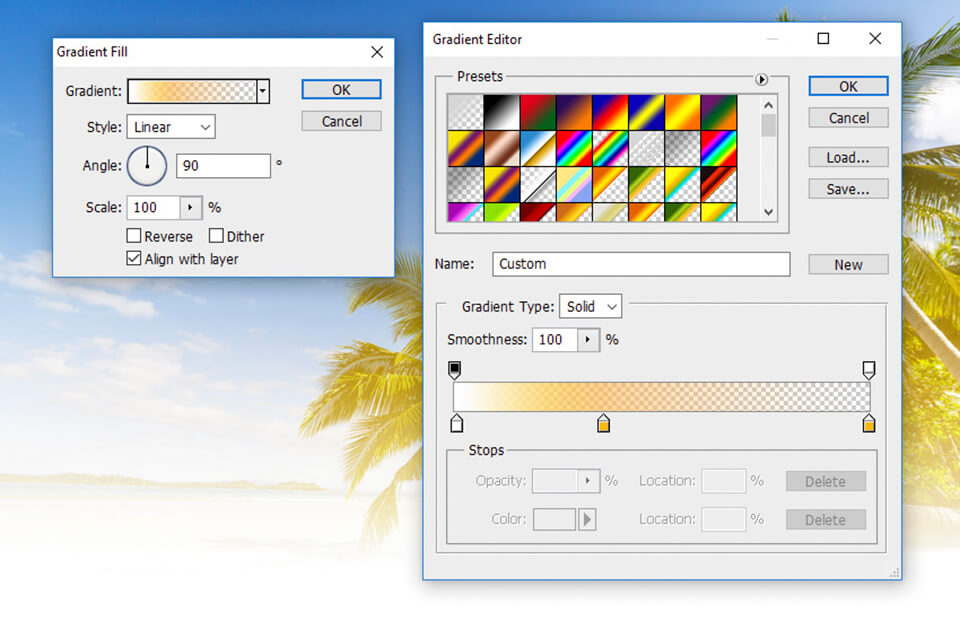
Edit the settings of the Gradient Fill adjustment layer . Change the Gradient color tones : #ffffff(location 0%, opacity 100% ), #ffba00(location 36%) and #ffba00 (location 100%, opacity 0% ).
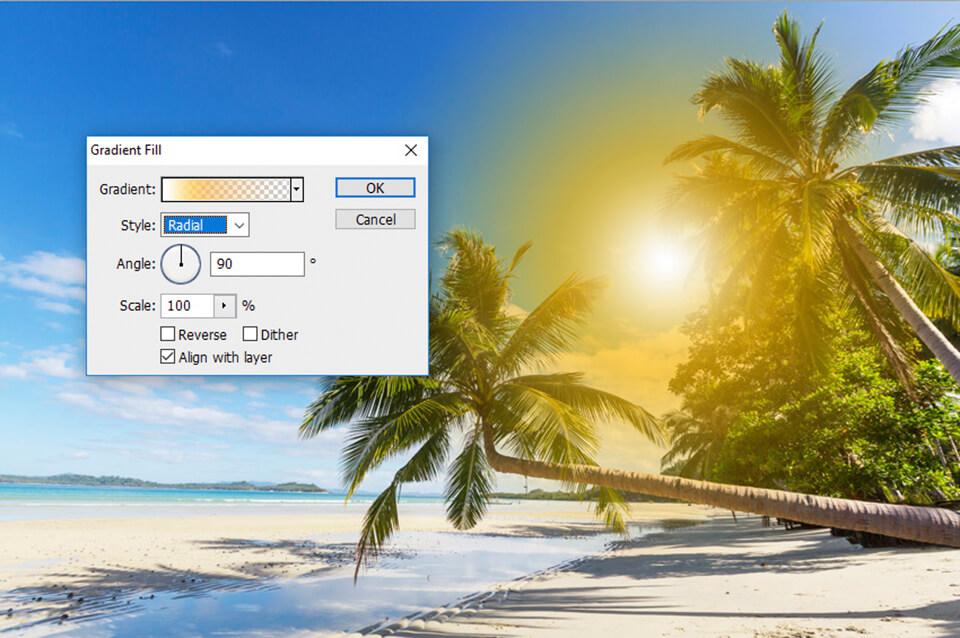
Step 3 Change the gradient Style and select Radial. Drag the image on the screen to move the sun as in the preview.
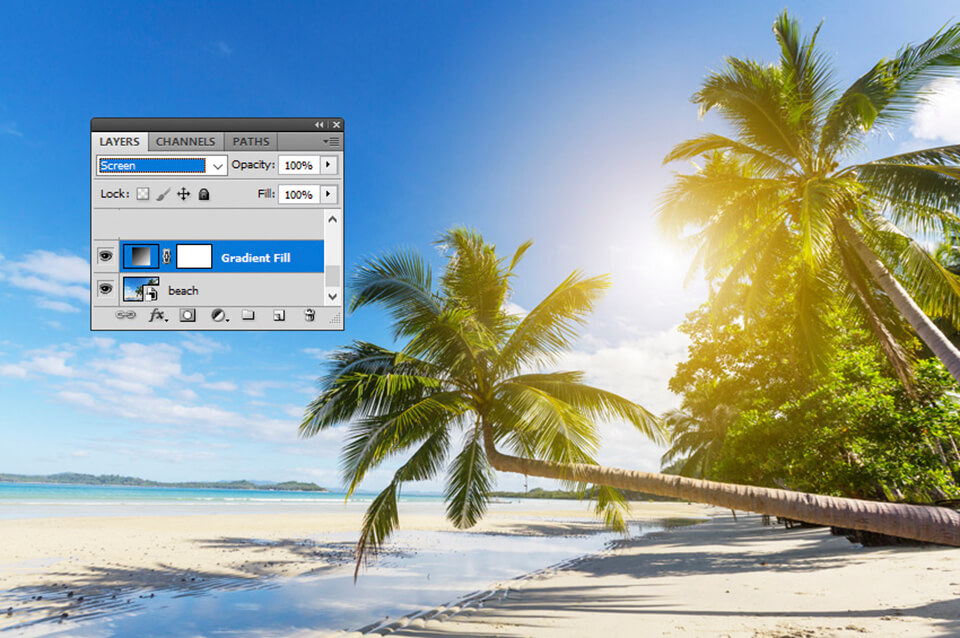
Step 4 Set the Blend Mode of the Gradient layer to Screen.
Create Rays of Light in Photoshop

Tsep 1 Create a new layer and fill it with color #000000.
Step 2 Use the Brush Tool and color #fffff
.jpg)
f to add dots of different sizes. Make sure the dots are added to the center of the layer.
color brush #ffffff
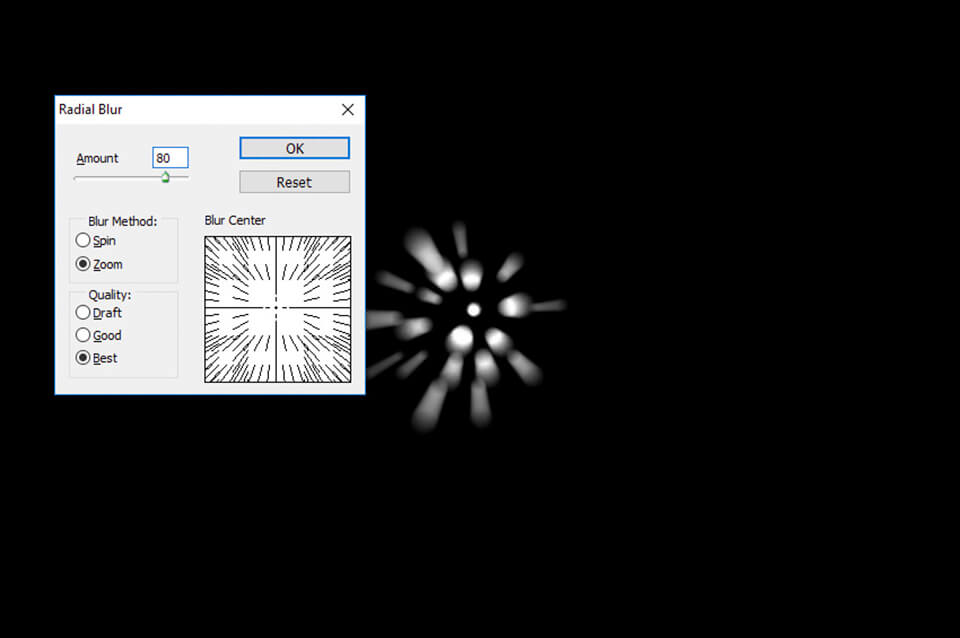
Step 3 Go to Filter > Blur > Radial Blur and use these settings to create the rays of light. Press Control-F to apply the Radial Blur multiple times.
.jpg)
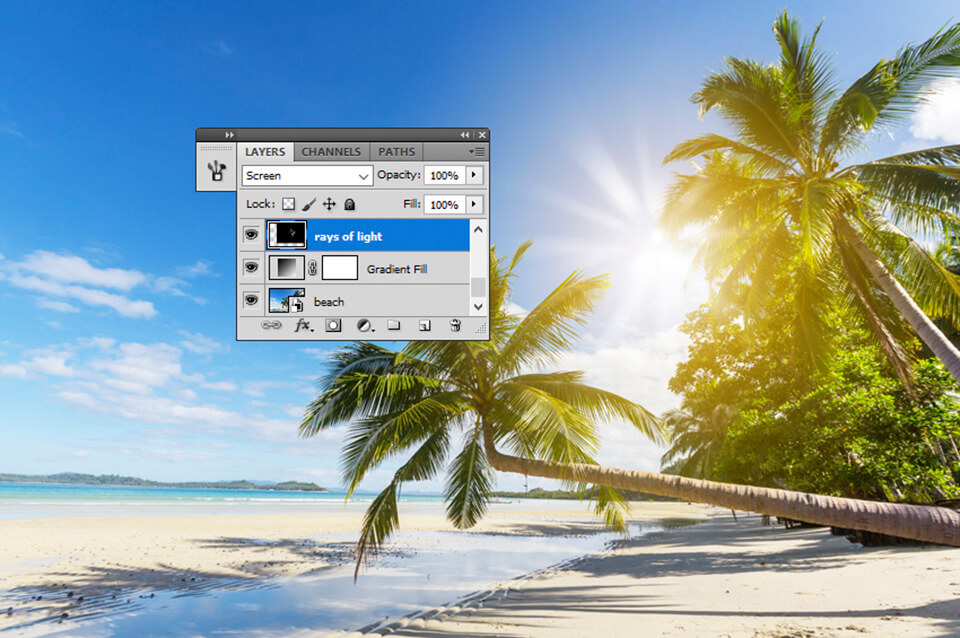
Step 4 Set the Blend Mode to Screen and move the rays of light across the sun.
Create Sun Flare in Photoshop
Step 1 Create a new layer and fill it with color #000000.

Step 2 Go to Filter> Render> Lens Flare.
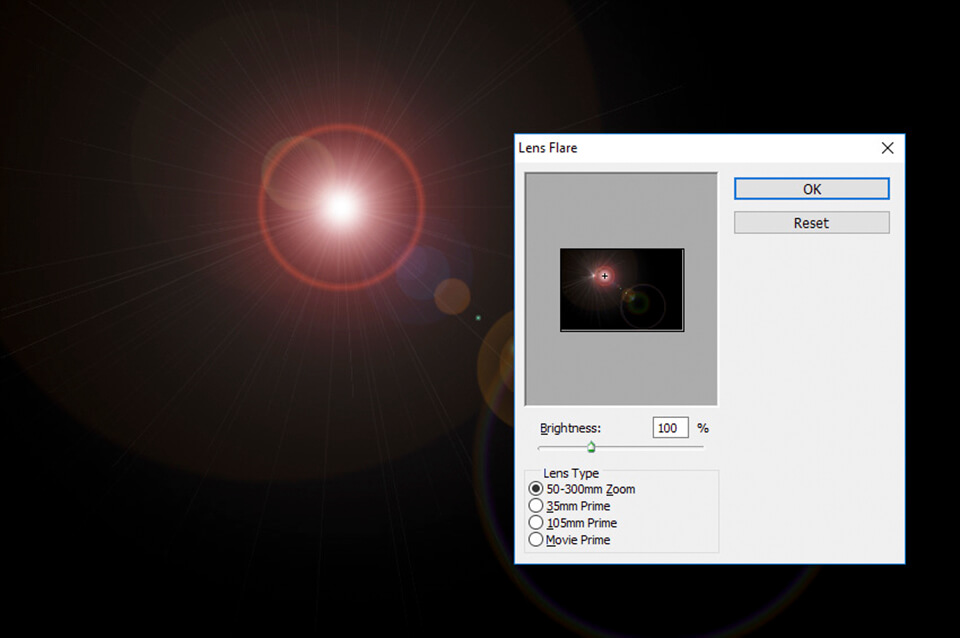
Step 3 Set the Blend Mode to Screen and move the flame over the sun.

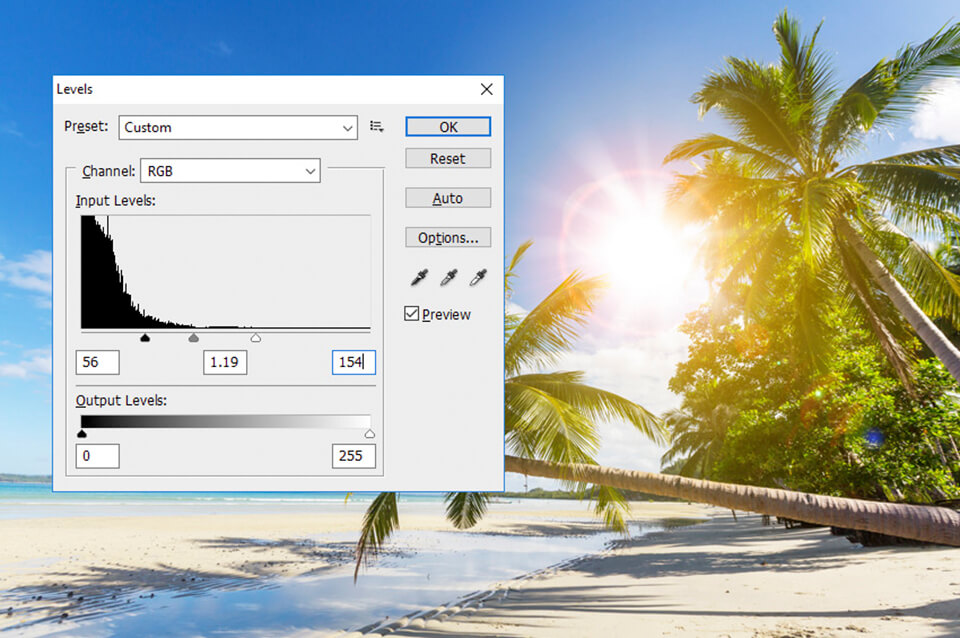
Step 4 Go to Image > Adjustments > Levels and adjust the contrast of the flare image to make it brighter.
Adjust Color Balance Go to Layer > New Adjustment Layer and add a Color Balance adjustment layer.

Create realistic shadow effects
Step 1 The result looks nice, but it's not entirely realistic. To get a realistic result, we have to take into account the shadows that are already in the image. That will give you some clues about where the sun is.
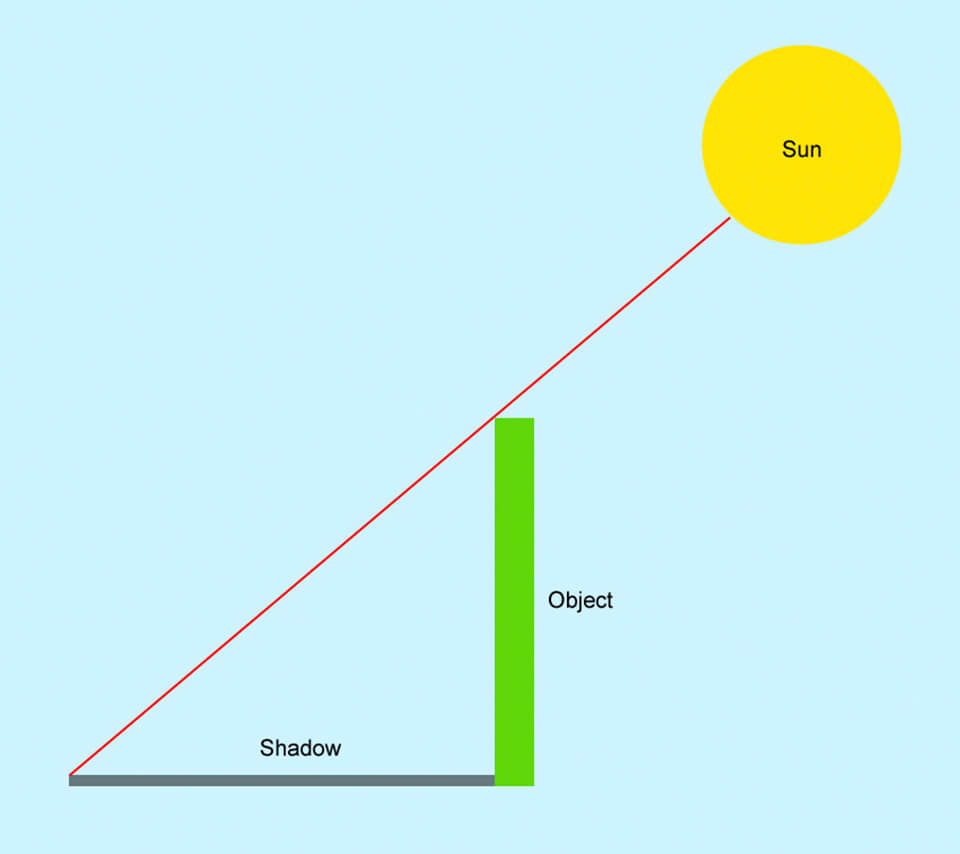
Step 2 So the result will be more realistic with the sun position higher and on the right side of the image. You can easily move the rays, sun flare and sunlight layers to the real position.

The result you get will be as shown below.

Plugin photoshop
How to install Plugin
To create sunlight with the Plugin, you must first install the Plugin. To install the Plugin, you can follow the instructions below . Step 1 : Download the Plugin named Digital Film Tools and install the software. Step 2 : Then click Agree to agree to the installation, then select Next to continue. Step 3 : Select Install to install the software as default and then select Finish. Step 4 : When the software is installed, there is still no Plugin in Photoshop to use, you need to do the following: Access the path: C:\Program Files >> Digital Film Tools >> select Copy or Cut. Step 5 : Paste into the Plugin folder according to the path C:\Program Files >> Adobe >> Adobe Photoshop >> Plugin
How to use the sunbeam plugin in photoshop
tep 1 : Once you have successfully installed Digital Film Tools software, then open Ps software >> go to File >> Open >> find the photo you want to create Ray of light.

Step 2 : Duplicate the image by pressing Ctrl + J Step 3: Go to Filter >> select Digital Film Tools >> select Rayv10... to enable the Plugin.
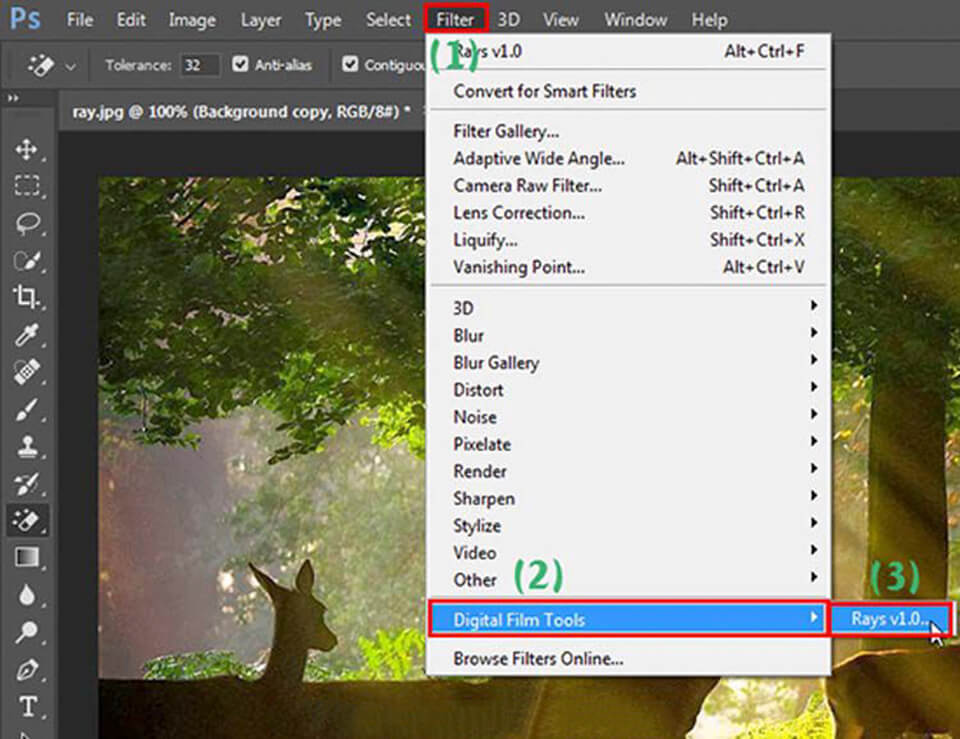
Step 4 : In this step, you will choose a color, click on Color then choose the light color to match the picture and press OK.
.jpg)
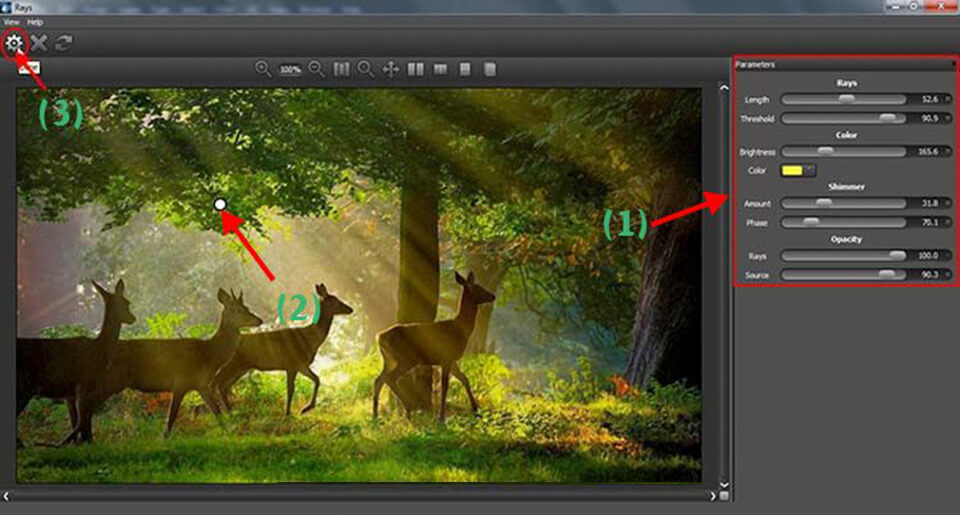
Step 5 : In this step, you need to use the sliders and tools to create beautiful lighting effects. In the Parameters window, there are the following features:
Length : Increase or decrease the intensity of the Ray
Threshold : Creates blind spots and dark depth for the image.
Brightness : Increase or decrease the brightness of Ray.
Amount : Increase or decrease the size of the Ray bar.
Phase : Rotate the Ray coordinates.
Rays: Increase or decrease the brightness of the Ray.
Source : Ray's Blind Spot Reversed.
Next, you will move the Ray bar's light point and click on the gear icon (Done) on the screen to apply.
Above is the entire process for you to create sunlight in photoshop


