Best Selling Products
Create winter atmosphere in Photoshop
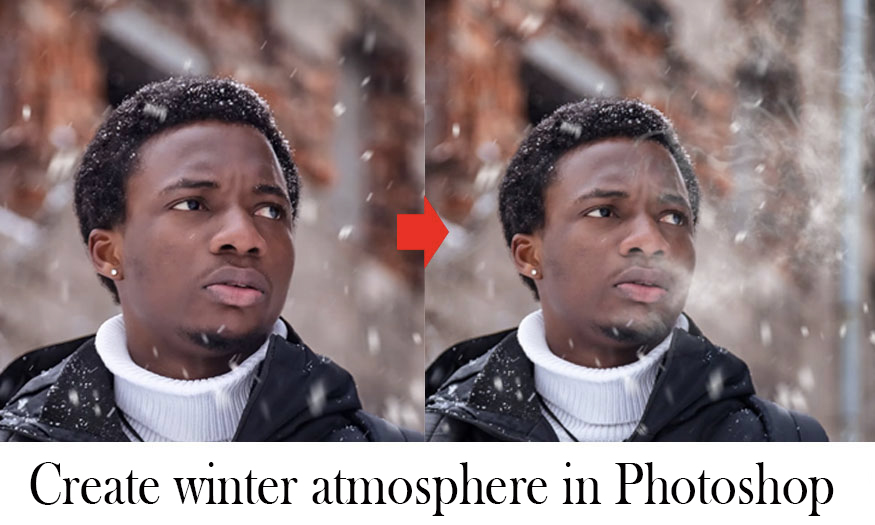
Exhaling smoke is typical of winter, right? The light smoke in front of the face seems to help the viewer feel the cold of winter. Let's learn with SaDesign how to create winter breath in Photoshop through the following shares.
1. Steps to create a winter atmosphere in Photoshop
Have a regular character photo, but want to add some smoky winter breath for the perfect winter vibe? Follow these steps.
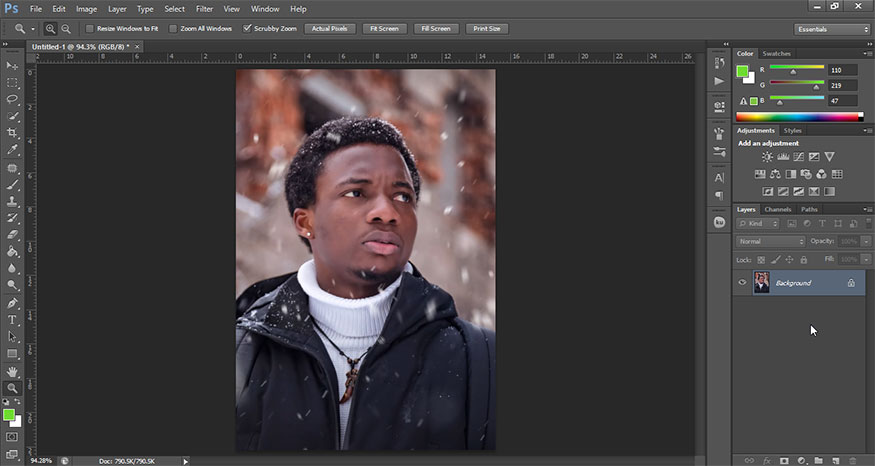
Step 1: First you need to open the photo you want to create a winter atmosphere in Photoshop. On the menu bar, select File => Open => select the appropriate photo and press Open. Here I want to create a winter atmosphere for the black man in the photo to create a cold vibe.
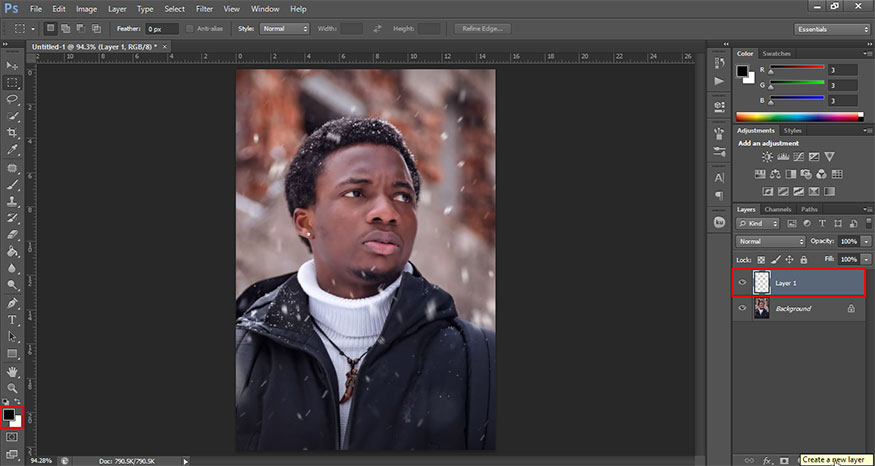
Step 2: First, set your Foreground and Background to black and white. Click Create a new layer at the bottom of the layers panel to create a new layer.
Then on the toolbar go to Filter => Render => Clouds.
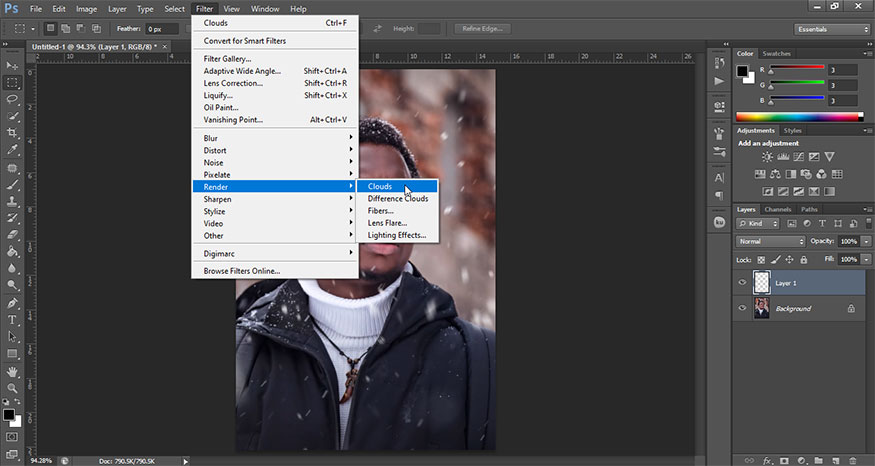
The result will be as shown.
.jpg)
Use the Rectangular Marquee Tool to cut out a portion of the cloud that is the same size as the object's face or slightly smaller. Then press Ctrl+J to duplicate the selection. Delete the original cloud portion.
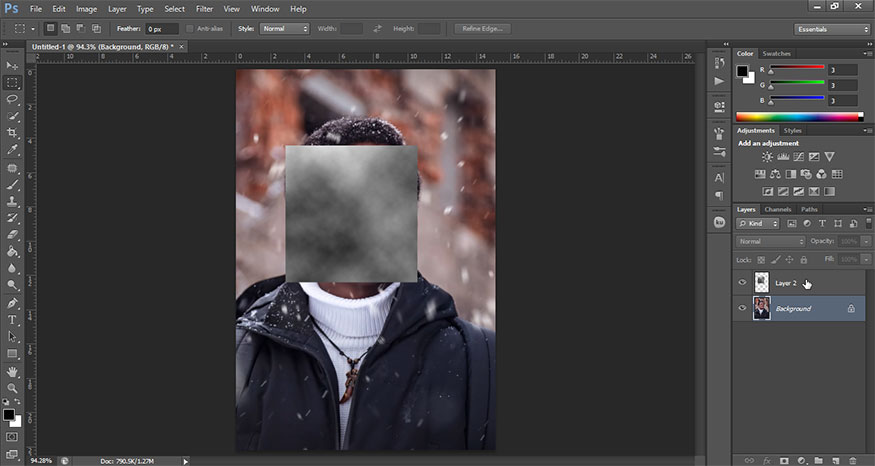
Step 3: Set the cloud's Layer Mode to Screen.

On the menu bar go to Image => Adjustments => Brightness/Contrast. Then set it to Brightness -60 and Contrast 100.

Use the Transform tool to zoom in and place the cloud over the subject's mouth and the area where you want the cold breath. Adjust the position until you like it best.
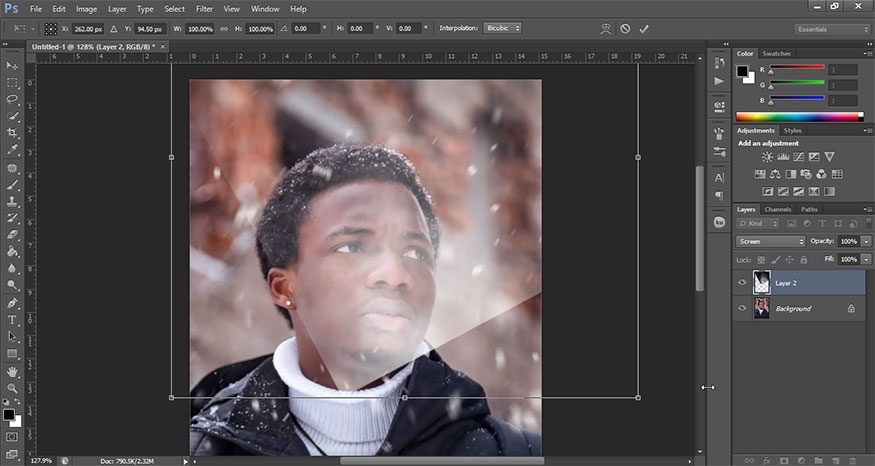
Step 4: At the bottom corner of the layers palette select Add a mask to add a Layer Mask to the cloud layer. Use a soft round Brush set to black to mask out the edges of the clouds, as well as shape the clouds to form the original cold breath shape.
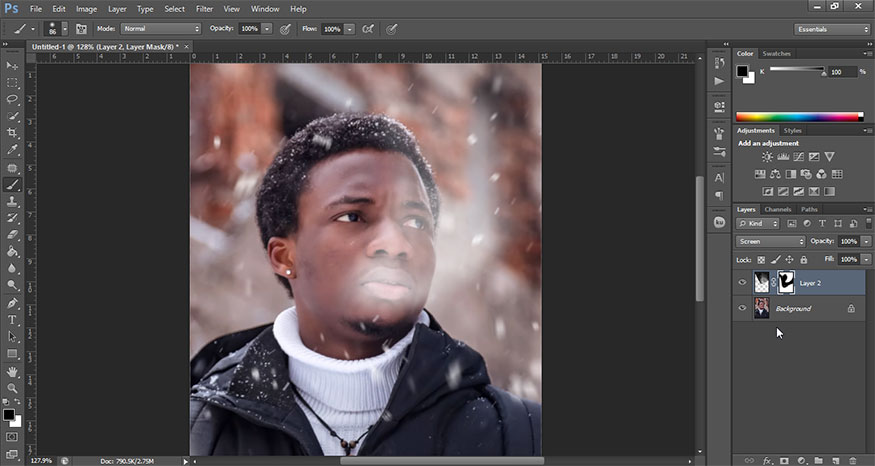
Step 5: Place a thin smoke image with a black background on your canvas.
Double click on the newly uploaded smoke image to open the Layer Style panel. Go down to Blend If and adjust the Current Layer transform handles to look like what you see below. This will help remove the black background from the smoke.
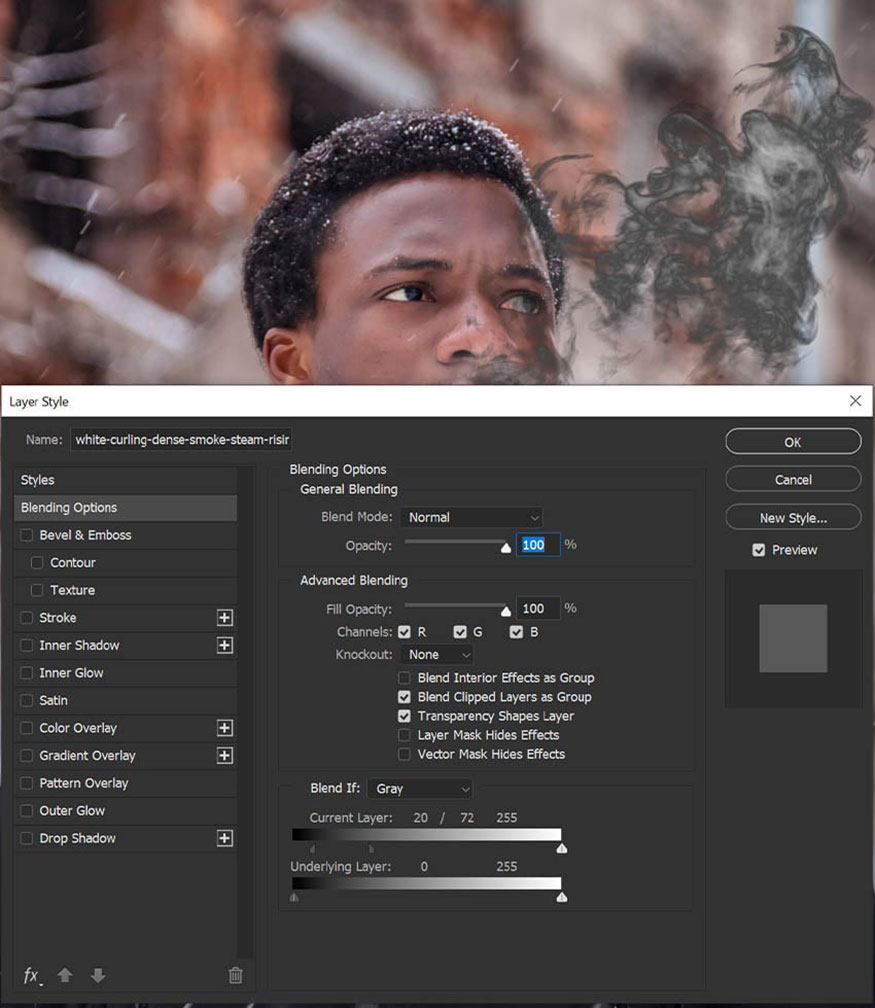
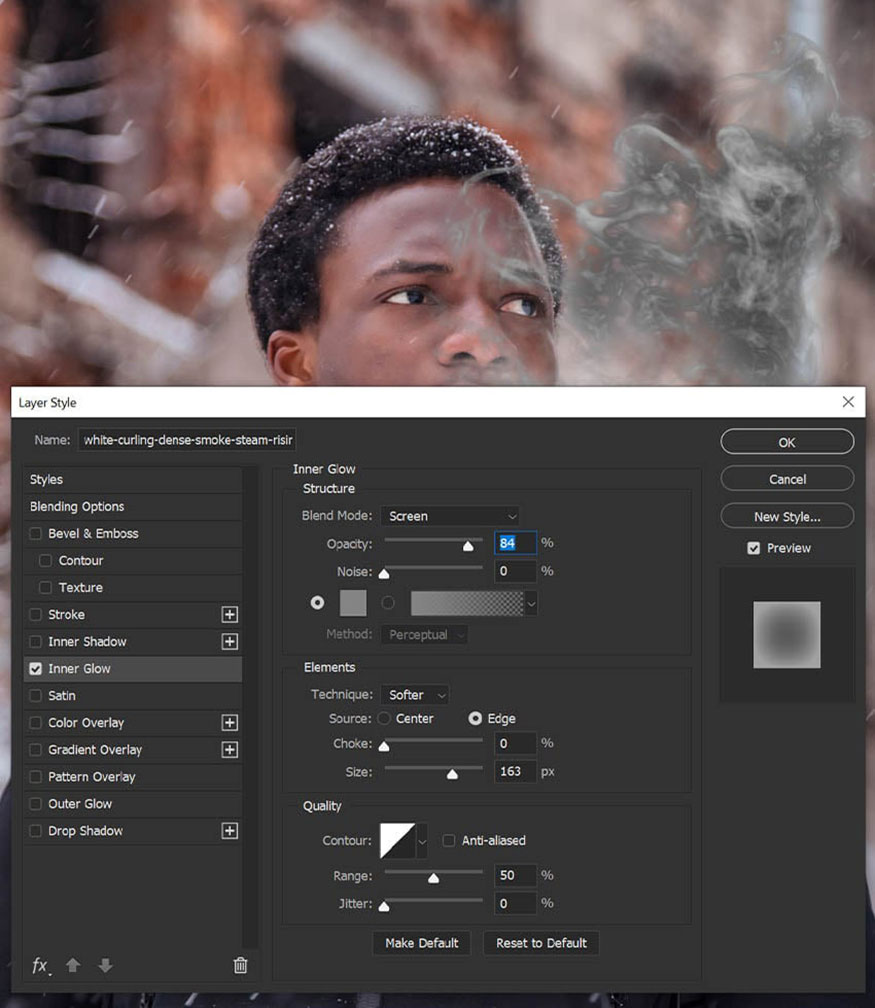
Step 6: Add an Inner Glow effect to the layer using the settings in the image below. This will help hide some of the remaining black background.
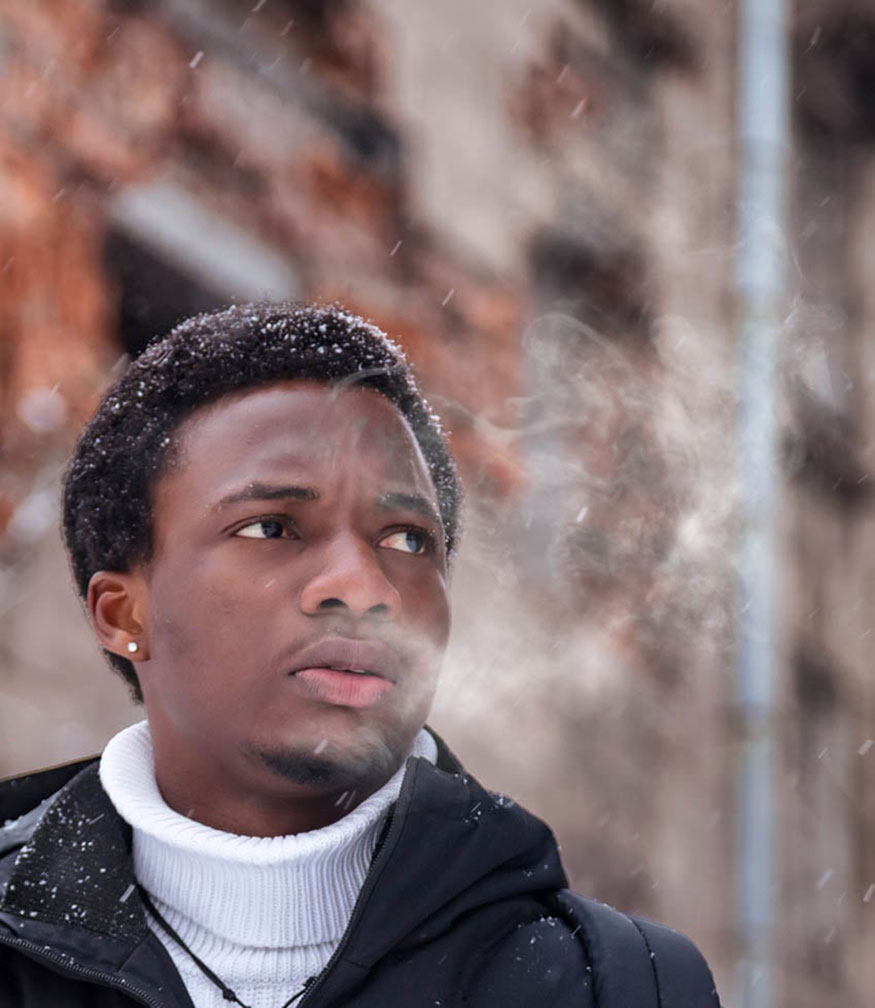
Step 7: Set the smoke layer to Overlay and add a Layer Mask. Use a soft round brush set to black to remove and blend the smoke into the existing breath.
Step 8: Duplicate and Transform the smoke layer to add more of the subtle breath effect. Try moving the layer around to different areas and zooming in or out.
Reduce the Opacity to make the effect more subtle.
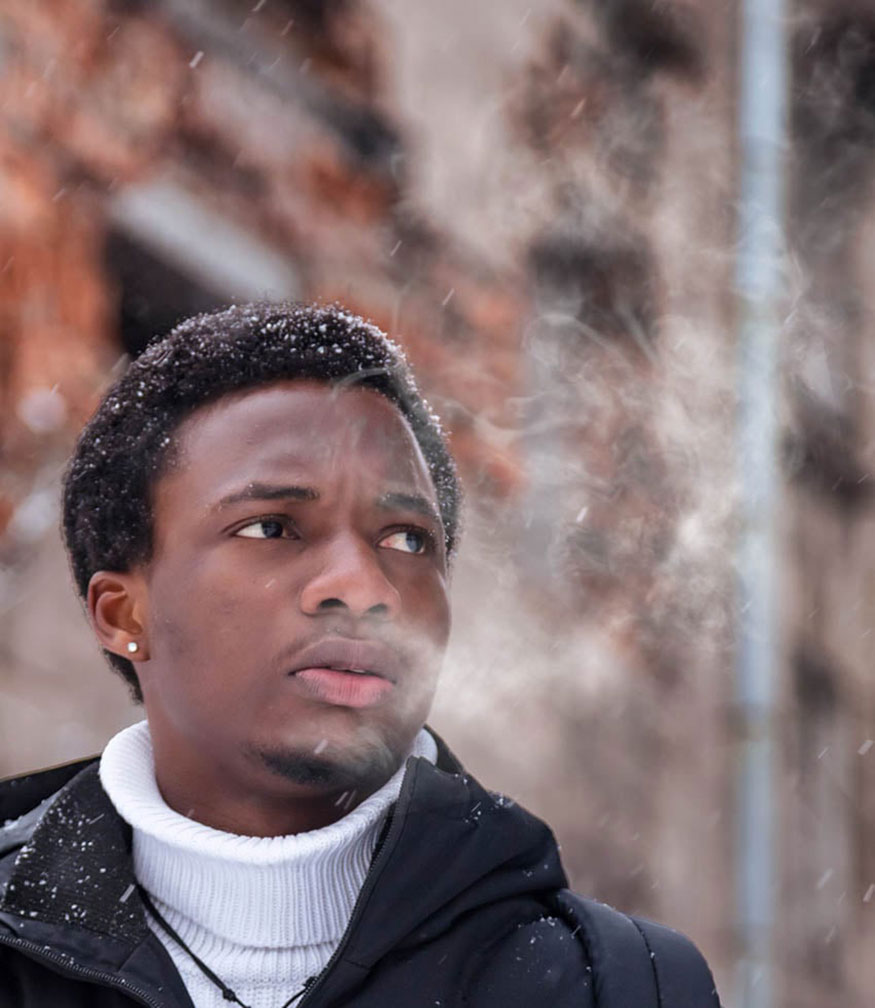
So you have completed the winter breath in Photoshop, the subject looks like it is breathing out the winter, the cold stormy winter atmosphere. With a few adjustments, you can also use this feature to create smoke and other misty effects that are great for close-up portraits.
2. Conclusion
Above is a summary of how to create winter breath in Photoshop extremely simple. With the first implementation, the result may not be "smooth" but do not hesitate to do it many times to get the most satisfactory result. Hopefully, our sharing above can help you edit satisfactory photos.

Installation and support contact information:
🏡 SADESIGN Software Company Limited
📨 Email: phamvansa@gmail.com
🌍 Website: https://sadesign.ai


.png)


