Best Selling Products
Creating a ransom note text effect in Photoshop with SaDesign
Nội dung
- 1. How to create background and text layers
- 2. How to add shapes and dummy text blocks
- 3. How to Add a Layer Mask
- 4. How to add basic paper textures
- 5. How to Add a Wrinkled Paper Texture
- 6. How to Create a Torn Edge Brush
- 7. How to create a path from a selection
- 9. How to Add White Torn Edges
- 10. How to Add a Drop Shadow
- 11. How to Add a Drop Shadow
- 12. How to convert element groups
- 13. How to Add a Simple Background Texture
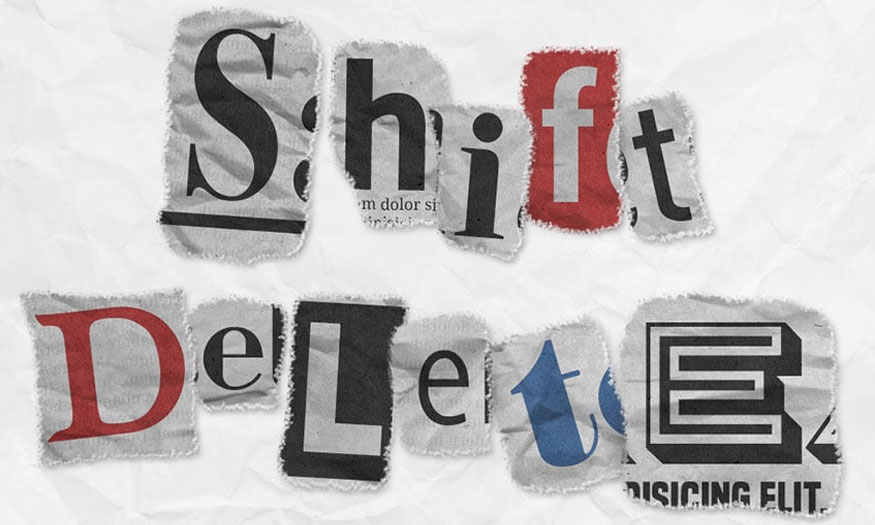
Creating a "ransom note" text effect in Photoshop is an interesting technique to craft images with a retro or dramatic style. In the following article, Sadesign will guide you on creating the most eye-catching and realistic ransom note text effect.
1. How to create background and text layers
To create the background and text layers, follow these steps:
Step 1: First, create a new document of 1000 x 1000 px. Then, click the Create New Fill or Adjustment Layer icon at the bottom of the layers palette, select Solid Color and use the color code #f6f6f6 for the fill.
.jpg)
Step 2: Create the text, with each letter on a separate layer, and use different fonts and font sizes as you like. Set the color code to #565656. Arrange each letter into its group named after the letter, and organize the letters of each word into a group named after that word.
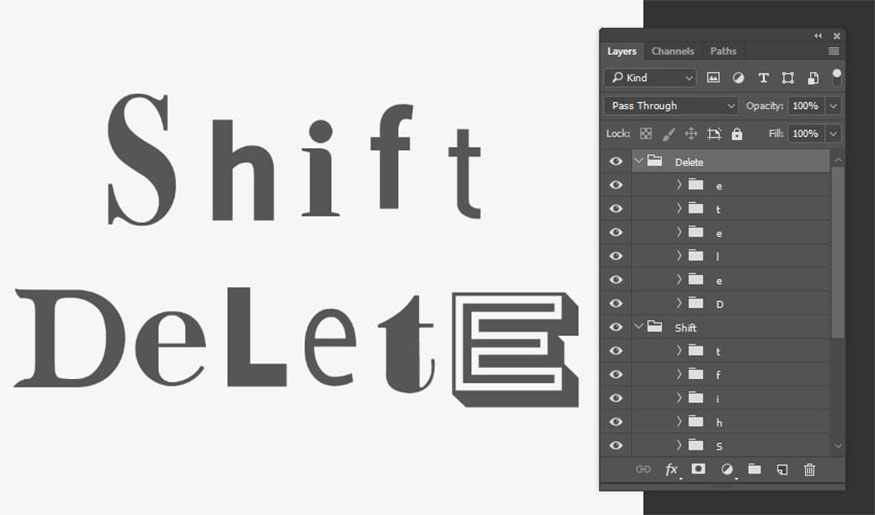
Step 3: You need to add some letters before or after each letter to make the effect more realistic.

2. How to add shapes and dummy text blocks
To add shapes and dummy text blocks, follow these basic steps:
Step 1: Select the Rectangle Tool and create lines underneath some of your letters. If you are adding any to any existing text, place the letter layer along with the additional layer in a new group inside the original letter group. This keeps things organized and makes it easier to work with.
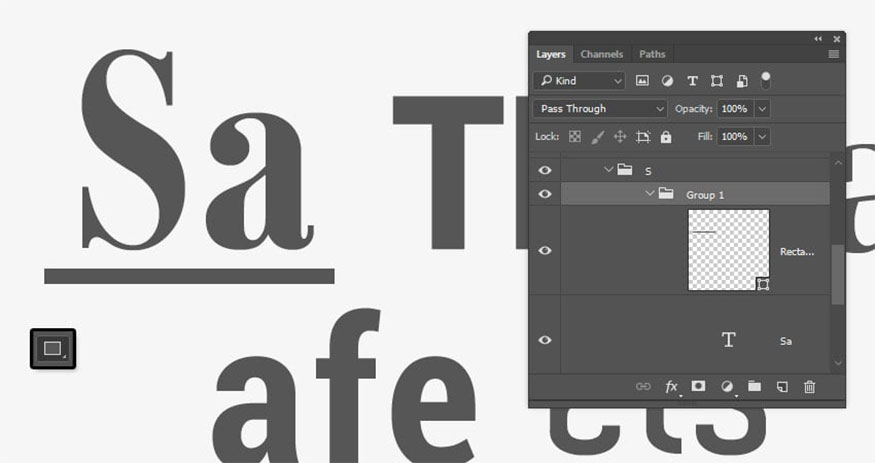
Step 2: To add dummy text to any letters you have, select the Type tool > click and drag the box below the letters you want to add dummy text to > go to Type > Paste Lorem Ipsum. Change the font and font size to your liking.
.jpg)
Step 3: You can delete some of the dummy text if you add more letters to avoid repeating blocks of text.
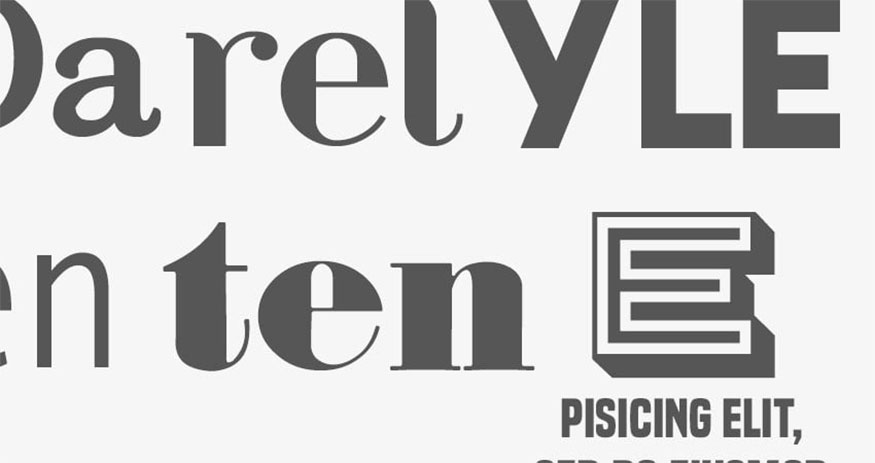
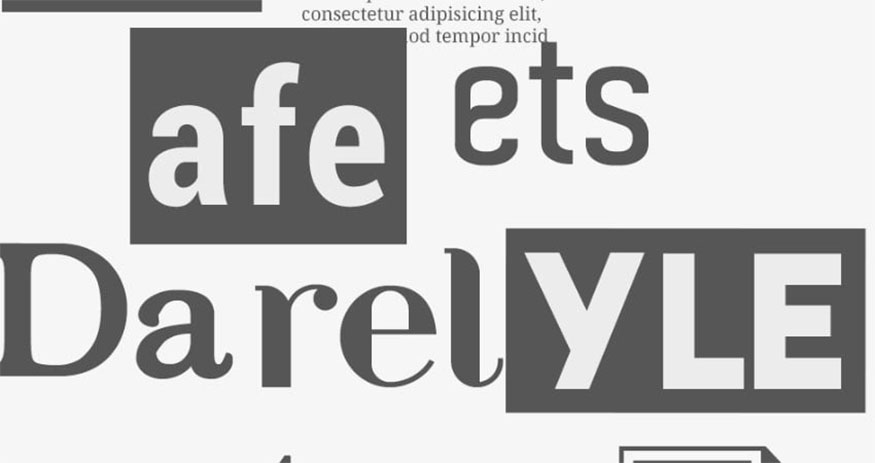
Step 4: You can use the Rectangle Tool to add boxes for the letters. If you do, set the box color to #565656 and the text color to #ececec.
3. How to Add a Layer Mask
Here are the specific steps to add a layer mask:
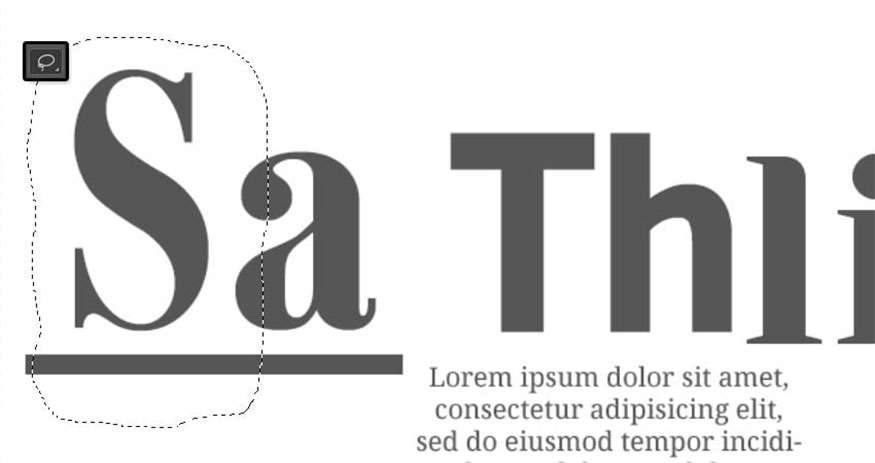
Step 1: Select the Lasso tool > select a group of letters and draw a selection around the letter you want to show, i.e. the letter in the group name. Try to shape the part chosen like a torn sheet of paper.
This is where adding random letters to the original comes in handy, you can add some parts of them to make the effect more realistic.
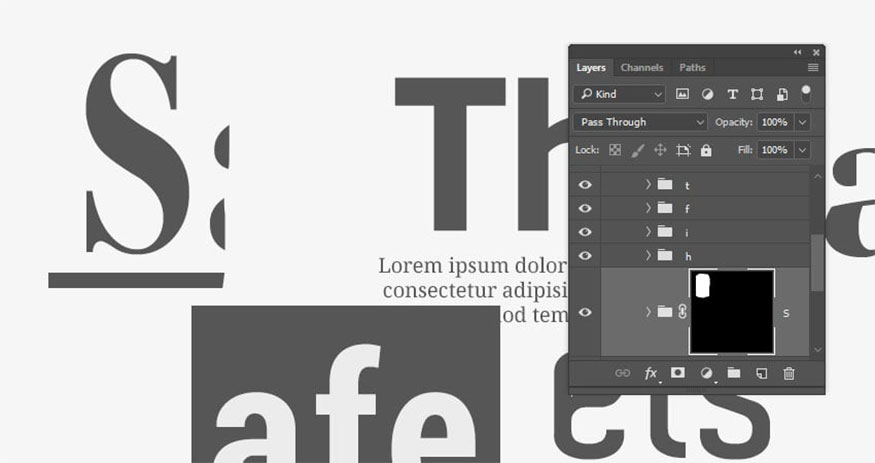
Step 2: After creating the selection, click on the add layer mask icon on the last layer.
Step 3: Repeat this to mask the rest of the letter group. You can adjust any of the masks as needed.
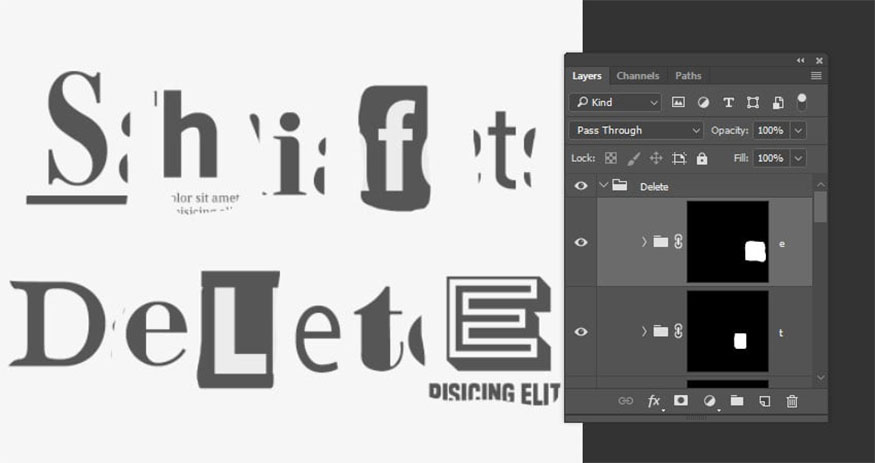
4. How to add basic paper textures
To add a paper texture, follow these steps:
Step 1: Place the Paper Texture image at the end of the first group of letters and resize it as needed.
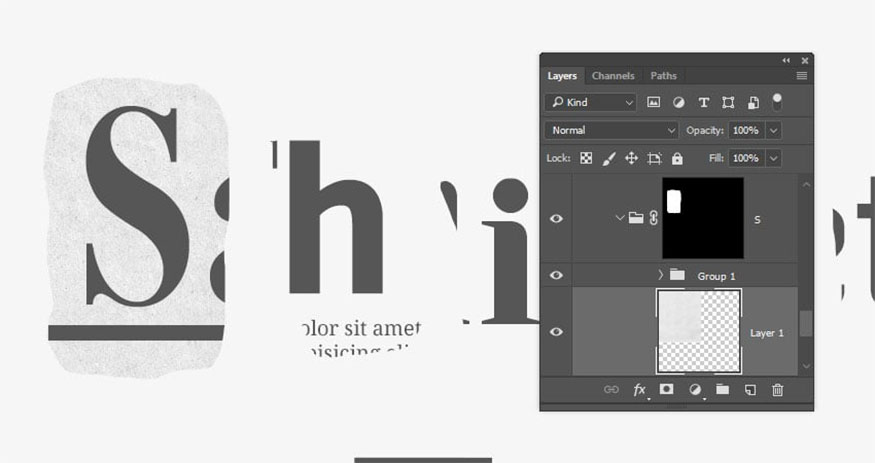
Step 2: Change the blend mode of the layer or group on top of the Paper Grain Texture layer to Linear Burn.

Step 3: Duplicate the Paper Grain Texture layer and repeat the steps to add the remaining letters.
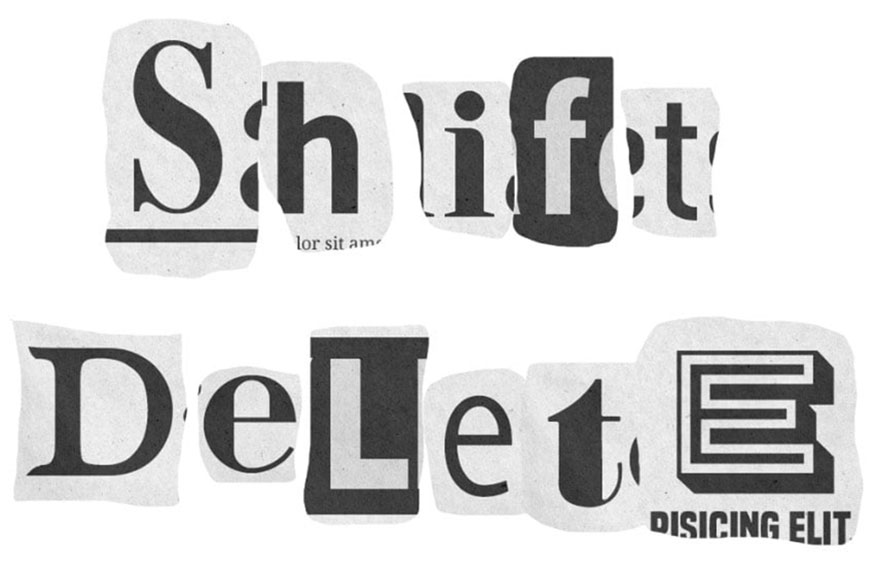
Step 4: If you need to move the group mask after adding the texture, you can unlink the mask from the group by clicking the link icon between their thumbnails. Then move the mask and link it back to the group.
.jpg)
5. How to Add a Wrinkled Paper Texture
To add a wrinkled paper texture, do the following:
Step 1: Place the paper texture (1) on top of the first group of letters, resize it as needed, and change the Blending Mode to Multiply.
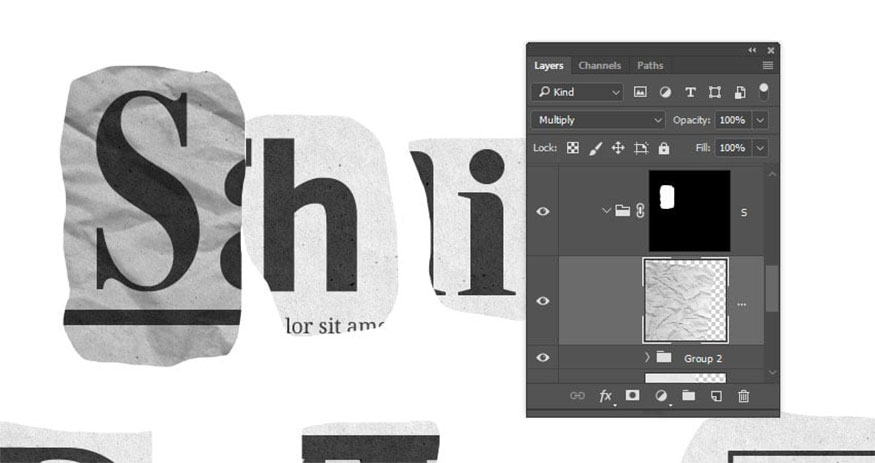
Step 2: Duplicate the texture and add it to the remaining letter groups
.jpg)
6. How to Create a Torn Edge Brush
Select a 23-pixel chalk tip and use the following settings:
Brush tip shape:
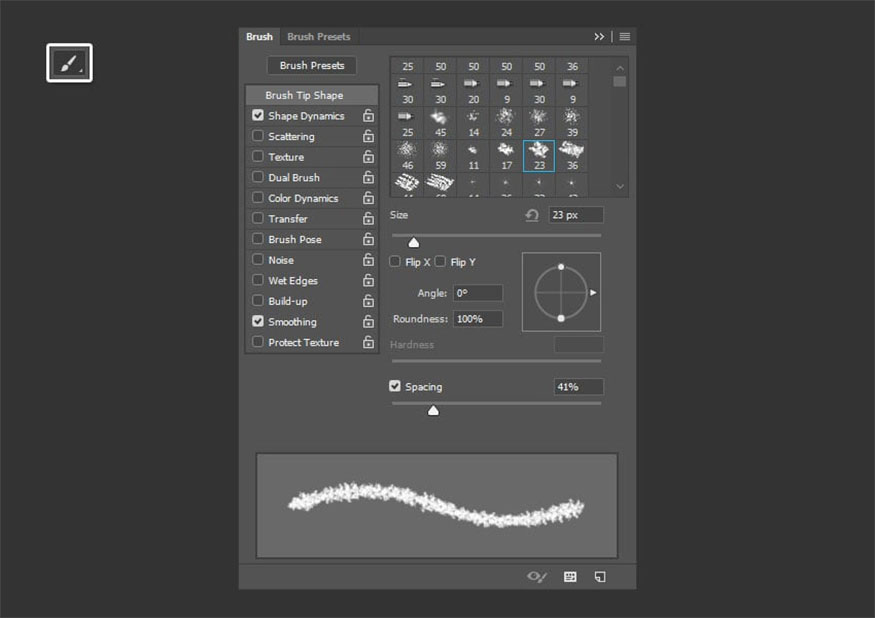
Shape Dynamics and setting parameters:

7. How to create a path from a selection
To create a path from a selection, proceed as follows:
Step 1: Hold down the Command key and click on the thumbnail of the first group of letters to create a selection.
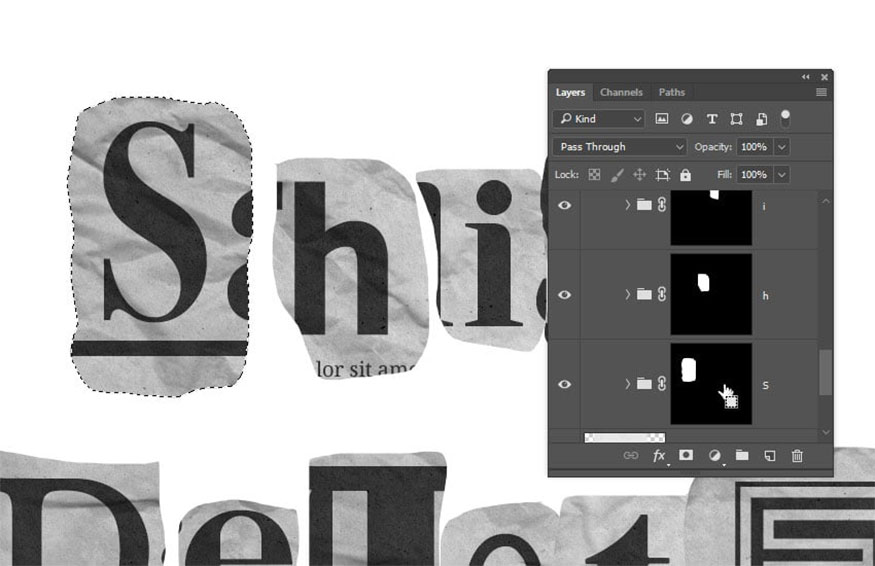
Step 2: Open the Paths panel and click the Make work path from selection icon at the bottom of the panel.
.jpg)
8. How to draw a work path
Here are the details on how to draw a very simple work path:
Step 1: You need to make sure the Brush Tool is active and select the mask thumbnail of the first group of letters. Then, set the Foreground Color to Black.
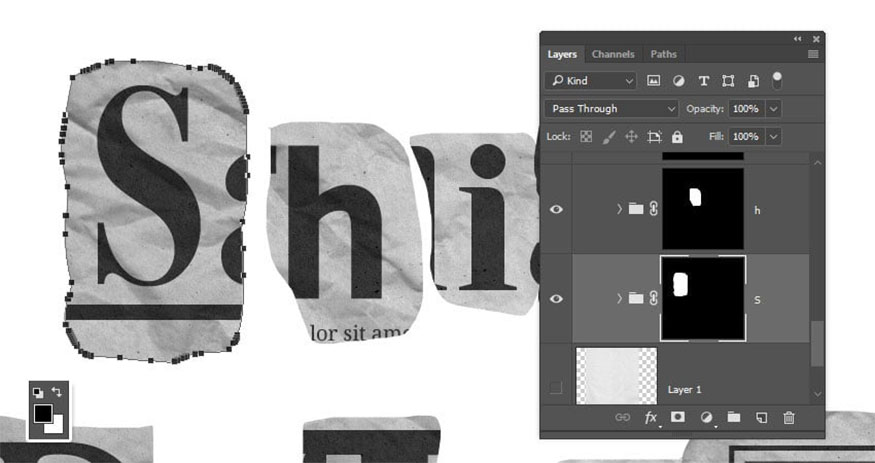
Step 2: Press the Return Key to Stroke the Path with the Brush and Add the Torn Edge Effect to the Mask
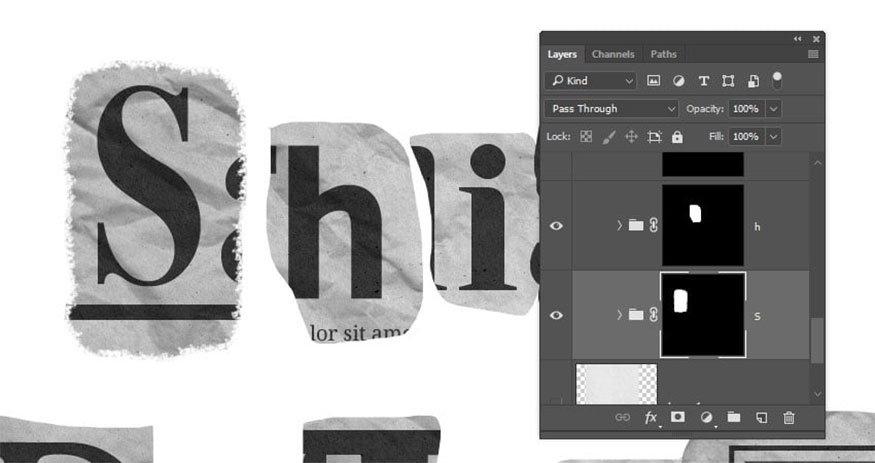
Step 3: Repeat with the remaining letters, when finished, select the Direct Selection Tool (A) and hit the Return key one last time to delete the work.
.jpg)
9. How to Add White Torn Edges
Instructions for adding white torn edges:
Step 1: For a more realistic effect, add some white edges to the existing torn sections. Start by adding the paper texture image (2) below the first group of letters, making sure it is placed outside of that group.
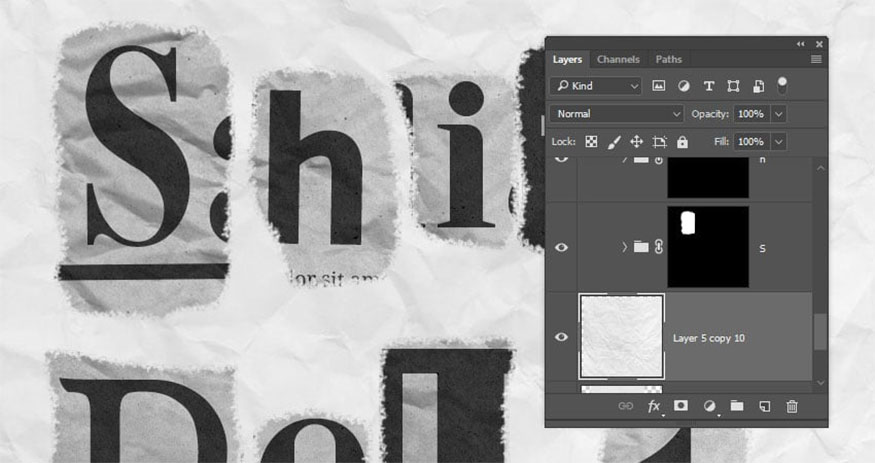
Step 2: Hold down the Option key, click and drag the letter group mask onto the paper texture layer (2) to copy it.
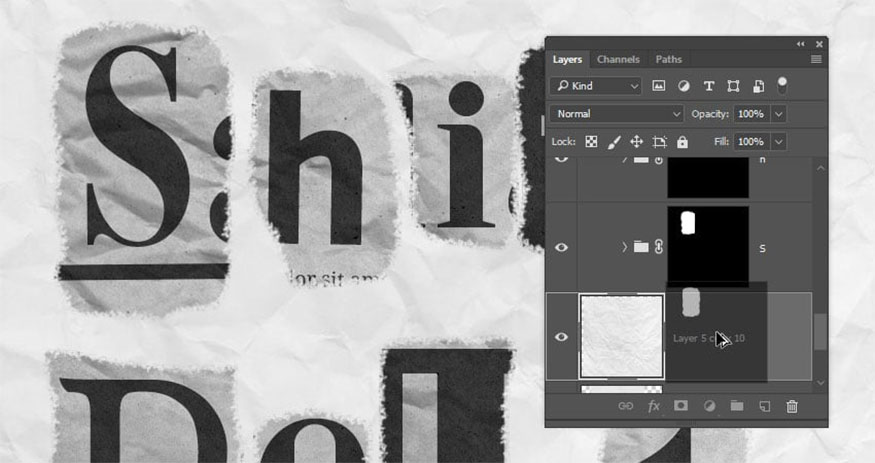
Step 3: Select the Move Tool and use the right and down arrow keys to gently erase the paper texture image (2) from the paper
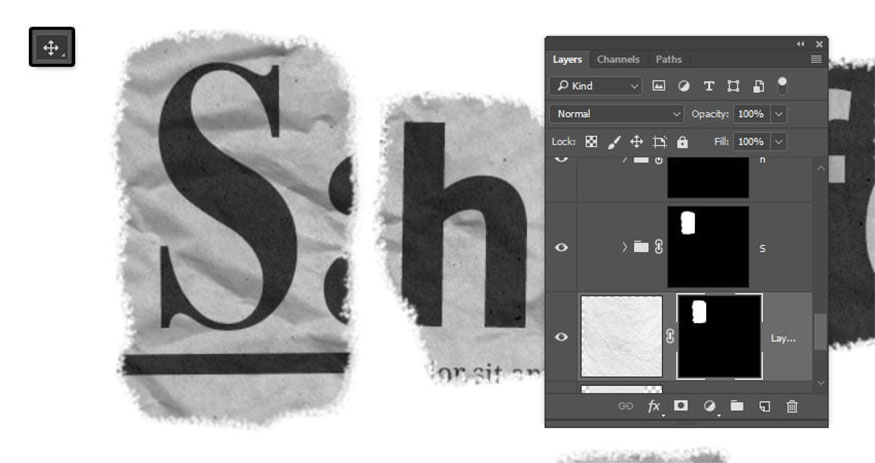
Step 4: Repeat the same with the remaining letters.

10. How to Add a Drop Shadow
To add a drop shadow effect in Photoshop, follow these steps:
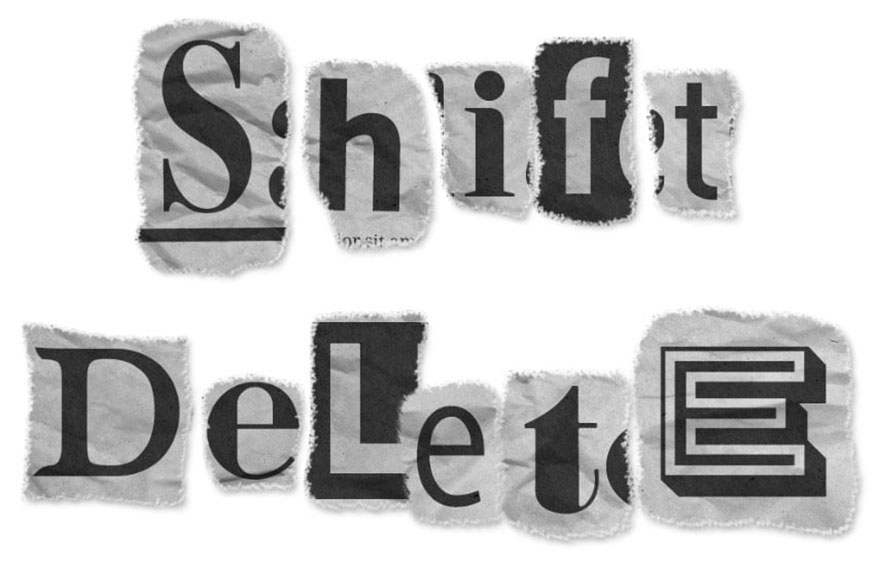
- Step 1: Double-click on the paper texture layer (2) to apply the Drop Shadow effect with the following settings:
Opacity: 35%
Distance: 3
Size: 7
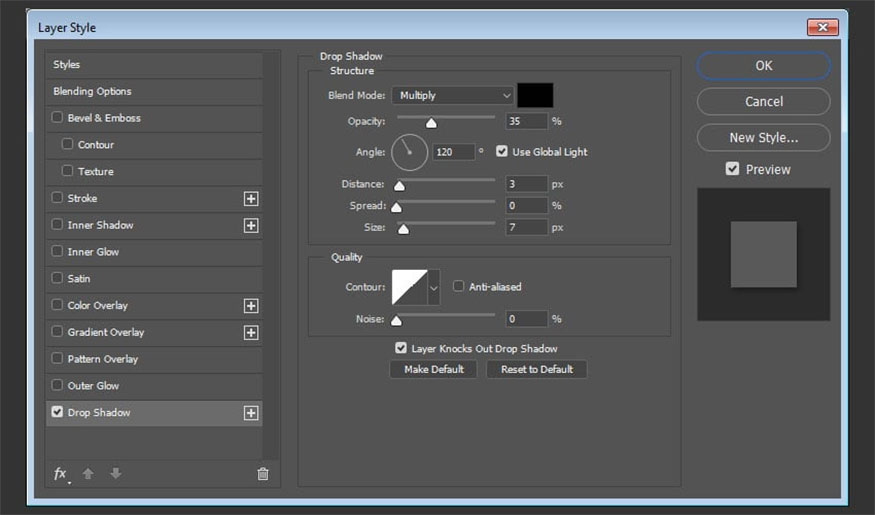
- Step 2: Right-click on the styled layer, select Copy Layer Style, select all the paper texture layers (2), right-click on any of them and select Paste Layer Style.
11. How to Add a Drop Shadow
To add a drop shadow effect in Photoshop, follow these steps:
Step 1: To add the text overflow effect, insert some Lorem Ipsum text at the beginning of the letter group.
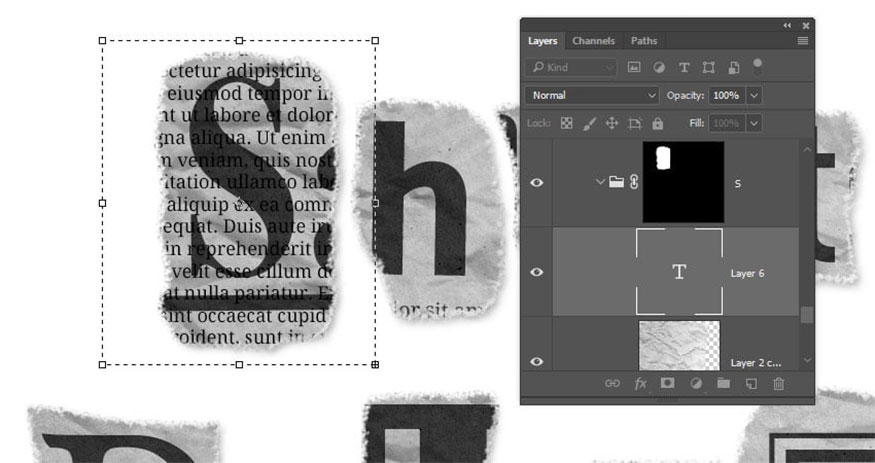
Step 2: Go to Edit > Transform > Flip Horizontal and change the Opacity of the layer to 10%. Repeat to add any other letters.
.jpg)
12. How to convert element groups
To convert element groups, do the following:
Step 1: Before making any changes, you can change some colors to red and blue. The values used here are the color code #d66161 for red and the color code #6a8ebc for blue.
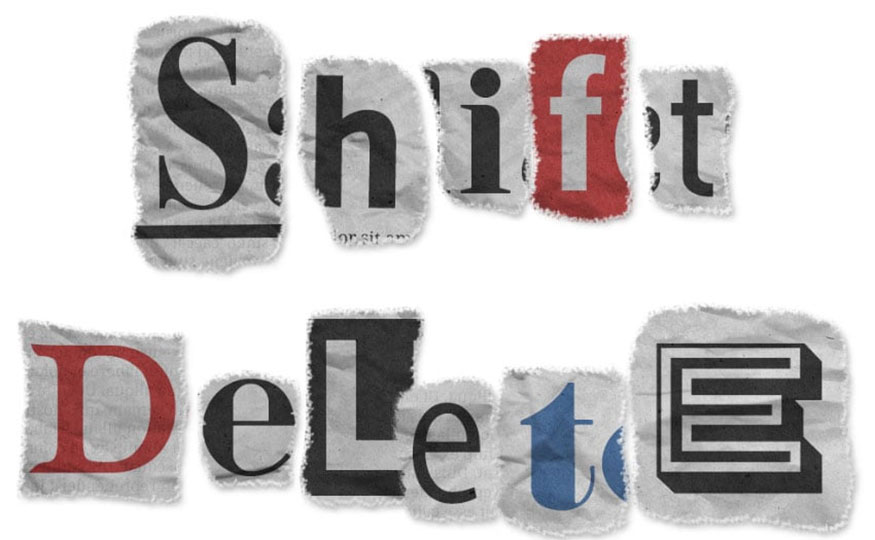
Step 2: Next, we'll transform some of the letters to create a more dynamic result. Select the letter group and the paper texture layer (2) and press Command-T to enter Free Transform Mode.
If you try to make any changes right away, they will behave a bit strangely. This is because the paper texture is quite large and the anchor/pivot point is not centered in the letter.
To solve this, hold down the Option key, then click and drag the anchor point to the center of the letter.
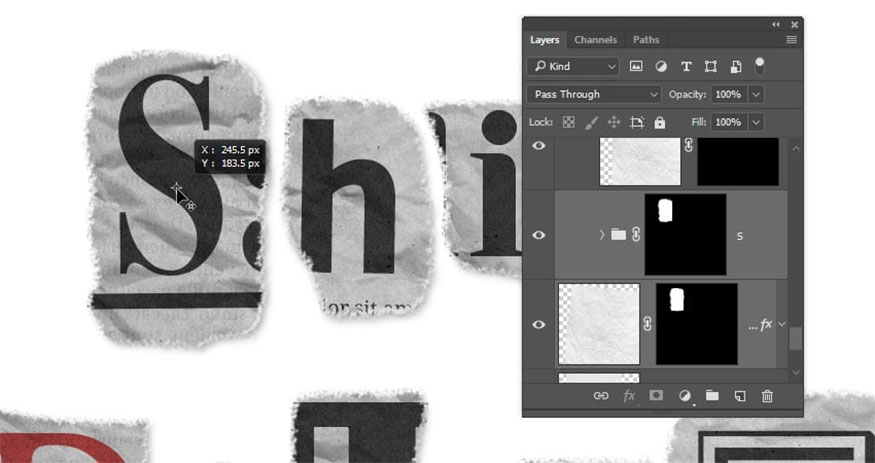
Step 3: Move, rotate and resize the letters as needed. Press the Return key to confirm the changes.
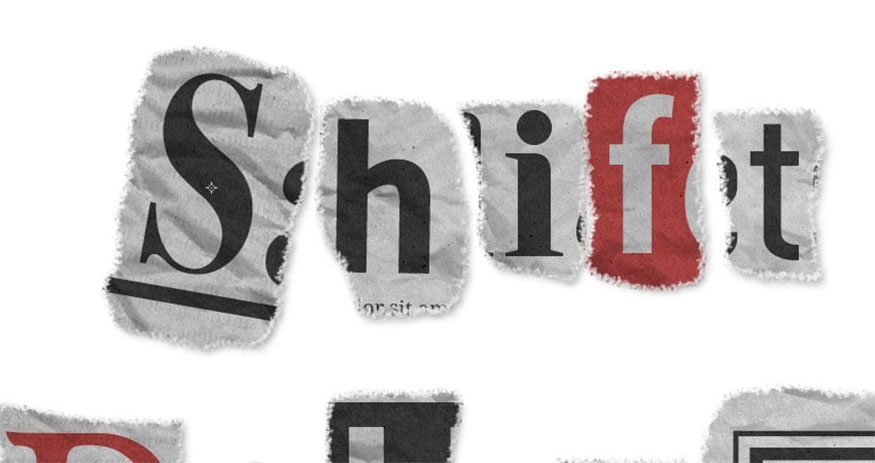
Step 4: Repeat the same steps to convert any other letters you like.
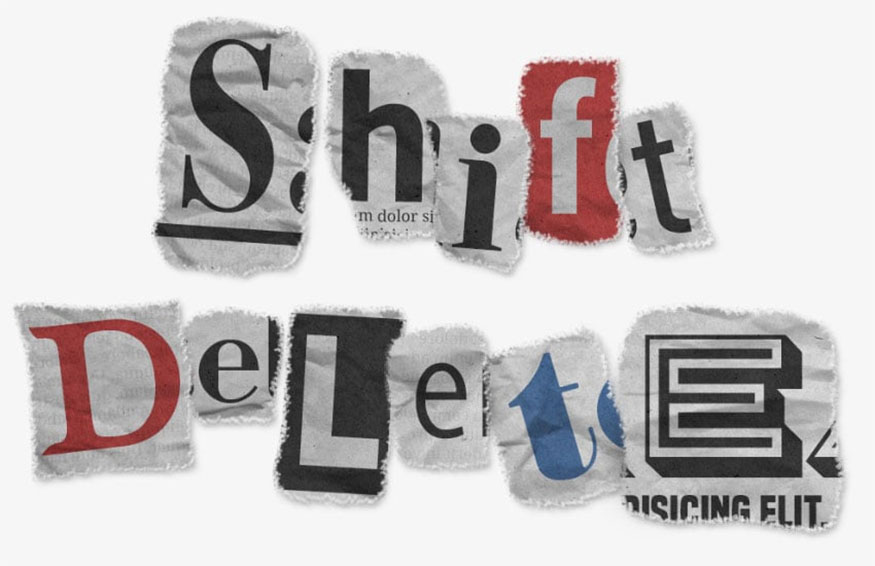
13. How to Add a Simple Background Texture
Below are the detailed steps to add a simple background texture:
Step 1: Add another copy of the paper texture image (2) above the Solid Color layer. Resize it as needed and change the layer's Opacity to 50%.
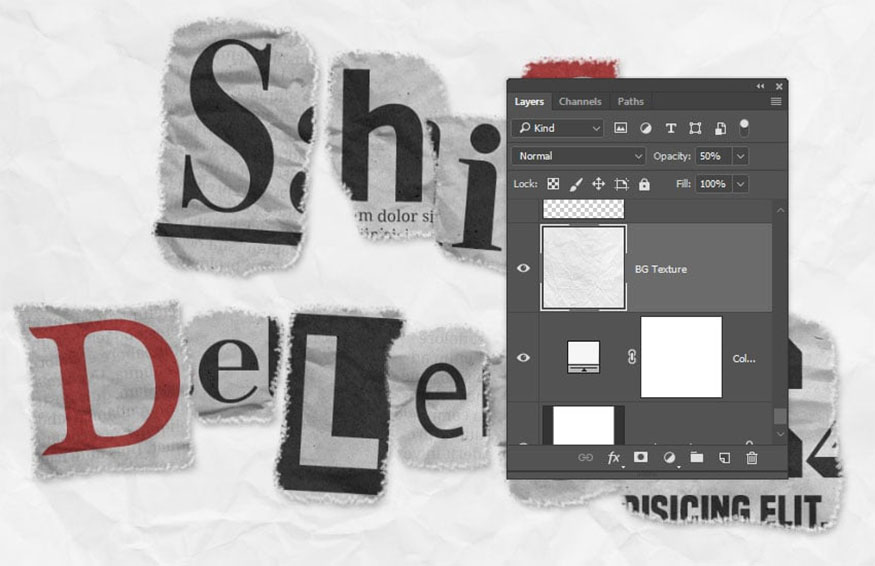
Step 2: You can adjust the font, size, and shape of the layer mask at any time until you are satisfied with the result.
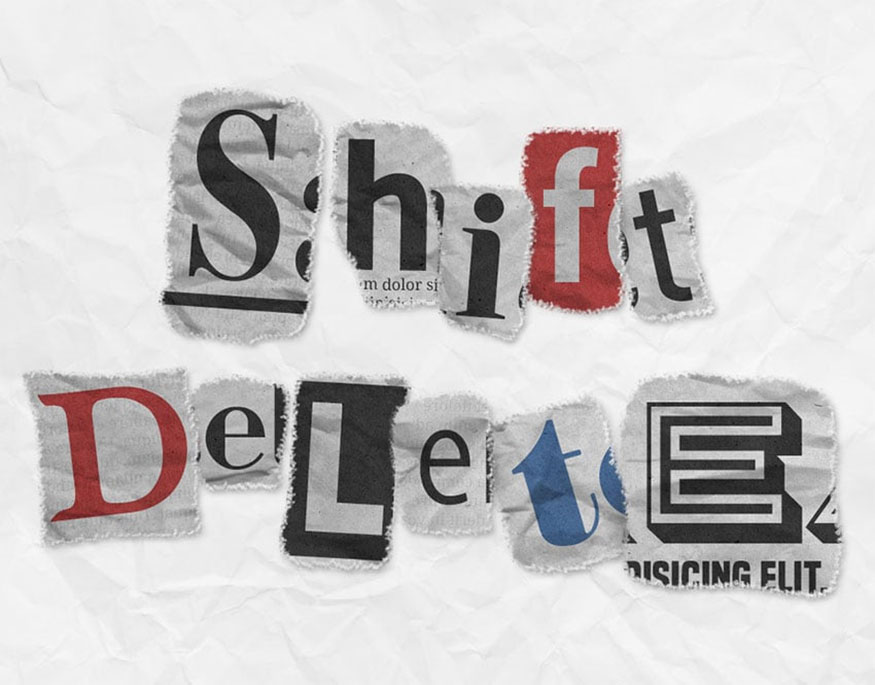
Here are the detailed steps to create a ransom note text effect in Photoshop. Follow the instructions to achieve the desired effect. Good luck.
Installation and support contact information:
🏡 SADESIGN Software Company Limited
📨 Email: phamvansa@gmail.com
🌍 Website: https://sadesign.ai


.png)


