Best Selling Products

Adobe Photoshop Copyright - Full App
120 USD

Freepik Premium Account
59 USD

Upgrade Duolingo Super
29 USD

Copyright Adobe Lightroom Account
59 USD

ChatGPT Plus Account (GPT-4)
16 USD

MidJourney Account
29 USD

Autodesk All App Account Copyright
120 USD

Adobe Premiere Pro Account
99 USD

Plugin Retouch4me
69 USD

Capcut Pro 1 Year
39 USD

Genuine Cheap Canva Pro
39 USD

Windows 10 & 11 Pro Key
36 USD

Upgrade Genuine Office 365
49 USD

Genuine Adobe Illustrator account
99 USD

Upgrade genuine Capture One account
120 USD
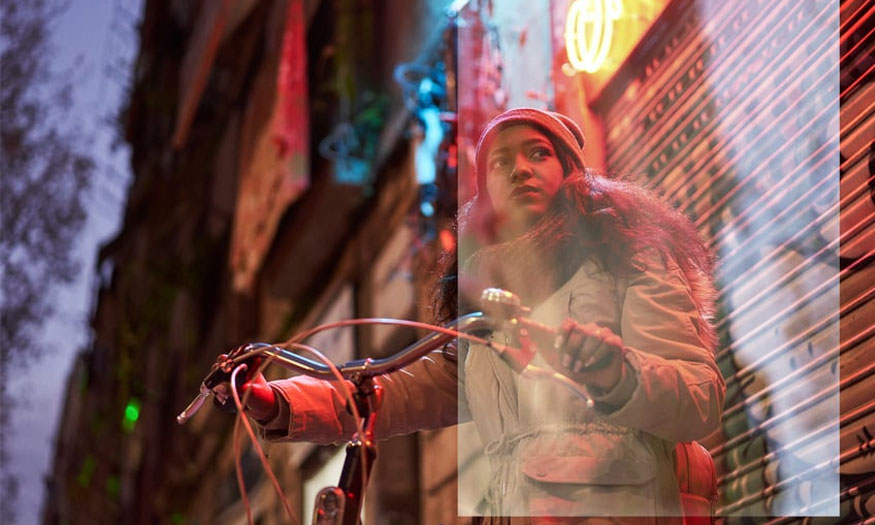
Creating a zombie in "the last of US" is EASY with SaDesign
Nội dung
The Last of Us is a particularly popular game today with vivid and realistic character images. If you are interested in how to create an impressive and attractive zombie in "the last of US" with Photoshop, let's learn with SaDesign in the following article so you can apply it to your design!.
1. How to create Zombies in Photoshop
Instructions on how to create Zombies in Photoshop:
1.1. Step 1
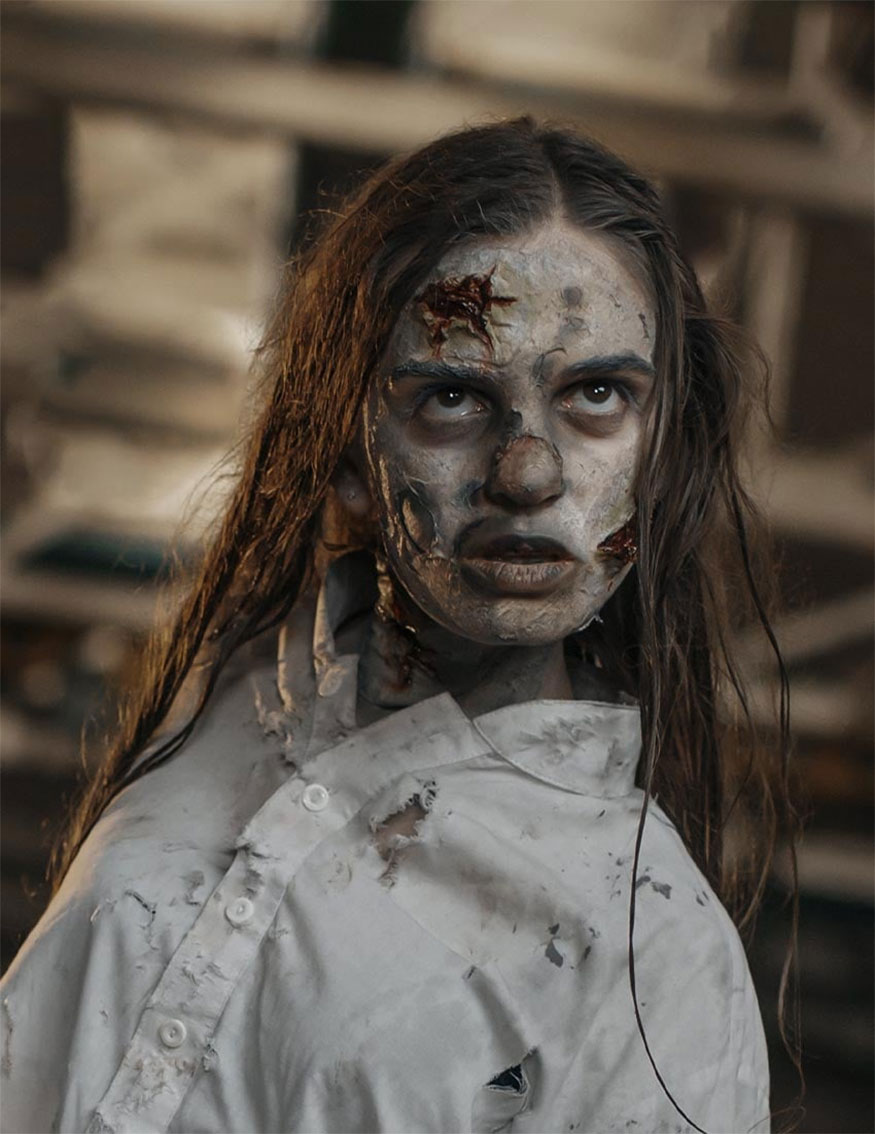
Before that, they need to start with some quick and optional edits to the image base. You need to remove the sunroof using the Patch tool to create a dark and underground environment.
Next add a Brightness/Contrast adjustment layer on top of the image. Set the layer to -40 Brightness and +23 Contrast to darken the image a bit.
1.2. Step 2
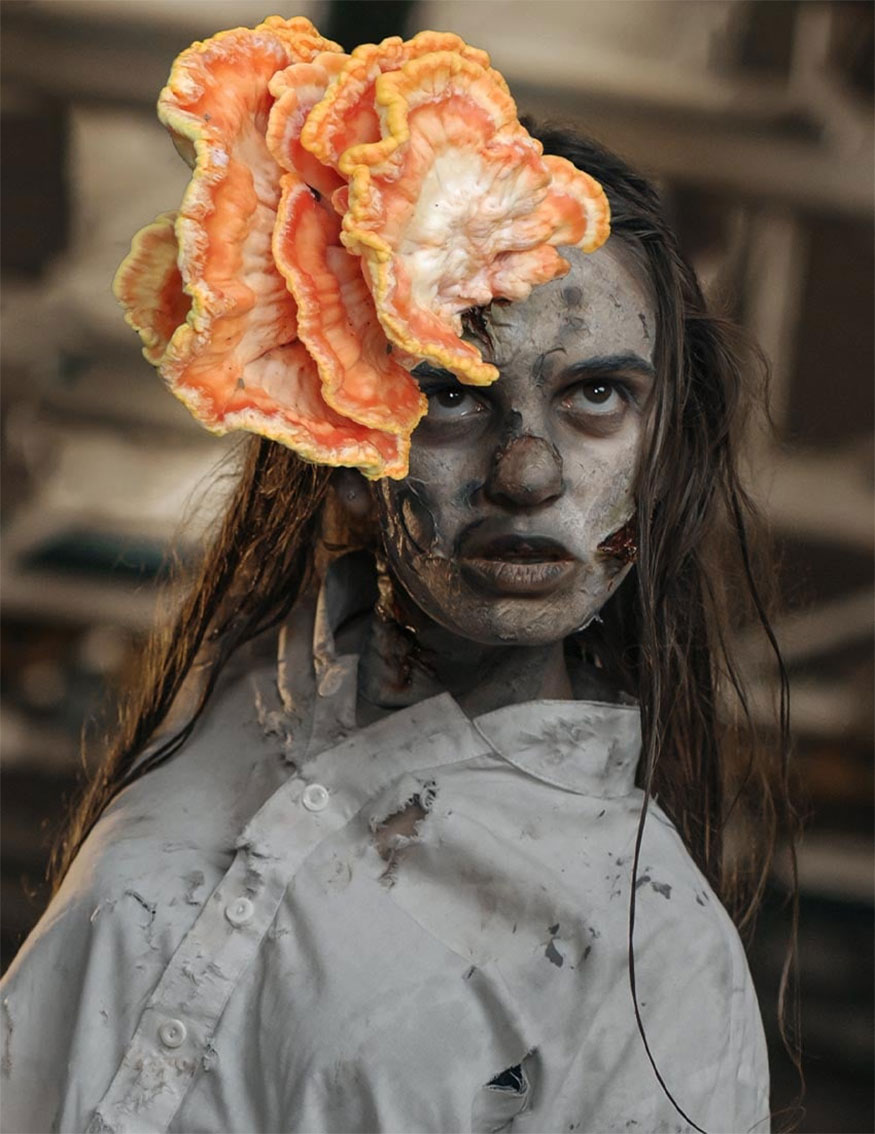
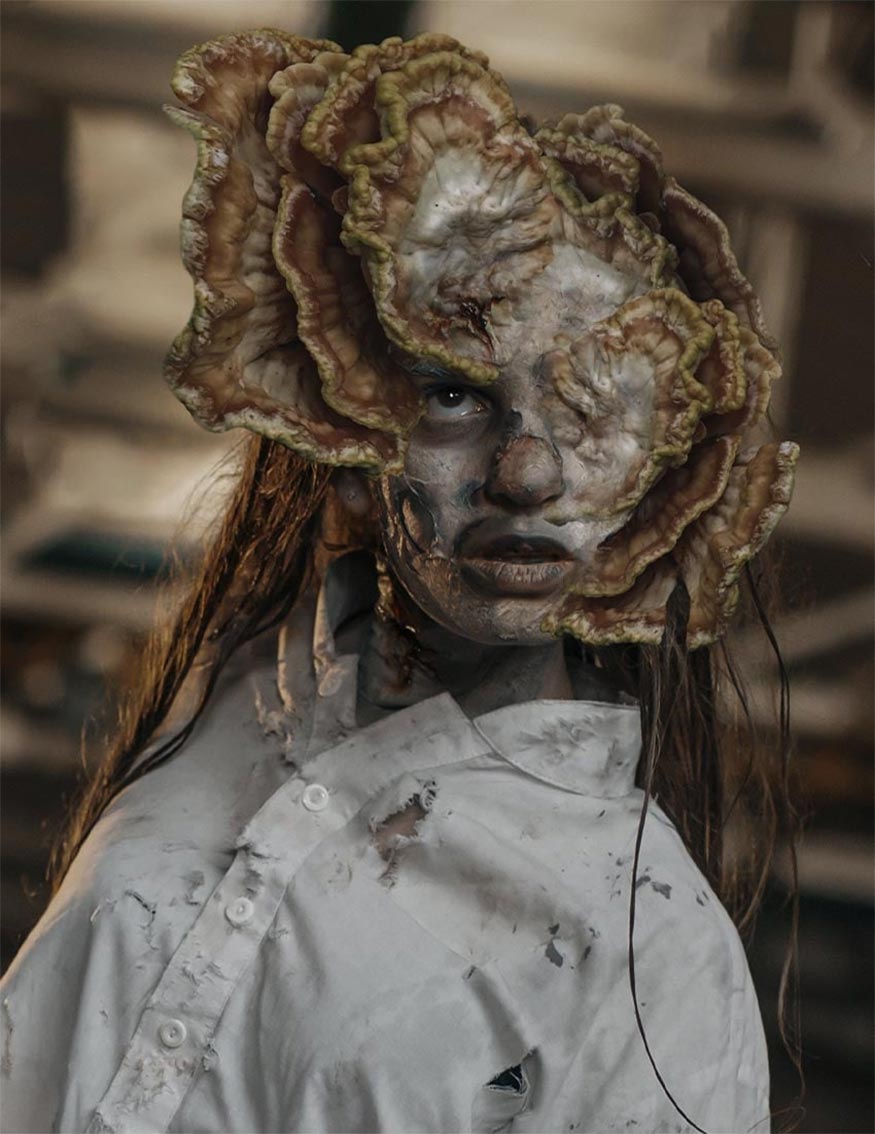
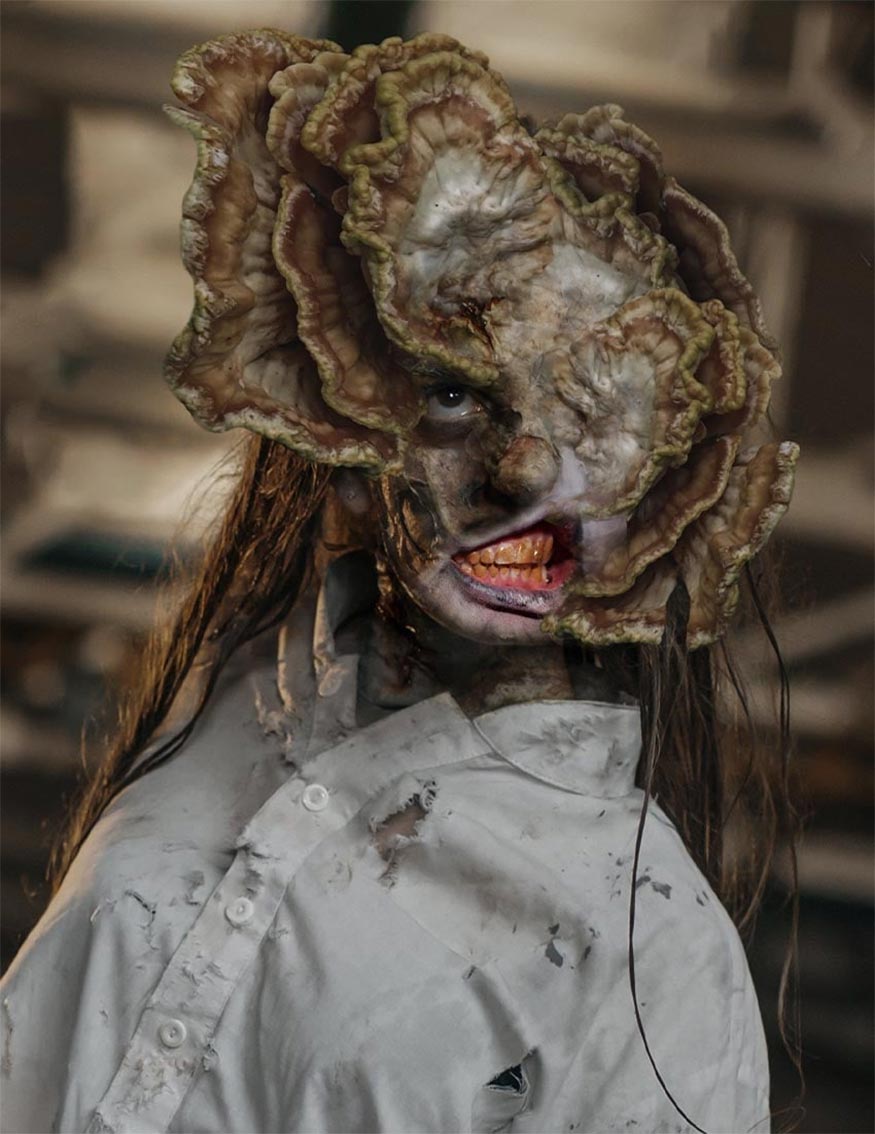
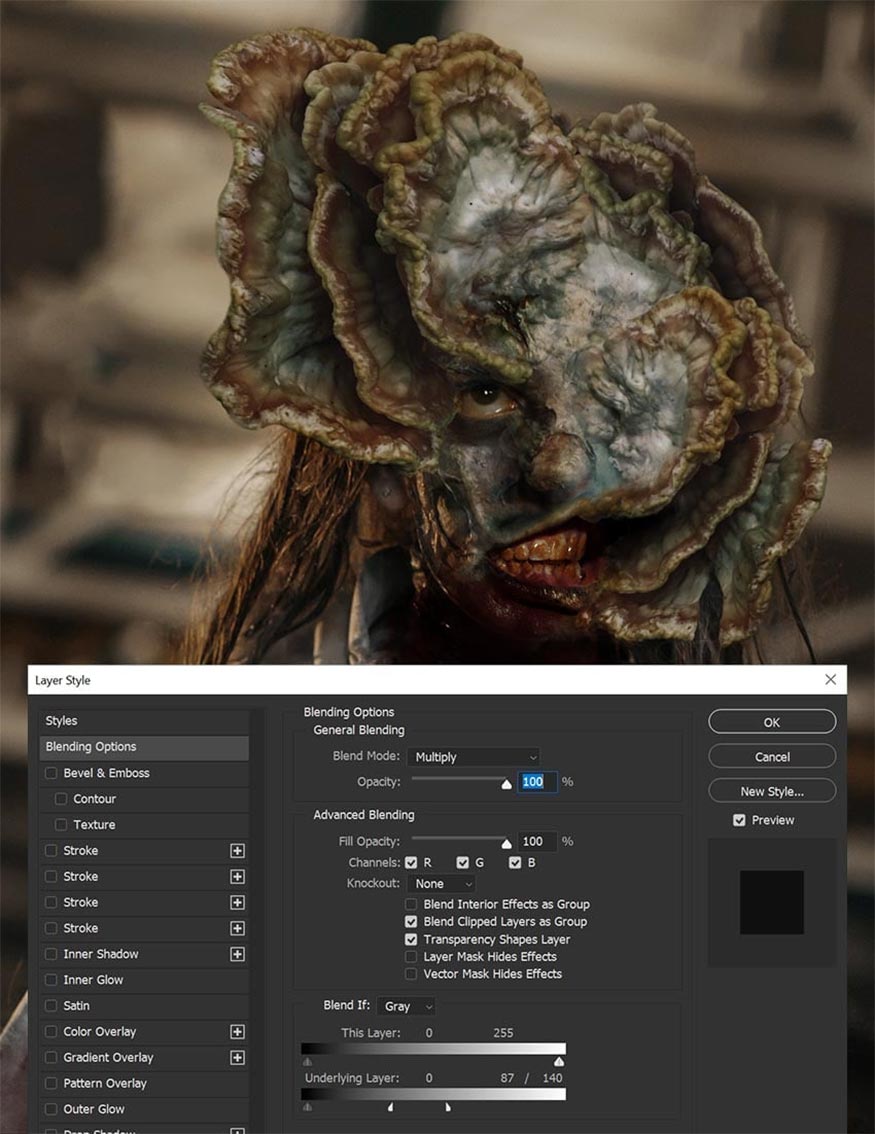
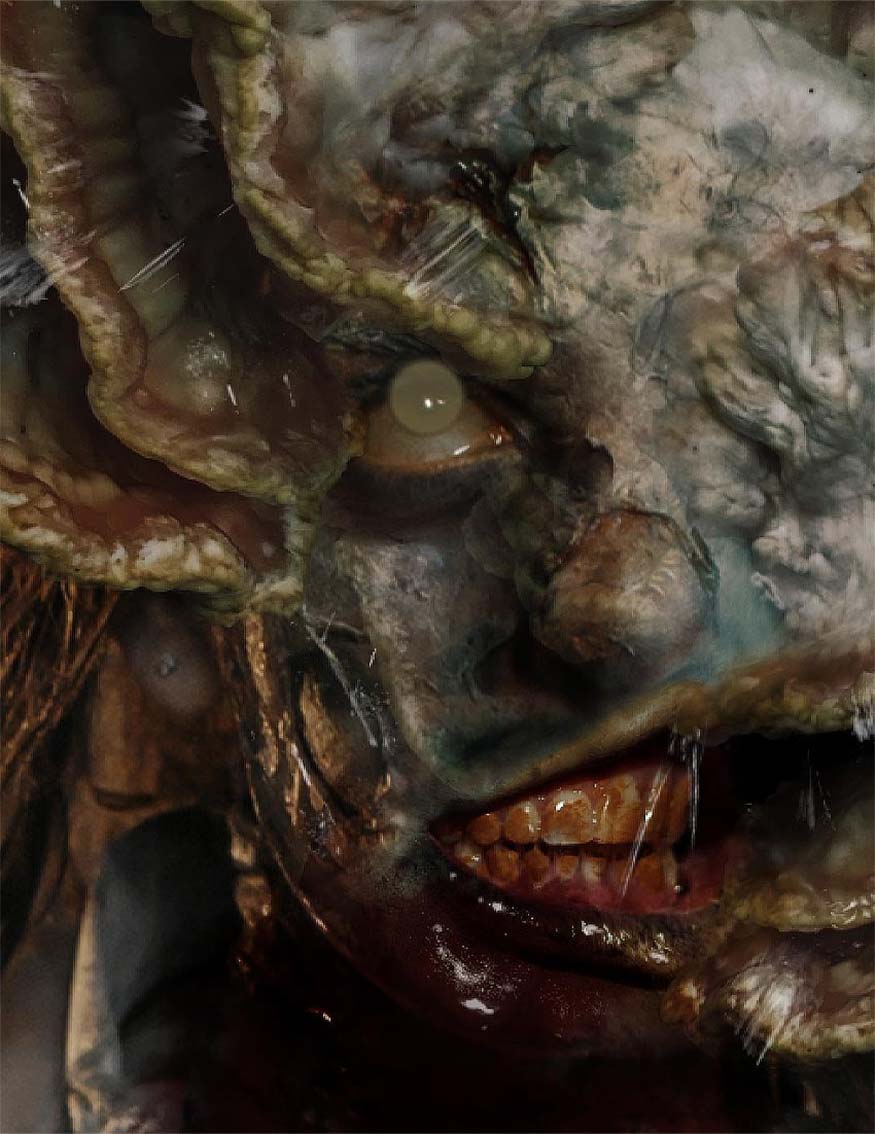
Next we need to create a human infection caused by a fungus, in this tutorial we use tree mushrooms to create a spooky and creepy effect. When placing the mushroom, pay attention to the angle of placement, place it comfortably around the subject's eyes and fold it into the subject's forehead.
1.2. Step 3
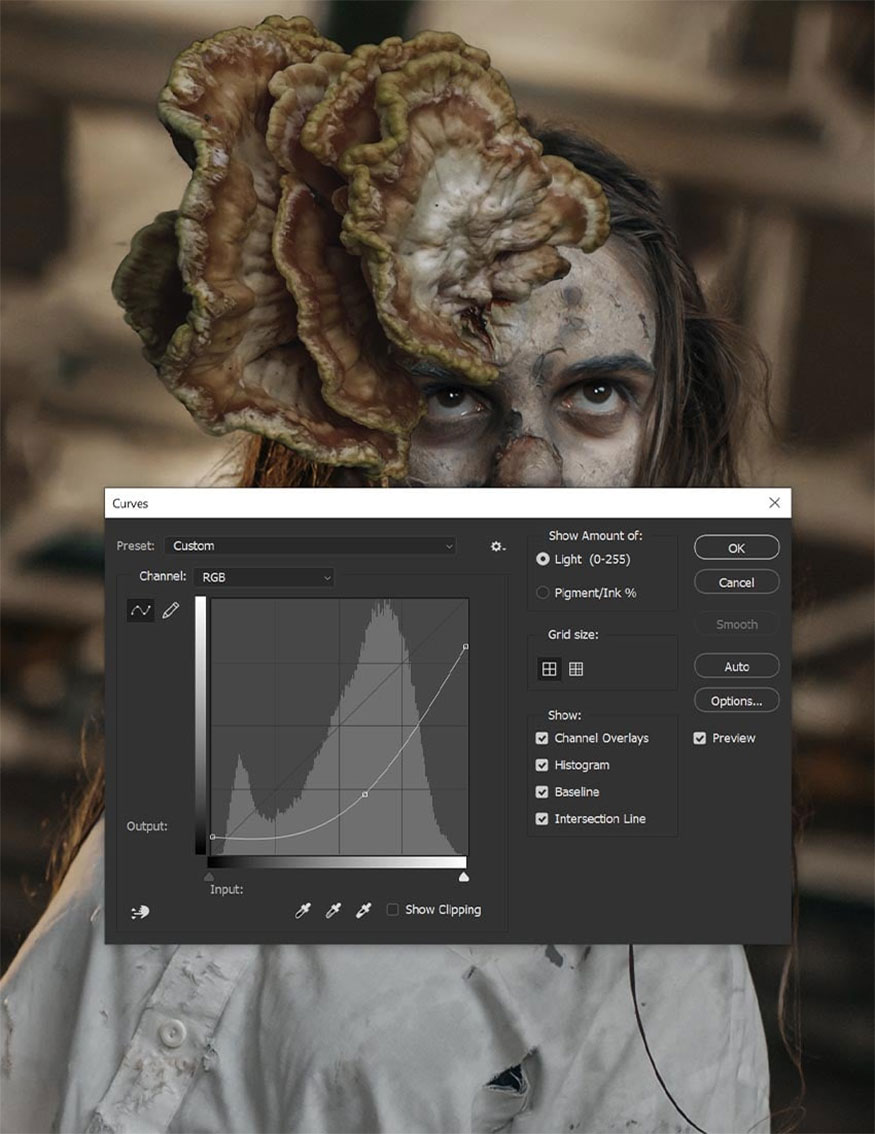
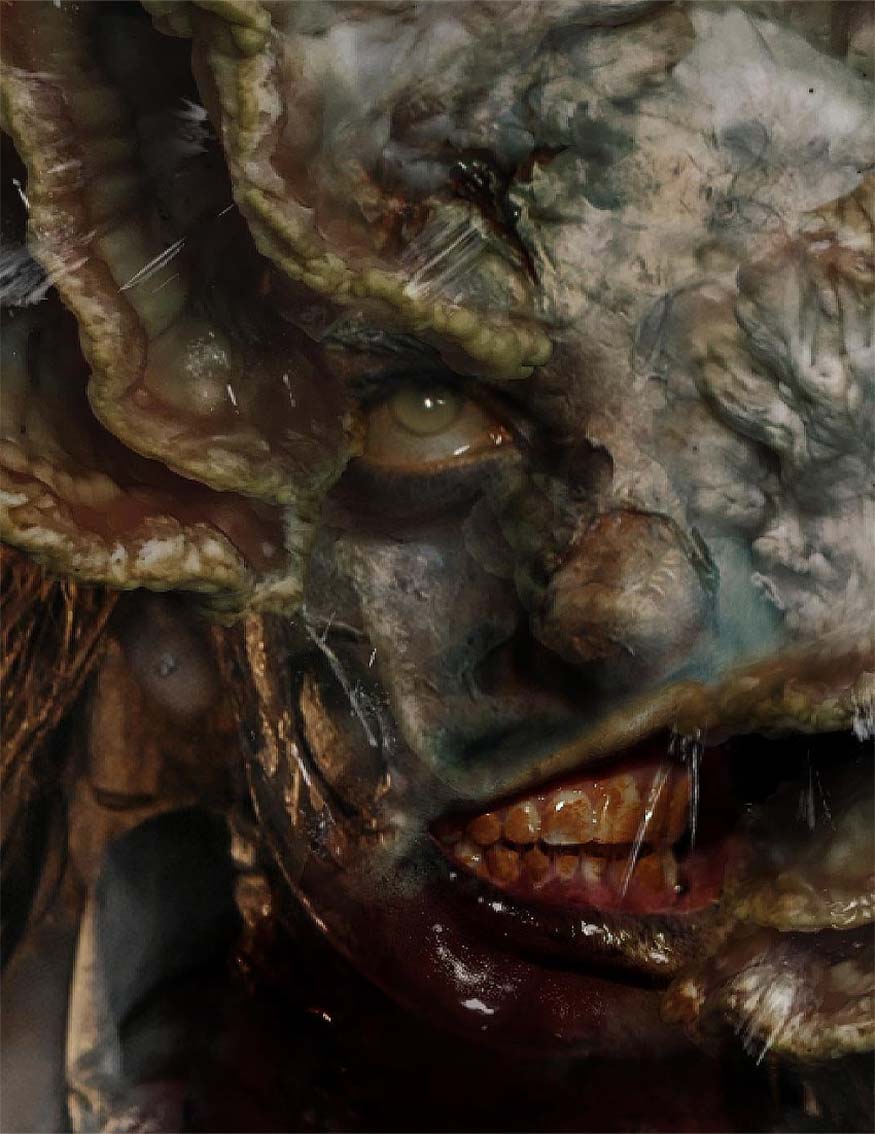
You can move the mushrooms around if needed, pay attention to adjusting the color on the zombie to create a darker and more realistic effect. To do this, go to Image > Adjustments > Saturation down to -70.
Then using Smart Objects, you're free to use cropped adjustment layers instead. Next, let's darken the mushrooms and remove some of their contrast using the Curves adjustment and copy what you see here:
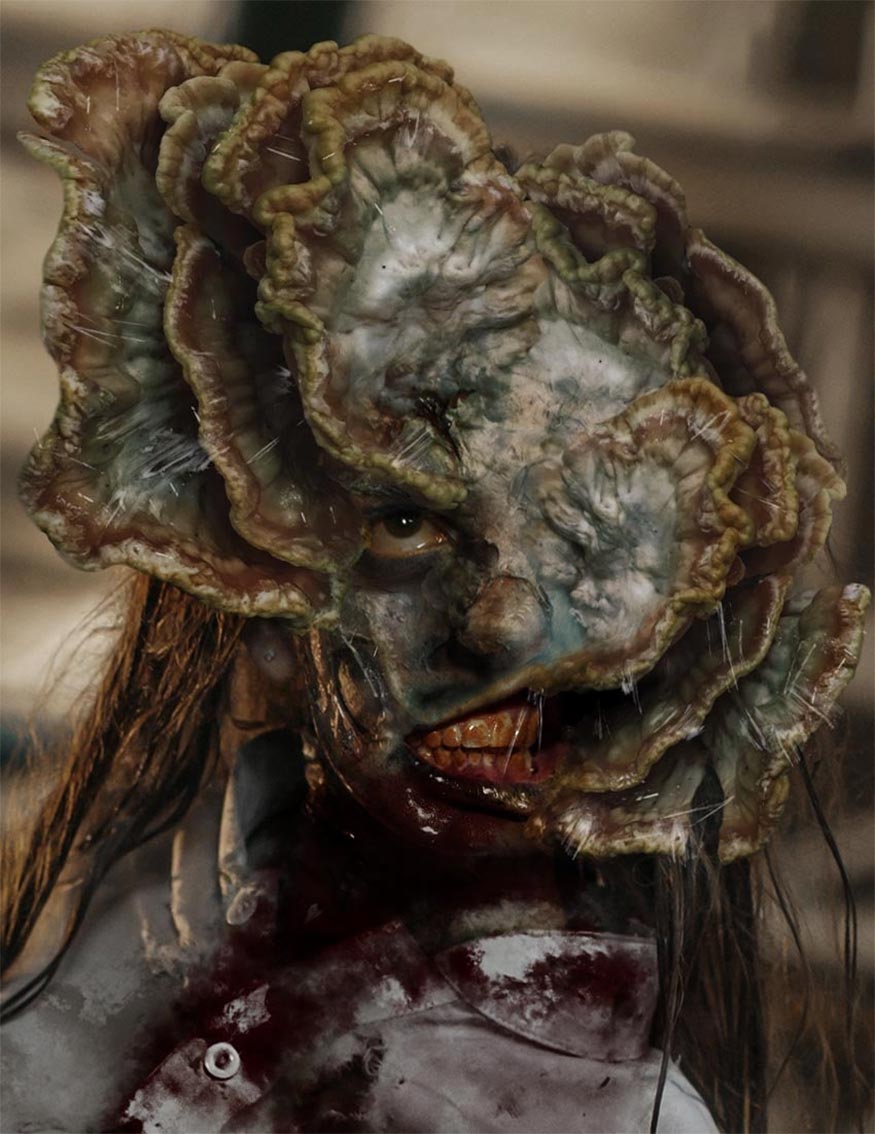
1.4. Step 4
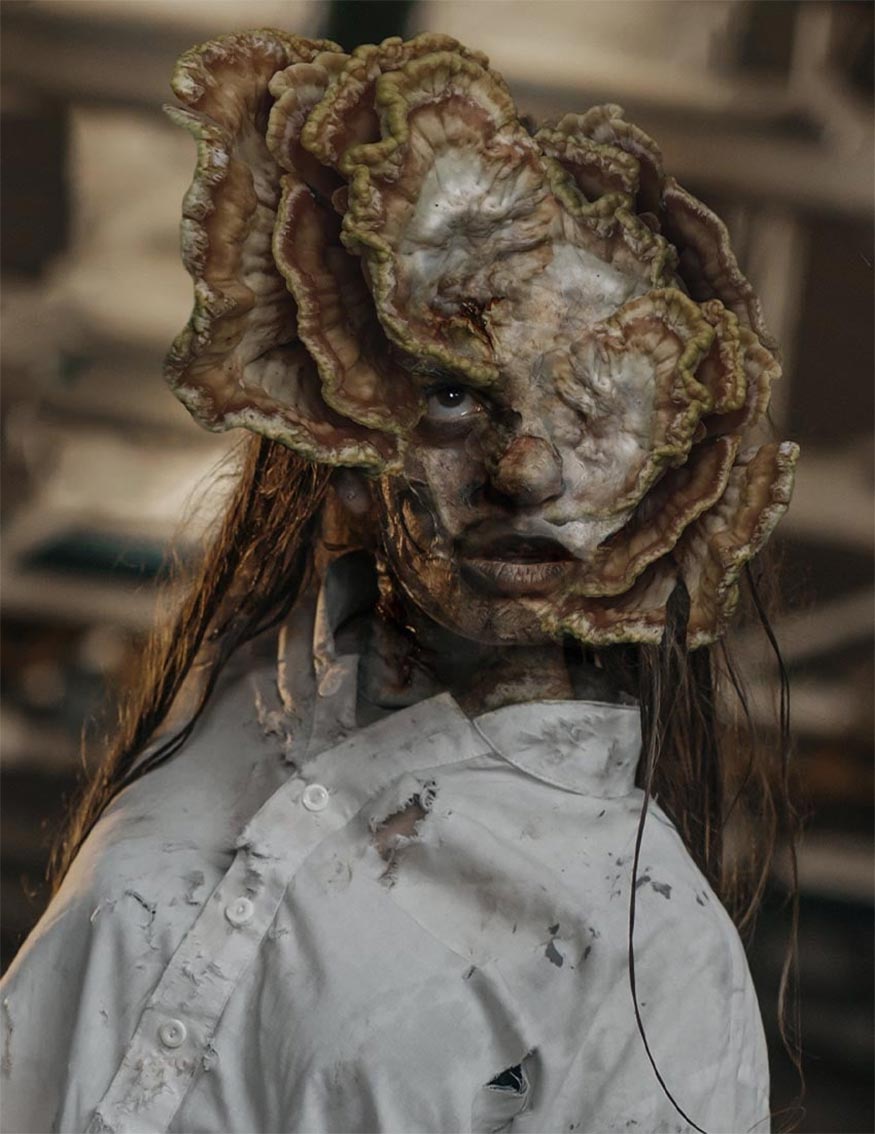
Once the mushroom has better suited the zombie's skin, add a new Layer Mask to the mushroom layer and refine the shape further. Use the hard round Brush tool to remove large parts of the fungus and use the softer round Brush to slowly blend some of the edges into the skin.
In addition to the Brush, you can use the Pen Tool or selection tool to shape the mushroom so that it blends better with the zombie's face.

1.5. Step 5
Repeat this step of adding mushrooms again to continue creating mushrooms on the model's face. We'll use the same mushroom, duplicate the mushroom and Delete its Layer Mask, then add a new Layer Mask to mask them into a new unique shape.
You can flip, resize and cover them with this new mushroom layer.
1.6. Step 6
Duplicate the mushroom one last time and erase any layer mask it may have and bring it below the previous mushroom layers.
Next, set the new mushroom layer to Overlay and place it on the zombie's face. This will bring a mushroom-like color and texture to the zombie's face, helping the fungus blend into the skin.
1.7. Step 7
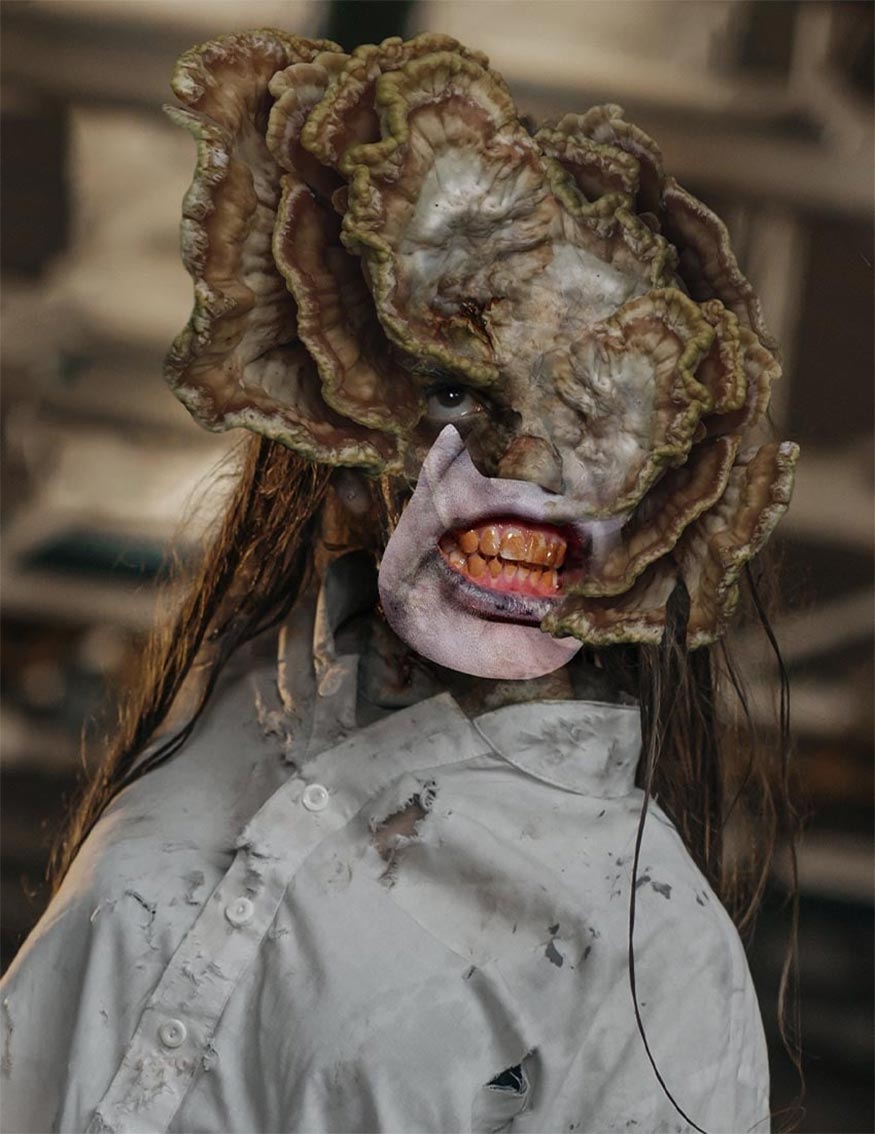
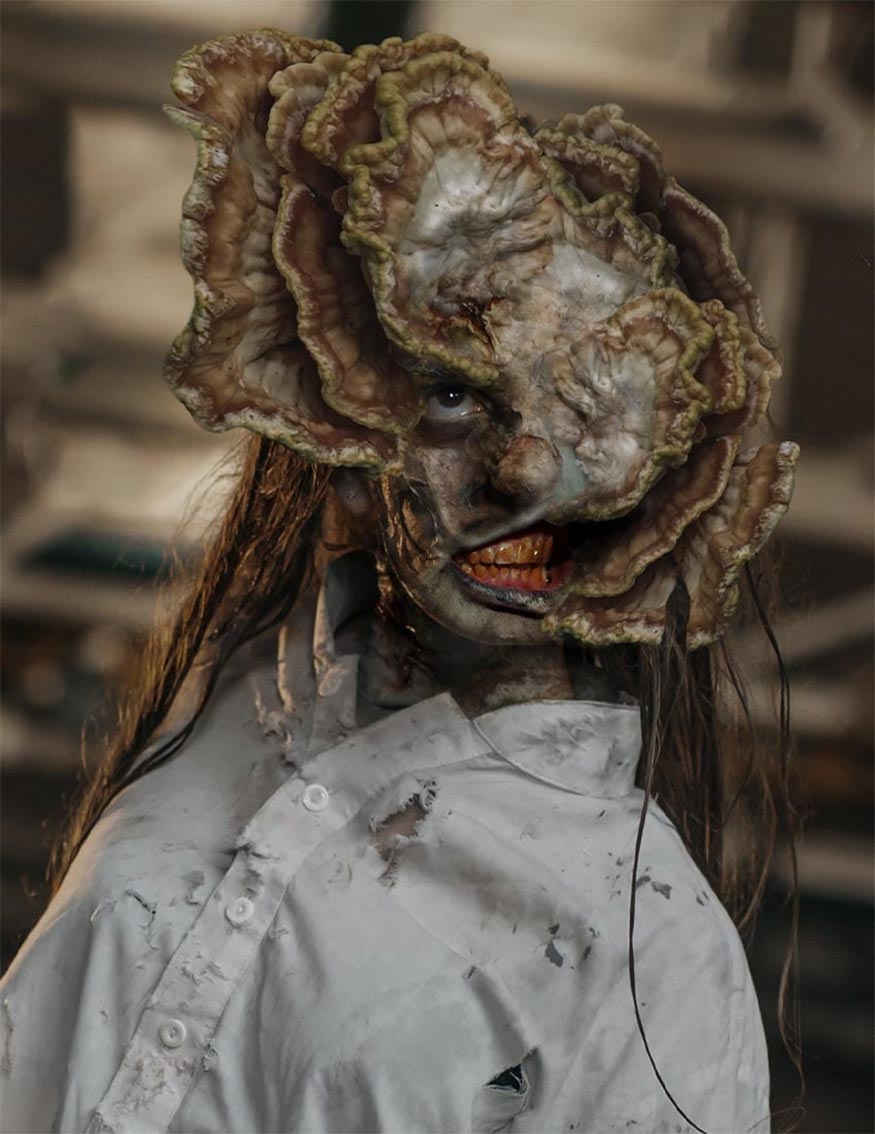
We could stop here, but "The Last of Us" zombies have very distinctive mouths. Therefore, we will borrow another zombie's mouth and teeth to paste on our zombie's mouth. Let's make it a little bigger than the current mouth.
1.8. Step 8
Next, we'll use the Warp Transform tool to curve the mouth, making it fit the face better.
In order for the zombie mouth to start and enter the folds of the mushrooms, you need to have them curve into the folds on the right side of the face.
If you use Smart Objects, you can go back and make adjustments later.
1.9. Step 9
Finish the zombie mouth by blending the edges with a new Layer Mask and a soft round Brush.
1.10. Step 10
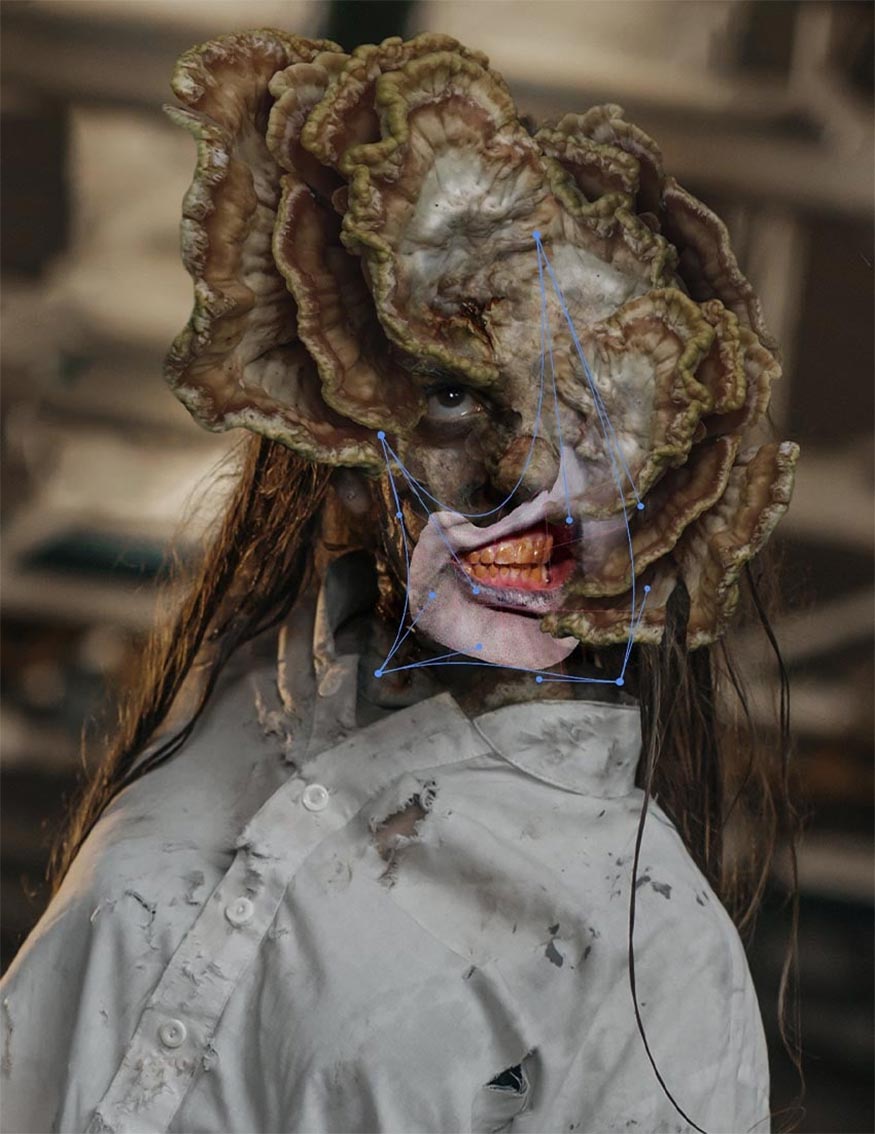
We need to blend the mouth into the folds of the mushroom using the Normal layer placed above the mouth and a very dark red color code #160000. This will create a quick shadow that looks much better after adding my color layer.
You can help match skin tones better by creating and clipping a Color Lookup adjustment layer set to 3D LUT TensionGreen to the mouth. Then set the layer to Multiply at 65% Opacity so the mouth becomes darker but has a more green tone.
2. How to create horror Zombie effects
Here are the specific steps to create a horror zombie effect:
2.1. Step 1
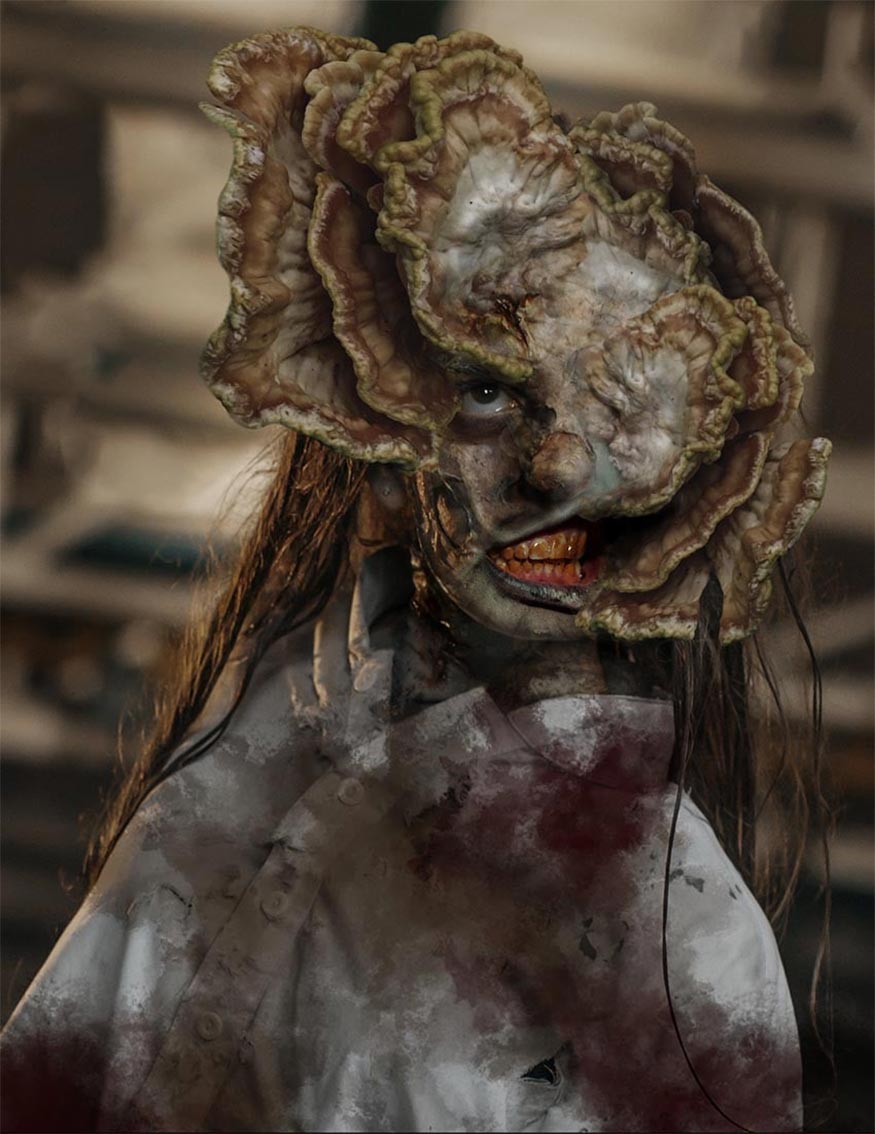
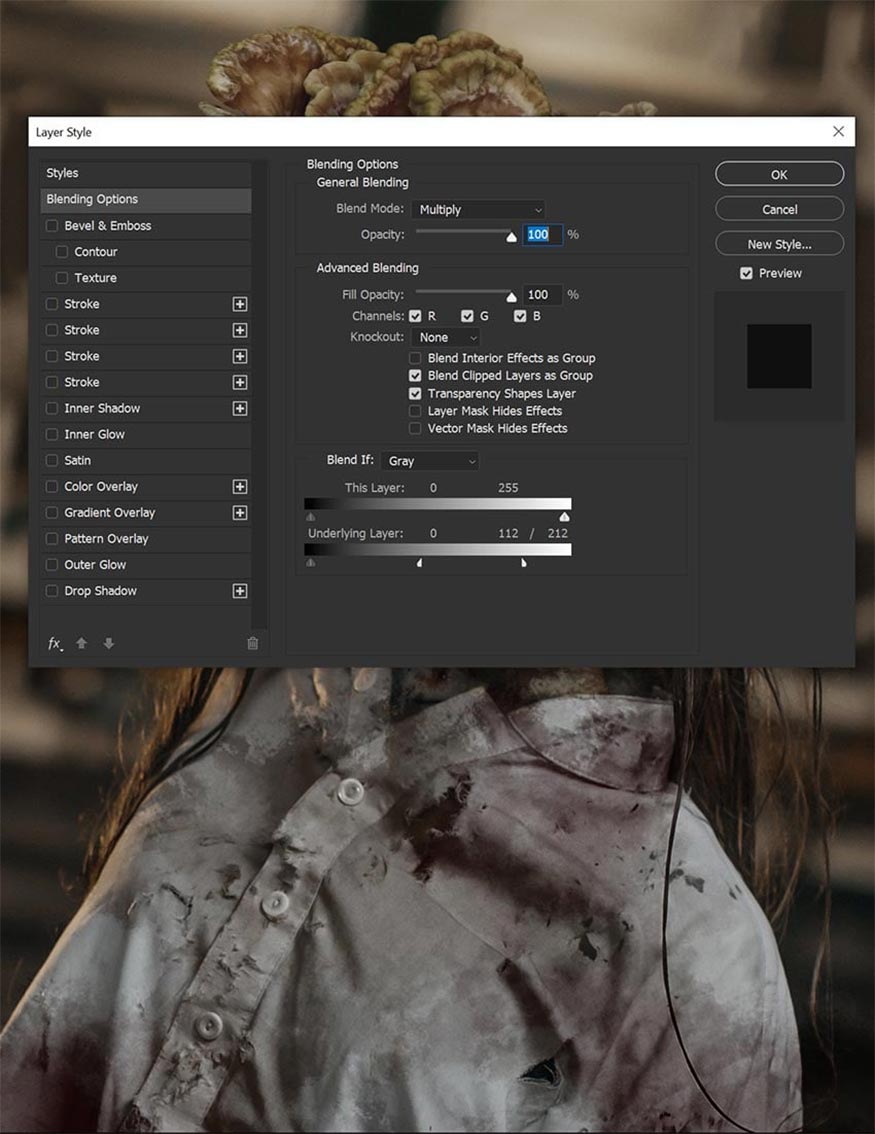
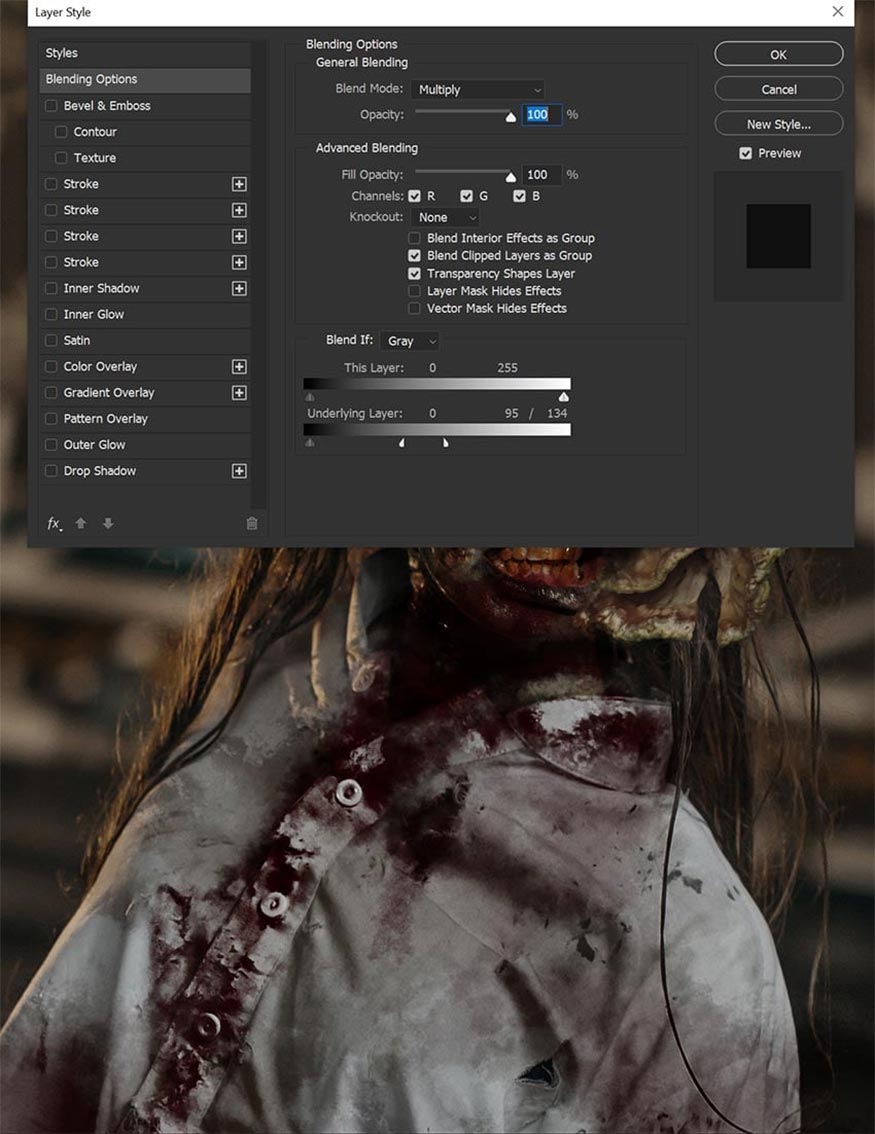
Now we have a basic zombie to add all sorts of details. First of all we need to add color, to add color you need to create a New Layer above all the current layers. Then set it to Multiply.
Use a grunge color or textured brush and paint brown #5d4435 and red #840000 over the zombie's entire shirt.
Using Multiply will make any color you apply over it look darker, so if you want a darker red, choose a vibrant medium red.
2.2. Step 2
Double-click the layer to open the Layer Styles panel and go down to Blend If. We'll use the Underlying Layer toggle to blend the dirt and blood out of the brighter values of the image.
Take the white switches, hold Alt to separate the switches and drag them to the left. The further left we drag, the more dirt blends out of those brighter values. And the farther apart the switches are, the smoother the blend will be.
The zombie's shirt is quite light, you can customize it until you feel satisfied.
2.3. Step 3
We'll use the same method, using a brush and red paint, to create blood from the mouth onto the chin and shirt.
The only thing we need to change is the BlendIf settings, you can copy the settings like this tutorial or play around with the toggles until it feels right.
2.4. Step 4
Blood and dirt aren't the only things that work. We can use the same method to add color to the zombie itself.
The zombies in "The Last of Us" have various shades of blue color code #74b4bf, yellow color code #f69f3a and light green color code #caed93 in their skin tones.
Using the same techniques we just learned, we can paint similar colors on the zombie's face, skin, and mushrooms.
2.5. Step 5
To complete the details, add a little saliva and slime. You can find brushes that simulate things like drool. Think of brush packs for creating monsters, animals or dragons.
You can also do your own coloring by drawing thin light blue lines with color code #cbd9dd on the Normal layer.
The trick is to make it thin and lose some areas. Make it look as if the slime has been stretched so thin that it's broken, or the light isn't hitting it.
You can use the Eraser tool to slim lines or stretch them out with the Smudge tool.
Or you can skip this step altogether, because some zombies in "The Last of Us" are slimy, and some are not.
3. How to create ghost dead eyes in Photoshop
3.1. Step 1
You need to focus on eye details, because zombies in "The Last of Us" have characteristic glossy, opaque white zombie eyes. We need a new layer set to Screen, using a semi-soft round Brush tool at about 70% hardness. Then choose light yellow color code #ffeeb1 or any color you want for the eyes.
Finally set the Brush Size to the size of the subject's iris and place a single dot of that light yellow color.
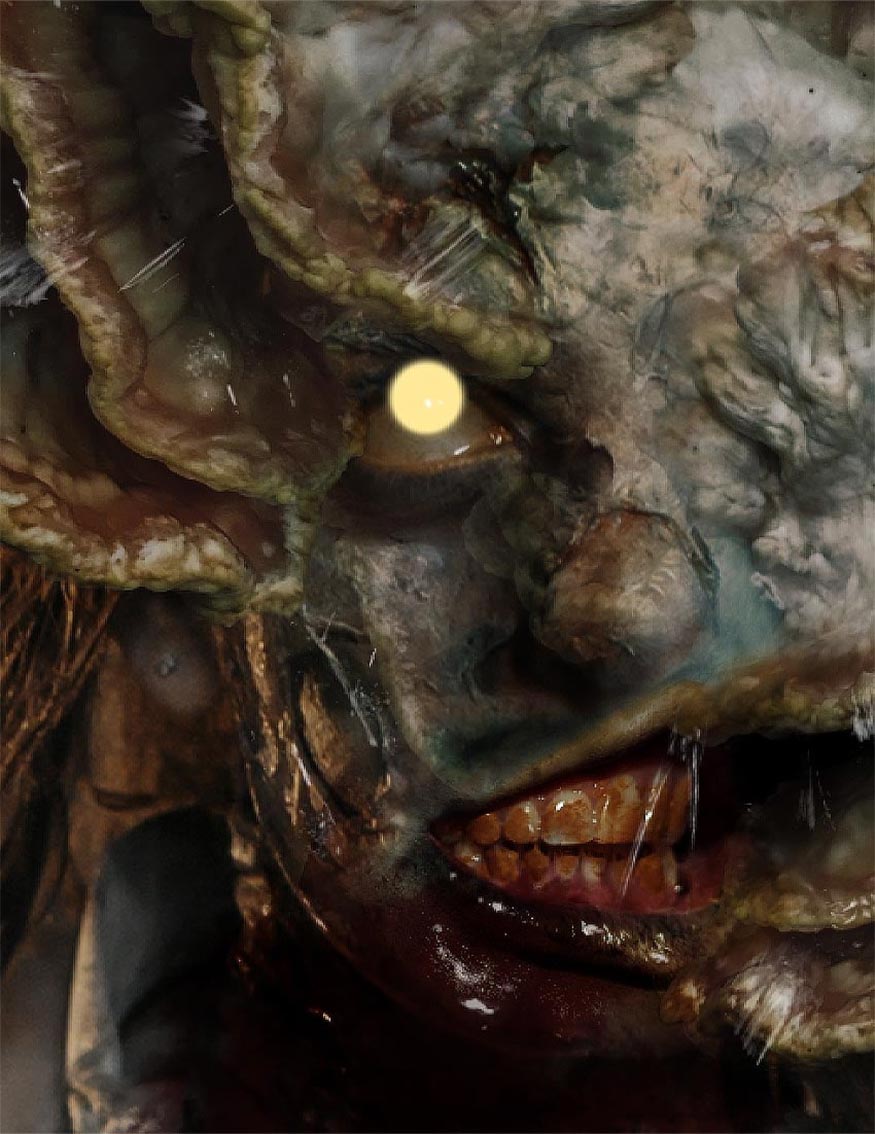
3.2. Step 2
Reduce the layer's Opacity to 30%.
3.3. Step 3
Finally, use a soft Eraser brush and blend evenly over the top of the eye to create depth. Depending on how much new eye color you blend and how opacity the layer is, you can get a few different effects, from dead eye to bright eye.
4. How to create impressive light effects in Photoshop
4.1. Step 1
The light looks flat, so create a curve layer and highlight the highlights.
Click on the layer mask and Invert it with Ctrl-I to turn the mask black.
We want to use this layer and a soft round Brush to cover some of the light on the subject's face and upper body for the purpose of brightening the zombie's face.
4.2. Step 2
Once you're happy with the lighting, you can also add some shadows using the Curves layer. This time we'll lower the brightness and highlight some shadows so the zombie's background looks foggy, dark, and dusty.
Once the Curves layer is set up, you can mask it from the zombie's face and upper body.

5. How to create horror movie color layers
To create a horror movie color layer, use the following adjustment layers:
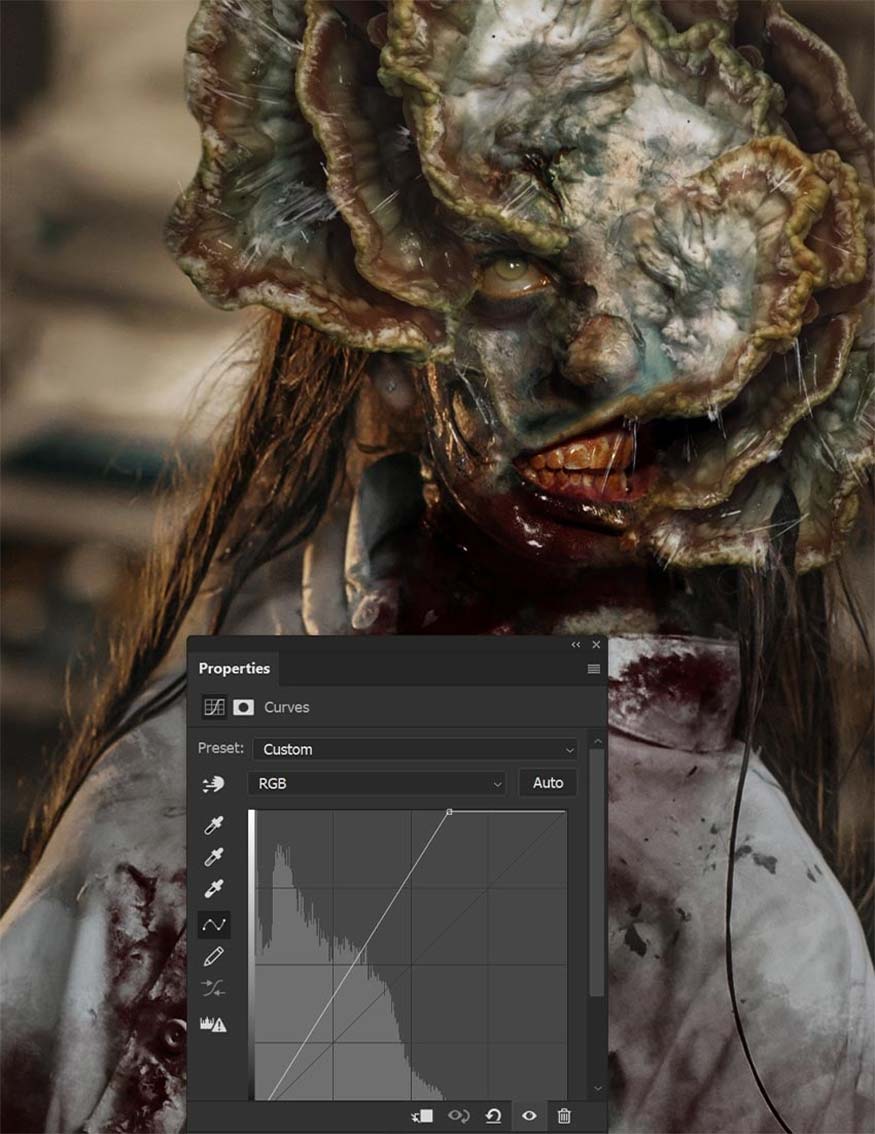
Step 1: First start by setting the Color Lookup to TealOrangeContrast at 40% Opacity.
Step 2: Next, add a second Color Lookup set to TensionGreen at 25% Opacity.
Step 3: Add a third Color Lookup set to 3Strip, Color layer mode and 100% Opacity to enhance the colors.
If the face is too dark, add more brightness using a Soft Light layer and a light blue color to create a flashlight effect on her face and body.
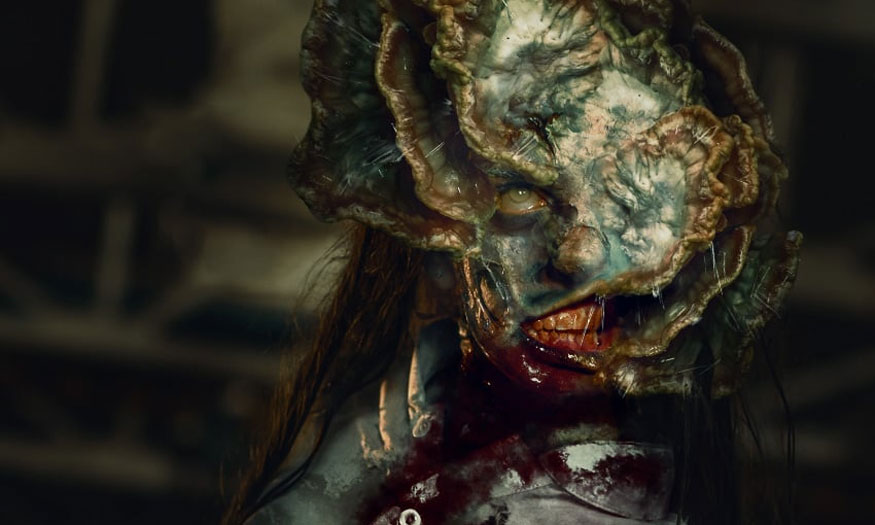
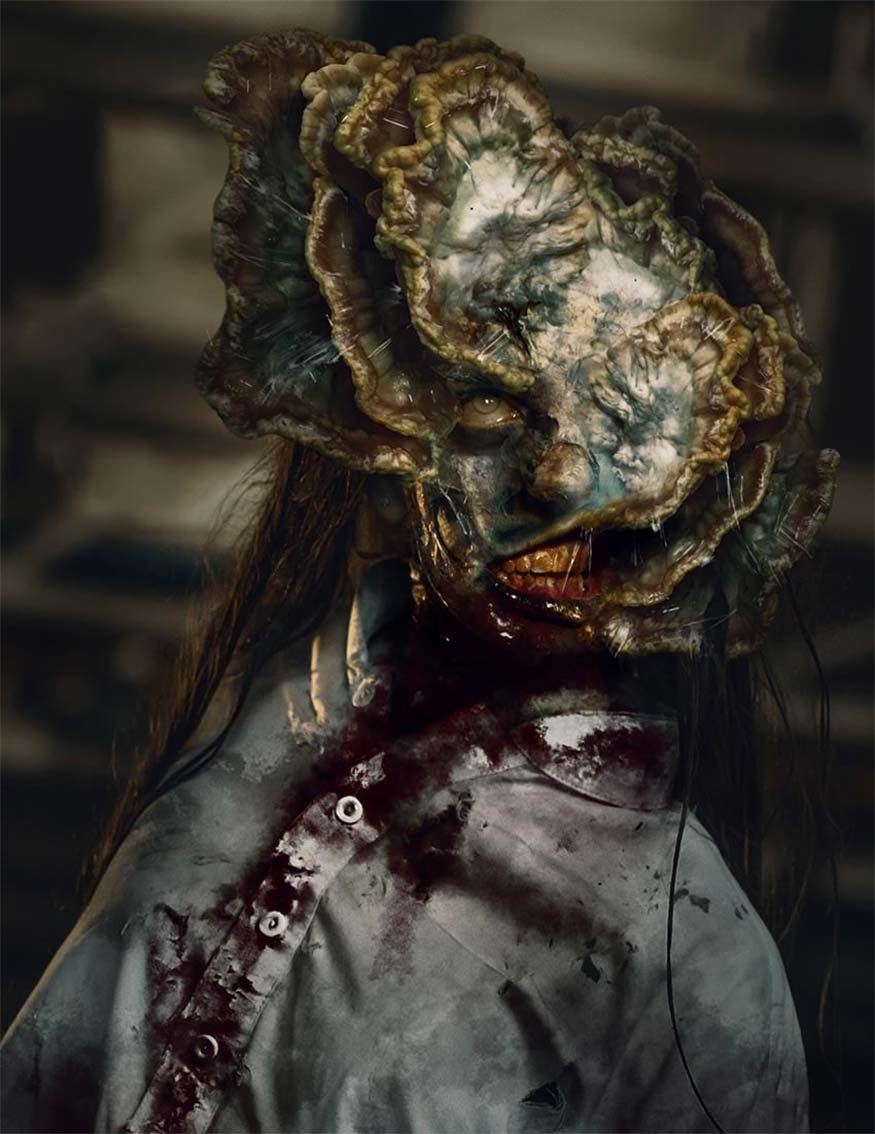
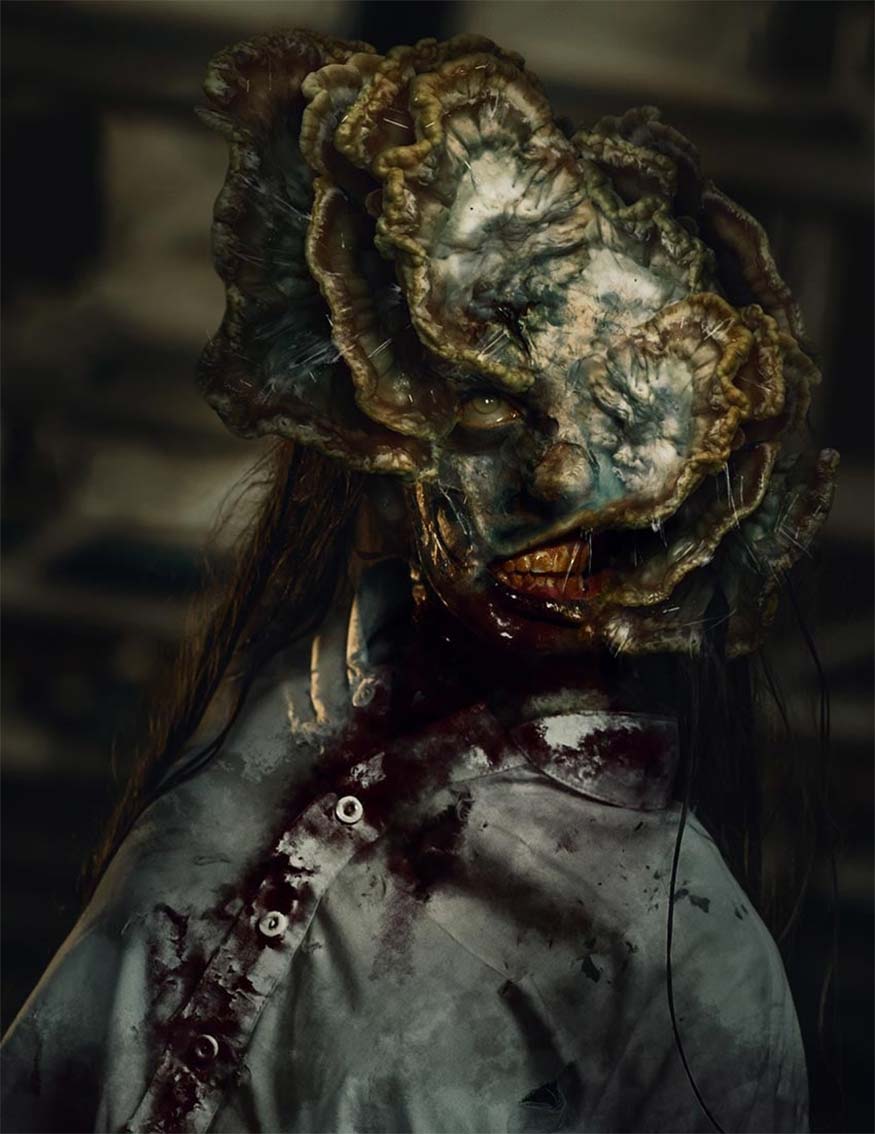
And this is the result we get. Zombies look so realistic and scary, right?
That's all it takes to create a zombie with "The Last of Us" mushrooms! There are millions of different types of mushrooms you can use to create scary zombies.
It can be seen that with just a few simple steps, we have created an extremely scary and hideous zombie in "the last of US". Try and create your own impressive zombie, wish you success with the instructions above. And don't forget to follow SaDesign to always update yourself with the most interesting information about design and photoshop!
SaDesign not only provides Retouch Panel Photoshop for quality photo editing, here, we also synthesize and share many good and attractive tutorials with Photoshop software. In addition, SaDesign also provides a lot of reputable copyrighted software at extremely cheap prices.
Installation and support contact information
🏡 SADESIGN Software Company Limited
📨 Email: phamvansa@gmail.com
🌍 Website: https://sadesign.ai
📞 Hotline/Zalo: 0868 33 9999


VIP Products


Best Selling Products
Adobe Photoshop Copyright - Full App
120 USD
Freepik Premium Account
59 USD
Upgrade Duolingo Super
29 USD
Copyright Adobe Lightroom Account
59 USD
ChatGPT Plus Account (GPT-4)
16 USD
MidJourney Account
29 USD
Autodesk All App Account Copyright
120 USD
Adobe Premiere Pro Account
99 USD
Plugin Retouch4me
69 USD
Capcut Pro 1 Year
39 USD
Genuine Cheap Canva Pro
39 USD
Windows 10 & 11 Pro Key
36 USD
Upgrade Genuine Office 365
49 USD
Genuine Adobe Illustrator account
99 USD
Upgrade genuine Capture One account
120 USD