Best Selling Products

Copyright Adobe Lightroom Account
59 USD

Genuine Adobe Illustrator account
99 USD

Genuine Cheap Canva Pro
39 USD

MidJourney Account
29 USD

Capcut Pro 1 Year
39 USD

Windows 10 & 11 Pro Key
36 USD

Freepik Premium Account
59 USD

Autodesk All App Account Copyright
120 USD

Adobe Premiere Pro Account
99 USD

Upgrade Duolingo Super
29 USD

Upgrade Genuine Office 365
49 USD

Upgrade genuine Capture One account
120 USD

Adobe Photoshop Copyright - Full App
120 USD

ChatGPT Plus Account (GPT-4)
16 USD

Plugin Retouch4me
69 USD
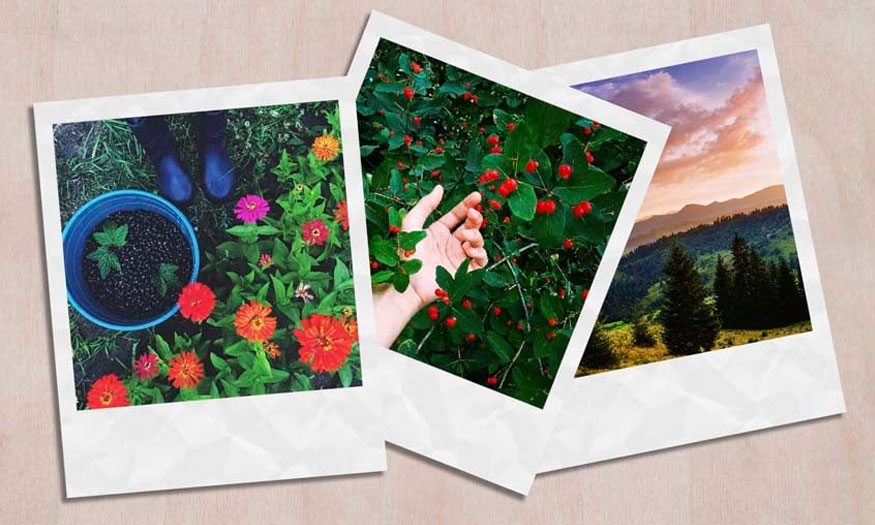
Easily create blurred glass effects in Photoshop with SaDesign
Nội dung
Frosted glass effects are very popular in graphic design, helping to create sophisticated and modern images. Photoshop offers many tools so you can create these effects easily and realistically. Join Sadesign to learn in detail how to create blurred glass effects in Photoshop in the following article so you can apply it to your designs.
1. How to create blurred glass effect in Photoshop
To create a blurred glass effect in Photoshop, we follow these basic steps:
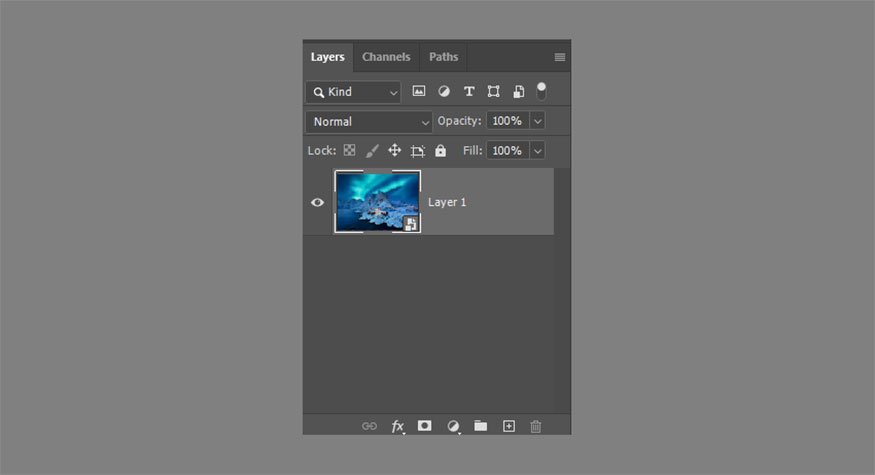
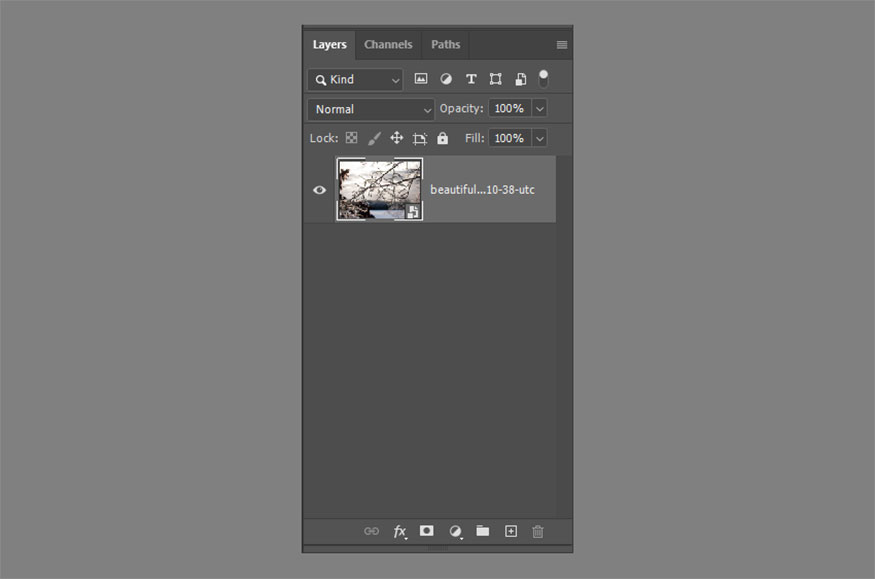
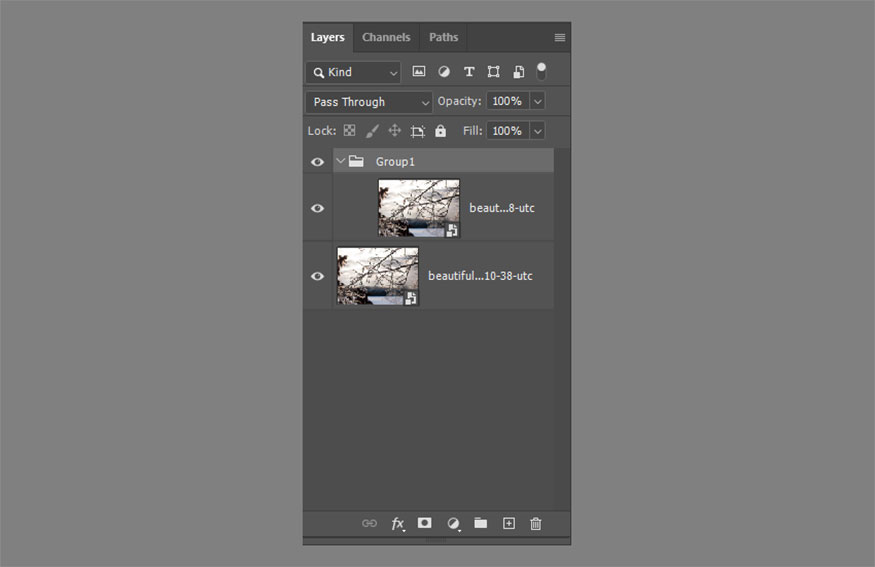
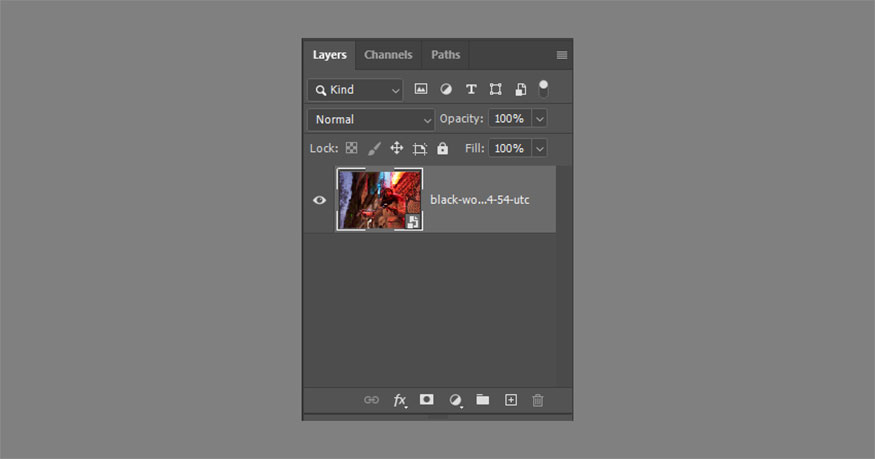
Step 1: Let's start with the most basic Photoshop glass effect, first open the image in Photoshop > right click on the image and select Convert to Smart Object. This step helps you easily replace the image later while still ensuring the glass effect is preserved.
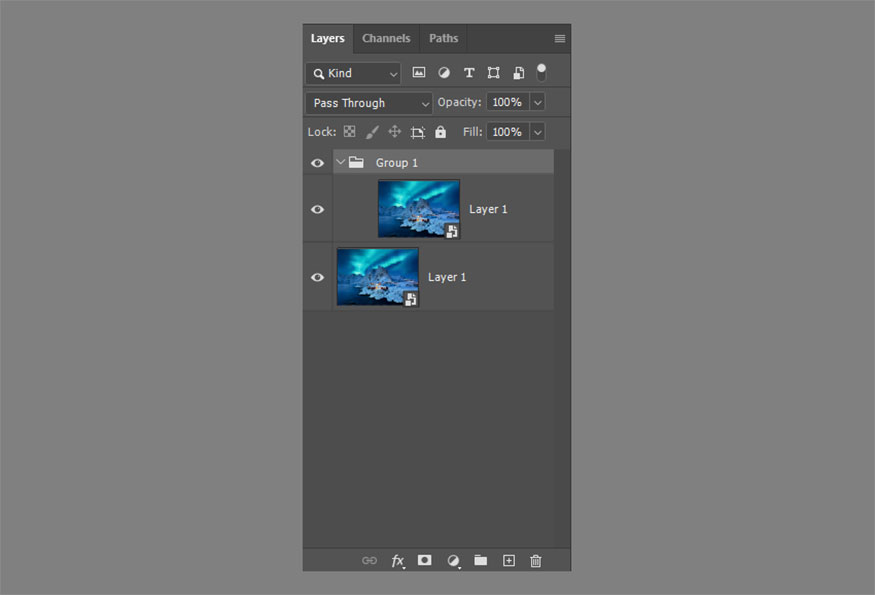
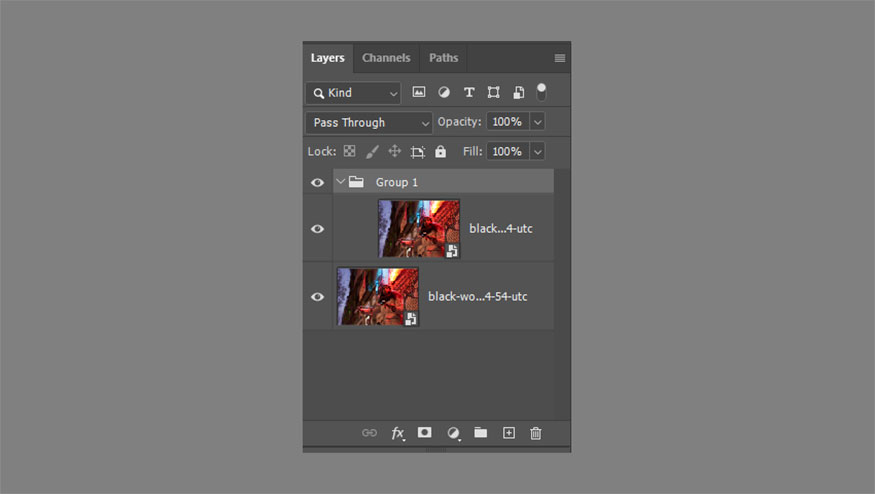
Step 2: Copy the smart object (Ctrl-J) and put it in the group (Ctrl-G).
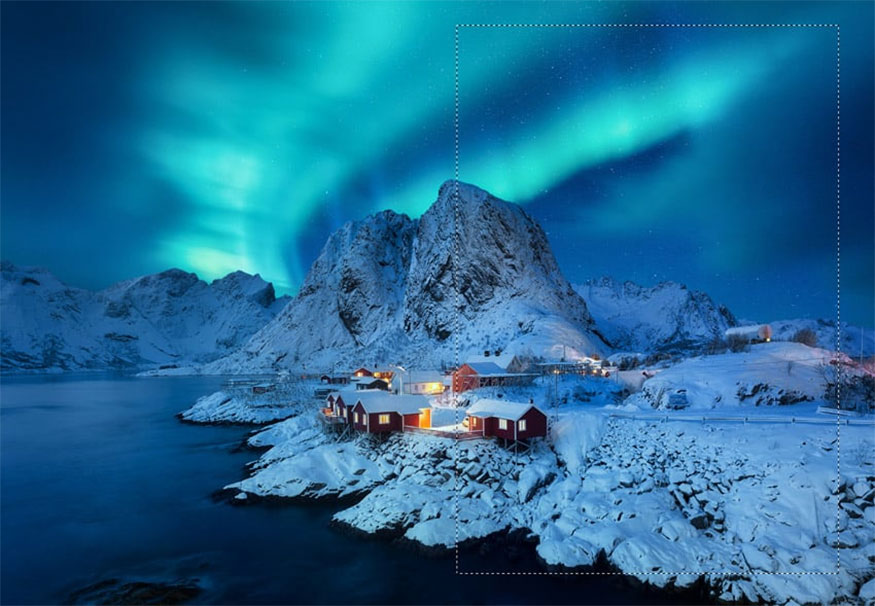
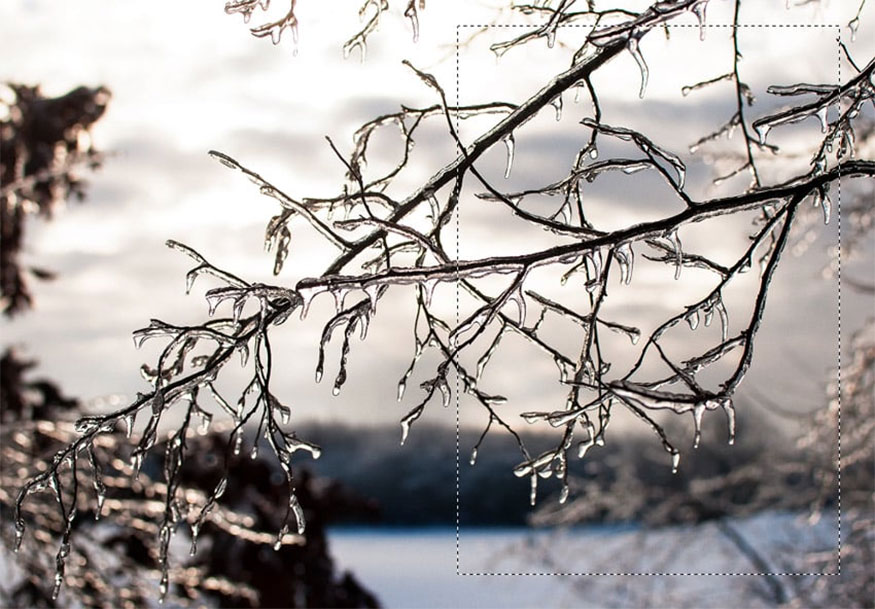
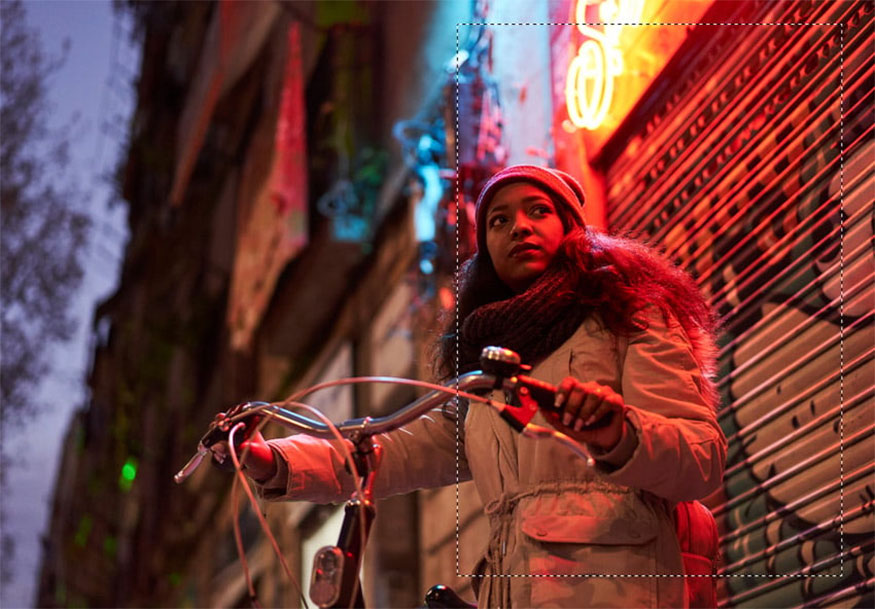
Step 3: Use the Rectangular Marquee Tool (M) or any other selection tool to select the area where you want to apply the frosted glass effect. Then add a Layer Mask to the group.
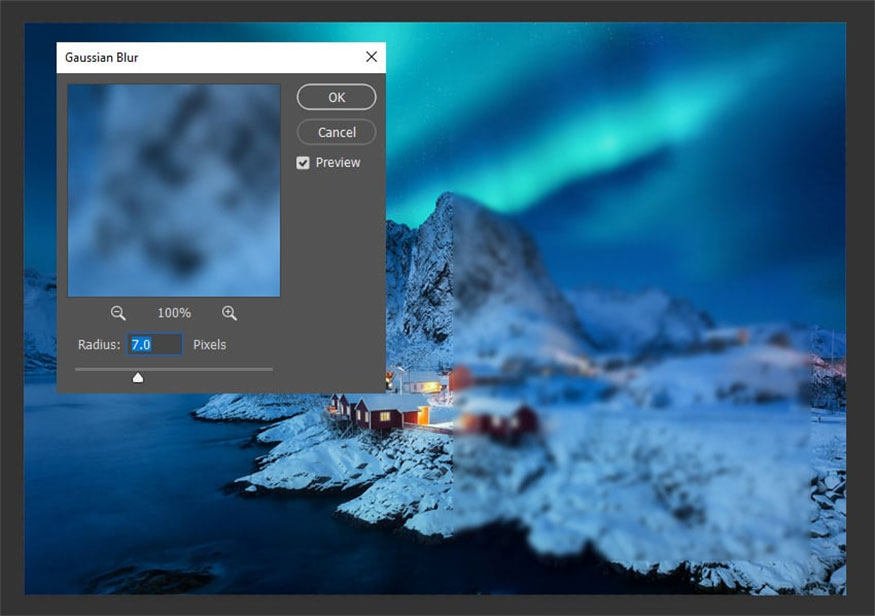
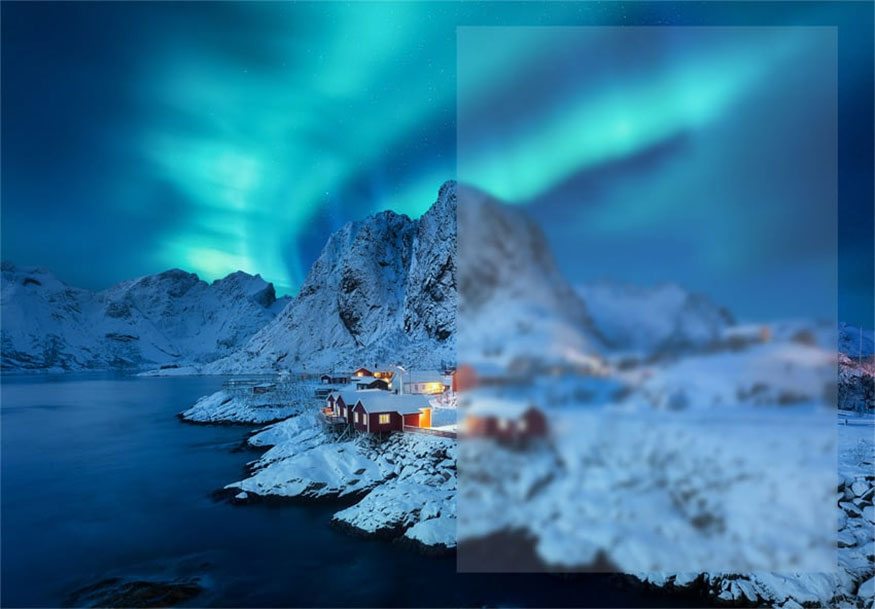
Step 4: Select the layer inside the group and go to Filter > Blur > Gaussian Blur. Adjust the Radius according to the effect you want to achieve.
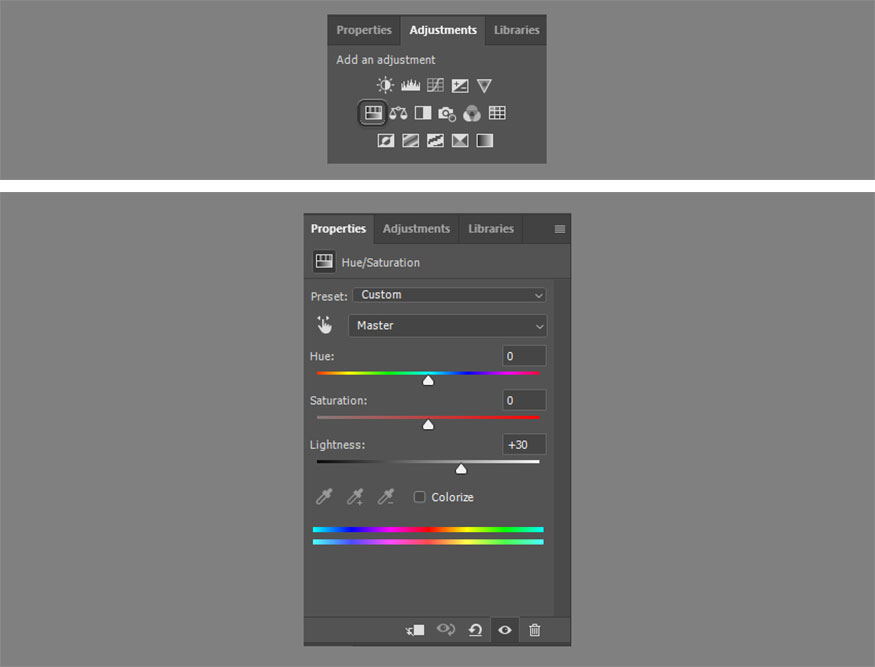
Step 5: So our Photoshop frosted glass effect is almost complete. The frosted glass effect not only blurs the image but also brightens it, so you need to brighten the image using a Hue/Saturation adjustment layer. Increase Lightness to about 30.
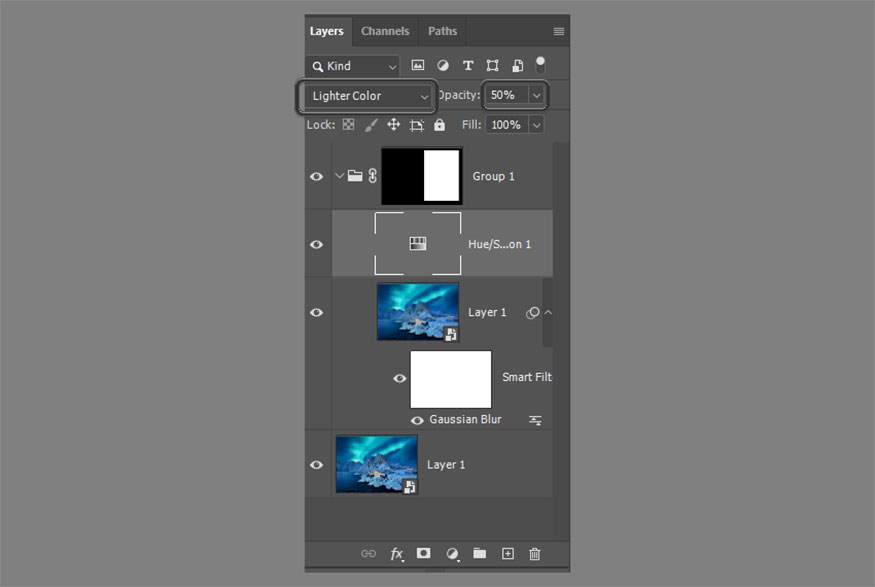
Step 6: To make them more realistic you need to change the Blend Mode to Lighter Color and adjust the Opacity to about 50%.
Như vậy là chúng ta đã hoàn thành đối với hiệu ứng kính mờ.
2. How to create a textured frosted glass effect in Photoshop
Below are detailed steps to create a textured frosted glass effect in Photoshop:
Step 1: If you want to create a more detailed glass texture in Photoshop, start by turning the image into a smart object (right click > convert to Convert to Smart Object).
Step 2: Copy the smart object (Ctrl-J) and put it in the group (Ctrl-G).
Step 3: Use the Rectangular Marquee tool (M) or any other selection tool to select the area where you want to apply the textured glass effect. Then add a layer mask to the group.
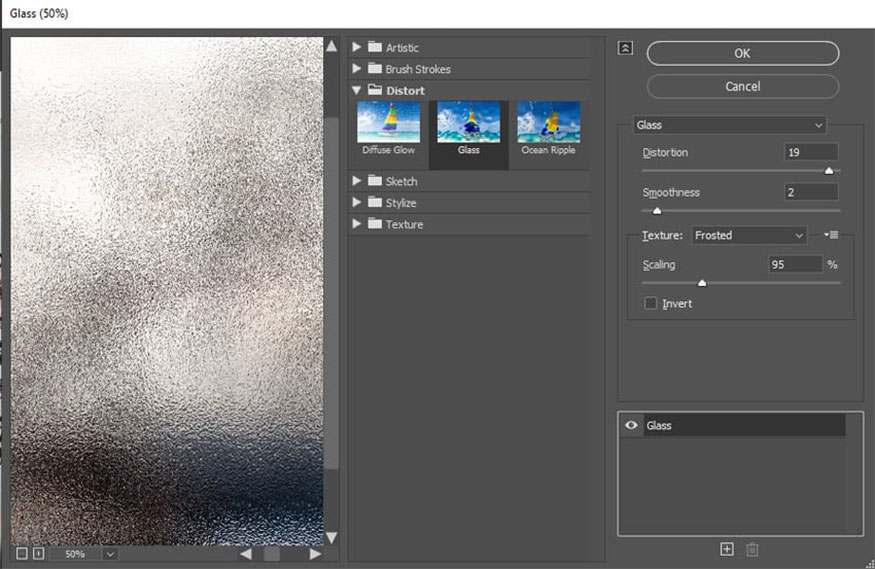
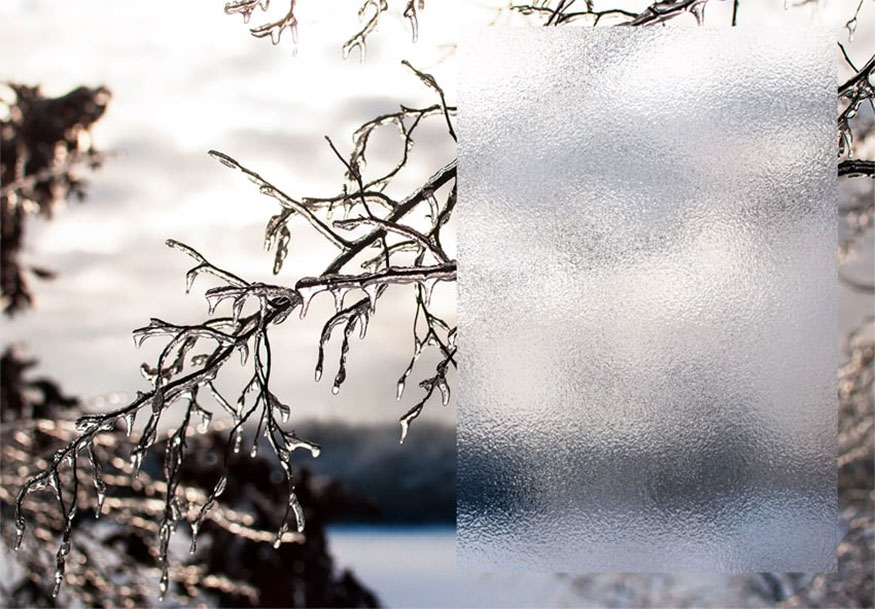
Step 4: Select the layer inside the group and go to Filter > Filter Gallery. Open the Distort tab and select Glass, use the Frosted texture and adjust the settings to create the effect you need. Below are the parameters we set:
Distortion: 19
Smoothness: 3
Scaling: 139%.

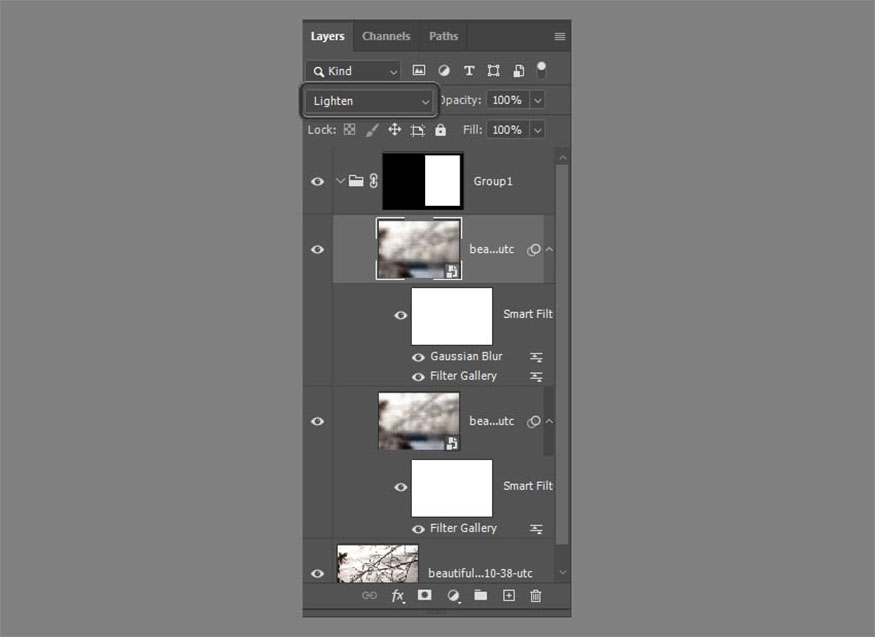
Step 5: The textured frosted glass effect is clearly visible but looks a bit rough. So we need to make a few adjustments, you need to duplicate this layer (Ctrl-J) and double click on the Filter Gallery filter. Next change the values to make the overlay smaller, almost like noise. Here are the values we use:
Distortion: 19
Smoothness: 2
Scaling: 95%.
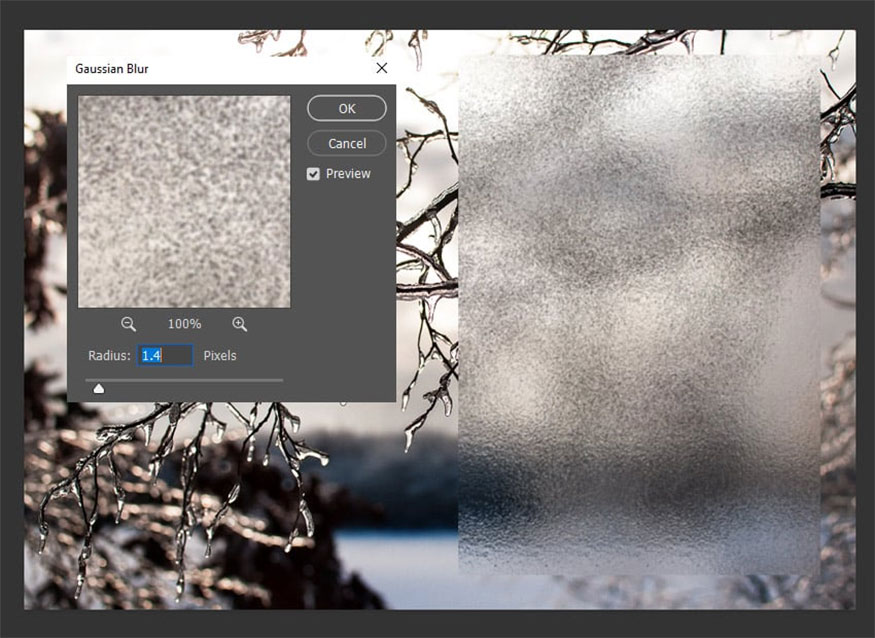
Step 6: Go to Filter > Blur > Gaussian Blur then add a little blur to this noise.
Step 7: Change the Blend Mode to Lighten to blend the effects of these two layers together. Drag this second layer up a bit and to the right for a more convincing distortion.
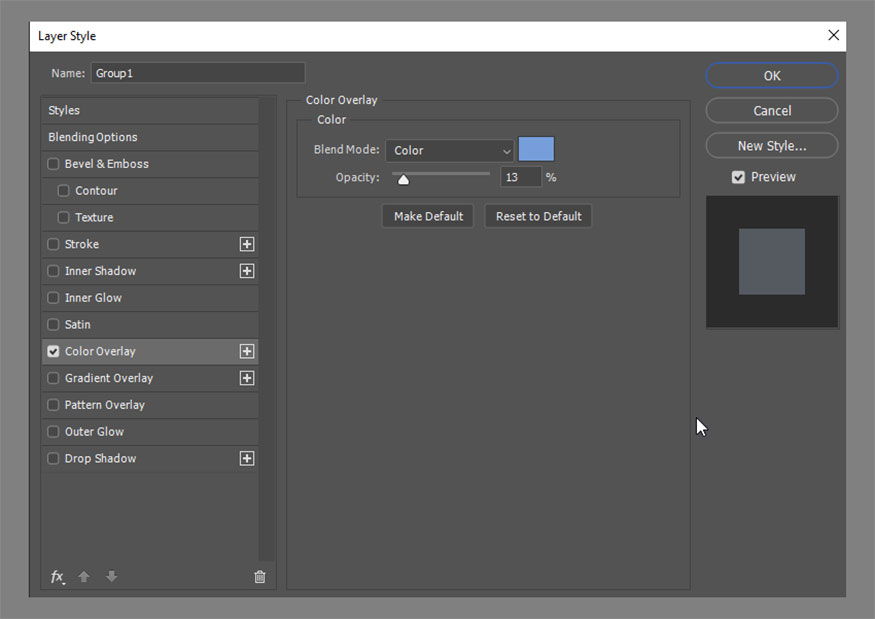
Step 8: Let's add some finishing touches by right-clicking on the group and selecting Blending Options. Check the Color Overlay and set it to blue (color code #769eda), Blend Mode to Color and Opacity to about 13%. This step will give the glasses a nice winter look. You are free to use other colors to complement the color palette of the photo.
Step 9: Add Inner Glow, this option makes the glass effect more beautiful. Here are the settings we used to make the glass brighter from the inside:
Blend Mode: Overlay
Opacity: 14%
Noise: 59%
Color: White
Technique: Softer
Source: Center
Choke: 40%
Size: 213%
Range: 100%
Jitter: 0%
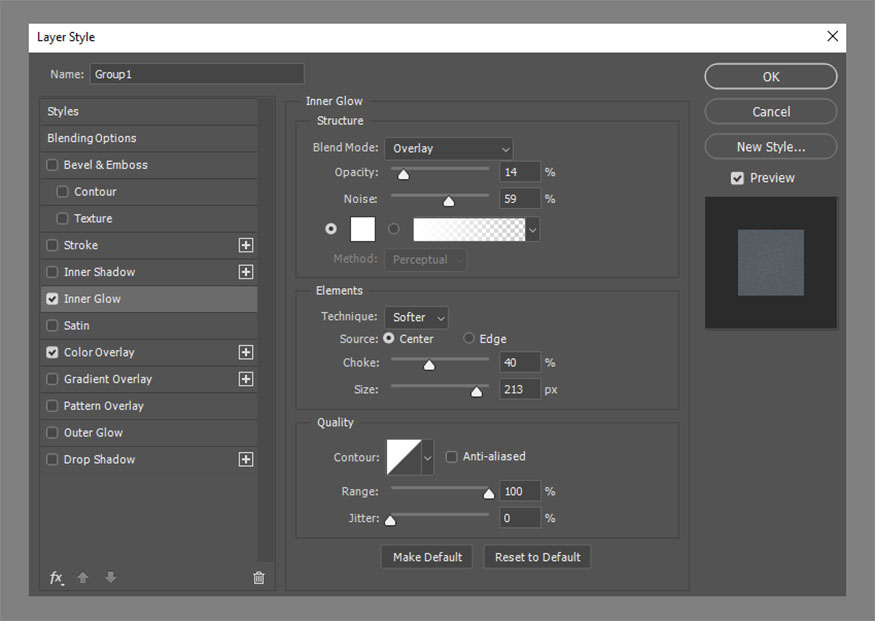
This value may vary depending on the size of your image. So we have completed the textured glass effect.
3. How to create a reflective glass effect in Photoshop
To create a reflective glass effect in Photoshop, follow these basic steps:
Step 1: To start you also need to turn your image into a Smart Object (right click > Convert to Smart Object).
Step 2: Copy the smart object (Ctrl-J) and put it in the group (Ctrl-G).
Step 3: Use the Rectangular Marquee Tool (M) or any other selection tool to select the area where you want to apply the textured glass effect. Then add a layer mask to the group.
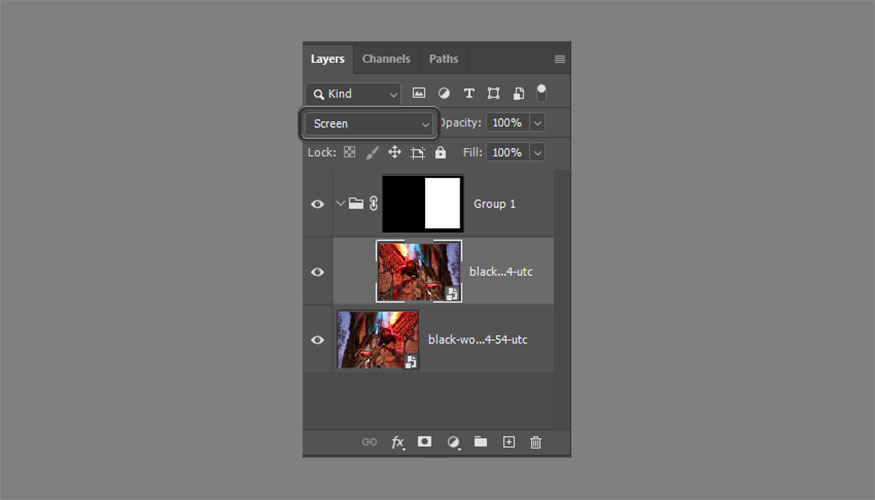
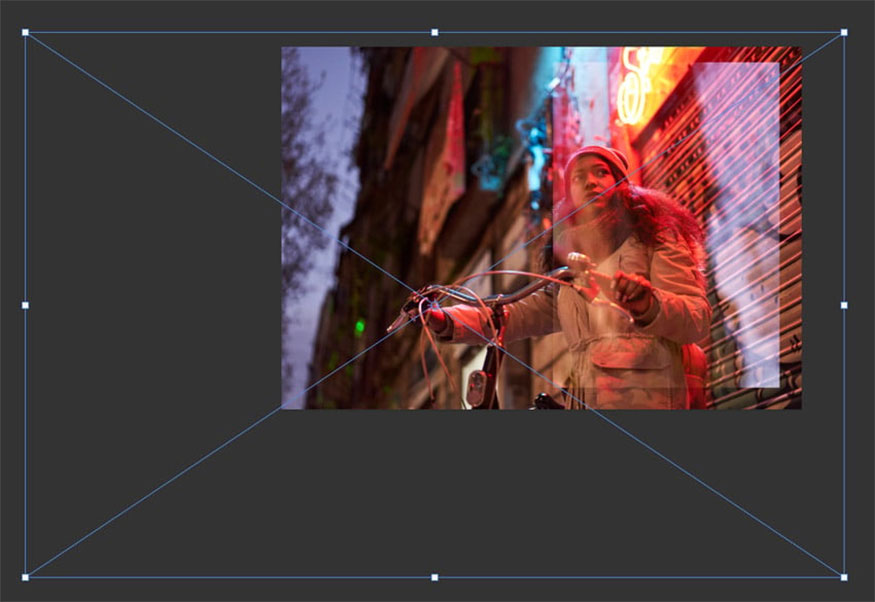
Step 4: Change the blending mode of the layer in the group to Screen. Then you need to go to Edit > Transform > Flip Horizontal.
Step 5: To make the reflection more realistic, press Ctrl-T to resize and drag the reflection around. This step allows you to remove any obvious reflections from the main area (any pixels that take attention away from the subject of the photo).
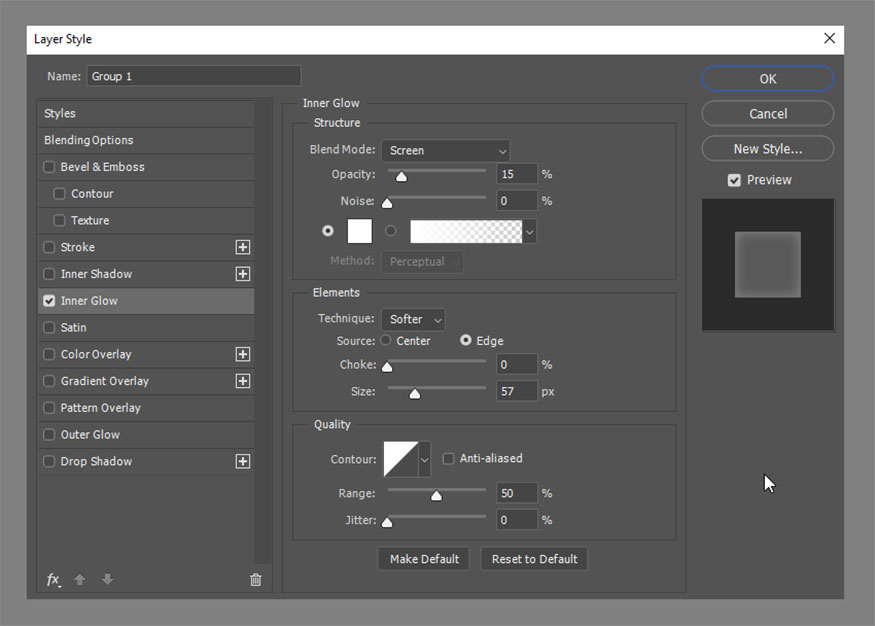
Step 6: Right click on the group and select Blending Options. Check Inner Glow and adjust the following settings:
Blend Mode: Screen
Opacity: 15%
Noise: 0%
Color: white
Technique: Softer
Source: Edge
Choke: 0%
Size: 57%
Range: 50%
Jitter: 0%
This value may vary depending on the size of your image.
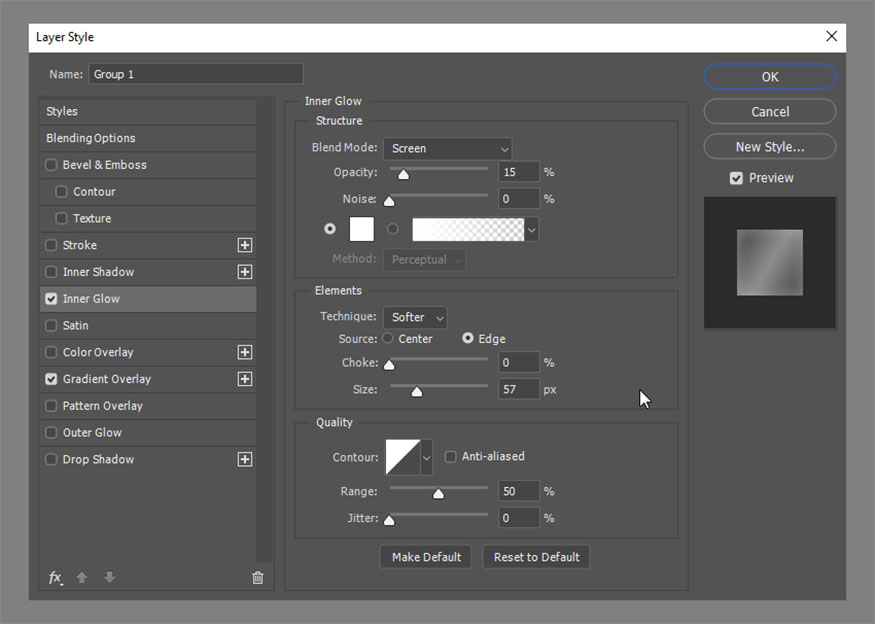
Step 7: Add Gradient Overlay then make the following settings:
Blend Mode: Screen
Opacity: 30%
Gradient: black and white (or reversed)
Style: Reflected
Angle: 148
Scale: 100%.
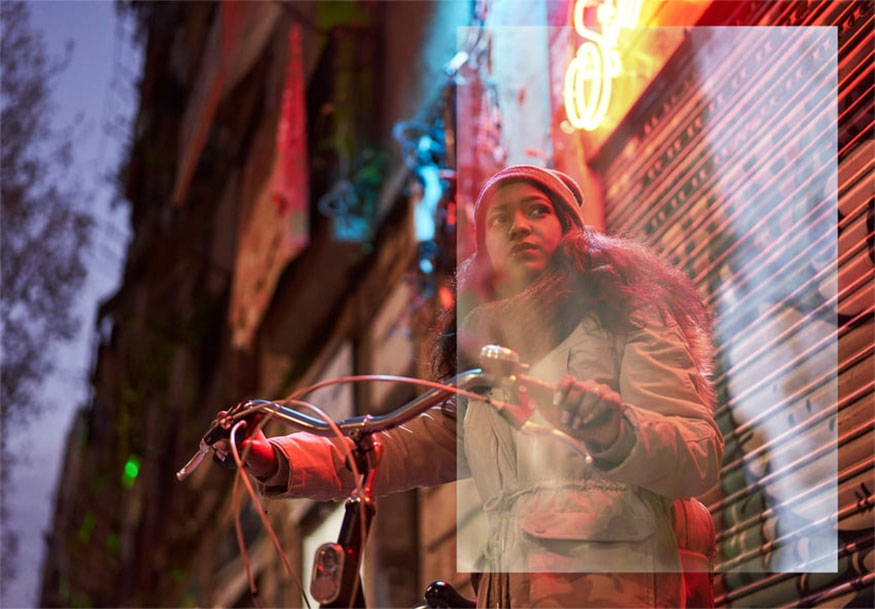
Step 8: Finally, add a Color Overlay to reduce the contrast in the reflection. Use Color as Blend Mode, low Opacity (about 13%), use green color (color code #24a268).

So we have completed the reflective glass effect.
Above are extremely simple ways to create blurred glass effects in Photoshop. Wishing you success in applying the frosted glass effect to your designs. Don't forget to follow Sadesign to update more useful and interesting information!
So, with SaDesign you have gone through all the instructions for creating blurred glass effects in Photoshop. The illustrations in the article are all made using copyrighted Photoshop application. To ensure the best effect and image quality, it is best to use copyrighted Photoshop software. SaDesign not only provides Retouch Panel Photoshop with more than 600 powerful functions, in addition, we also provide copyrighted software and applications at the cheapest prices, including copyrighted Adobe Photoshop, at a much cheaper price. Many times you buy directly from the homepage, but the functions are equivalent.
Installation and support contact information
🏡 SADESIGN Software Company Limited
📨 Email: phamvansa@gmail.com
📞 Hotline/Zalo: 0868 33 9999


VIP Products


Best Selling Products
Copyright Adobe Lightroom Account
59 USD
Genuine Adobe Illustrator account
99 USD
Genuine Cheap Canva Pro
39 USD
MidJourney Account
29 USD
Capcut Pro 1 Year
39 USD
Windows 10 & 11 Pro Key
36 USD
Freepik Premium Account
59 USD
Autodesk All App Account Copyright
120 USD
Adobe Premiere Pro Account
99 USD
Upgrade Duolingo Super
29 USD
Upgrade Genuine Office 365
49 USD
Upgrade genuine Capture One account
120 USD
Adobe Photoshop Copyright - Full App
120 USD
ChatGPT Plus Account (GPT-4)
16 USD
Plugin Retouch4me
69 USD