Best Selling Products

Freepik Premium Account
59 USD

Adobe Premiere Pro Account
99 USD

Genuine Adobe Illustrator account
99 USD

MidJourney Account
29 USD

Genuine Cheap Canva Pro
39 USD

Autodesk All App Account Copyright
120 USD

ChatGPT Plus Account (GPT-4)
16 USD

Upgrade Genuine Office 365
49 USD

Windows 10 & 11 Pro Key
36 USD

Plugin Retouch4me
69 USD

Copyright Adobe Lightroom Account
59 USD

Adobe Photoshop Copyright - Full App
120 USD

Upgrade Duolingo Super
29 USD

Upgrade genuine Capture One account
120 USD

Capcut Pro 1 Year
39 USD
How to create a Polaroid template in Photoshop
Nội dung
Polaroid photo effects make your images more vivid and impressive. So if you want to preserve beautiful moments, Polaroid photos are the perfect choice. The content of the following article SaDesign will guide you how to create a simple and impressive Polaroid template in Photoshop.

Polaroid photo effects make your images more vivid and impressive. So if you want to preserve beautiful moments, Polaroid photos are the perfect choice. The content of the following article SaDesign will guide you how to create a simple and impressive Polaroid template in Photoshop.
1. What are Polaroid photos?
Polaroid photos are photos printed from instant cameras, also known as Instant Camera. This type of photo is usually about 5.8cm x 8.7cm in size with a white border surrounding the image.
Polaroid photos possess the following impressive features:
- Compact size, convenient to carry.
- After taking a photo, the photo will be printed in just a few minutes.
- Photo quality is classic and slightly blurred colors.
- Polaroid photos have a white border around them, creating a unique look.
- Polaroid photos have high commemorative value, used to preserve special moments authentically.
Polaroid photos can be used to paste into notebooks, albums to preserve memories or used to hang on walls to decorate your home.
In addition, Polaroid photos are also used to make postcards to send to friends, relatives or are also items that many people love to collect.
2. How to create a Polaroid template in Photoshop
2.1. How to prepare a document
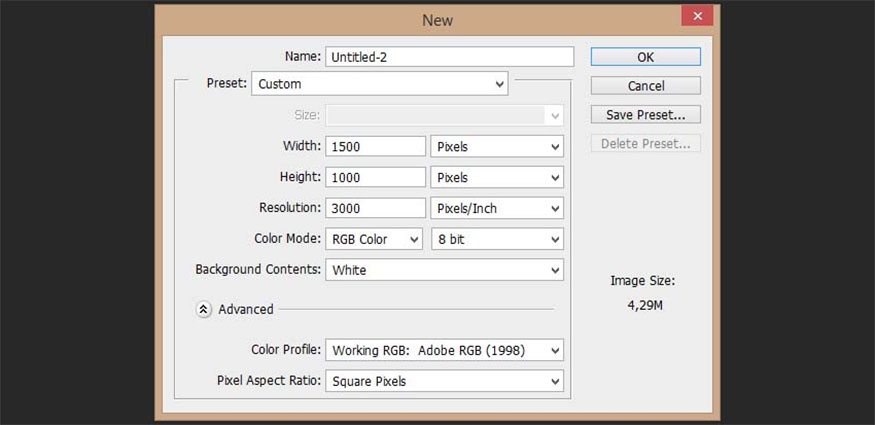
Step 1: You need to create a new document by pressing Ctrl-N, set the document size to 1500 x 1000 px.
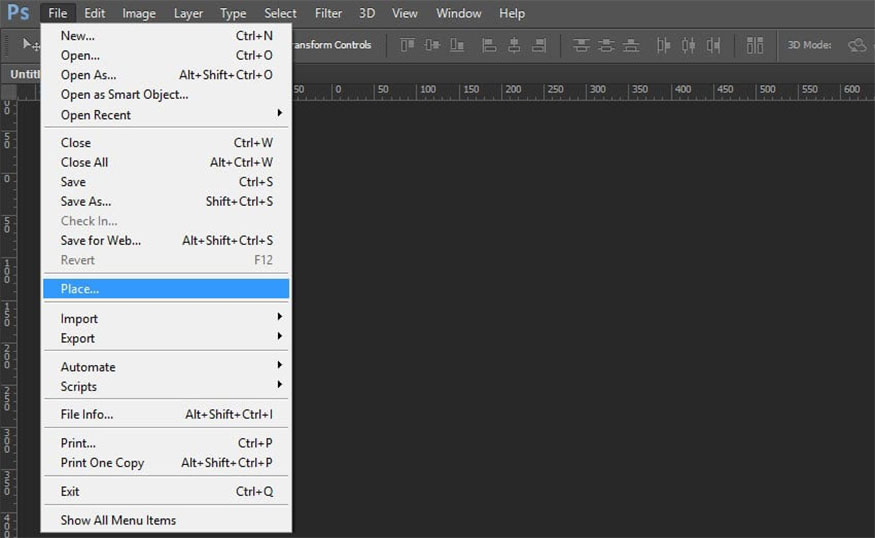
Step 2: Go to File => Place and place the wood texture on top of the Polaroid template's background layer.
2.2. How to create a Polaroid photo frame template in Photoshop
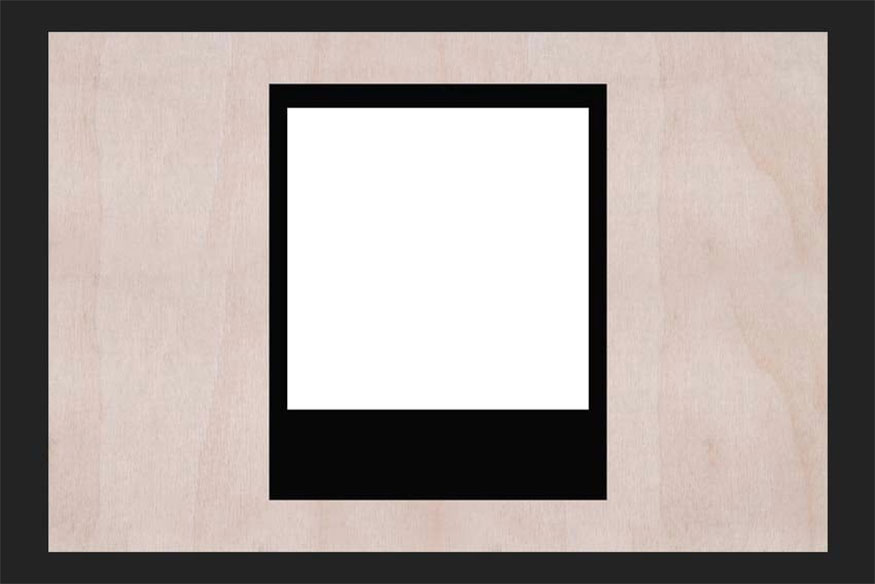
Step 1: Press U to create a rectangle, make sure the Stroke setting is turned off and the Polaroid photo dimensions are as follows: Width 650px and height 800px.

Step 2: Create another rectangle but use the following Polaroid photo size settings: Width 580px and height 580px.

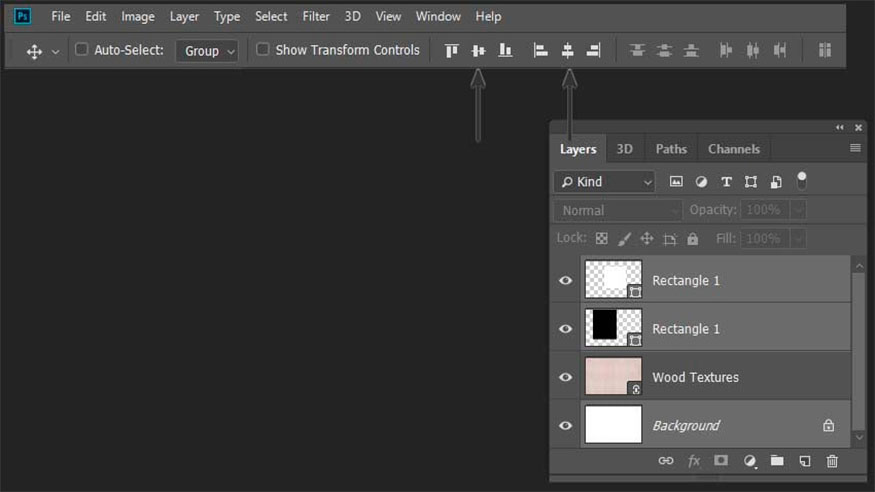
Step 3: Select both the shape and the background layer, then align them to the center of the document.
Step 4: Move the second Polaroid film sample up 65 px while holding down the Shift key.
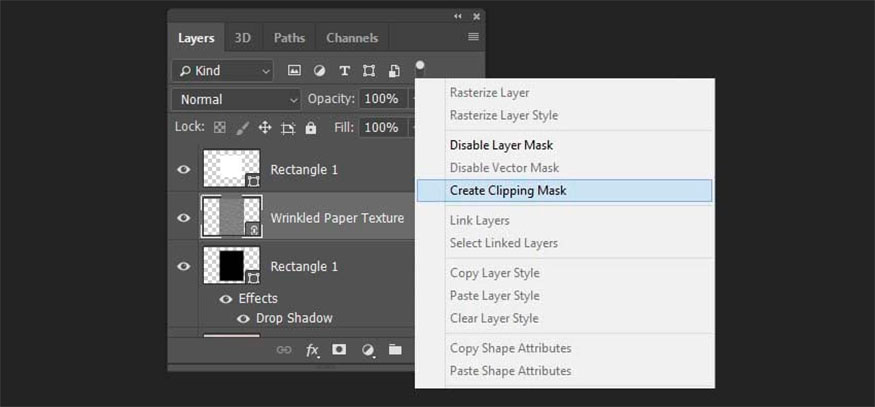
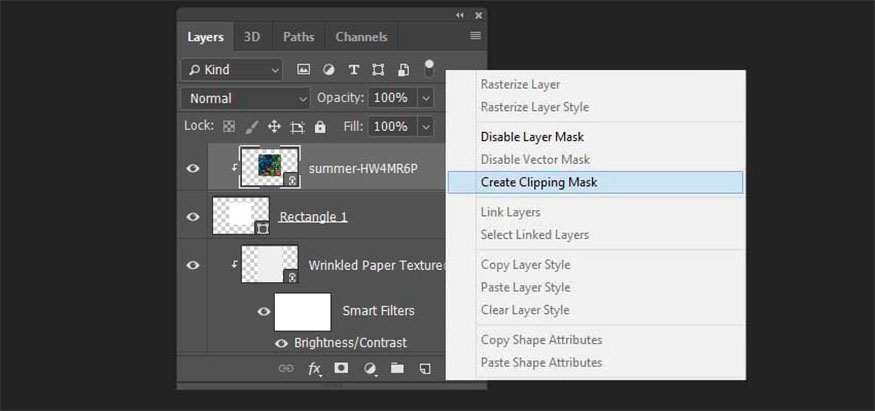
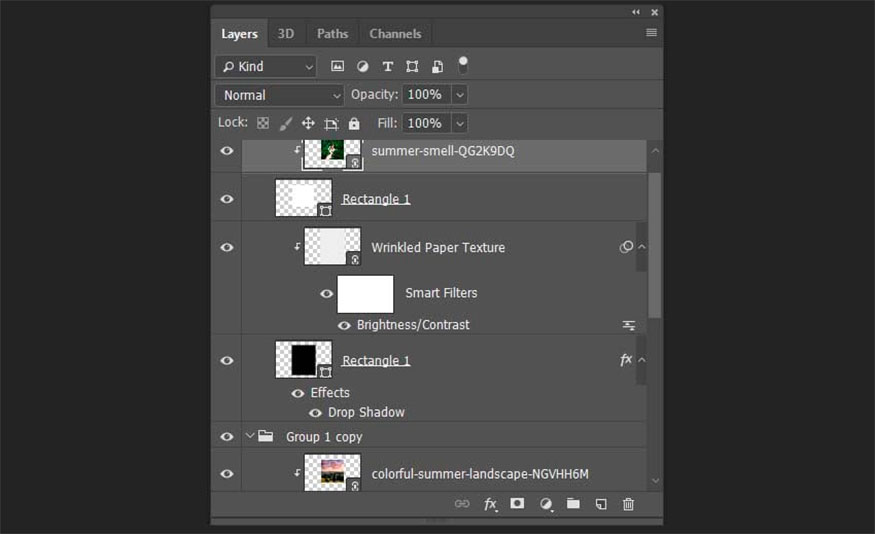
Step 5: Place the paper texture above the first shape, right-click and select Create Clipping Mask.
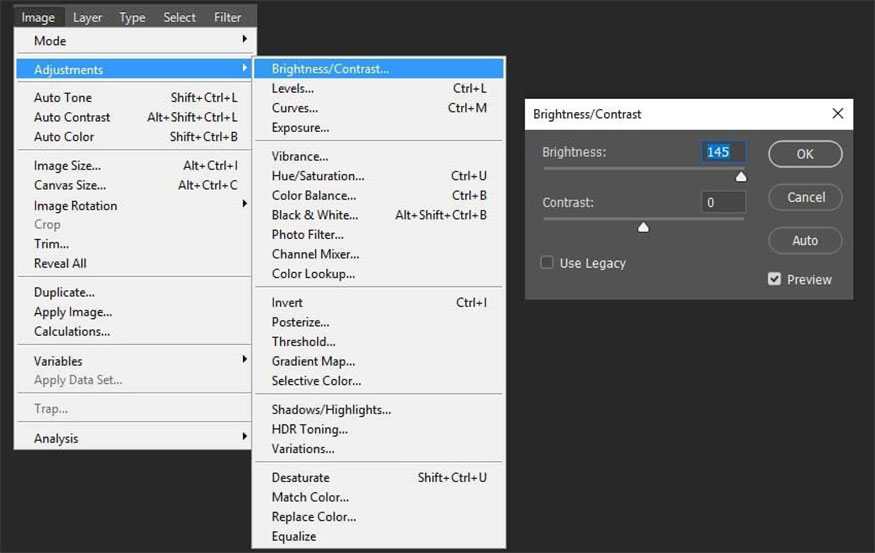
Step 6: You can see that the texture of this paper looks quite dark, so make them brighter by selecting the texture => go to Image => Adjustments => Brightness/Contrast and set as follows: Brightness: 145; Contrast: 0.
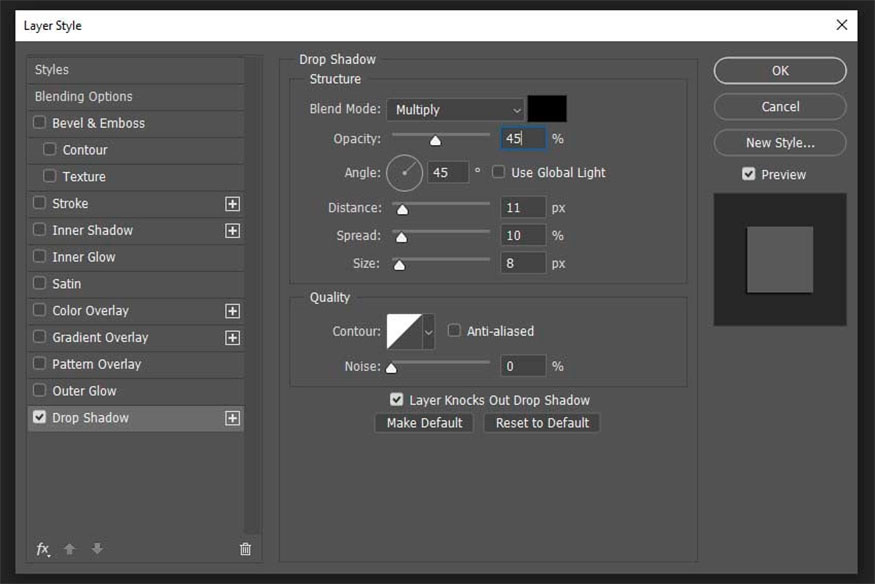
Step 7: Add drop shadow to the template, select the first shape and double click => Drop Shadow, make the following settings:
- Color: Black
- Blend Mode: Multiply
- Opacity: 45%
- Distance: 11
- Spread: 10
- Size: 8.
2.3. How to put photos into Photoshop's Polaroid frame template
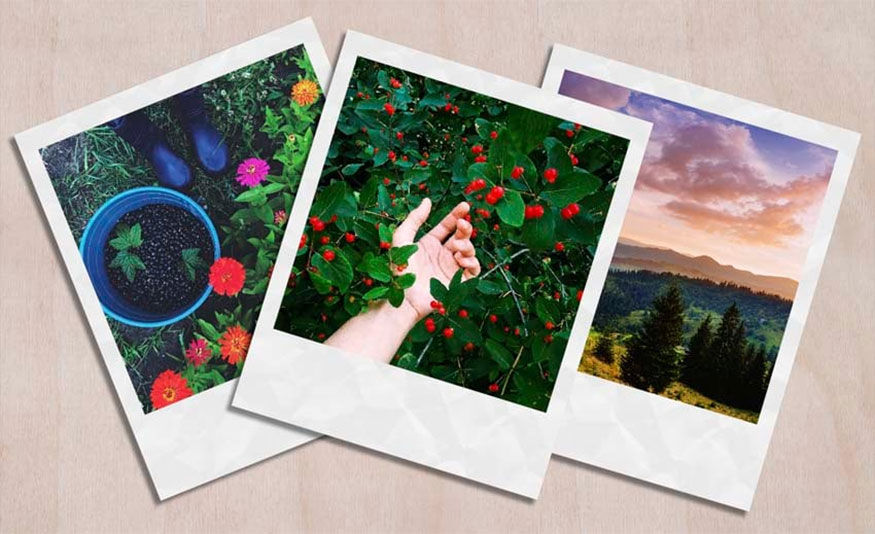
Now we can easily turn photos into Polaroids. Place the image on top of the second one and right-click and select Create a Clipping Mask.
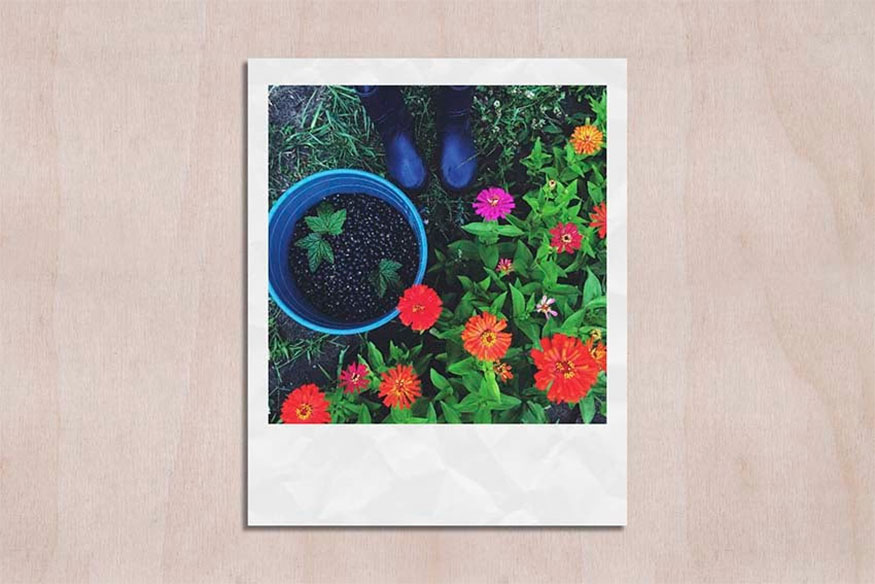
This is the result:
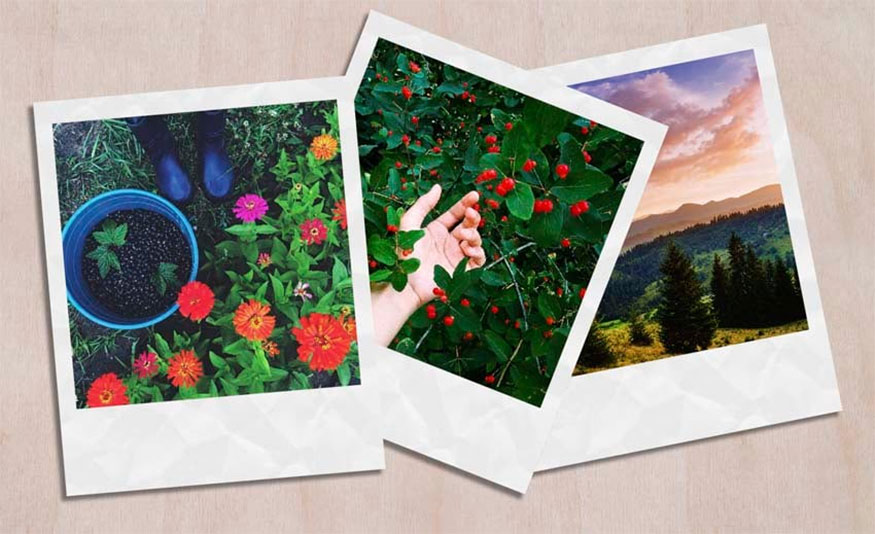
2.4. How to create a Photoshop Polaroid collage template
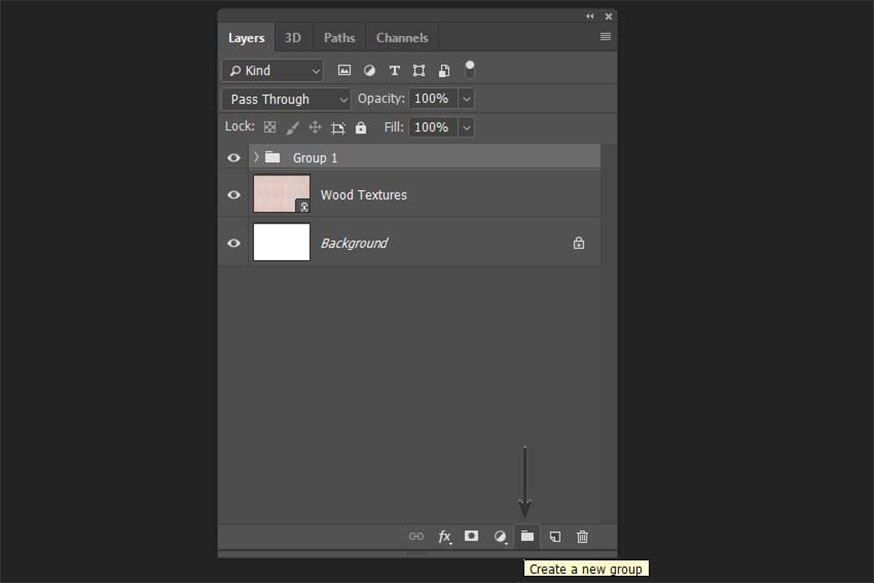
Step 1: If you want to create multiple Polaroid frames, you need to group all the elements together. Select them in the layers panel and press Create a New Group.
Step 2: Make 2 copies of this group by pressing Ctrl-J.
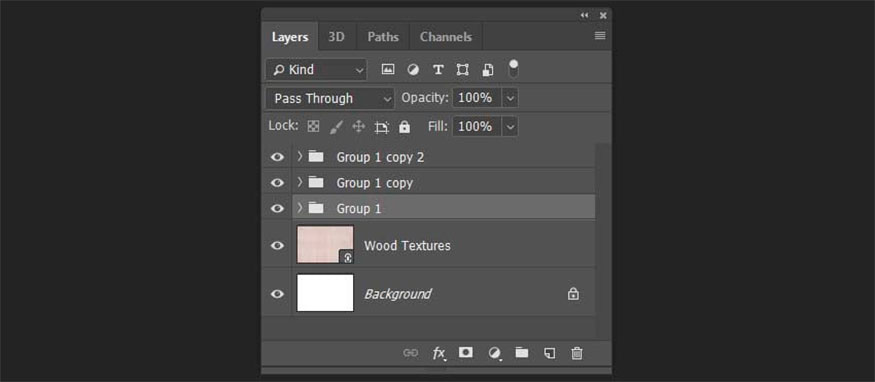
Step 3: Delete photos from the last two groups and replace them with any other photos.
Step 4: After placing the image, switch the sample groups by pressing Control-T. You can move and rotate them as you like.
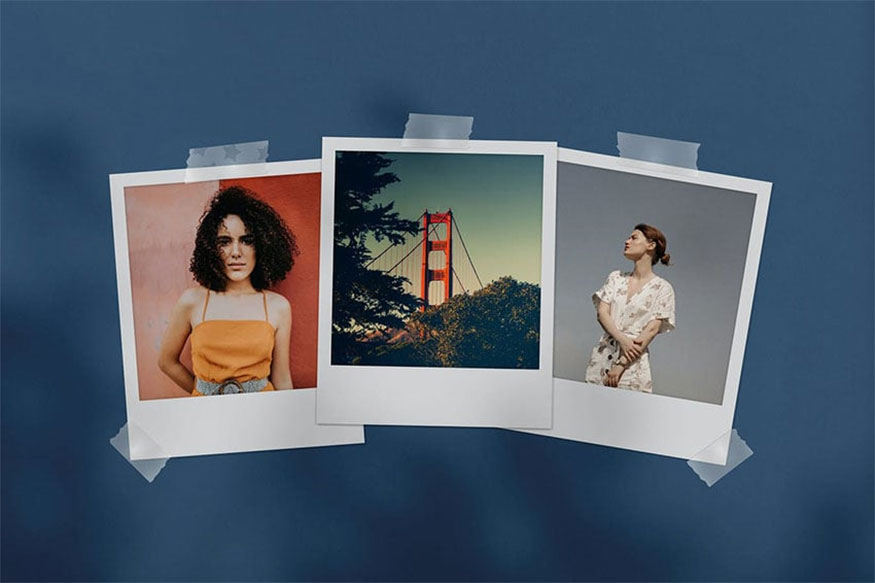
This is the final result:
Wishing you success in creating a Polaroid model in Photoshop with the detailed instructions Sadesign brings above. Let's transform a variety of styles to create the most impressive photos!


VIP Products


Best Selling Products
Freepik Premium Account
59 USD
Adobe Premiere Pro Account
99 USD
Genuine Adobe Illustrator account
99 USD
MidJourney Account
29 USD
Genuine Cheap Canva Pro
39 USD
Autodesk All App Account Copyright
120 USD
ChatGPT Plus Account (GPT-4)
16 USD
Upgrade Genuine Office 365
49 USD
Windows 10 & 11 Pro Key
36 USD
Plugin Retouch4me
69 USD
Copyright Adobe Lightroom Account
59 USD
Adobe Photoshop Copyright - Full App
120 USD
Upgrade Duolingo Super
29 USD
Upgrade genuine Capture One account
120 USD
Capcut Pro 1 Year
39 USD