Best Selling Products

Plugin Retouch4me
69 USD

Adobe Premiere Pro Account
99 USD

Upgrade genuine Capture One account
120 USD

Genuine Adobe Illustrator account
99 USD

Genuine Cheap Canva Pro
39 USD

Upgrade Duolingo Super
29 USD

Adobe Photoshop Copyright - Full App
120 USD

Capcut Pro 1 Year
39 USD

ChatGPT Plus Account (GPT-4)
16 USD

Windows 10 & 11 Pro Key
36 USD

Upgrade Genuine Office 365
49 USD

Freepik Premium Account
59 USD

MidJourney Account
29 USD

Copyright Adobe Lightroom Account
59 USD

Autodesk All App Account Copyright
120 USD
Create a chalk text effect in Photoshop using SaDesign
Nội dung
Are you interested in creating a chalk text effect in Photoshop? Then don't miss Sadesign's tutorial to apply to your design. The results will be extremely impressive!

Are you interested in creating a chalk text effect in Photoshop? Then don't miss Sadesign's tutorial to apply to your design. The results will be extremely impressive!

1. Instructions for creating a background for a chalk effect in Photoshop
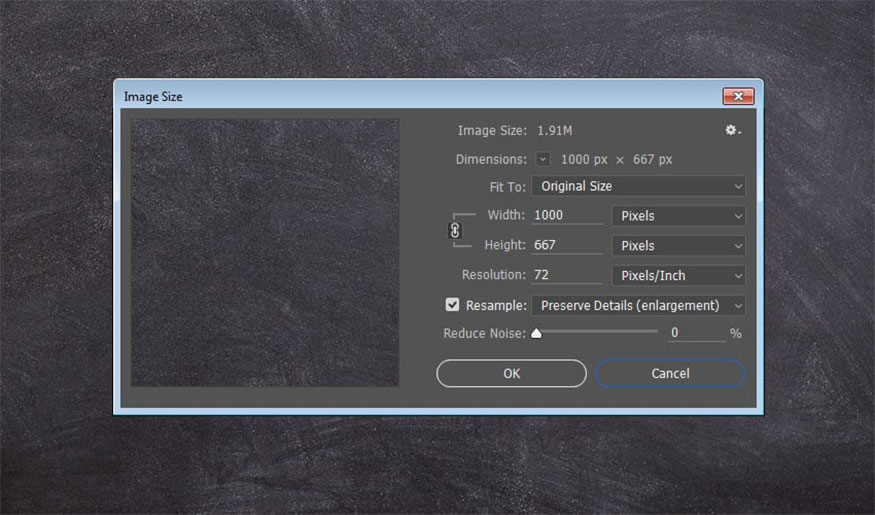
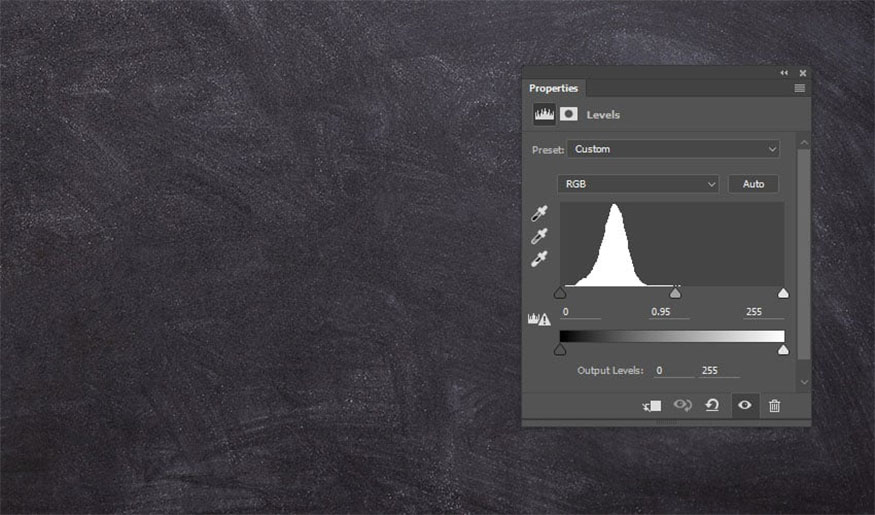
Step 1: First, you need to open the gray chalkboard wallpaper, then go to Image => Image Size, set Width to 1000px.
Step 2: Click Create new fill or adjustment layer at the bottom of the layers panel and select Levels.
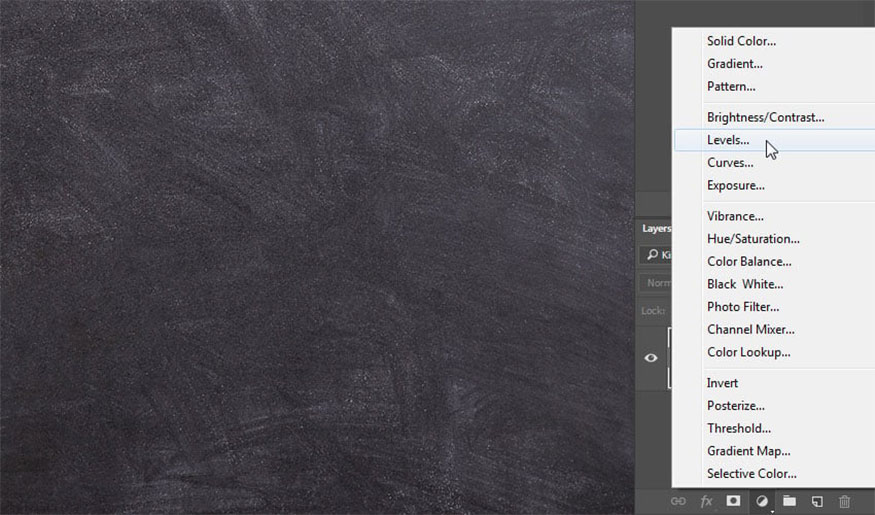
Step 3: Set the value of Gamma to 0.95 to darken the texture a bit.
2. How to create a chalk font and chalk layers
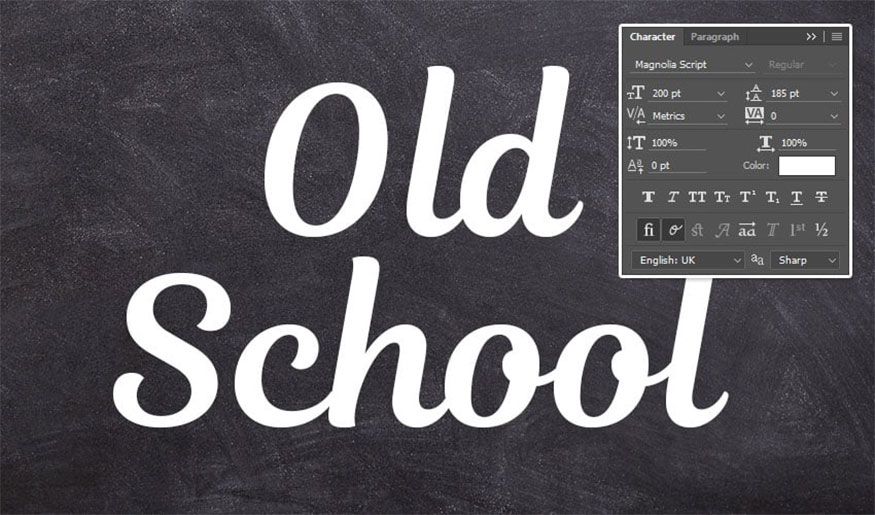
Step 1: You need to create text and use the Magnolia Script font. Next, set the size to 200 pt. If you want to create longer text, set Leading about 185 pt.
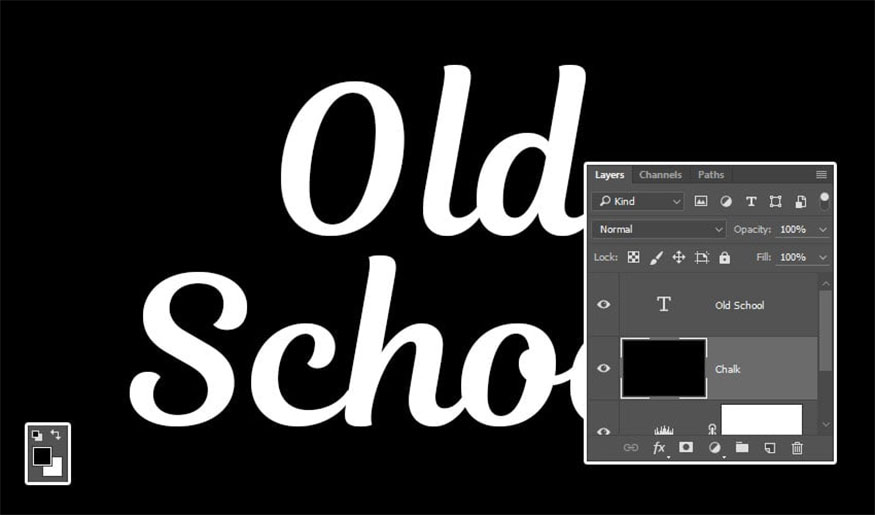
Step 2: Set Foreground and Background colors to Black and White. Then create a new layer below the text layer, name them “Chalk” and fill it with Black.
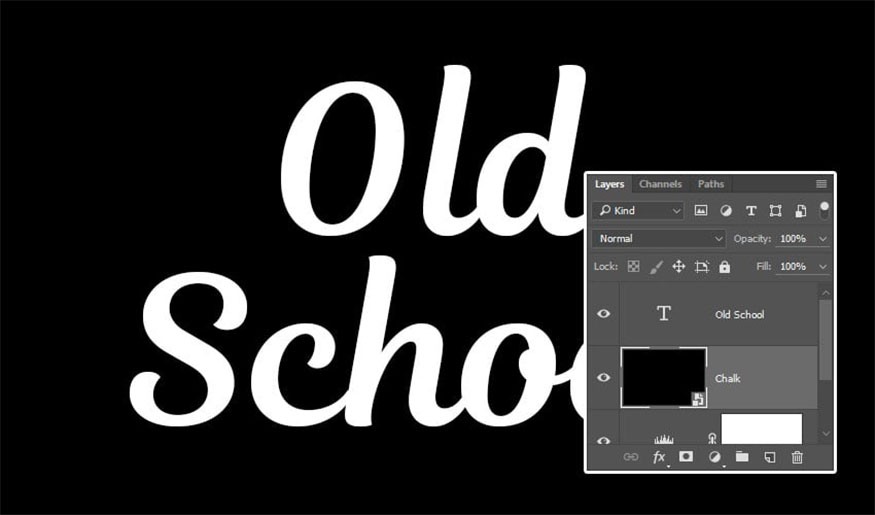
Step 3: Go to Filter => Convert for Smart Filters to convert the layer into a smart object.
3. How to apply a filter to text with a chalk effect in Photoshop
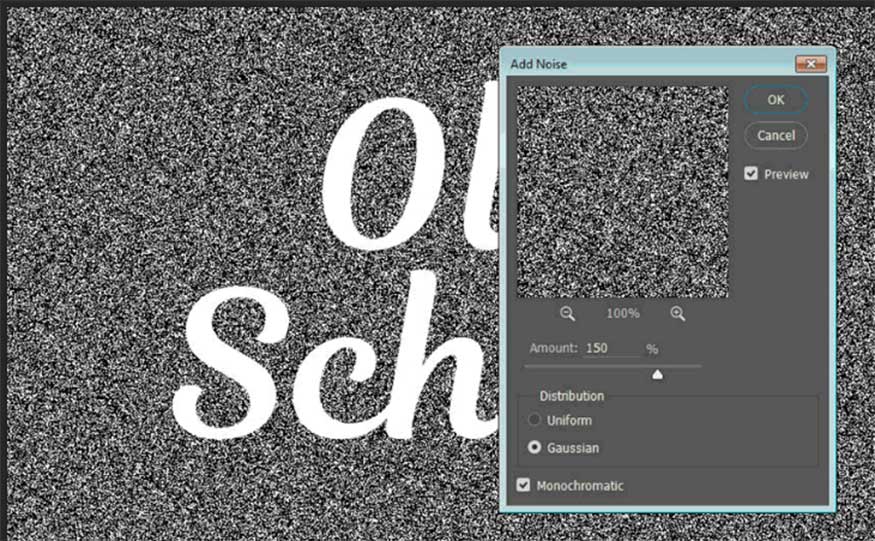
Step 1: Go to Filter => Noise => Add Noise. Then, change Amount to 150 and Distribution to Gaussian, click Monochromatic.
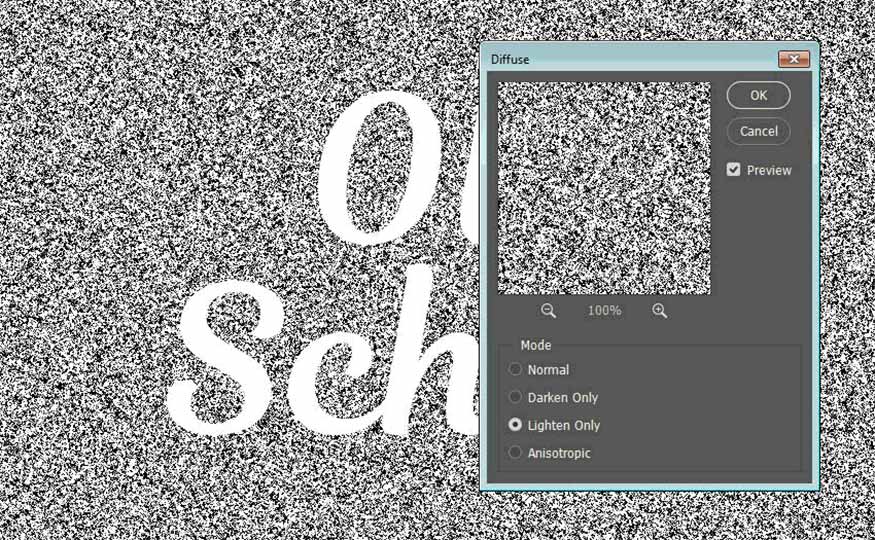
Step 2: Go to Filter => Stylize => Diffuse and select Lighten Only Mode.
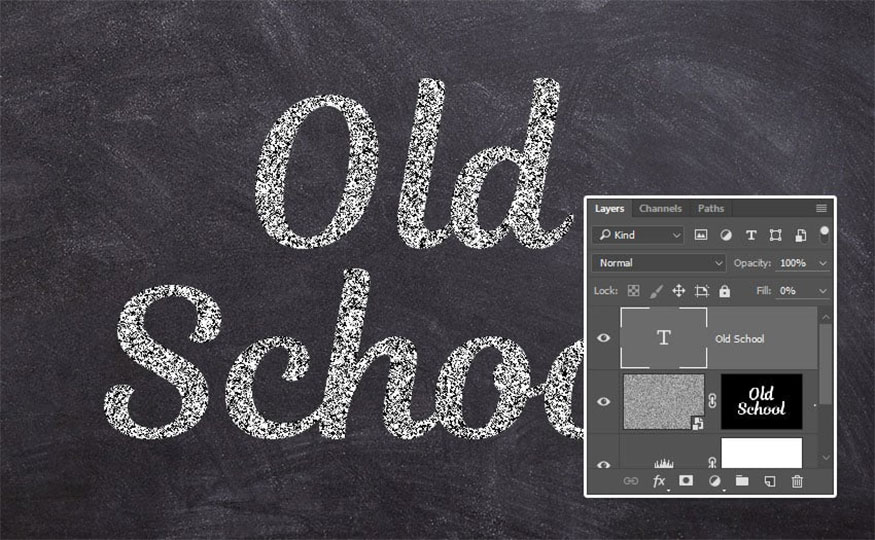
4. Instructions on how to cover chalk texture
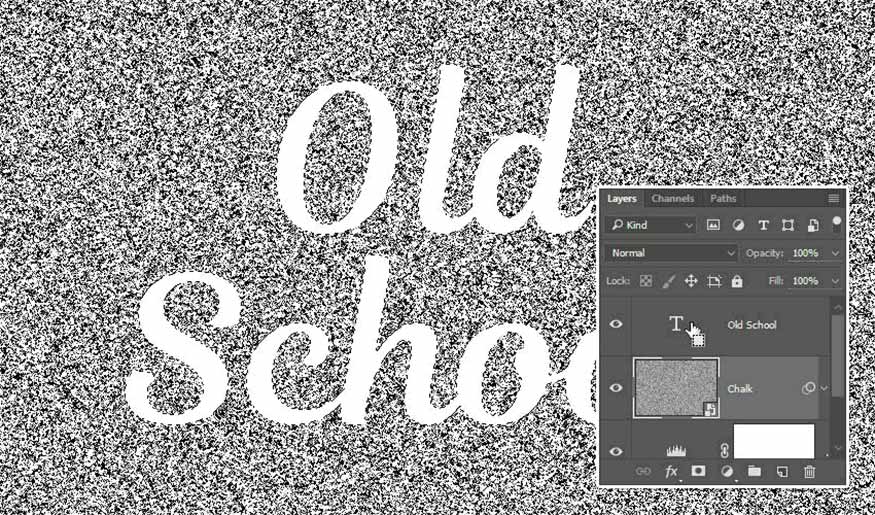
Step 1: Click on the thumbnail of the text layer to create a selection.
Step 2: Click the Add layer mask icon at the bottom of the Layers panel.
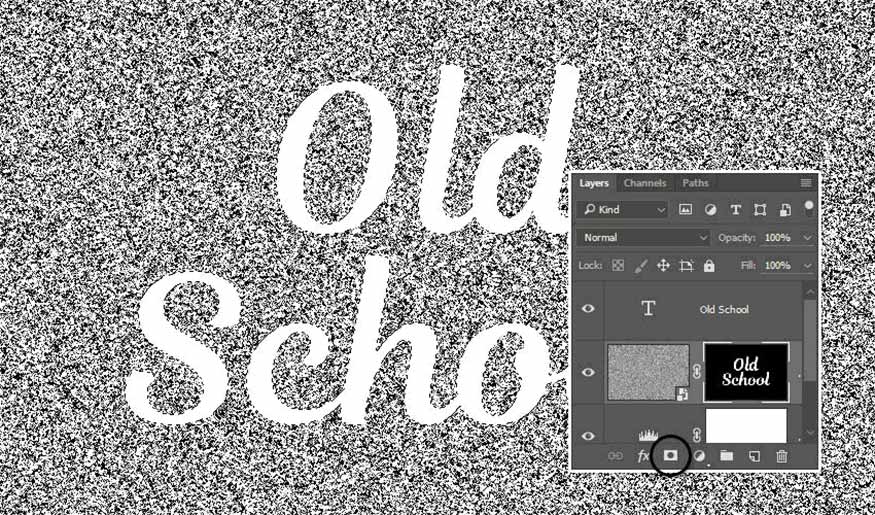
Step 3: Select the text layer and change its Fill value to 0.
5. How to style the chalk text font layer
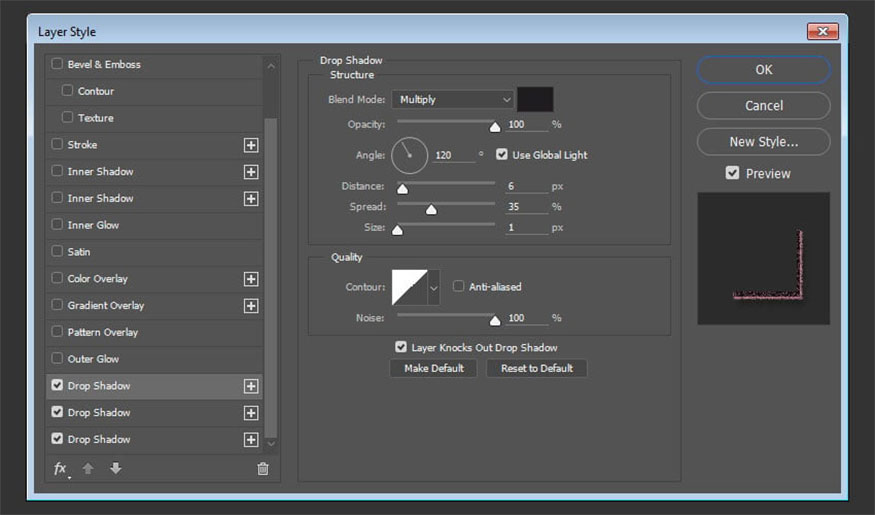
- Step 1: Add Drop Shadow and set the following settings:
-
Color: #1e1c1e
-
Opacity: 100%
-
Distance: 6
-
Spread: 35
-
Size: 1
-
Noise: 100%.
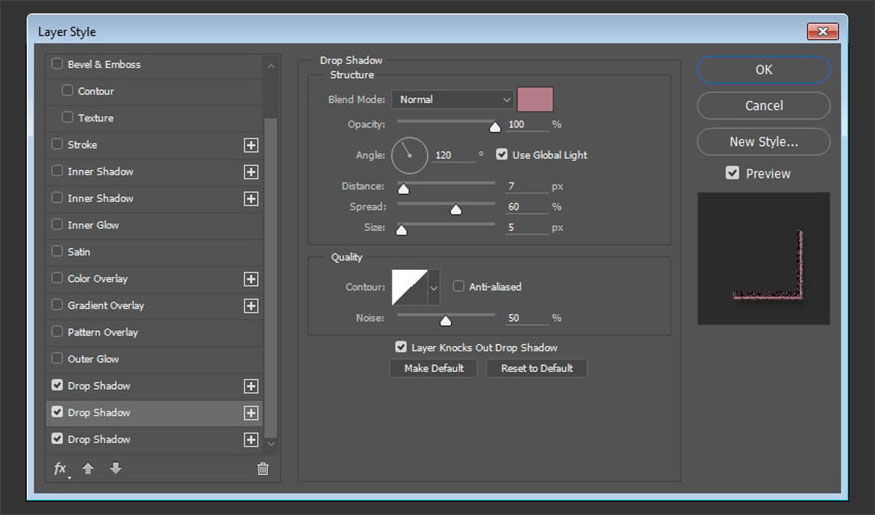
- Step 2: Click the + icon to the right of the Drop Shadow tab to add another version. Continue setting parameters as follows:
-
Color: #b57b88
-
Opacity: 100%
-
Distance: 7
-
Spread: 60
-
Size: 5
-
Noise: 50%.
- Step 3: Add another Drop Shadow and set the following settings:
-
Color: #000000
-
Opacity: 25%
-
Distance: 15
-
Spread: 0
-
Size: 15
-
Noise: 30%.
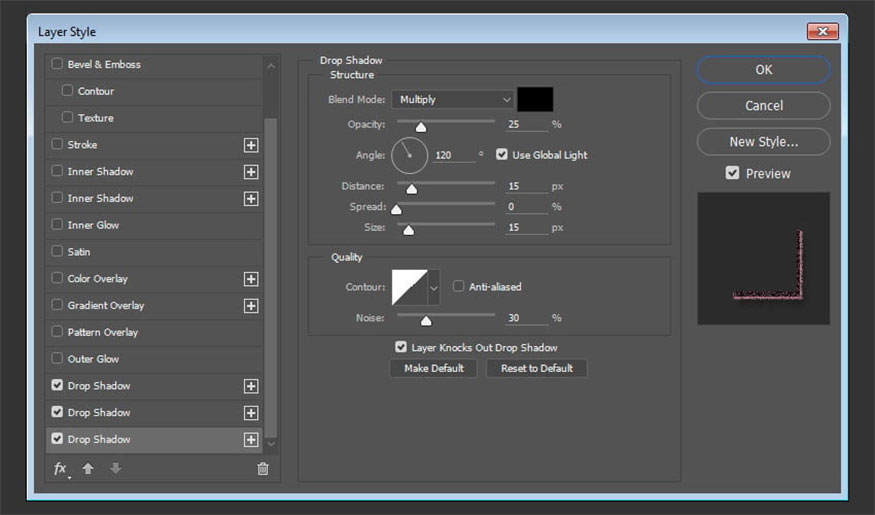
This will create the outline with pastel and complete the implementation of the "writing with chalk" effect.
And here is the final result we get:
So in this tutorial, we learned how to make text look like chalk in Photoshop. It can be seen that the implementation is quite simple and does not take too much time.
By just applying a few basic steps, we can create a chalk text effect in Photoshop. Hopefully the above instructions that Sadesign brings will help you apply them successfully. Don't forget to try again and again to create your own letterform with the most realistic and impressive chalk effect!
- Master the skills to create animated text effects in Photoshop
- Create a fabric text effect in Photoshop


VIP Products


Best Selling Products
Plugin Retouch4me
69 USD
Adobe Premiere Pro Account
99 USD
Upgrade genuine Capture One account
120 USD
Genuine Adobe Illustrator account
99 USD
Genuine Cheap Canva Pro
39 USD
Upgrade Duolingo Super
29 USD
Adobe Photoshop Copyright - Full App
120 USD
Capcut Pro 1 Year
39 USD
ChatGPT Plus Account (GPT-4)
16 USD
Windows 10 & 11 Pro Key
36 USD
Upgrade Genuine Office 365
49 USD
Freepik Premium Account
59 USD
MidJourney Account
29 USD
Copyright Adobe Lightroom Account
59 USD
Autodesk All App Account Copyright
120 USD