Best Selling Products

Windows 10 & 11 Pro Key
36 USD

Genuine Cheap Canva Pro
39 USD

Plugin Retouch4me
69 USD

Adobe Photoshop Copyright - Full App
120 USD

Upgrade Duolingo Super
29 USD

Upgrade genuine Capture One account
120 USD

Freepik Premium Account
59 USD

Upgrade Genuine Office 365
49 USD

Copyright Adobe Lightroom Account
59 USD

ChatGPT Plus Account (GPT-4)
16 USD

Adobe Premiere Pro Account
99 USD

Autodesk All App Account Copyright
120 USD

Genuine Adobe Illustrator account
99 USD

MidJourney Account
29 USD

Capcut Pro 1 Year
39 USD
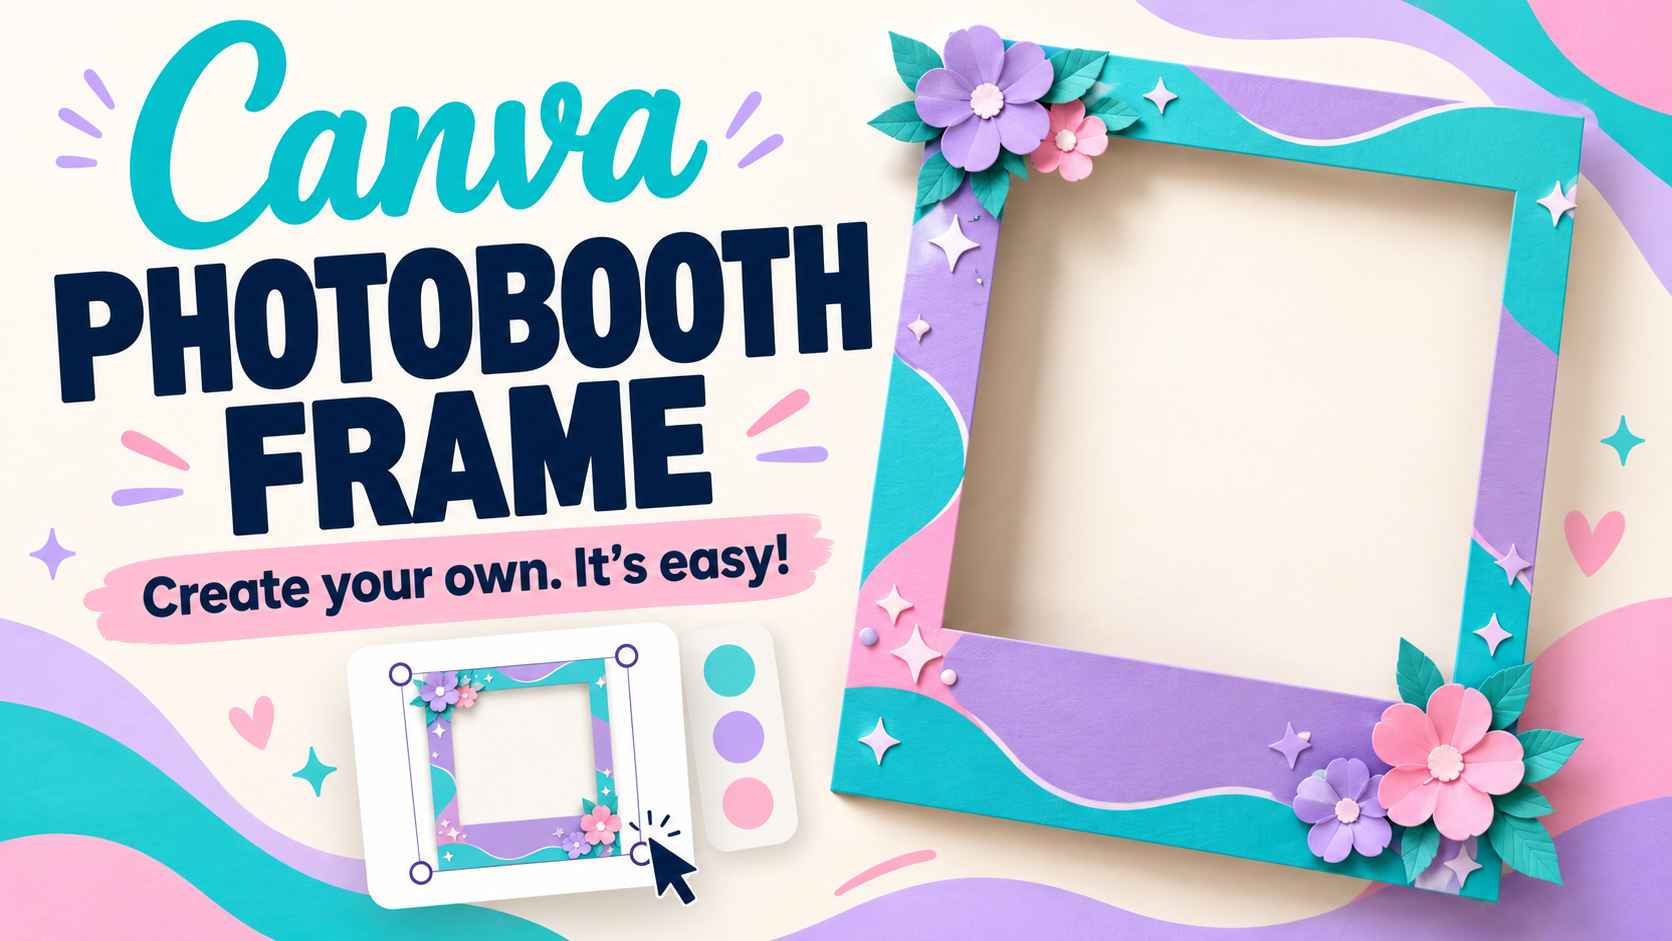
Creating your own photobooth frame using Canva is extremely simple; anyone can do it.
Nội dung
- 1. What do I need to prepare before creating a Photobooth frame using Canva?
- 2. What photobooth frame size is suitable?
- 3. Instructions on how to create your own Photobooth frame using Canva
- 3.1. Step 1: Create a new design with custom dimensions.
- 3.2. Step 2: Choose a template or design from the blank page.
- 3.3. Step 3: Design the background and overall layout
- 3.4. Step 4: Add text, logo, and decorative details
- 3.5. Step 5: Coordinate colors and fonts for consistency.
- 3.6. Step 6: Create a blank area for the photo.
- 3.7. Step 7: Check and export the complete file
- 4. Tips for designing beautiful and professional photobooth frames using Canva
- 5. Is it difficult to create a Photobooth frame using Canva?
- 6. Conclusion
A beautiful photo booth frame can make photos from weddings, birthdays, or events stand out. Instead of hiring a designer or using pre-made templates that are difficult to edit, you can completely design your own frame according to your ideas using Canva. With just a few simple drag-and-drop actions, you can create a photo frame with your own unique style, from cute and youthful to elegant and professional. The great thing is that Canva has many design support components such as photo frames, shapes, icons, stickers, fonts, and templates. Therefore, even if you don''t have much design experience, you can still get started quite easily. In this article, let''s explore with Sadesign how to create your own photo booth frame using Canva, from preparation and layout planning to exporting the complete file.
1. What do I need to prepare before creating a Photobooth frame using Canva?
Before you start designing, you should determine where the frame will be used and for what event. A frame for digital photography will have different requirements than a frame printed as a handheld accessory. Defining this from the start helps you choose the right size, colors, layout, and minimizes the need for extensive design revisions later. You should also prepare the information you want to include in the frame. For a private party, this could include the names of the bride and groom, the date, or a fun slogan. For a corporate event, the logo and brand colors should be prepared in advance to be incorporated naturally into the design.
-
Determine the intended use of the frame.
-
Choose a theme and design style.
-
Prepare a logo, slogan, or event name if needed.
-
Determine the image size and aspect ratio.
-
Prepare a main color palette in advance.
-
Choose a few fonts that fit the concept.

2. What photobooth frame size is suitable?
Size is a crucial factor to consider before designing, as it directly impacts layout and final product quality. If the frame is for printing, you need to pay attention to the actual dimensions and resolution to ensure the printed image remains sharp. Meanwhile, for frames used on screens, you can prioritize aspect ratios such as 16:9 or 4:3 depending on the device. Some common sizes for photo booth design include 4 x 6 inches, 8 x 10 inches, or 11 x 14 inches. However, you don't necessarily have to stick to a single size. The important thing is to know the exact device or intended use to determine the design dimensions from the outset.
-
4 x 6 inch: Suitable for small-sized printed photos.
-
8 x 10 inch: Suitable for many types of event photography frames.
-
11 x 14 inch: Provides ample space for decoration and information placement.
-
16:9: Suitable for monitors and digital display devices.
-
4:3: Can be used with some cameras or monitors that have a corresponding aspect ratio.
3. Instructions on how to create your own Photobooth frame using Canva
3.1. Step 1: Create a new design with custom dimensions.
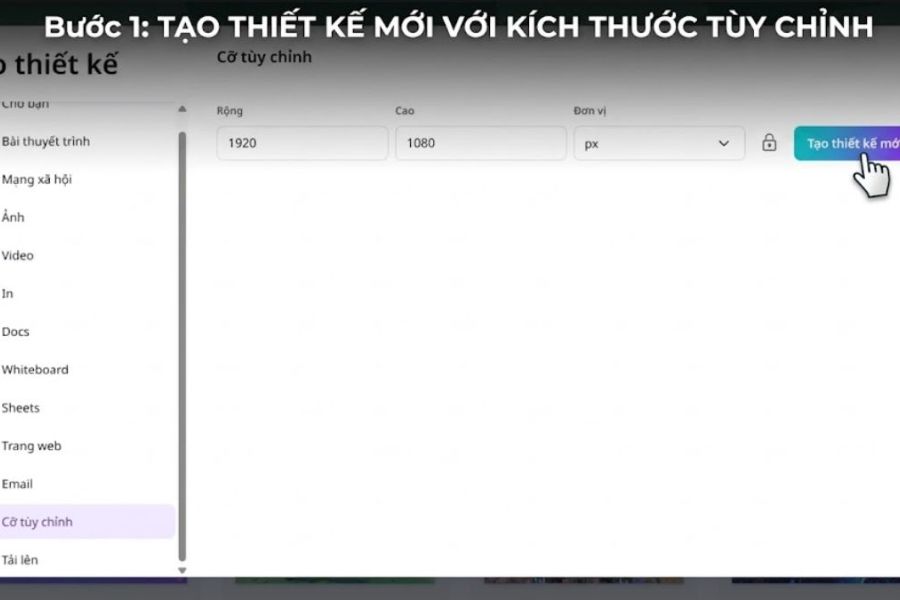
First, go to Canva and select Create Design . Instead of using pre-set dimensions, you can choose the custom size option and then enter the width and height as needed. Double-check the units of measurement before confirming to avoid incorrect dimensions in your design.
After creating the design page, you'll have a blank area to start building the frame. This is the overall framework, so take some time to visualize the placement of images, text, logos, and decorative details before adding too many elements.
-
Enter the correct width and height.
-
Check the units of measurement before creating.
-
Leave adequate space for the photo area.
-
Avoid placing important details right at the edge of the design.
3.2. Step 2: Choose a template or design from the blank page.
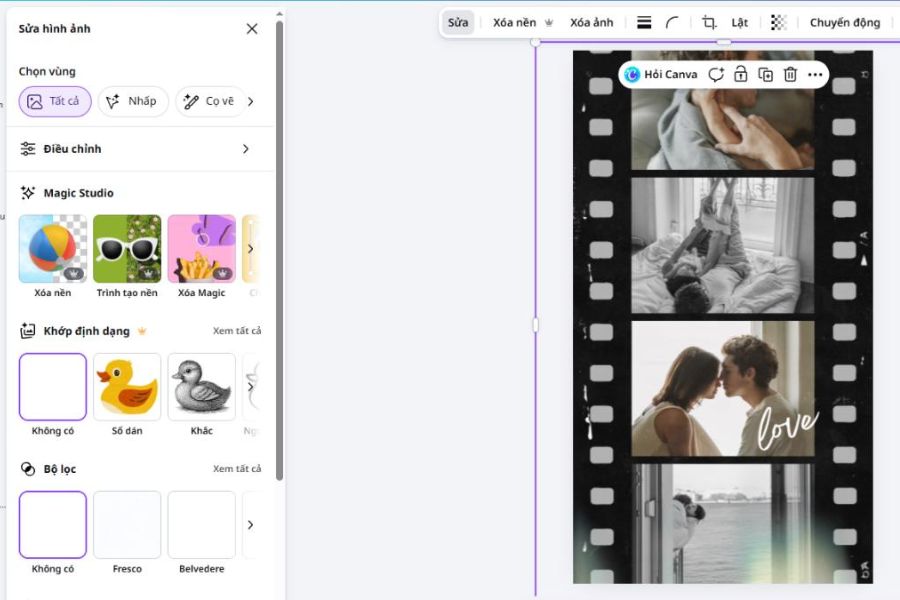
If you don't have much experience, you can search for Photo Booth templates on Canva for reference. Ready-made templates help you quickly visualize layout, color scheme, and font selection. Then, simply change the content, colors, or elements according to your own concept.
If you want to create a unique template, start with a blank page. This takes a little more time but gives you complete control over the design. You can decide for yourself whether the frame style is minimalist, cute, vintage, elegant, or youthful.
-
Use templates if you want to save time.
-
Use a blank page if you want to be completely creative.
-
You shouldn't keep the entire template if you want to create your own design.
-
Ideas from different designs can be combined.
3.3. Step 3: Design the background and overall layout
The background is the first impression a frame gets. For a photo booth design, you shouldn't use an overly complex background because the photo and the people in it are the focal point. A simple background with a main color, gradient, or small pattern usually creates a cleaner and more visually appealing feel.
Next, determine which areas are for images and which are for text, logos, or graphics. You can use Canva's alignment lines to keep the elements aligned. Once the layout is set, adding decorative details will be much easier.
-
Prioritize a simple background.
-
Choose a background color that matches the concept.
-
To ensure the image area is wide enough and easily recognizable.
-
Don't cram too many details into one corner.
-
Leave some open space to allow for an airy design.
3.4. Step 4: Add text, logo, and decorative details
After you have the main layout, add the information you want to appear in the frame. For a wedding, you can use the couple's names and the date. For a birthday, a special message or hashtag will make the photos more interesting. If it's a brand event, the logo and slogan should be placed in an easily visible position but without overshadowing the subject.
Canva offers a wide variety of shapes, stickers, icons, and patterns for you to decorate with. However, don't try to use everything you like. A good design usually has a clear focal point instead of covering every available space.
-
Text should be concise and easy to read.
-
The logo should be of a suitable size.
-
Patterns should support the theme rather than hog all the attention.
-
Prioritize details that are relevant to the event.
-
Maintain appropriate spacing between text, logos, and image areas.
3.5. Step 5: Coordinate colors and fonts for consistency.
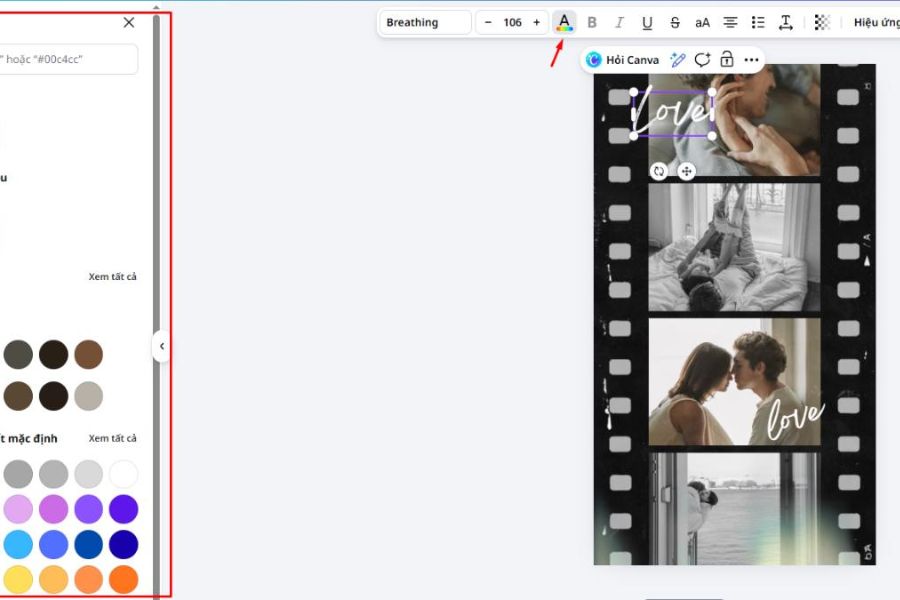
Color can completely change the feel of a frame. For weddings, pastel shades, white, cream, or light pink often create a gentle feeling. For birthdays, you can be bolder with brighter colors. For corporate events, prioritize the brand's signature color to ensure image consistency.
Font choices also need to be carefully considered. A frame with too many different fonts will quickly become visually cluttered. It's best to use about two to three fonts with different roles, for example, a prominent font for the title and a simple font for supplementary information.
-
Choose a dominant color palette.
-
Avoid using too many contrasting colors.
-
Prioritize fonts that are easy to read.
-
Avoid using too many different font styles.
-
Make sure the text stands out against the background.
3.6. Step 6: Create a blank area for the photo.
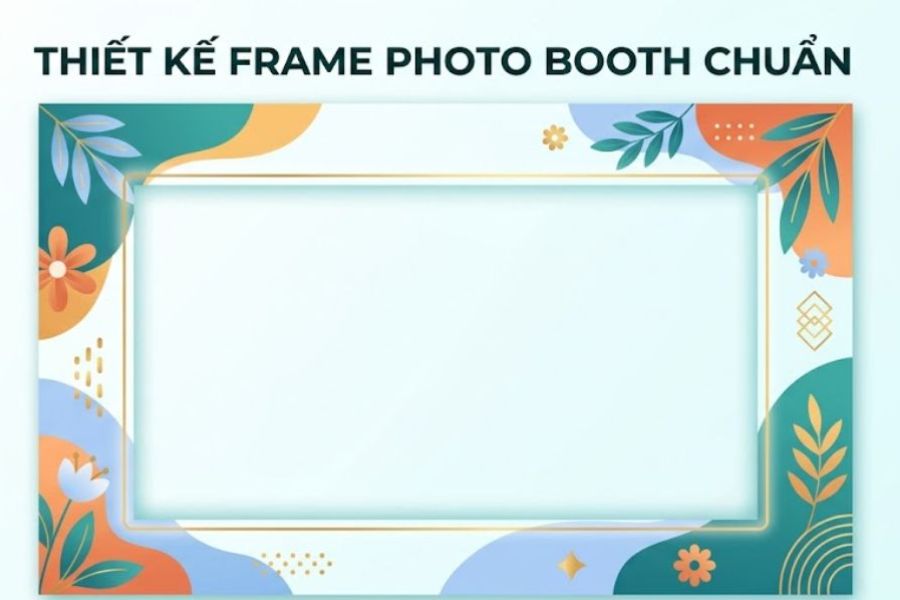
This is one of the most important steps when designing a photobooth frame. Precisely define the area where the photo or the person will appear. If the frame is used directly for taking photos, ensure that details such as logos, event names, or graphics don't obscure faces or other important areas.
On Canva, you can use shapes, borders, or frames to estimate the available space. After aligning, try to imagine a real photo placed in that position. If the photo still stands out and the decorative details don't get in the way, your layout is on the right track.
-
Define the image area before adding too much decoration.
-
Avoid placing important text in areas where it can easily obscure the face.
-
Ensure the empty space is of the appropriate size.
-
Check both the horizontal and vertical dimensions to see if the frame can be used in multiple ways.
3.7. Step 7: Check and export the complete file
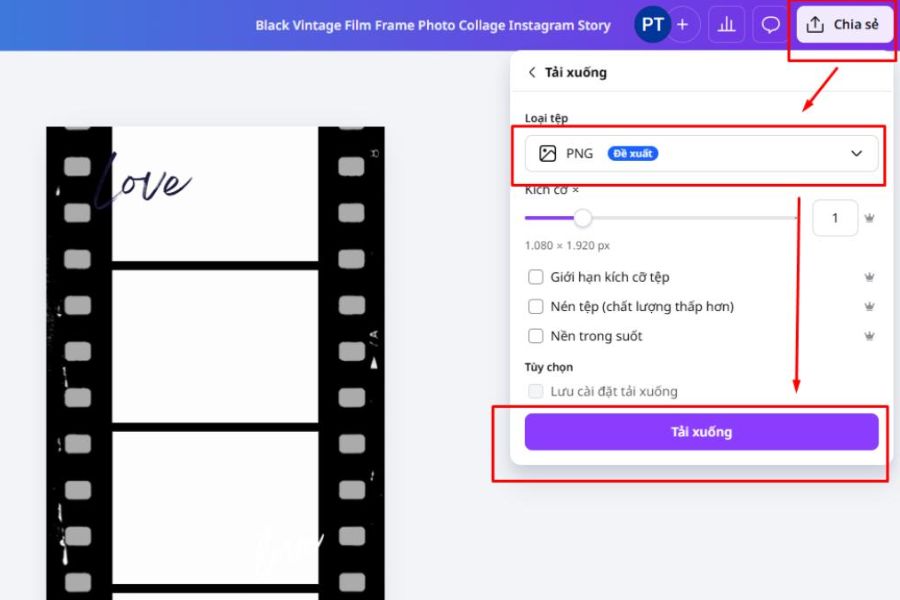
Before downloading the design, take the time to check the entire frame from top to bottom. This is when you can spot small errors such as spelling mistakes, misplaced logos, fonts that are too small, or a detail accidentally placed too close to the edge. A thorough check can help you avoid having to revise the file after printing.
Once everything is ready, select Share and then Download in Canva. For designs intended for screen use, PNG or JPG are usually convenient choices. If printing is required, prioritize a format that meets the printing company's requirements and choose a high quality setting to maintain sharpness in the final product.
-
Check the spelling.
-
Check the size and proportions.
-
Check the positioning of the logo, text, and image area.
-
Choose the appropriate file output quality.
-
Preview the design before sending it to print.
4. Tips for designing beautiful and professional photobooth frames using Canva
Creating a complete frame is just the first step. To make your design truly stand out, you need to know how to moderate the details and create focal points in the right places. A beautiful frame doesn't necessarily need lots of stickers or colors. Sometimes, a simple layout with harmonious colors makes the photo look more elegant and user-friendly. You can rely on a few basic design principles below to make your frame look more professional:
-
Maintain a balanced layout: Components should be distributed appropriately, avoiding excessive concentration in one area.
-
Create a focal point: Choose a key detail such as the event name, slogan, or distinctive design element.
-
Ensure sufficient contrast: The text must stand out against the background.
-
Avoid overusing effects: Too many shadows, borders, and stickers can make the frame look heavy.
-
Style consistency: Colors, fonts, and patterns should follow the same concept.
-
Prioritize user experience: The frame must be aesthetically pleasing but still provide enough space for the subject to appear clearly.
5. Is it difficult to create a Photobooth frame using Canva?
In fact, creating a photobooth frame using Canva isn't too complicated, even if you've never studied design. The most important thing is to determine the correct dimensions, choose a suitable concept, and build the layout from basic elements. Canva has simplified much of the process with its drag-and-drop feature, template library, and intuitive editing tools.
Instead of trying to create an elaborate design right from the start, you can begin with a minimalist frame and then add details one by one. Once you're familiar with alignment, color coordination, and font usage, you can easily create many different templates for weddings, birthdays, year-end parties, or branding campaigns.
6. Conclusion
Creating your own photobooth frame using Canva is a simple way to personalize your event photos. With just a little creativity, a suitable concept, and a few drag-and-drop actions, you can create a frame that truly reflects your style without relying entirely on pre-made templates. The most important thing is not to overcomplicate things. Start with standard dimensions, establish a clear layout, choose consistent colors and fonts, and then add necessary accents. Once you understand this process, designing photobooth frames in Canva will become much faster, easier, and more enjoyable.





















VIP Products








Best Selling Products
Windows 10 & 11 Pro Key
36 USD
Genuine Cheap Canva Pro
39 USD
Plugin Retouch4me
69 USD
Adobe Photoshop Copyright - Full App
120 USD
Upgrade Duolingo Super
29 USD
Upgrade genuine Capture One account
120 USD
Freepik Premium Account
59 USD
Upgrade Genuine Office 365
49 USD
Copyright Adobe Lightroom Account
59 USD
ChatGPT Plus Account (GPT-4)
16 USD
Adobe Premiere Pro Account
99 USD
Autodesk All App Account Copyright
120 USD
Genuine Adobe Illustrator account
99 USD
MidJourney Account
29 USD
Capcut Pro 1 Year
39 USD