Best Selling Products

Freepik Premium Account
59 USD

Capcut Pro 1 Year
39 USD

Adobe Photoshop Copyright - Full App
120 USD

Plugin Retouch4me
69 USD

ChatGPT Plus Account (GPT-4)
16 USD

Upgrade Genuine Office 365
49 USD

MidJourney Account
29 USD

Genuine Cheap Canva Pro
39 USD

Upgrade Duolingo Super
29 USD

Autodesk All App Account Copyright
120 USD

Windows 10 & 11 Pro Key
36 USD

Upgrade genuine Capture One account
120 USD

Adobe Premiere Pro Account
99 USD

Copyright Adobe Lightroom Account
59 USD

Genuine Adobe Illustrator account
99 USD
How to expand the dynamic range of an image while retaining highlights in highlights and shadows
Nội dung
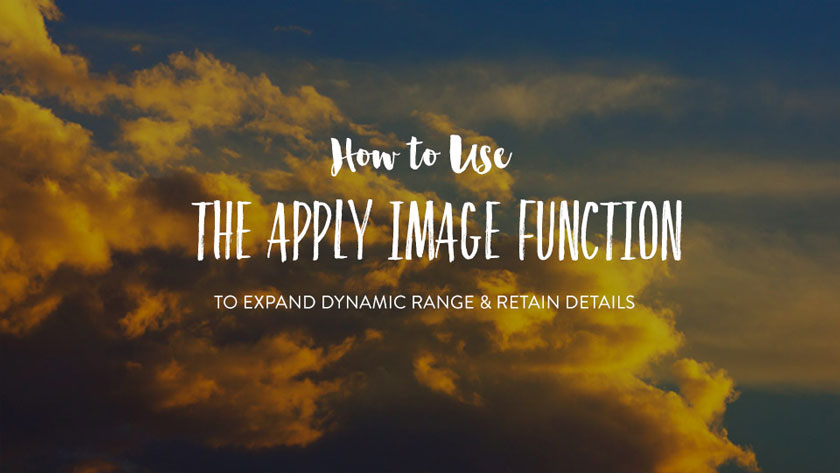 how to expand the dynamic range of images
Exposure problem in the image area
One typical problem that photographers often face when taking digital photography is the limited dynamic range of DSLR cameras. The performer must always consider, choose between which part they want to keep and which detail will unfortunately be lost. before edit
 after edit
Light-dark area contrast adjustment technique for images
This is a quick tip that will show you how you can enhance and retain light and dark information in the image. Normally, this is used for landscape photography, however you can apply it to any type of image. This technique allows you to adjust the contrast of the scene to try and reflect your original vision. Follow these steps to add contrast and brightness adjustment to your image:- Step 1: Duplicate your background layer by pressing Ctrl + J on a windows computer or Command + J on Mac computer.
- Step 2: You choose "Apply image ..." from the menu Image:
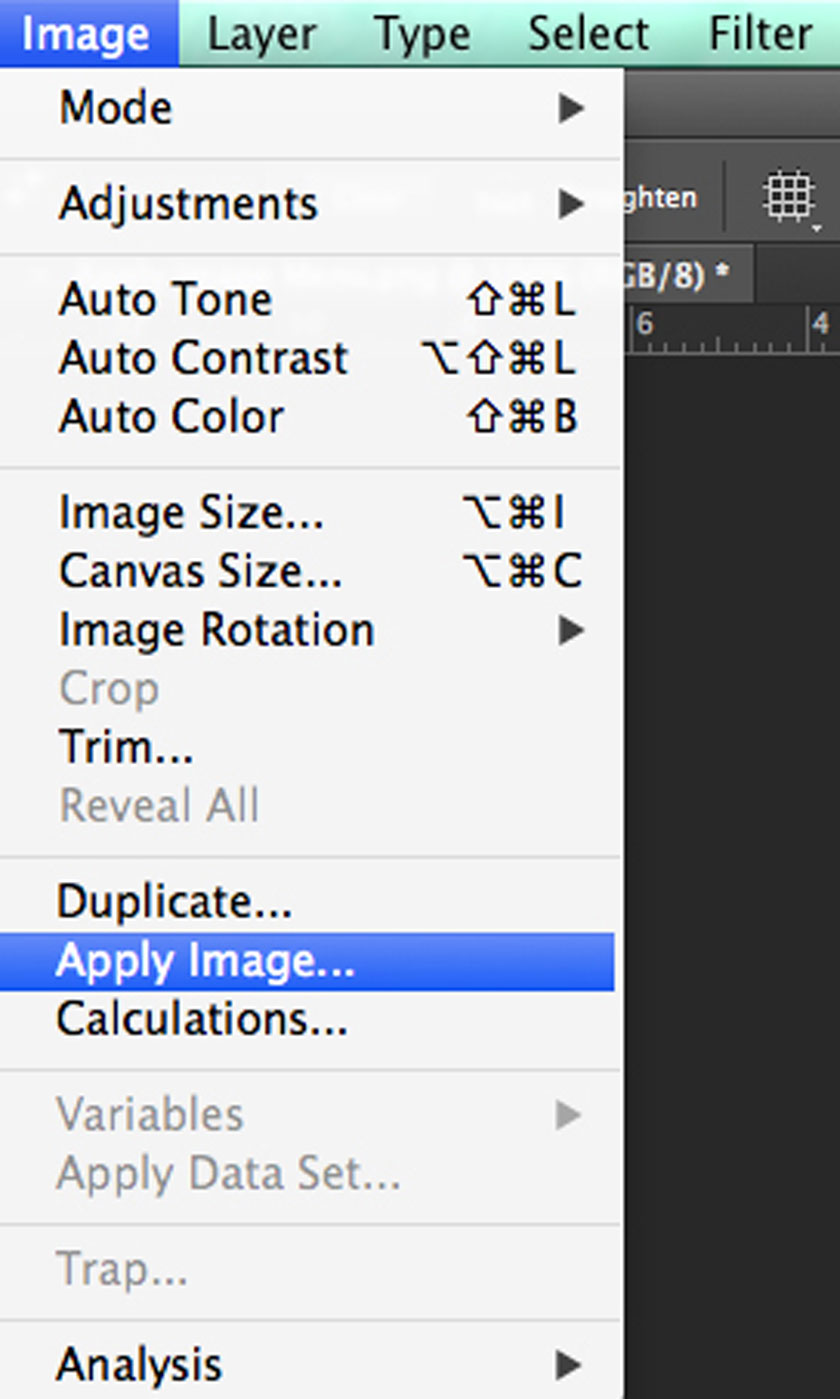 choose apply image
How to enhance the details in an image
With this particular adjustment, you are darkening the image, specifically targeting the highlight details in the image. Change the blending mode in the Apply Image dialog box into Multiply.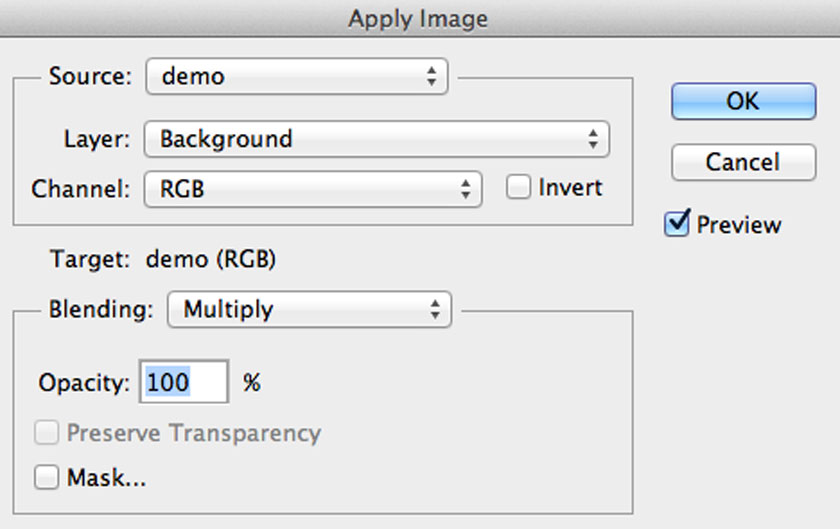 Choose Multiply
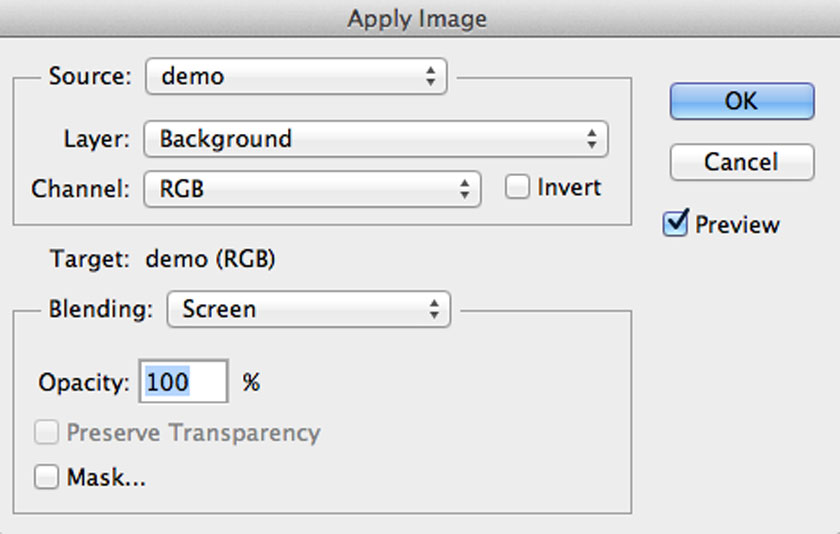 Choose Screen
Adjust shadows for individual areas
With this adjustment, you need to darken shadows and brighten highlights, in other words, it’s Adding contrast. Change the Apply Image's blending mode into Overlay or Soft Light, depending on how much contrast you want to showcase.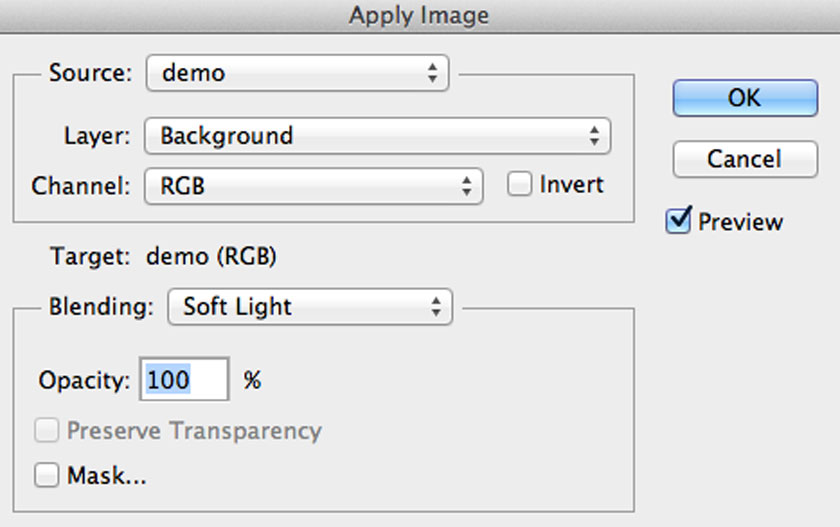 Choose Overlay or Soft Light
Some notes you need to pay attention
You can apply each or more of these adjustments as separate layers and then selectively hide the areas where you want those specific effects to be displayed. For example, for the image above, you use two Apply Image layers for highlights and one for contrast. This is a simple way but an effective way to add contrast to your images. The best thing about this method is that you can create contrast without the side effects of color banding. From there, you can completely master what will happen on your photos to get the product you want. Above is sharing about how to expand the dynamic range of images while preserving details in shadows and highlights, SaDesign Retouching hopes to help you grasp useful information. If you want more advice on this issue or want to consult professional photo editing services, please contact us by leaving a comment below the article for the fastest service. See more How to improve memory performance in Photoshop CC, CS6


VIP Products


Best Selling Products
Freepik Premium Account
59 USD
Capcut Pro 1 Year
39 USD
Adobe Photoshop Copyright - Full App
120 USD
Plugin Retouch4me
69 USD
ChatGPT Plus Account (GPT-4)
16 USD
Upgrade Genuine Office 365
49 USD
MidJourney Account
29 USD
Genuine Cheap Canva Pro
39 USD
Upgrade Duolingo Super
29 USD
Autodesk All App Account Copyright
120 USD
Windows 10 & 11 Pro Key
36 USD
Upgrade genuine Capture One account
120 USD
Adobe Premiere Pro Account
99 USD
Copyright Adobe Lightroom Account
59 USD
Genuine Adobe Illustrator account
99 USD