Best Selling Products
Working with the Healing Brush Tool
Nội dung
One of the most common image editing tools in Photoshop is the Healing Brush tool. It works similarly to the Clone Stamp tool, allowing the user to select the area where they want to get the source, but it also comes with a number of other smart utilities.  Working with the Healing Brush Tool The main attraction of the Healing Brush tool is its ability to transfer textures of one area to another. It does this while simultaneously blending the color and brightness sampled from the edges of your alternatives.
 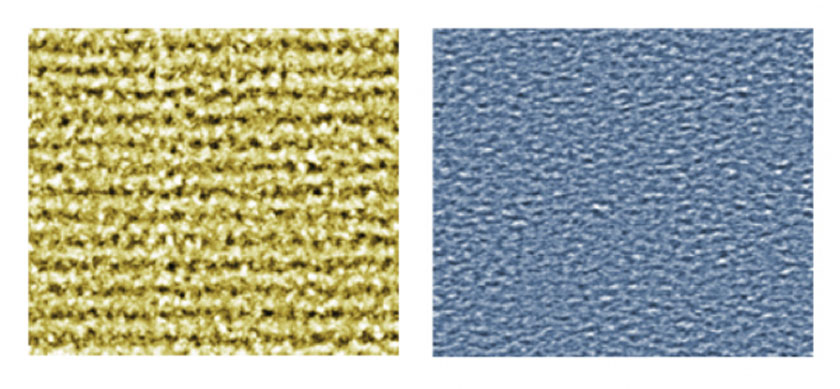 example While looking from the right source and will yield this result:
 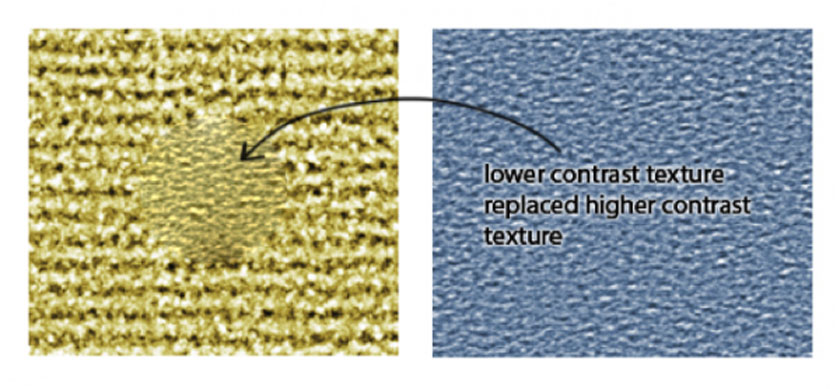 the Healing Brush Tool works You can see the texture has been replaced while preserving the original color and luminance. When cleansing skin from blemishes and bristles, this allows more areas to be used to source from there, while creating a more seamless alternative by using the Clone Stamp tool. You can also see that in the lower part of the healed circle, a dark area merged like a gradient to the point. This is because the edge of the image was used to get the brightness and hue of the surrounding area to be averaged and blended. To show this more clearly, please refer to the images below. A bright pink line is added to both patterns, with the setting of the Healing Brush: And the result:
 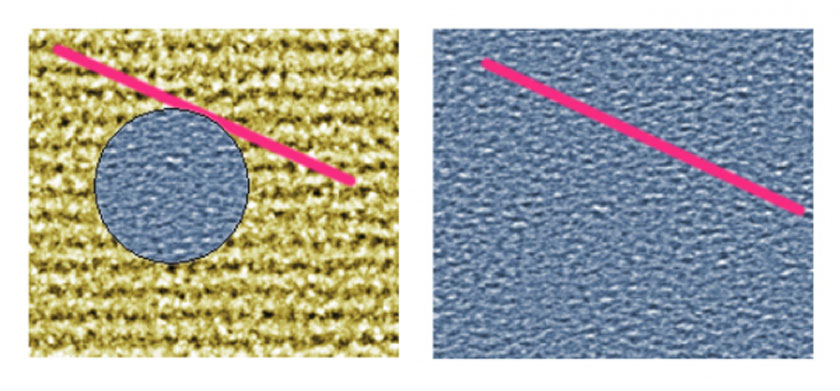 The blending effect approach Although the Stamp Tool can be used in smaller brush strokes to gradually replace an area, the best results when using the Healing Brush tool will be achieved when the entire problem area is covered and replaced at the same time.
 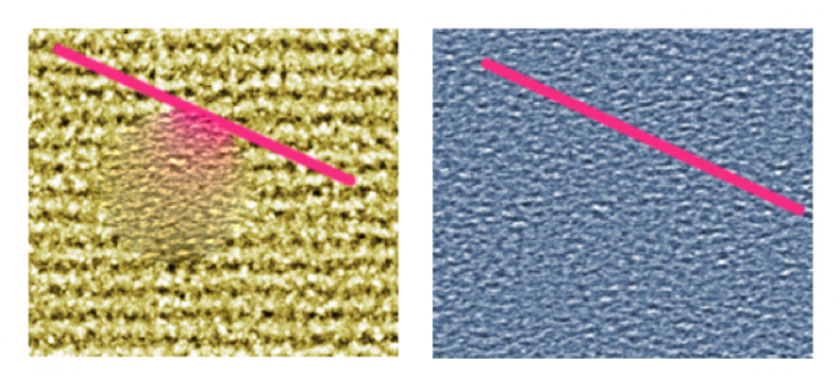 result However, to help the tool create an average of hue and luminance, using a smaller area than the problem area and creating a squiggling shape on what you want to replace. It’s good to cover the entire area. This is due to the increased surface area that the healed area's contour is exposed, giving the tool a better chance of precisely blending the areas together. Similar to the Clone Stamp tool, you should use a hard edge brush to keep the most texture. A soft edge brush creates the effect by blending and blurring the edges into the rest of the image. Therefore, over time if you are not careful, it can lead to a slightly smudged and patchy effect. However, using a brush at 100% hardness is also not ideal, as you can see the contour from where the problem area is being fixed. Around 75% hardness seems to work best.
  effects application Remember that shadows are usually flat with little contrast, and highlights have decent contrast and detail. This means when sourcing, make sure to choose a spot with relatively similar focus and light levels. Above is sharing about the Healing Brush Tool, SaDesign Retouching hopes to help you grasp useful information. If you need support using professional photo editing services, please contact us for the fastest support. See more How to remove dark circles in Photoshop using the Patch tool and Curves
 Working with the Healing Brush Tool
Learn how the Healing Brush Tool works
If you are taking an image source with a similar texture to the texture you are replacing, you use different textures and colors to illustrate how the Healing Brush tool works. The left square is highlighted with a large grain pattern with yellow high contrast, while the right square has a large grain pattern with lower contrast. example
 the Healing Brush Tool works
Blending and shadowing effects with the Healing Brush Tool
You can see that the Healing Brush is more or less unaffected by the line and replaces the rest of the image with no color or brightness in the finished area. The blending effect approach is used when trying to perfect high-contrast areas or borders. For example, the bridge of the nose, jawline, eyes, or any other area where you want to keep the contours from blending into the finished area. The blending effect approach
 result
 effects application
 Sadesign Co., Ltd. provides the world's No. 1 warehouse of cheap copyrighted software with quality: Panel Retouch, Adobe Photoshop Full App, Premiere, Illustrator, CorelDraw, Chat GPT, Capcut Pro, Canva Pro, Windows Copyright Key, Office 365 , Spotify, Duolingo, Udemy, Zoom Pro...
Contact information
SADESIGN software Company Limited
Sadesign Co., Ltd. provides the world's No. 1 warehouse of cheap copyrighted software with quality: Panel Retouch, Adobe Photoshop Full App, Premiere, Illustrator, CorelDraw, Chat GPT, Capcut Pro, Canva Pro, Windows Copyright Key, Office 365 , Spotify, Duolingo, Udemy, Zoom Pro...
Contact information
SADESIGN software Company Limited


