Best Selling Products

Adobe Photoshop Copyright - Full App
120 USD

Plugin Retouch4me
69 USD

Freepik Premium Account
59 USD

Genuine Adobe Illustrator account
99 USD

Copyright Adobe Lightroom Account
59 USD

Upgrade genuine Capture One account
120 USD

Upgrade Duolingo Super
29 USD

Genuine Cheap Canva Pro
39 USD

Capcut Pro 1 Year
39 USD

ChatGPT Plus Account (GPT-4)
16 USD

Windows 10 & 11 Pro Key
36 USD

MidJourney Account
29 USD

Autodesk All App Account Copyright
120 USD

Adobe Premiere Pro Account
99 USD

Upgrade Genuine Office 365
49 USD
Experience in Editing Old Photos Using Photoshop for Beginners
Nội dung
- 1. Why should you edit old photos using Photoshop?
- 2. Common problems with old photos that need restoration
- 2.1 The image is blurry and lacks detail.
- 2.2 Photos show scratches and dirt.
- 2.3 Faded photos
- 2.4 Images that are torn or partially missing
- 3. Preparation before editing old photos using Photoshop
- 3.1 Scan images with high quality
- 3.2 Create a copy of the original image
- 3.3 Use a monitor with good display quality.
- 4. Basic Photoshop Tutorial for Editing Old Photos
- 4.1 Step 1: Remove dirt and scratches
- 4.2 Step 2: Adjust brightness and contrast
- 4.3 Step 3: Restore color
- 4.4 Step 4: Increase sharpness
- 5. Tips for editing old photos more effectively using Photoshop
- 5.1 Always edit on multiple layers
- 5.2 Enlarging images when processing details
- 5.3 Avoid overusing filters
- 5.4 Checking images at various zoom levels
- 6. Useful Photoshop tools for restoring old photos
- 7. Common mistakes beginners make
- 8. Conclusion
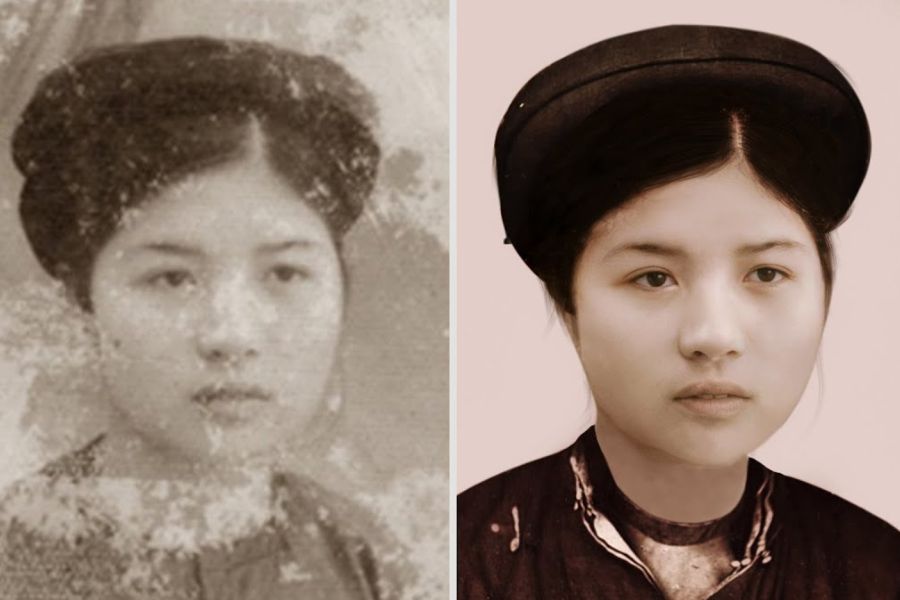
Old photographs always hold special value. They could be images of grandparents, parents, childhood memories, or important moments that have lasted through the years. However, over time, paper photos often fade, become blurry, tear, develop mold, or accumulate dust, significantly reducing their quality. This is why more and more people are turning to Photoshop to restore the original beauty of these precious photographs.
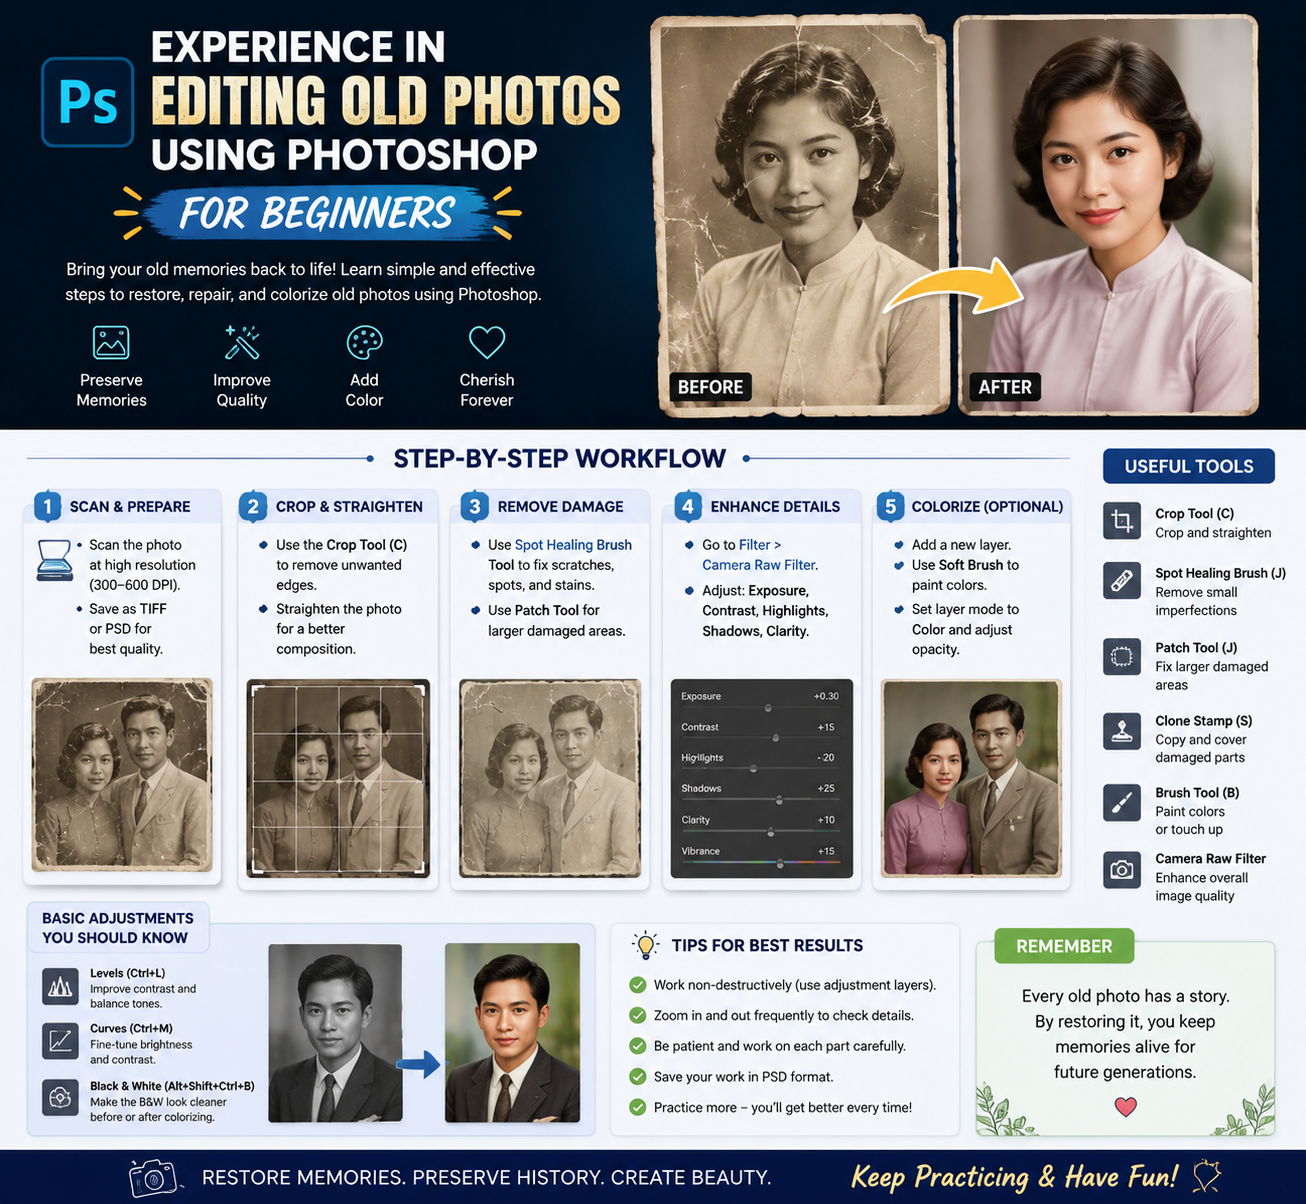
1. Why should you edit old photos using Photoshop?
Old photographs are often more than just images; they hold the memories of an entire family. Photo restoration helps preserve these precious moments before they are completely damaged by the effects of time. Instead of letting photos deteriorate further, digitizing and editing them will help preserve them for a longer period.
Furthermore, Photoshop offers many powerful tools that help handle almost any problem with old photos. From removing dust and scratches to restoring color, enhancing sharpness, and recreating lost areas of the image, everything can be done in a single software program. This is why Photoshop is always the top choice for photo restoration professionals.
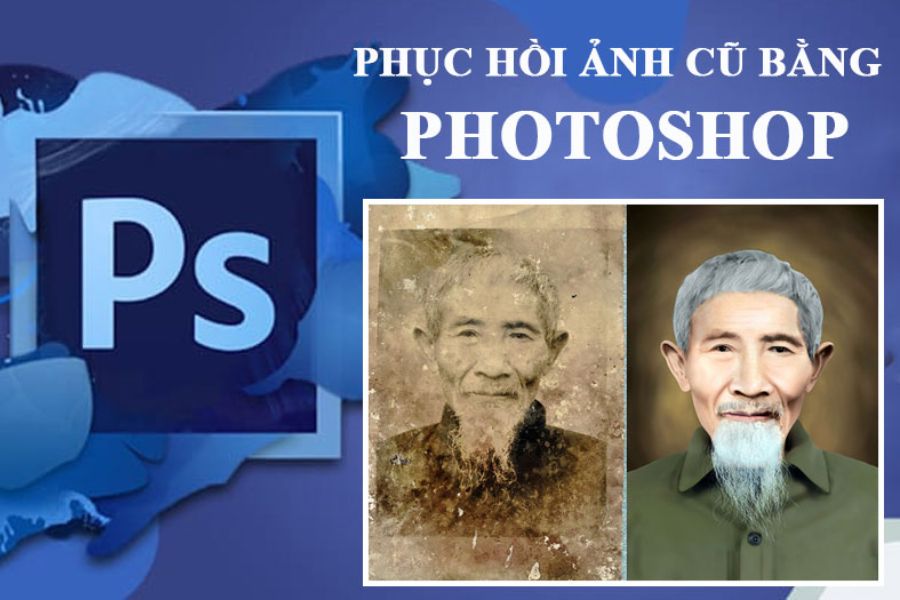
2. Common problems with old photos that need restoration
2.1 The image is blurry and lacks detail.
After years of storage, photos often lose sharpness due to the degradation of photo paper quality or substandard scanning processes. This makes details such as faces, clothing, or landscapes difficult to discern.
When editing old photos in Photoshop, sharpening is one of the most important steps. However, overuse of sharpening tools can cause image noise or artificial edges. Therefore, users need to adjust the settings appropriately to achieve the most natural results.
2.2 Photos show scratches and dirt.
Photographs that have been preserved for a long time are prone to scratches, dust, or mold. These flaws not only affect the aesthetics but also obscure many important details.
Photoshop offers tools like the Spot Healing Brush, Clone Stamp, and Patch Tool to effectively remove these imperfections. With patience and by processing each small area, you can restore the image to near its original state.
2.3 Faded photos
For color photographs, color fading is a very common phenomenon. Colors become pale, lifeless, and lose their original contrast.
Thanks to Photoshop's powerful color correction system, users can restore image colors using Curves, Levels, Hue/Saturation, or Color Balance. This helps make the image more vibrant while still retaining its original classic look.
2.4 Images that are torn or partially missing
This is the most serious type of damage. Many photos have torn corners, missing parts of faces, or other important details.
Although restoring this type of image is quite complex, Photoshop can still provide effective support through its advanced image region cloning and AI tools. Users can completely recreate the missing areas if they have sufficient reference data.
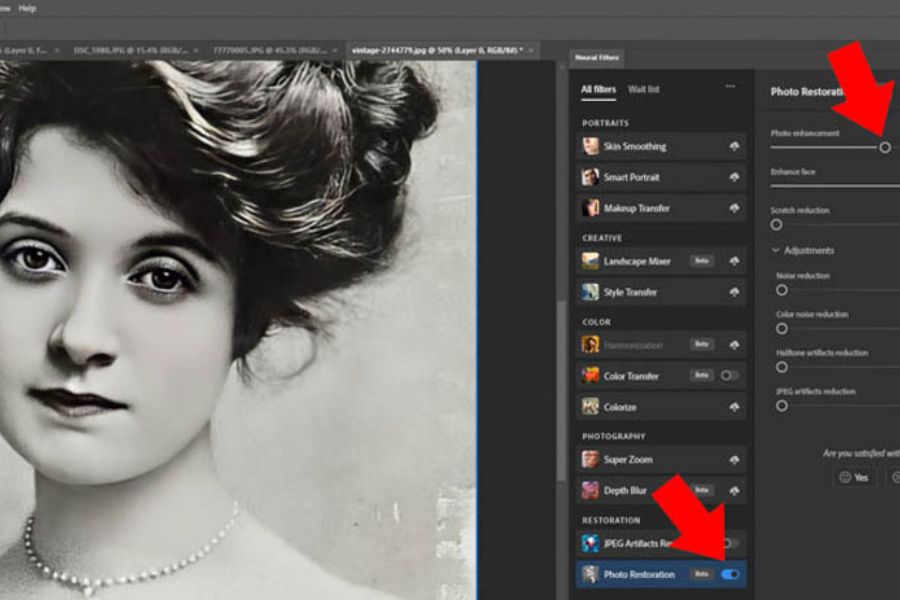
3. Preparation before editing old photos using Photoshop
3.1 Scan images with high quality
The first step is to digitize the image using a scanner or a phone with a good quality camera. Prioritize scanning at a resolution between 300 DPI and 600 DPI to ensure the most detail is preserved.
Using low-quality scanned images will reduce the effectiveness of subsequent editing. A clear image file from the start will help Photoshop tools work more accurately.
3.2 Create a copy of the original image
This is an important principle that beginners often overlook. Before editing, back up the original image to avoid data loss in case of accidental manipulation.
Working on a copy allows you to experiment with different methods without worrying about affecting the original image. This is also a professional practice adopted by designers.
3.3 Use a monitor with good display quality.
The color and brightness of the screen directly affect the photo restoration process. If the screen display is inaccurate, the editing results may look completely different when viewed on a different device.
You don't necessarily need to invest in an expensive monitor, but you should adjust the brightness and color settings to suit your needs before you start working.
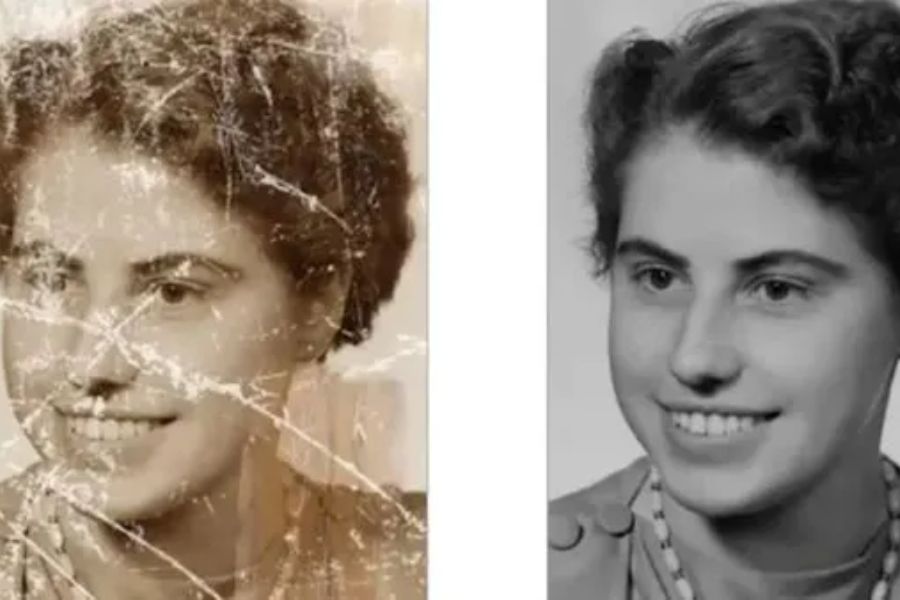
4. Basic Photoshop Tutorial for Editing Old Photos
4.1 Step 1: Remove dirt and scratches
After opening the image in Photoshop, create a new layer to work on without destroying the original data. Use the Spot Healing Brush Tool to remove the small dust spots that appear on the image.
For large scratches or complex damaged areas, the Clone Stamp Tool will be more effective. Zoom in on the image to process each detail and ensure the most natural-looking result.
4.2 Step 2: Adjust brightness and contrast
Old photos often have dark or unbalanced lighting. You can use Levels or Curves to improve overall brightness.
When making adjustments, it's best to do it in small steps rather than drastically increasing the parameters. This helps the image retain depth and avoids loss of detail in bright or dark areas.
4.3 Step 3: Restore color
If an image is faded, the Hue/Saturation tool will effectively increase color saturation. Additionally, Color Balance helps to rebalance any skewed tones.
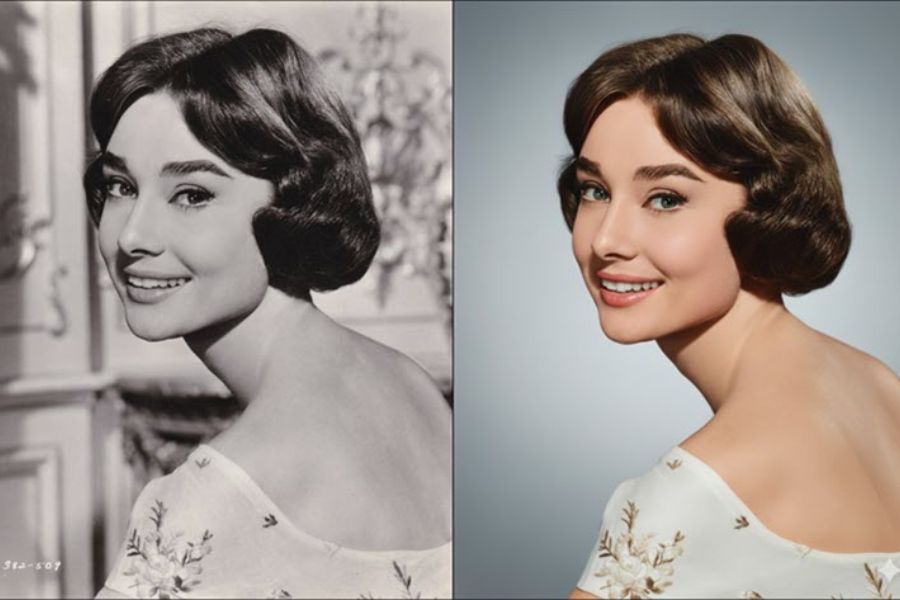
During the color restoration process, try to maintain a natural look. The goal is to bring the photo to life, not to make it overly vibrant or unrealistic.
4.4 Step 4: Increase sharpness
After completing the basic editing steps, you can use Unsharp Mask or Smart Sharpen to clarify the details.
This is the final step in the restoration process. If done too early, imperfections in the image may be highlighted, making the subsequent processing more difficult.
5. Tips for editing old photos more effectively using Photoshop
5.1 Always edit on multiple layers
Working with layers makes it easy to control changes and revert to previous steps when necessary. This is a fundamental but crucial skill in Photoshop. Furthermore, dividing each step onto separate layers makes the editing process more organized and professional.
5.2 Enlarging images when processing details
Many beginners tend to edit at a small display size, easily missing tiny flaws in photos. Regularly zoom in from 100% to 300% to carefully examine each area. Close-up observation helps to completely eliminate dust, scratches, and small imperfections that are difficult for the naked eye to notice.
5.3 Avoid overusing filters
Photoshop offers numerous filters that can quickly enhance images. However, overuse can make images lose their natural look. Especially with old photos, the goal is restoration, not transforming them into overly modern, edited works of art. Prioritize authenticity and preserve the unique characteristics of the original image.
5.4 Checking images at various zoom levels
After editing, view the image at different sizes to detect any remaining errors. Some details may look good when enlarged but appear unnatural at normal size. This is a simple trick that significantly improves the quality of the final restored image.
6. Useful Photoshop tools for restoring old photos
Below are the most commonly used tools in Photoshop for editing old photos:
-
Spot Healing Brush Tool
-
Healing Brush Tool
-
Clone Stamp Tool
-
Patch Tool
-
Content-Aware Fill
-
Assistants
-
Curves
-
Color Balance
-
Hue/Saturation
-
Smart Sharpen
-
Raw Filter Camera
Mastering these tools will help you handle most common types of damage found on old photos without needing additional software.
7. Common mistakes beginners make
-
Many people tend to over-adjust the colors, causing the image to lose its natural look. This is the most common mistake when first learning photo restoration.
-
Furthermore, excessive sharpening can cause images to appear grainy and withered. This significantly reduces image quality instead of improving it.
-
Another mistake is not saving multiple versions during the editing process. If you encounter an error or want to go back to a previous step, you'll have to start over, wasting a lot of time.
8. Conclusion
Editing old photos with Photoshop is not just a design skill, but also a way to preserve priceless sentimental value. Even if you're a beginner, mastering the basics, understanding the necessary tools, and being patient will allow you to restore old photos to their sharpest and most vibrant state. Hopefully, the Photoshop editing tips in this article will give you more confidence as you begin your photo restoration journey. Practice regularly, experiment with different methods, and gradually improve your skills to transform old photos into lasting memories.





















VIP Products








Best Selling Products
Adobe Photoshop Copyright - Full App
120 USD
Plugin Retouch4me
69 USD
Freepik Premium Account
59 USD
Genuine Adobe Illustrator account
99 USD
Copyright Adobe Lightroom Account
59 USD
Upgrade genuine Capture One account
120 USD
Upgrade Duolingo Super
29 USD
Genuine Cheap Canva Pro
39 USD
Capcut Pro 1 Year
39 USD
ChatGPT Plus Account (GPT-4)
16 USD
Windows 10 & 11 Pro Key
36 USD
MidJourney Account
29 USD
Autodesk All App Account Copyright
120 USD
Adobe Premiere Pro Account
99 USD
Upgrade Genuine Office 365
49 USD