Best Selling Products

Plugin Retouch4me
69 USD

Genuine Adobe Illustrator account
99 USD

Upgrade Duolingo Super
29 USD

Copyright Adobe Lightroom Account
59 USD

Freepik Premium Account
59 USD

Adobe Photoshop Copyright - Full App
120 USD

Upgrade Genuine Office 365
49 USD

MidJourney Account
29 USD

Adobe Premiere Pro Account
99 USD

Capcut Pro 1 Year
39 USD

Windows 10 & 11 Pro Key
36 USD

ChatGPT Plus Account (GPT-4)
16 USD

Upgrade genuine Capture One account
120 USD

Autodesk All App Account Copyright
120 USD

Genuine Cheap Canva Pro
39 USD
Film Photography Experience: Touching the Artistic Soul Through Every Frame
Nội dung
- 1. Basic Understanding of Film Cameras
- 1.1 Distinguishing Film Cameras and Digital Cameras
- 1.2 Popular Types of Film Cameras
- 1.3 Introduction to Film Stock
- 2. Preparation Before Shooting
- 2.1 Choosing the Right Equipment
- 2.2 Understanding How Film Cameras Work
- 2.3 Movie Selection and Settings
- 3. Film Photography Techniques
- 3.1 Frame and Composition
- 3.2 Getting Familiar With Shooting Settings
- 3.3 Focusing and Metering Techniques
- 3.4 Creativity and Experimentation
- 4. Practice and Post-Processing
- 4.1 Film Processing Process
- 4.2 Analysis and Evaluation of Shooting Results
- 5. Film photography experience for beginners
For many, film photography is not just a hobby but a living passion. Join us on a journey to discover film photography techniques – where every click is a fascinating experience and creative inspiration.
In recent years, the trend of using film cameras has gradually become popular again, especially among young people and designers. This trend is not only attractive because of the "soulful" image quality but also because the experience of taking photos with film cameras brings a unique feeling, refining every moment. When starting with film cameras, the first thing to understand is that this is not just about recording images but also a process of learning, self-experimentation and discovery. The following article will help you discover the most basic knowledge to creative photography techniques in the field of design and photography.
1. Basic Understanding of Film Cameras
1.1 Distinguishing Film Cameras and Digital Cameras
One of the most common confusions that many beginners encounter when starting out in photography is the comparison between film and digital cameras. Although both types of cameras record images, there are some fundamental differences between them:
Film camera:
Using a roll of film to take pictures, each picture is “printed” onto the film after it is taken.
There is no screen to show the results immediately after taking the shot, making the shooting process require patience and finesse.
Brings a “vintage” effect, natural colors and characteristic contrast, creating a unique mark in each photo.
.png)
Digital camera:
Record images in digital format, allowing immediate review of results after shooting.
Easily edit and archive images without developing film.
Provides stable image quality, but sometimes lacks the "soul" of each image created by the chemical process of the film.
The unique features of film cameras are the reason why they are still popular among photographers, especially those who love the authenticity and sophistication in each photo.
.png)
1.2 Popular Types of Film Cameras
There are many types of film cameras with different structures, sizes and functions, however, some of the most popular and accessible types for beginners include:
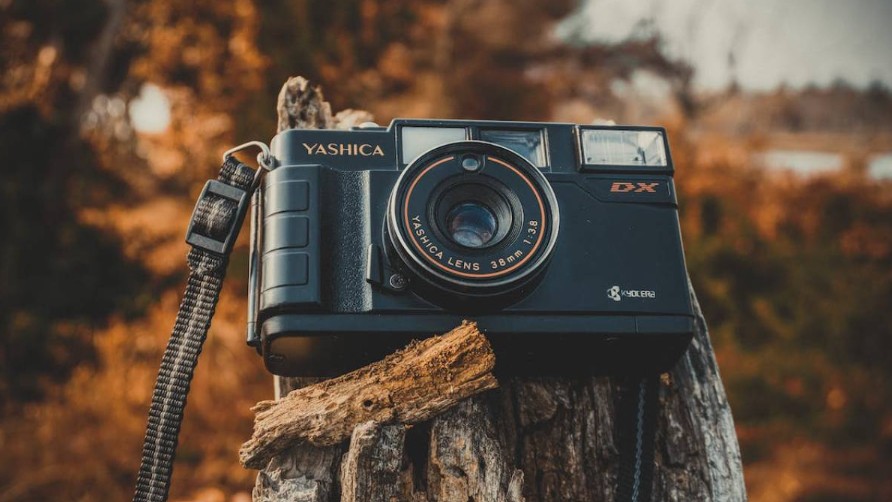
35mm film camera:
This is the most popular type of film camera, easy to use and has a wide selection of lenses and accessories.
Highly regarded for its ability to capture vivid images at moderate distances and resolutions.
Medium format film camera:
Provides higher image quality than 35mm, commonly used in fashion and landscape photography.
However, the cost of use and maintenance is also higher, so it is only suitable for those with certain experience.
1.3 Introduction to Film Stock
Choosing the right film also plays an important role in creating impressive photos:
Color film:
Provides natural color gamut, suitable for natural scenes, portraits and everyday moments.
Each type of color film has its own characteristics such as color saturation and contrast that photographers should experiment with to find their own style.
.png)
Black and white film:
Creates a classic effect and focuses on structure, light and shadow.
Helps photographers easily capture the emotions and details of the photo, creating a unique artistic depth.
Understanding the difference between film and digital cameras and choosing the right type of film is an important first step.
2. Preparation Before Shooting
2.1 Choosing the Right Equipment
One of the most important things when starting out with film cameras is choosing the right equipment. For beginners, we should prioritize models that are easy to use, have a reasonable price but still ensure quality. Criteria to note include:
Reliability and ease of use:
Choose models that are highly rated for stability and smooth operation.
Price and compatibility:
Consider accessories such as lenses, film cases, bags, etc. to ensure convenient shooting and storage.
35mm film cameras are often a wise choice for beginners due to their popularity and the variety of models available on the market.
2.2 Understanding How Film Cameras Work
.png)
To use a film camera effectively, it is necessary to clearly understand the basic operating principles of the machine:
Film shooting process: When the shutter button is pressed, the shutter door of the film camera opens to let light in and create an image on the film roll.
Maintenance and cleaning: Knowing how to properly clean and maintain your film camera will ensure longevity and image quality. Regular cleaning, especially of parts such as the lens and shooting mechanism, will help avoid unwanted errors during shooting.
2.3 Movie Selection and Settings
Not only film cameras need care, film stock – the source of image recording materials – also requires careful selection and use:
How to load film: Step-by-step instructions from how to open the camera cover, load the film roll, to closing the camera cover so as not to affect shooting.
Check the expiry date and storage: Always check the expiry date of the film before purchasing and using. The film should be stored at the appropriate temperature, away from direct sunlight and high humidity.
Tips for choosing the right film for your shooting conditions: If you are shooting in bright light, you can choose a film with a low sensitivity index to avoid overexposure. Conversely, when shooting in low light, you should prioritize a film with a higher index to ensure the brightness of the photo.
.png)
Once you have an understanding of film cameras and film types, the next step is to prepare your equipment and film properly to get off to a good start. Being well prepared will not only help reduce the risk of shooting, but will also allow you to experience the true artistry of film.
3. Film Photography Techniques
3.1 Frame and Composition
One of the factors that makes a photo attractive is the reasonable composition:
Rule of Thirds: A method of dividing the frame into three horizontal and vertical sections, helping to determine the position of the main subject, creating a focal point for the photo.
Using diagonal lines: This technique helps create a sense of movement and depth in the photo.
Find focus and create depth: Consider the position and distance between objects in the frame to create balance and focus in the photo.
3.2 Getting Familiar With Shooting Settings
Film cameras are not like digital cameras with the ability to display the results directly. This requires the user to master the basic settings:
Adjusting the aperture: Aperture not only affects the light but also creates a blurring or sharpening effect behind. Choosing the right aperture helps the photo have a certain visual depth.
Shutter Speed: Shutter speed affects the ability to “freeze” the movement of a subject or create motion blur. A slow speed can create a blurry effect on a moving scene, while a fast speed will capture the moment sharply.
ISO: While not as flexible as on digital cameras, ISO on film cameras still plays an important role in determining the brightness of a photo. Adjusting ISO to suit the lighting conditions will avoid photos that are “noisy” or too dark.
.png)
3.3 Focusing and Metering Techniques
A successful photo is not only based on composition but also on sharpness and light handling:
Manual Focus: Most film cameras require the user to focus manually. This requires patience and experience to adjust the focus distance correctly.
Metering: Some modern film cameras have built-in light meters, but most still use manual metering. Accurate metering ensures that the light in your photo is balanced, not too dark or too bright.
3.4 Creativity and Experimentation
Film cameras offer a wealth of experimental opportunities for photography enthusiasts:
Use natural and artificial light: Experiment with shooting in a variety of lighting conditions, from bright daylight to the shimmering light of dusk, or low light in quiet moments.
Shoot in an artistic style: You can experiment with different shooting styles: street photography, portraits, landscapes… Each style will bring its own unique shooting experiences and techniques.
Take advantage of “mistakes” to create art: Sometimes, small mistakes in the shooting process create unexpected artistic effects, resulting in unique and inspiring photos.
.png)
Once you have mastered the basics, the next step is to put yourself into practice. Don’t be afraid to experiment and make mistakes, as each shot is a valuable lesson that will help you get closer to your own personal style and true artistry.
4. Practice and Post-Processing
4.1 Film Processing Process
Once a “shoot” is over, the work doesn’t stop there. Film development and processing are crucial steps in bringing your work to life:
Developing your own film: For those who are passionate about “doing things by hand,” developing your own film at home can be a fun experience. However, it requires proper equipment and basic knowledge of chemicals and processing.
Choose a reputable studio: If you’re not ready to develop your own, send your film to a professional studio. This ensures quality and saves time.
Converting to Digital: After developing film, many people choose to scan the film and convert it to digital format. This makes it easier to edit, store, and share the work on today's digital platforms.
4.2 Analysis and Evaluation of Shooting Results
.png)
Image processing is just the beginning, the next important step is to analyze and learn from each photo:
Review Images: Take time to review each photo after it has been developed. Comment on the strengths and minor flaws to improve on next time.
Identify and correct errors: You may find errors in composition, focus, or exposure that are not up to standard. Take note and learn from them, because each error is a lesson that helps you improve your technique.
Save and compare: Storing photos of your shoot not only helps you track your progress, but also serves as inspiration for future projects.
The process of taking a photo does not end when you press the shutter button. It is the lessons learned after reviewing each photo that will be the valuable “fuel” to help you improve your technique and art over time.
.png)
5. Film photography experience for beginners
Before getting into the film photography experience, you need to note that film is very sensitive to light. Even a small amount of light can cause your photo to be overexposed or even overexposed. When taking a photo, the shutter will quickly open – at this time light will pass through the aperture to the film roll. Normally the shutter only operates for a very small fraction of a second.
To create a perfect photo, you have to precisely calibrate the amount of light that will enter the film roll – this is called metering. Metering depends on two factors: shutter speed and aperture. Shutter speed is measured in seconds (can be from 1/10,000th of a second to 30 seconds). Aperture has its own unit called f-stops, such as f/4 and f/8. A smaller f-number (like 1 or 2.8) means the aperture is wide open, which will let in more light. On the other hand, a higher f-number (like 16, 22 or 32) means the aperture is narrow open, which will let in less light.
For pocket cameras or point and shoots that produce well-exposed photos with the push of a button. These cameras use photocells (electronic light sensors) that automatically adjust shutter speed, aperture, and focus.
Film cameras, with their classic beauty and ability to create “soulful” images, are finding their place again in the digital age. Although there were certain difficulties and limitations at first, it is thanks to these limitations that photographers can discover their own style, thereby conveying emotions and stories through each photo.


VIP Products


Best Selling Products
Plugin Retouch4me
69 USD
Genuine Adobe Illustrator account
99 USD
Upgrade Duolingo Super
29 USD
Copyright Adobe Lightroom Account
59 USD
Freepik Premium Account
59 USD
Adobe Photoshop Copyright - Full App
120 USD
Upgrade Genuine Office 365
49 USD
MidJourney Account
29 USD
Adobe Premiere Pro Account
99 USD
Capcut Pro 1 Year
39 USD
Windows 10 & 11 Pro Key
36 USD
ChatGPT Plus Account (GPT-4)
16 USD
Upgrade genuine Capture One account
120 USD
Autodesk All App Account Copyright
120 USD
Genuine Cheap Canva Pro
39 USD