
Best Selling Products

Upgrade genuine Capture One account
120 USD

Autodesk All App Account Copyright
120 USD
Copyright Adobe Lightroom Account
59 USD

Windows 10 & 11 Pro Key
36 USD

Upgrade Duolingo Super
29 USD

MidJourney Account
29 USD

Upgrade Genuine Office 365
49 USD

Adobe Photoshop Copyright - Full App
120 USD

ChatGPT Plus Account (GPT-4)
16 USD

Adobe Premiere Pro Account
99 USD

Genuine Cheap Canva Pro
39 USD

Plugin Retouch4me
69 USD

Capcut Pro 1 Year
39 USD

Freepik Premium Account
59 USD

Genuine Adobe Illustrator account
99 USD
How to adjust the sky to be bluer in Lightroom for a natural-looking, non-artificial effect.
Nội dung
- 1. Why should you adjust the sky to be bluer in Lightroom?
- 2. Formula for making the sky bluer in Lightroom
- 3. Instructions on how to make the sky bluer in Lightroom
- Step 1: Open the image you want to edit in Lightroom.
- Step 2: Reduce the brightness of the sky in Light.
- Step 3: Adjust the color temperature in Color.
- Step 4: Increase the blue color in the Color Mixer
- Step 5: Adjust the turquoise strip to make the sky color uniform.
- Step 6: Increase Dehaze to make the sky clearer and sharper.
- Step 7: Review and save the image after editing.
- 4. How to process the sky according to different real-world photographic conditions.
- 4.1. The sky is pale, tinged with turquoise.
- 4.2. The sky was almost white, completely devoid of blue.
- 4.3. The sky is blue but lacks depth.
- 5. When should you replace the sky instead of continuing to adjust it in Lightroom?
- 6. Tips for adjusting the sky to look natural and not artificial.
- 7. Conclusion
A photograph with a clear blue sky and gentle white clouds always feels brighter and more appealing. However, photos don''t always capture the desired sky color. Sometimes the sky appears pale, has a turquoise tint, lacks depth, or is even overexposed due to excessive light. Instead of retaking the photo, you can use Lightroom to improve the color and restore some of the sky''s details. With just a few adjustments in Light, Color Mixer, and Effects, the photo will become clearer, more harmonious, and still retain its natural look. In this article, let''s explore with Sadesign how to make the sky bluer in Lightroom, the easy-to-apply formulas and parameters, and the situations where you should replace the sky using Photoshop.

1. Why should you adjust the sky to be bluer in Lightroom?
The sky is one of the elements that directly influences the emotions and overall feel of a photograph. A clear blue sky makes the scene look more spacious, bright, and has more depth. Especially in travel, landscape, architectural, or outdoor photography, a beautiful sky can help the subject stand out and create a clear visual focal point.
However, lighting conditions, weather, and camera equipment can cause the sky color to not turn out as expected. Photos taken at midday often have overly bright skies, while photos taken in cloudy conditions tend to appear gray or washed out. Some photos even have a turquoise tint, making the overall effect unnatural.
Lightroom offers many tools to address these issues. You can reduce the brightness of the sky, enhance blue tones, adjust clarity, and highlight cloud layers. The advantage of this method is that it doesn't require changing the entire photo, and you can control the level of editing to maintain harmonious colors.

2. Formula for making the sky bluer in Lightroom
Before you begin, you should understand that a pale sky isn't always due to a lack of saturation. In many cases, the main cause is overly bright areas that cause the blue color to fade. Therefore, instead of just increasing saturation, you need to combine adjustments to light, color, and contrast. Below is a sample formula for photos with a pale blue sky that still retain color and detail.
3. Instructions on how to make the sky bluer in Lightroom
Step 1: Open the image you want to edit in Lightroom.
First, launch Lightroom on your computer or phone, then import the photo you want to edit. You should prioritize photos where the sky still retains some color and detail, as this is a favorable condition for improving the sky's color.
After opening the image, observe the overall picture to identify the main problem. Is the sky too bright, tinged with turquoise, or lacking clarity? Accurately identifying the image's condition will help you choose the appropriate settings, avoiding over-adjustment that could result in a washed-out sky or uneven color patches.
Step 2: Reduce the brightness of the sky in Light.
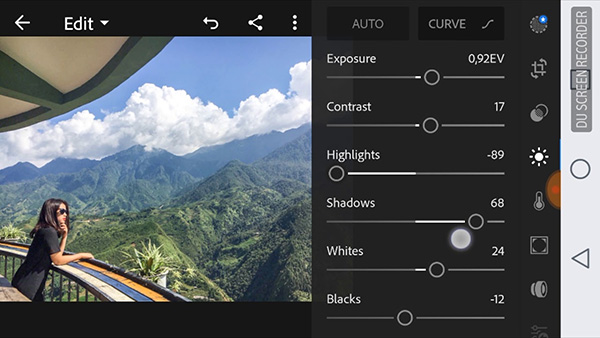
Select the Light option to begin adjusting the lighting. Drag the Highlights down to around -50 to reduce the brightness in prominent areas, especially white clouds and brightly lit skies. Next, reduce the Whites to -10 to minimize loss of detail in white areas.
You can increase the shadows by around +10 if the background is too dark. However, don't increase it too much as this can cause the image to lose contrast. After this step, check the sky and surrounding details again to ensure the image still has balanced brightness.
Step 3: Adjust the color temperature in Color.
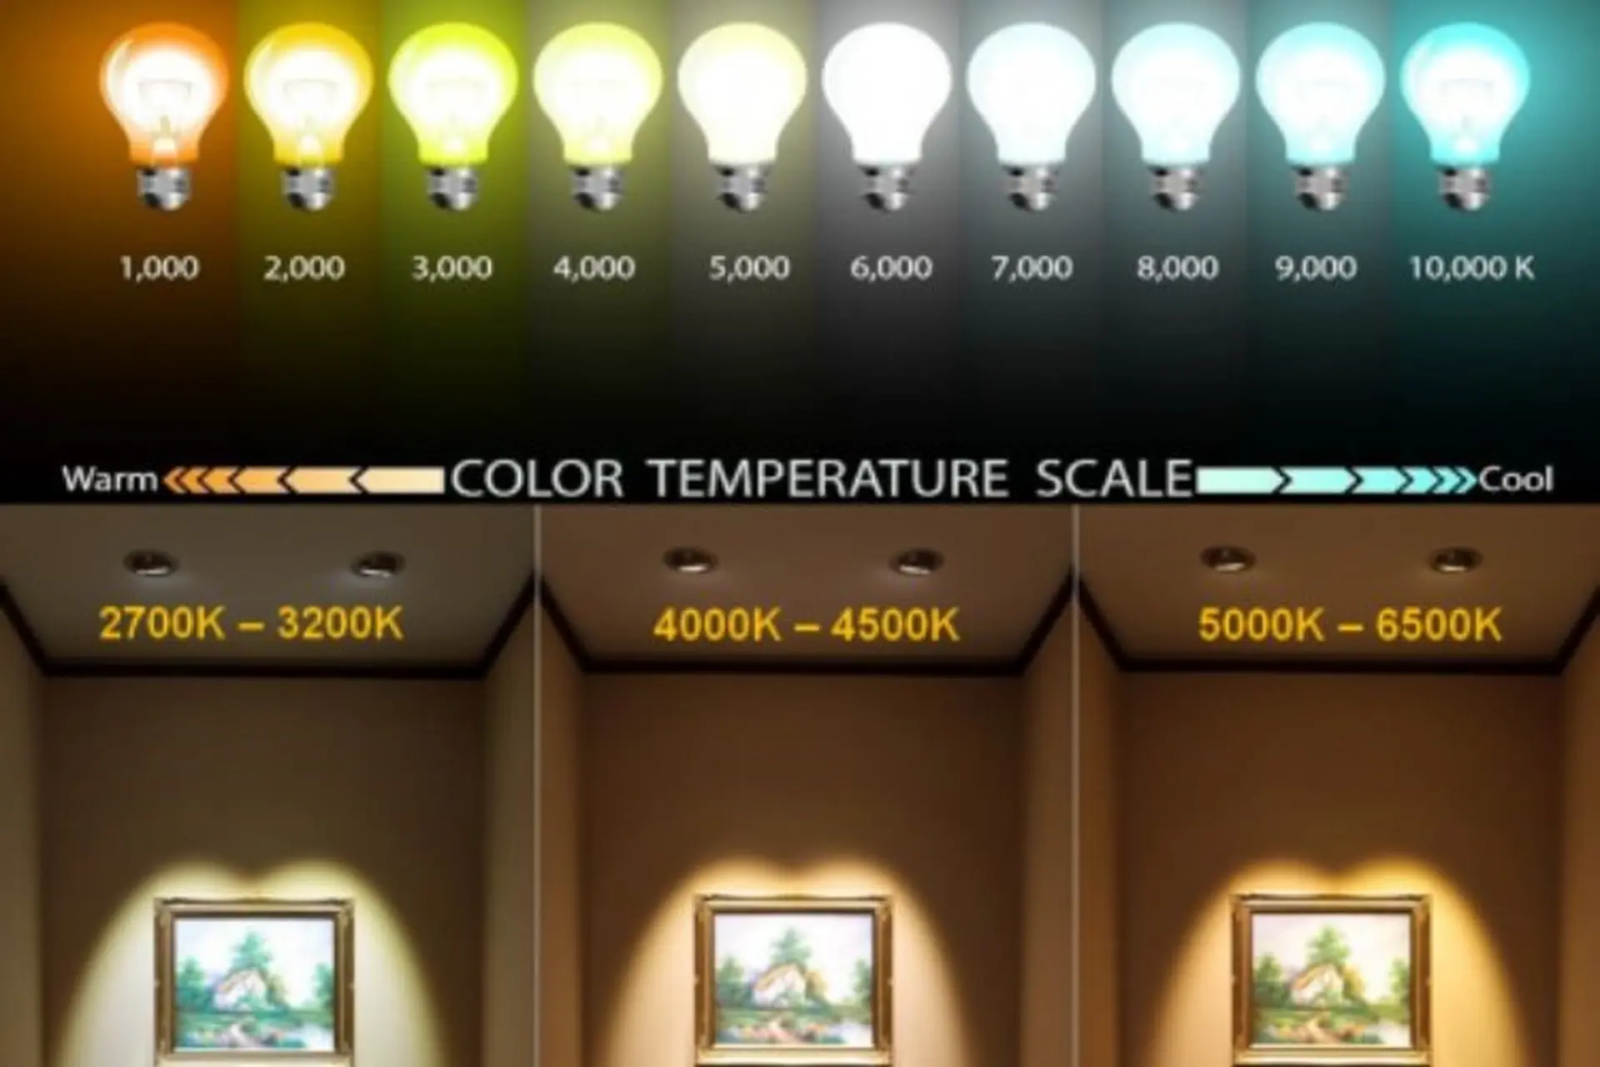
Next, open the Color settings and reduce the Temp to around -5. This will give the overall image a cooler feel, helping to create a pleasant blue hue for outdoor scenes.
Next, increase Vibrance to around +15 to make the colors more vibrant. The difference with Vibrance is that it prioritizes enhancing relatively pale colors, giving the image more life without overpowering the overall color palette. You should also observe the sky, trees, and other subjects to avoid unbalanced overall color.
Step 4: Increase the blue color in the Color Mixer
This is the most important step in creating a deep and clear blue sky. In the Color Mixer, select the Blue range, then adjust Hue down to -10, Saturation up to +30, and Luminance down to -30. Luminance is a particularly important parameter. Reducing Luminance decreases the brightness of the blue range, making the sky appear deeper and more vibrant. This is also why you shouldn't just increase Saturation when trying to improve a pale sky.
If you increase the saturation too much, the sky color can turn a glaring blue, looking unnatural and easily giving the impression of over-editing. Therefore, combine a moderate increase in saturation with a decrease in luminance for a more harmonious effect.
Step 5: Adjust the turquoise strip to make the sky color uniform.
Some photos show skies that aren't purely blue but have a mix of turquoise and other shades of blue. In this case, you need to select Aqua (turquoise) in the Color Mixer, increase Saturation to +15, and decrease Luminance to -15.
Adjusting the Aqua range further helps to make areas with turquoise hues more intense, preventing the situation where part of the sky is blue while the rest is pale. However, if the image contains a lot of turquoise water, clothing, or objects, you need to check carefully because the Color Mixer can affect all areas with the same color range.
Step 6: Increase Dehaze to make the sky clearer and sharper.
After adjusting the lighting and colors, go to the Effects section and find the Dehaze slider. You can increase it to around +15 to reduce the foggy effect, improve clarity, and make the clouds stand out more.
Dehaze is particularly useful for landscape photos taken in slightly hazy or low-contrast conditions. However, if increased too much, the image may exhibit dark edges, unusually saturated colors, and harsh transitions. Therefore, adjust it gradually and compare it to the original image before saving.
Step 7: Review and save the image after editing.
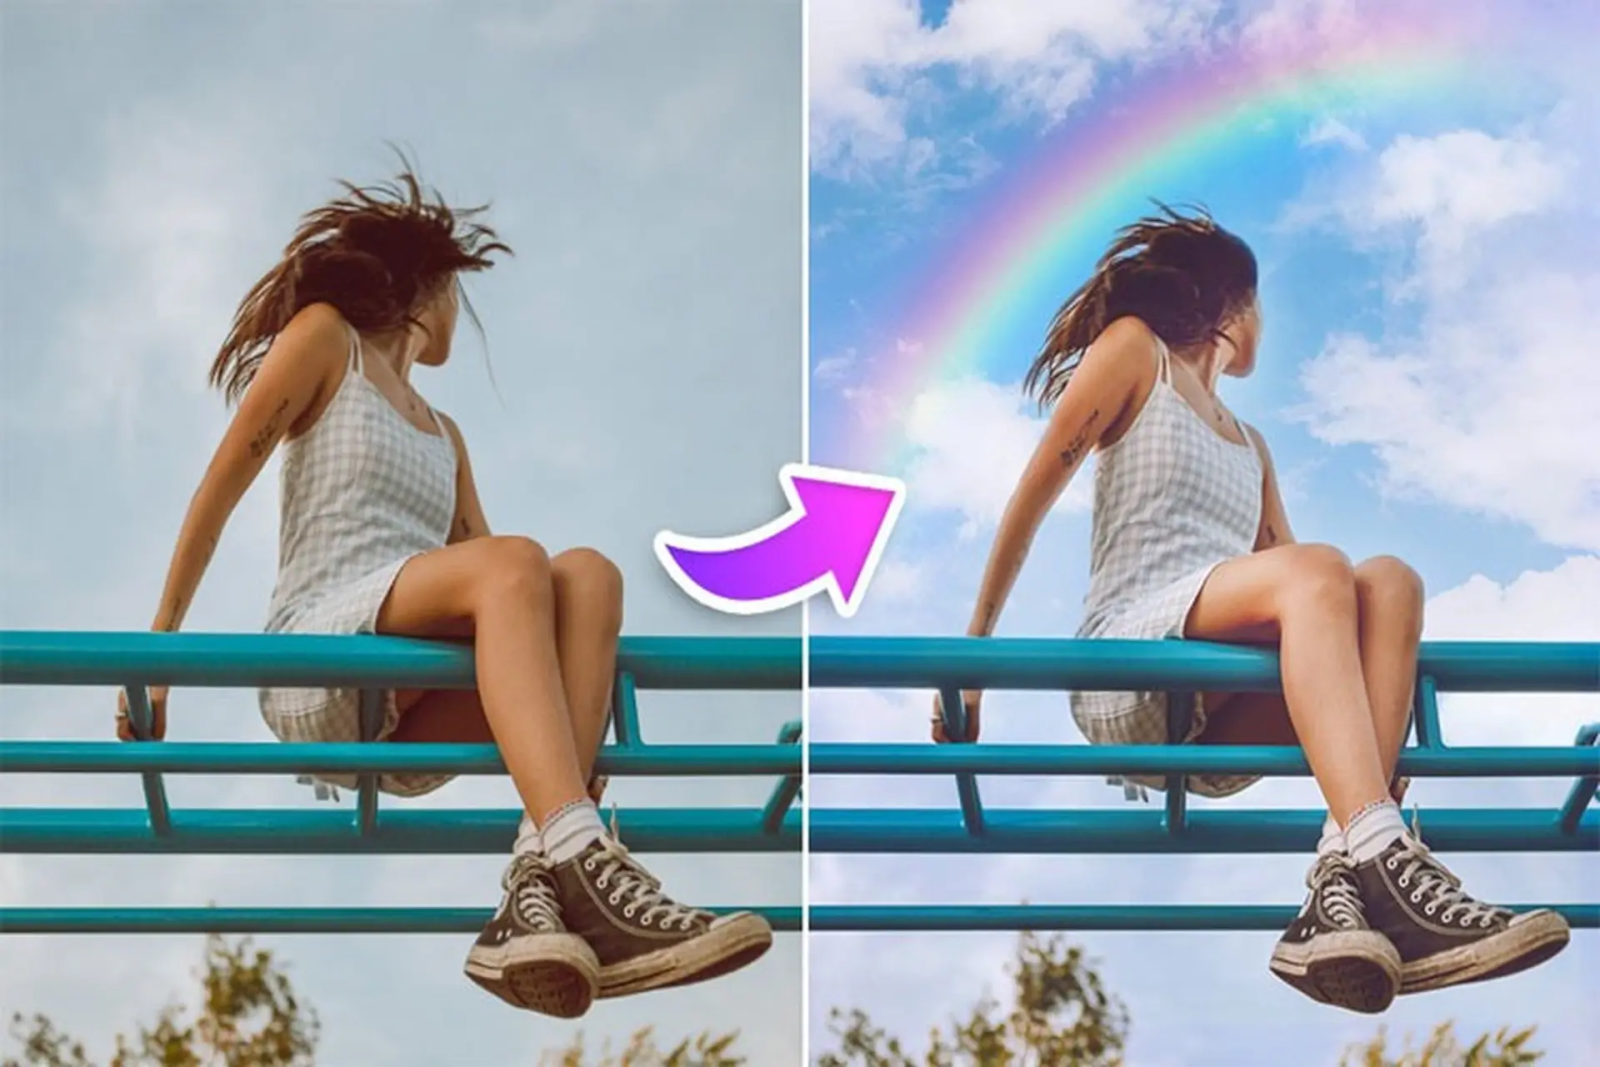
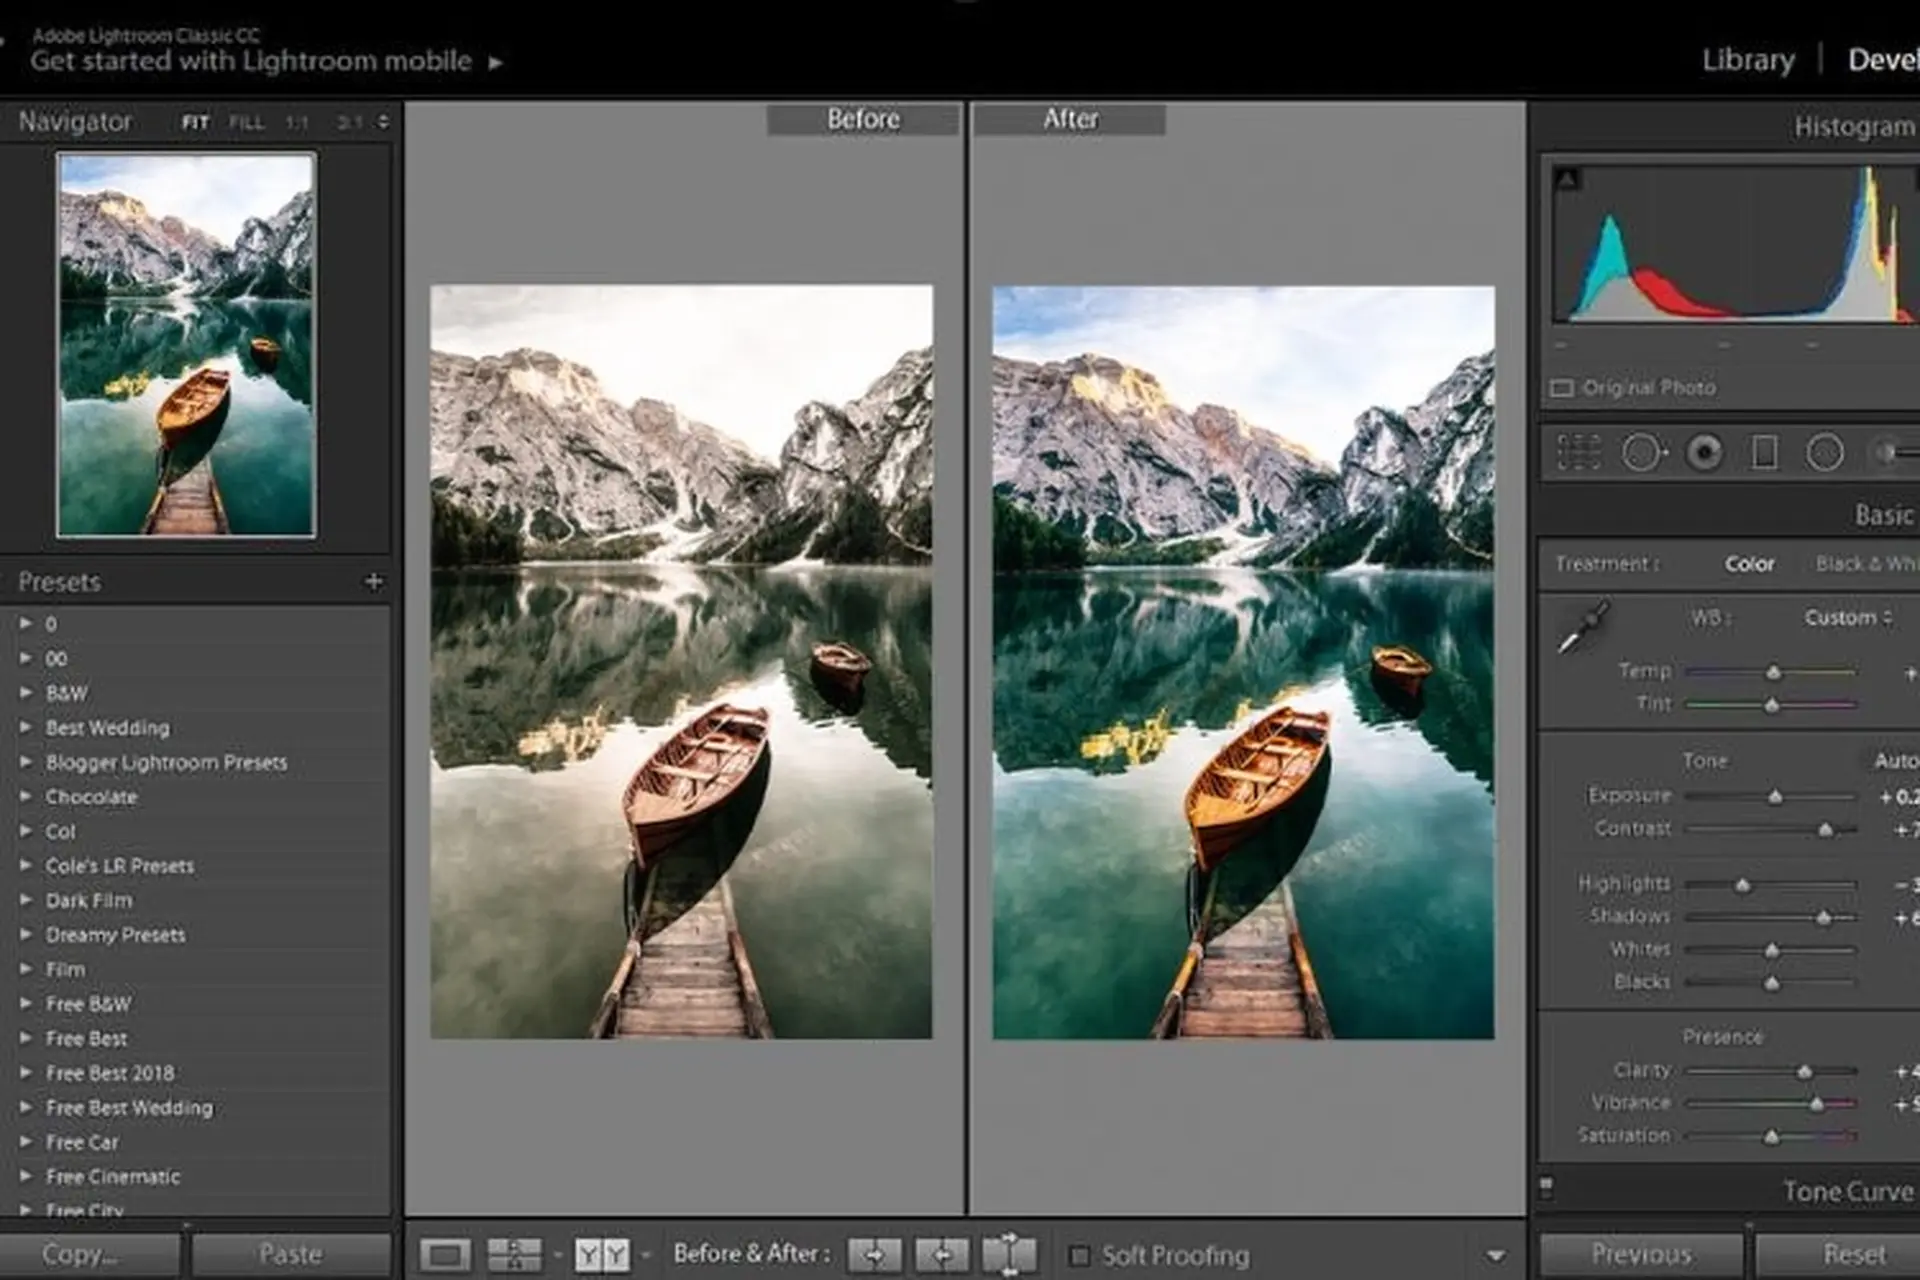
Once you've completed the steps above, use the before-and-after editing comparison mode to evaluate the results. A beautiful sky doesn't necessarily have to be a deep blue. What's important is that the colors match the light, the scenery, and the emotion the photo aims to convey.
If you notice that trees, water, or clothing are also being unintentionally altered in color, consider using Masking to adjust the sky separately. Finally, select Export to export the image in a suitable quality. You can save the image as a JPEG to share on social media or use a format that suits your further editing needs.

4. How to process the sky according to different real-world photographic conditions.
Not every photo can be treated using the above formula. Depending on the color and quality of the original image, you may need to adjust the parameters to achieve better results.
4.1. The sky is pale, tinged with turquoise.
For photos with turquoise skies, directly increasing the Saturation of the Aqua setting can make the blue appear too dark and patchy. Instead, you should adjust the Hue of Aqua to shift the turquoise hue closer to blue.
You can try the following formulas: Aqua Hue +40, Saturation +10, Luminance -10; Blue Saturation +20, Luminance -20, and Dehaze +10. After making the changes, observe the color transition between the two ranges to avoid unnatural-looking boundaries. If the original image is a heavily compressed JPEG, some areas of the sky may still appear streaky due to incomplete color data.
4.2. The sky was almost white, completely devoid of blue.
This is a more difficult situation to handle because the sky area may have been overexposed. You could try reducing Highlights to -80, Whites to -30, and increasing Dehaze to +30 to check if you can recover the detail.
However, it's important to understand that Lightroom cannot automatically recreate completely lost color data. If the sky is almost uniformly white, dragging the sliders too aggressively will often only create an unnatural grayish-blue area, or even banding. In this situation, replacing the sky with Photoshop would be a more sensible option.
4.3. The sky is blue but lacks depth.
If the image already has a blue tint but the sky looks a bit pale, you don't need to change too many parameters. Try reducing the Luminance of Blue to around -15 to -25, slightly increasing Saturation, and adjusting Dehaze to a moderate level.
This technique helps to add depth to the sky without making the colors too saturated. Especially if the photo has many white clouds, keep the highlights at an appropriate level so the clouds still stand out against the blue sky.
5. When should you replace the sky instead of continuing to adjust it in Lightroom?
Lightroom is suitable for improving color and restoring details that were present in the original image. However, not every case can be handled with Color Mixer or Dehaze. You should consider changing the settings in the following situations:
-
The sky is completely white: There is no longer any color data or cloud detail to restore. Adjusting the parameters only creates unnatural patches of color.
-
The sky appears streaky: Heavily compressed JPEG images or areas with insufficient color transition data can exhibit banding when adjusted too deeply.
-
The sky color is uneven: some areas are deep blue, while others are white or gray, making the overall effect difficult to balance.
-
Want to completely change the scene? If you want to transform a gray sky into a clear blue one, add white clouds, or create a sunset atmosphere, a sky changer tool would be more suitable.
In these cases, Photoshop's Sky Replacement feature allows you to select a new sky and adjust the brightness, color, and direction of light to better match the original image. However, you still need to carefully check the edges of trees, roofs, hair, and other intricate details to avoid creating the illusion of a composite image.
6. Tips for adjusting the sky to look natural and not artificial.
To get a great photo, using the right tools is only part of the equation. How you control the parameters and choose the source image also greatly affects the final result.
-
Prioritize proper exposure: When shooting outdoors, avoid overexposing the sky from the start. If necessary, slightly reduce the exposure to retain detail in the bright areas.
-
Use RAW images: RAW format typically retains more information about light and color than JPEG, making it easier to adjust highlights or sky color.
-
Avoid excessive saturation: Limit saturation above +40 unless absolutely necessary, especially with JPEG images. Overly vibrant blue can make the sky look more like a graphic representation than a realistic scene.
-
Use Masking when you need to adjust only the sky: Color Mixer affects the entire area with the same color range. If you want to keep the colors of your shirt, water, and trees intact, use Masking with the Select Sky option to limit the editing area.
-
Observe the overall color: After adjusting the sky, check the other subjects to ensure the colors are consistent and the lighting remains uniform.
7. Conclusion
Adjusting the sky to be bluer in Lightroom isn't too complicated if you know how to combine the right tools. Start by reducing highlights and whites to control the bright areas, then adjust blue and aqua in the Color Mixer to create a deeper blue hue. Finally, increase dehaze just enough to make the sky clearer and highlight the clouds. In particular, avoid over-adjusting images that are overexposed or have many streaks. When the original image data is insufficient for restoration, replacing the sky using Photoshop is a more suitable option to achieve a beautiful and natural result.
















VIP Products







Best Selling Products
Upgrade genuine Capture One account
120 USD
Autodesk All App Account Copyright
120 USD
Copyright Adobe Lightroom Account
59 USD
Windows 10 & 11 Pro Key
36 USD
Upgrade Duolingo Super
29 USD
MidJourney Account
29 USD
Upgrade Genuine Office 365
49 USD
Adobe Photoshop Copyright - Full App
120 USD
ChatGPT Plus Account (GPT-4)
16 USD
Adobe Premiere Pro Account
99 USD
Genuine Cheap Canva Pro
39 USD
Plugin Retouch4me
69 USD
Capcut Pro 1 Year
39 USD
Freepik Premium Account
59 USD
Genuine Adobe Illustrator account
99 USD