Best Selling Products
How to change Line-Art color in Photoshop
Do you have Photoshop designs with artistic Line-Art lines and want to change the color of these Line-Art lines? You can do it with just a few simple steps. Let's learn how to change Line-Art color in Photoshop to any color immediately through the following shares.


1. Steps to change Line-Art color in Photoshop
To change Line-Art color in Photoshop, let's follow the basic steps below.
Step 1: Find a photo containing the line art lines that you need to change the color. Then open Photoshop.

Step 2: If the photo you choose has more than one layer, right-click on the layer and select Flatten Image to merge the layers.

Step 3: On the menu bar, select Image => Mode => Grayscale.

Step 4: Go to the "Channels" palette. Click on the small icon at the bottom to "Load Channel as Selection".

Step 5: Go back to the Layers palette and rename the background. Here I changed the name to Line Art.
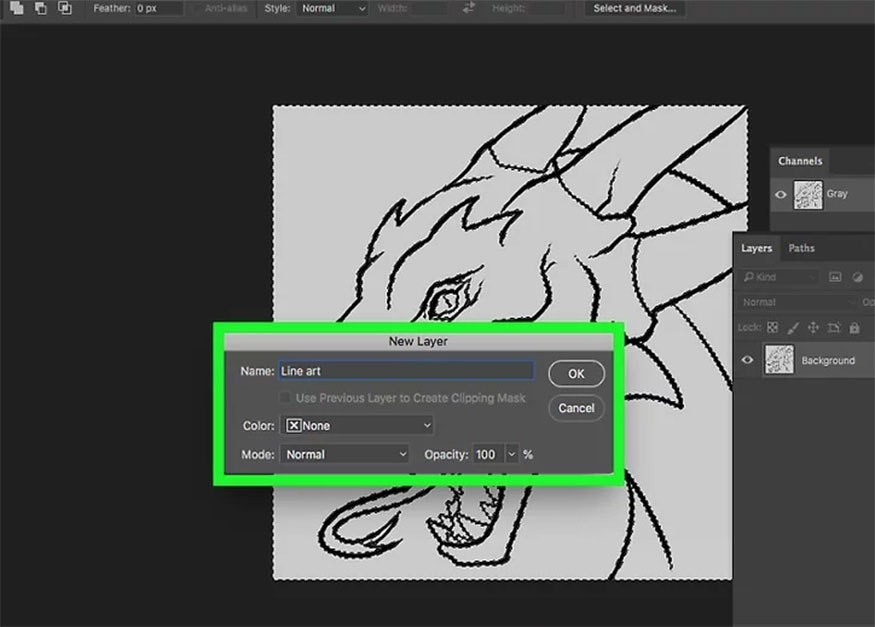
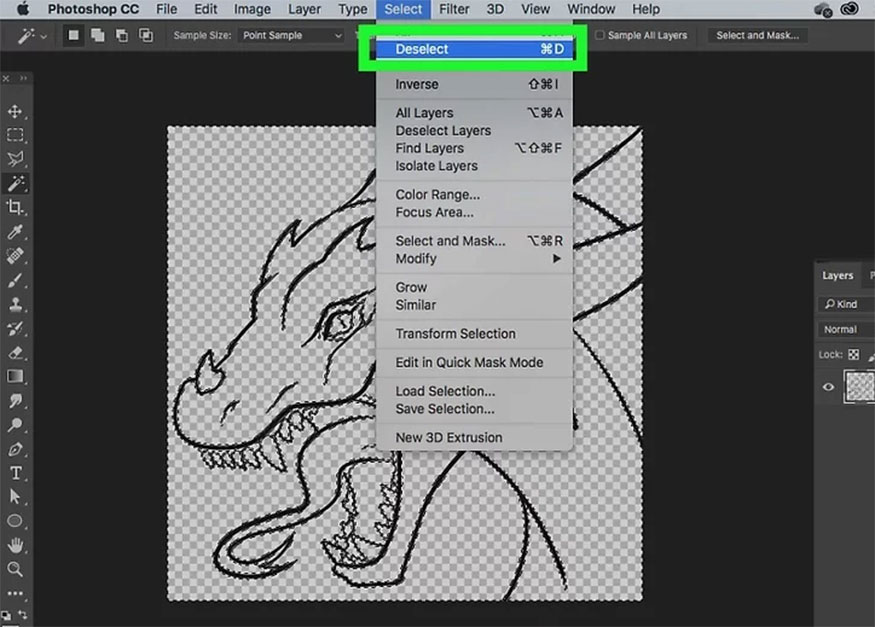
Step 6: Press Delete then press Ctrl+D to deselect.
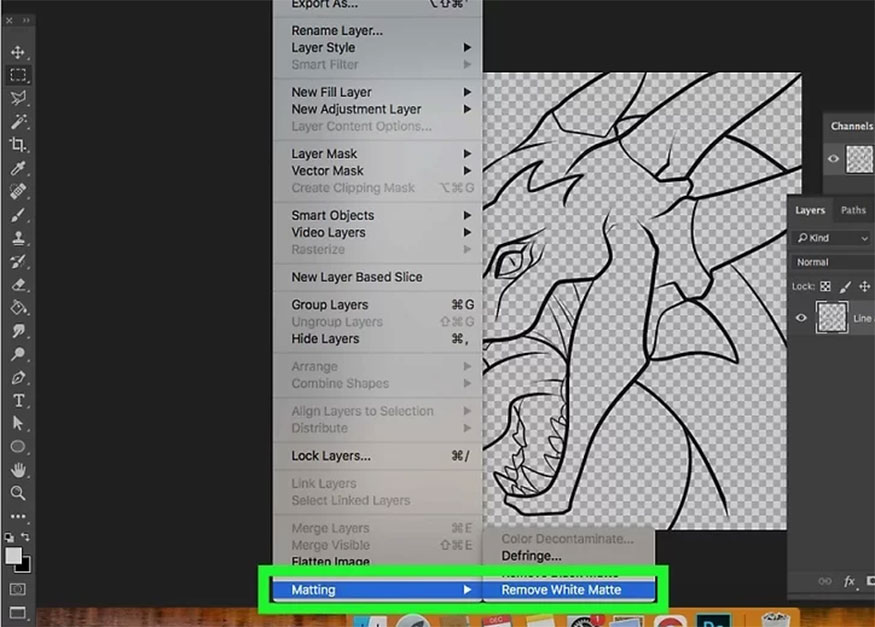
Step 7: On the menu bar, go to Layer => Matting => Remove White Matte.
Step 8: Change the Mode of the image to RGB by going to Image => Mode => RGB Color.

Step 9: Create a blank layer and move it below the line art layer. Name it Color.

Step 10: Create another blank layer and fill it with your chosen color. White is a good color, but any light color you choose to use will work.

Step 11: Save the file as a PSD to preserve the structure of the design.
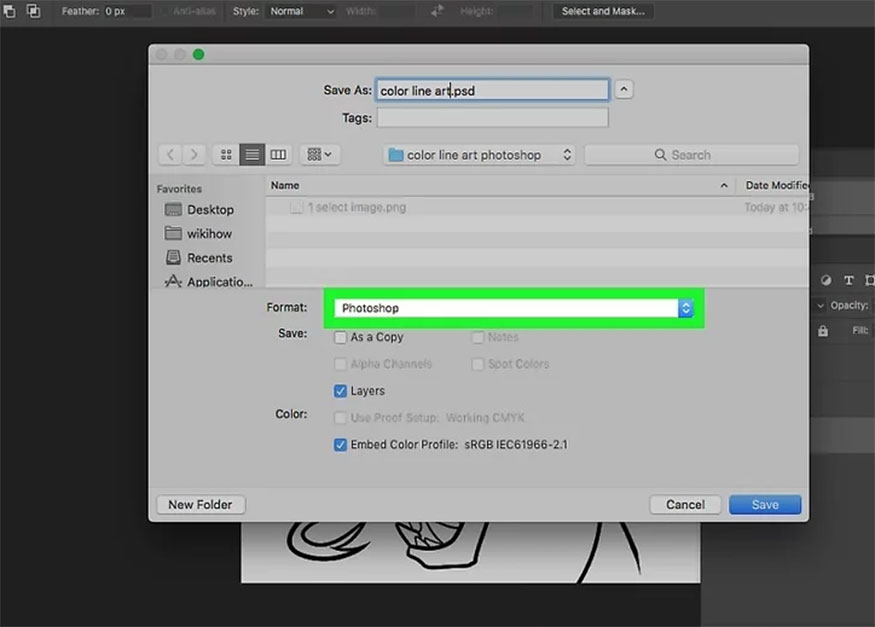
Step 12: Using a selection tool, such as the Magic Wand tool or the Quick Selection tool, select as much of the area around the line art as possible.

Step 13: Try to select as many images that are not line art as possible.

Step 14: Press Ctrl+Shift+I to invert the selection.
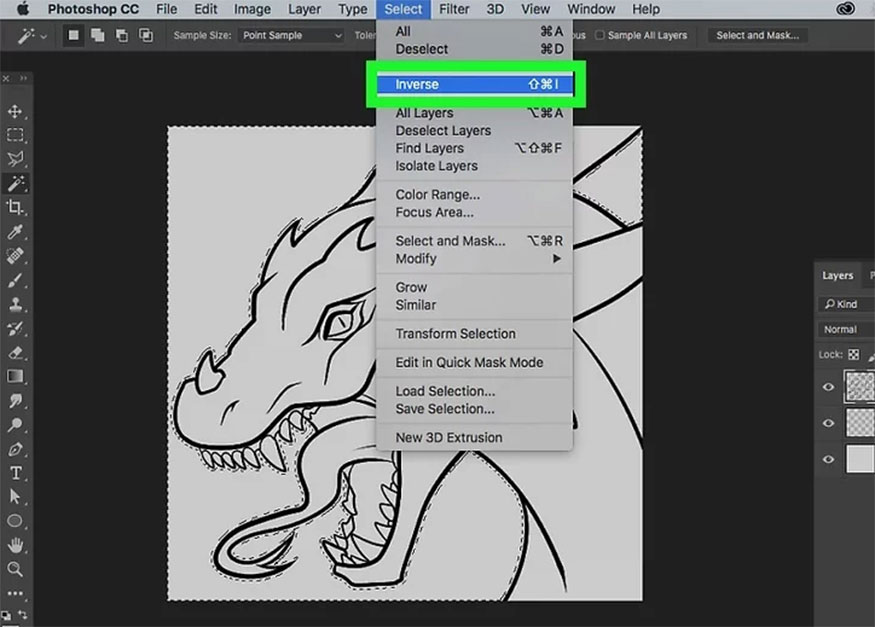
Step 15: Choose a blend or primary color. Red or yellow are good choices.
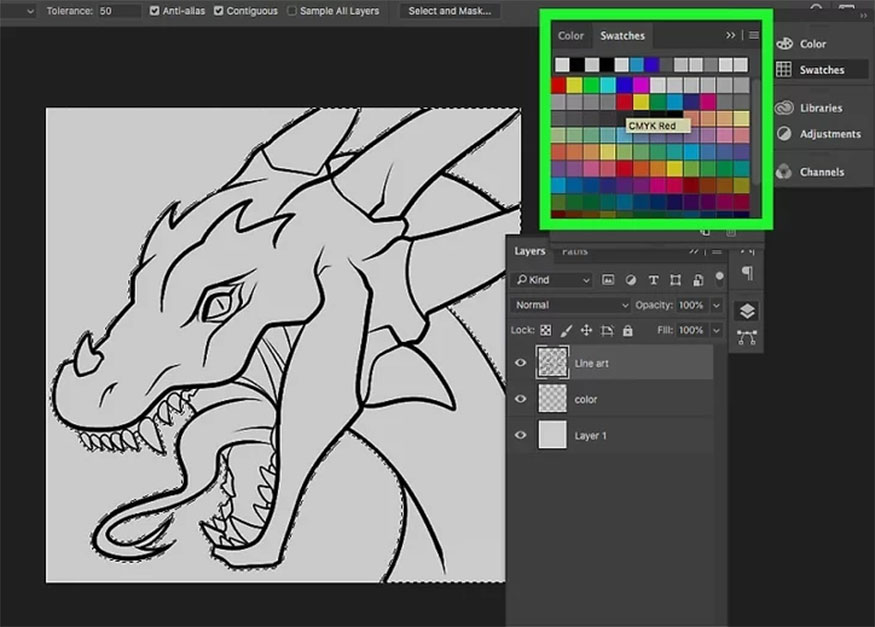
Step 16: Fill the selection with your chosen color. Don't worry if you see parts that aren't selected. A large, hard brush will do the trick.
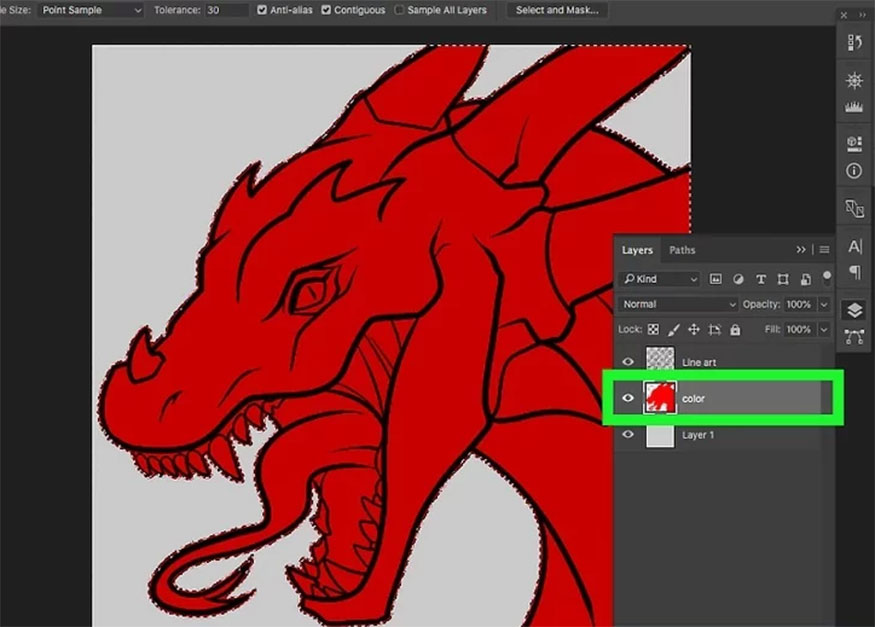
Step 17: Press Ctrl+D to deselect everything when you're done using the selection to simplify filling your line art.
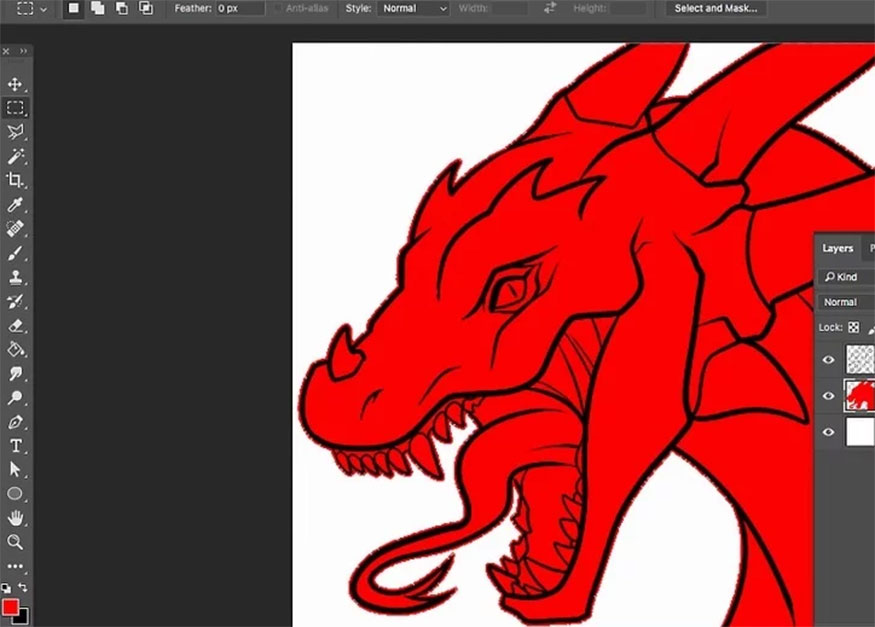
Step 18: Zoom in to see any spots that should or should not be colored. Use the Eraser to clean up so that every part of the image that you want to color is covered.

Step 19: Select Lock transparent pixels (the square icon with alternating pixels after Lock) in the Layers panel. This is the function that prevents you from coloring outside-the-line art.
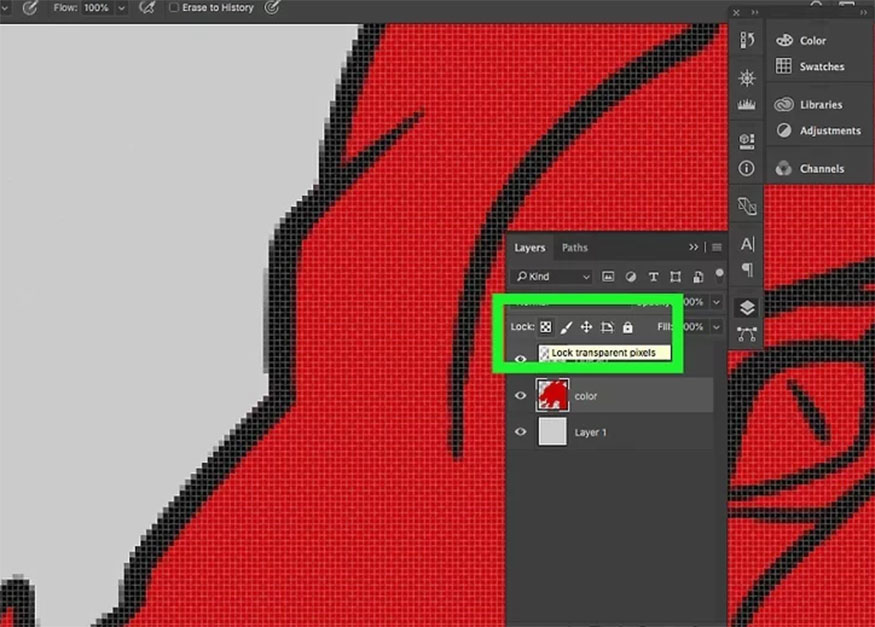
Step 20: Start coloring your line art. Note that you will not be coloring outside the drawing, but this method will not preserve the lines inside the drawing. To do that, you will need to do the same steps for each section.

So you have changed the color of Line-Art in Photoshop. Now the line art lines in the shape of a dragon. The design is more unique and impressive, right?
2. Conclusion
Above is a summary of the steps to change the color of Line-Art in Photoshop. The implementation is not too simple, now you can freely change the color of your line art. Hopefully, the above sharing can help you have unique and impressive designs.

Installation and support contact information:
🏡 SADESIGN Software Company Limited
📨 Email: phamvansa@gmail.com
🌍 Website: https://sadesign.ai

Installation and support contact information:
🏡 SADESIGN Software Company Limited
📨 Email: phamvansa@gmail.com
🌍 Website: https://sadesign.ai


.png)


