Best Selling Products

Upgrade genuine Capture One account
120 USD

MidJourney Account
29 USD

Autodesk All App Account Copyright
120 USD

Plugin Retouch4me
69 USD

Windows 10 & 11 Pro Key
36 USD

Genuine Cheap Canva Pro
39 USD

Adobe Premiere Pro Account
99 USD

Freepik Premium Account
59 USD

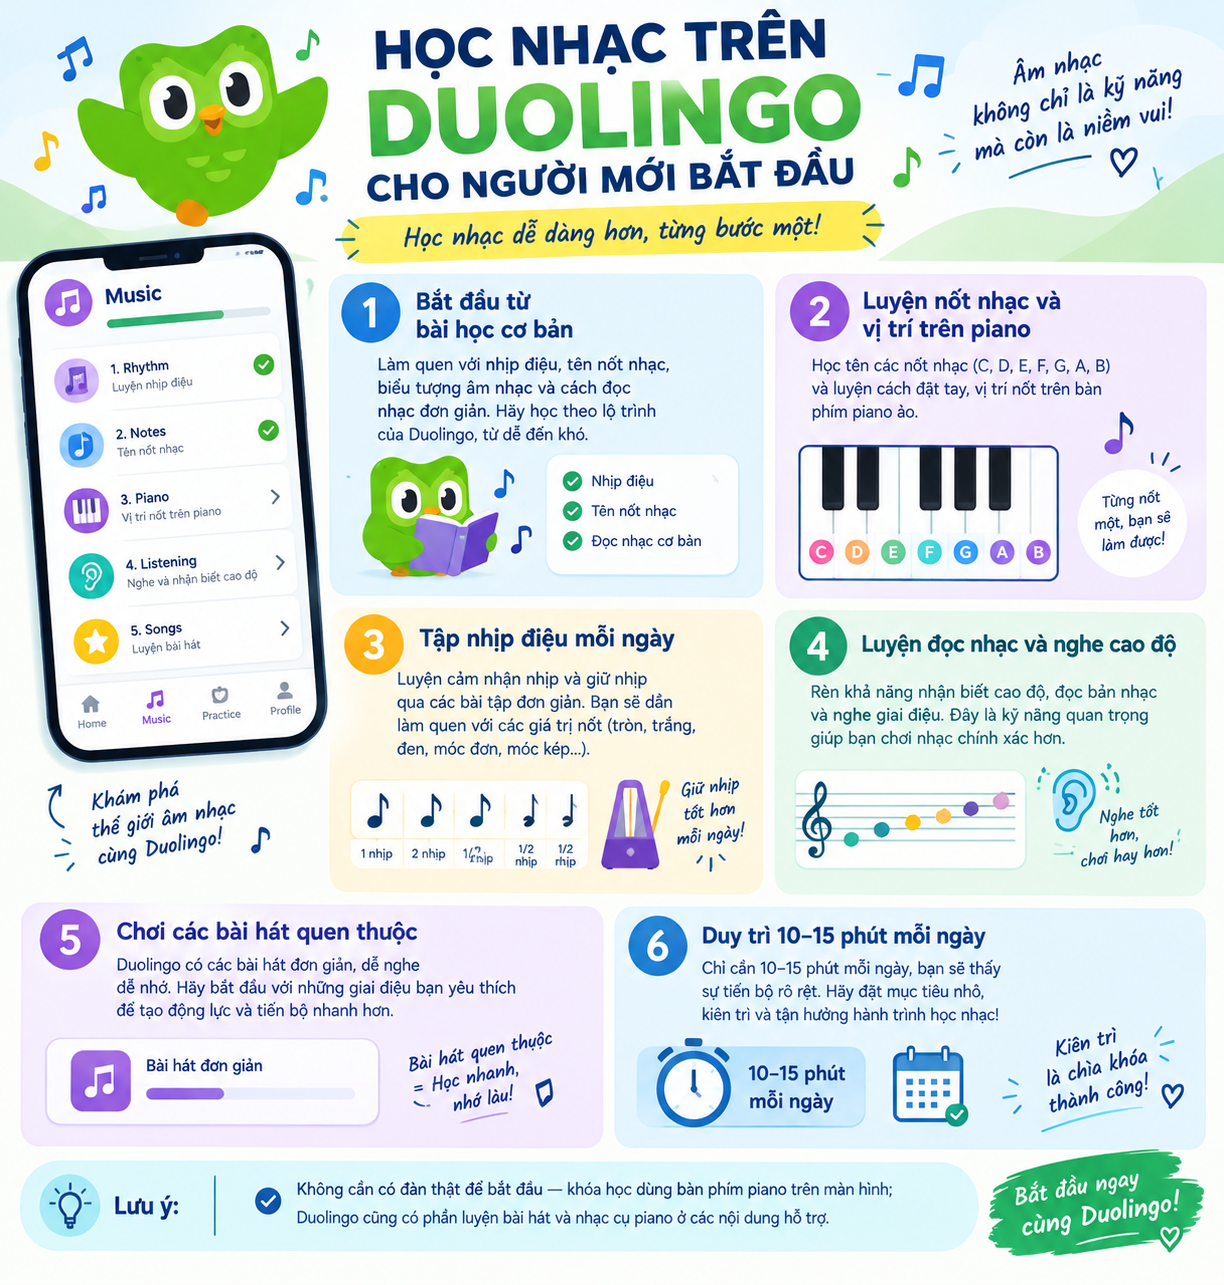
Upgrade Duolingo Super
29 USD

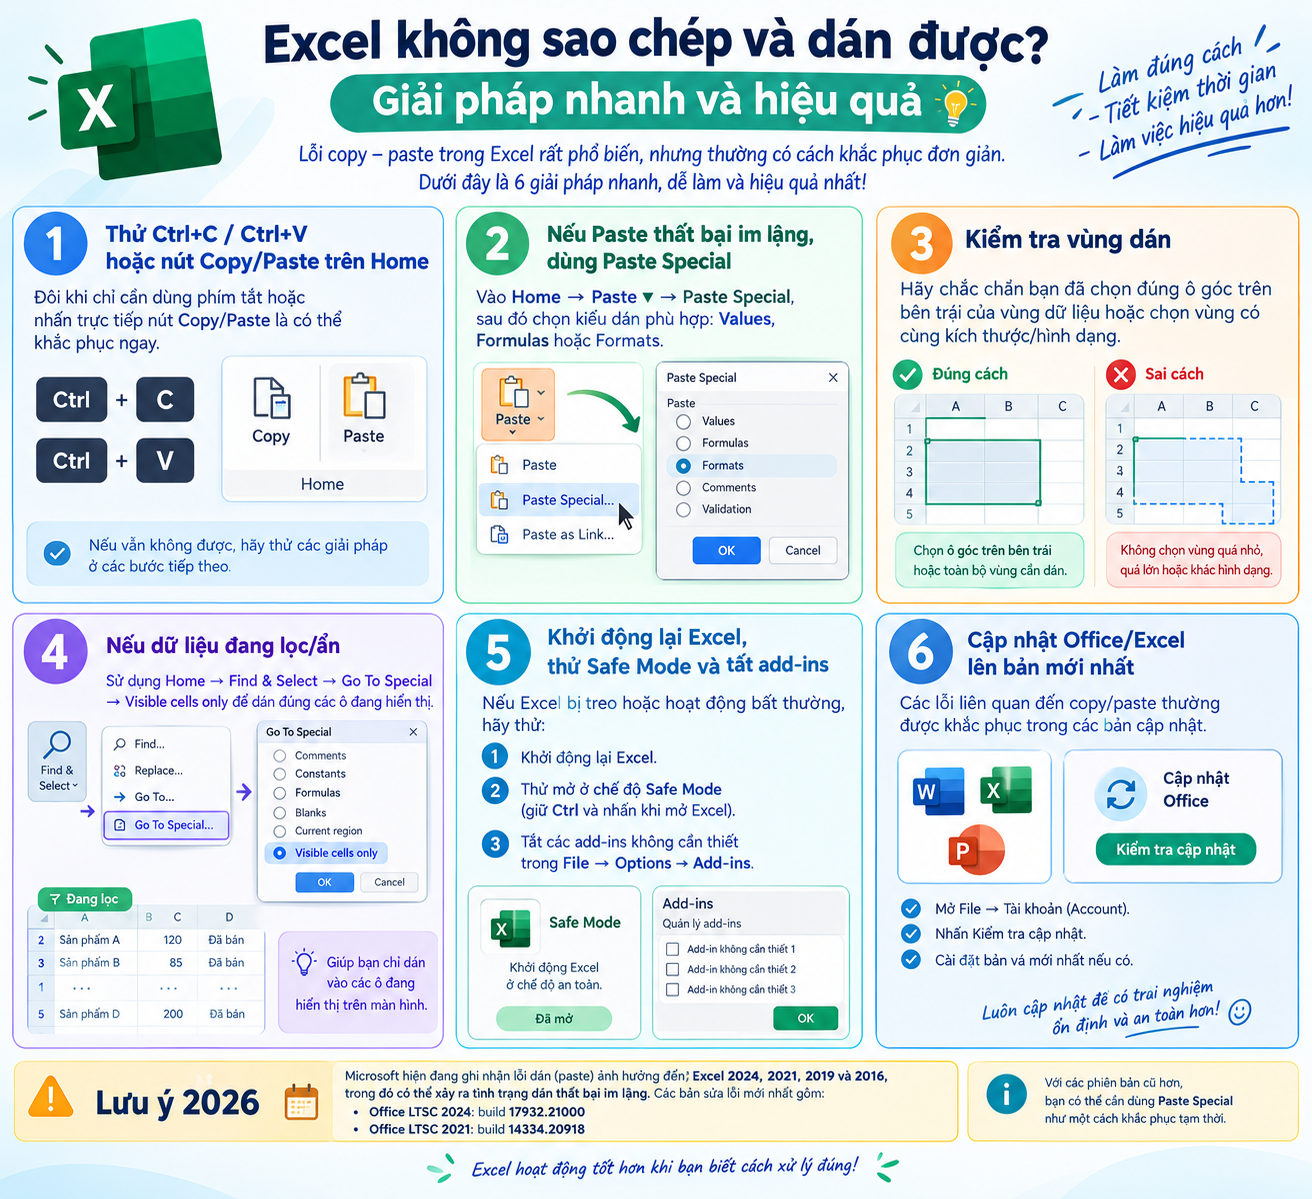
Upgrade Genuine Office 365
49 USD

ChatGPT Plus Account (GPT-4)
16 USD

Copyright Adobe Lightroom Account
59 USD

Capcut Pro 1 Year
39 USD

Genuine Adobe Illustrator account
99 USD

Adobe Photoshop Copyright - Full App
120 USD
How to create a Second Brain on Notion: Knowledge management tips for freshmen
Nội dung
- 1. What is a Second Brain and why should freshmen develop one?
- 2. Why is Notion suitable for building the Second Brain?
- 3. Fundamental thinking before building the Second Brain
- 4. Detailed instructions on how to build a Second Brain on Notion
- Step 1: Create the central page for Second Brain
- Step 2: Create a Notes database to manage knowledge.
- Step 3: Create a Projects database to manage assignments and goals.
- Step 4: Create database areas for the areas that need to be maintained.
- Step 5: Create Resources to save reference materials.
- Step 6: Create an Inbox to quickly record any new information.
- Step 7: Connect the databases to turn Notion into a knowledge network.
- 5. Workflow using Second Brain every day
- 6. Tips to prevent your Second Brain from becoming an information "dumping ground".
- 7. Turn Second Brain into your own personal "learning assistant".
- 8. Conclusion
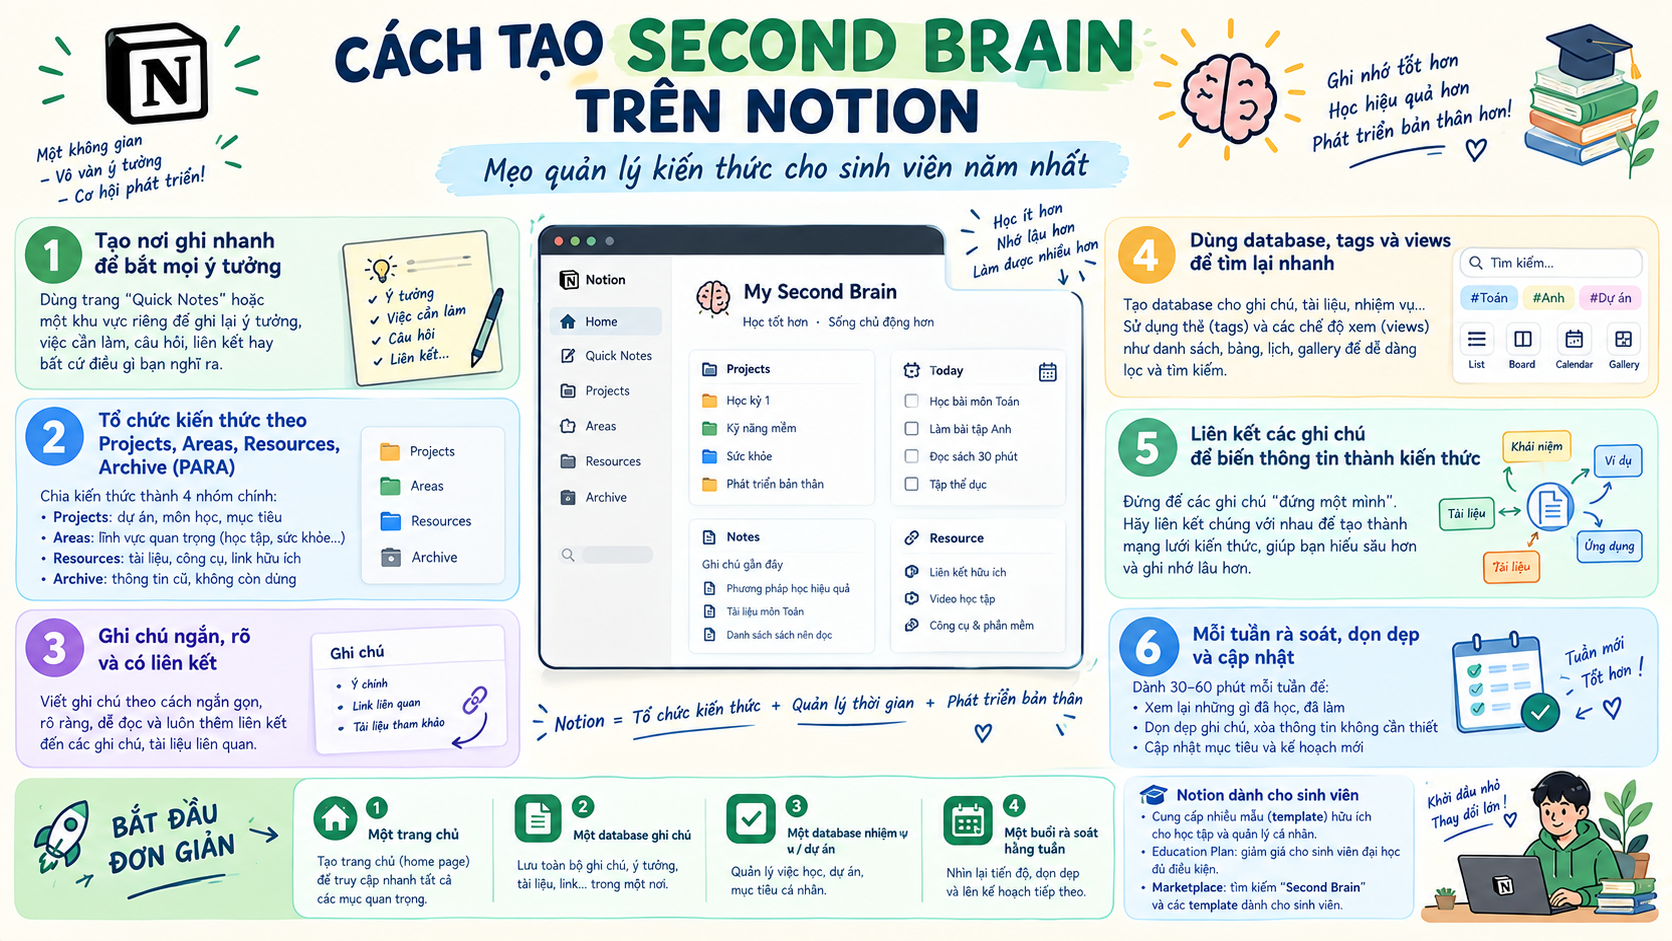
Entering university means a significant increase in the amount of information you have to process. From lecture slides and reference materials to deadlines, group assignments, and spontaneous ideas during your studies, everything can quickly become a jumbled mess of data if only scattered across your laptop or phone. Instead of trying to memorize everything, you can build a "second brain" right on Notion to store, organize, and retrieve knowledge when needed. Second Brain is more than just a place to take notes. When properly designed, this system helps you transform disparate pieces of information into an organized knowledge base where notes, subjects, projects, and documents can be linked together. For freshmen, this is a very intuitive way to develop proactive study habits from the very first days on campus. Let''s explore it with Sadesign!
1. What is a Second Brain and why should freshmen develop one?
Simply put, Second Brain is an external memory system where you store important information to reduce the pressure of having to memorize everything. Instead of having to sift through computer folders, message history, or numerous Word files every time you need something, you can bring it all into a unified system and access it faster.
For freshmen, this method is especially helpful because this is the stage where they have to get used to a completely different way of learning compared to high school. You need to manage your time, materials, assignments, and subjects yourself, and you won't always have someone to remind you. A Second Brain built from the beginning can support you:
-
Reduced memory load: Information that needs to be stored is entered into the system instead of having to try to remember everything.
-
Find information faster: Notes are categorized by subject, topic, or project.
-
Information linking: A piece of knowledge can be linked to related exercises, documents, or projects.
-
Reduce the risk of losing documents: Important reference sources can be centralized in one place.
-
Easy to review: When the exam comes around, you can find your notes again instead of studying from scratch.
-
Develop systematic learning habits: Every new piece of information has a clear place and purpose.
The most important point is that Second Brain wasn't created to make Notion complicated. The ultimate goal is still to help you learn more easily, find information faster, and use knowledge more effectively.

2. Why is Notion suitable for building the Second Brain?
Notion is a popular choice for building knowledge management systems due to its ability to combine notes, content pages, and databases. Instead of each note existing separately, you can create relationships between them through attributes such as Relation, Tags, or Select. This transforms the note repository into a connected system rather than just a place to store information.
In particular, Notion allows you to start with a very simple structure and gradually expand as needed. New students don't need to design a complicated dashboard from day one. With just a central page and a few basic databases, you can build the foundation for your personal knowledge system.
-
Notes: Record the knowledge, ideas, and content you have learned.
-
Projects: Manage assignments, presentations, projects, or goals with deadlines.
-
Areas: Track areas that require long-term maintenance, such as learning, skills, or personal activities.
-
Resources: Save books, websites, videos, PDFs, and reference materials.
-
Inbox: The place where all new information is quickly received before being categorized.
One notable point is that these sections can be interconnected. For example, a document on Marketing can be linked to notes from a basic Marketing course and simultaneously used in a presentation. This prevents knowledge from being confined to separate folders.
3. Fundamental thinking before building the Second Brain
Before you start creating databases in bulk, you should clearly define what Second Brain is being built for. A system with too many features but that takes too long to update will quickly be forgotten. For freshmen, prioritize a simple structure that is easy to input information into and fast enough for daily use.
You can refer to the PARA model, where information is categorized into four main groups. This classification helps you understand what purpose a piece of content serves and where it should be placed.
-
Projects: Tasks with specific goals and deadlines, such as presentations or assignments.
-
Areas: Fields that need to be maintained long-term as a specialization or skill.
-
Resources: Knowledge, documents, and reference materials that can be used repeatedly.
-
Archive: Projects or information that have been completed and are no longer used regularly.
When applying this to your studies, you should also remember the principle of "each note focusing on one main point ." A note on the "principle of supply and demand" should focus solely on this concept, rather than lumping it together with the entire economics chapter. Writing in small, clear sentences makes it easier to connect, search, and review later.
4. Detailed instructions on how to build a Second Brain on Notion
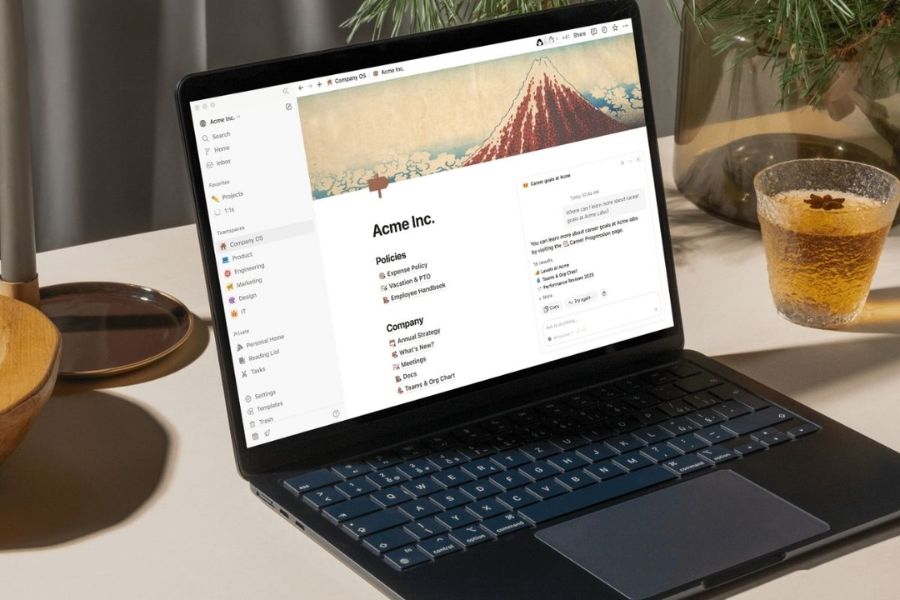
After understanding the basic structure, you can start creating the system directly in Notion. In this article, the system is designed to serve learning purposes, suitable for new students who have never built a personal knowledge base before.
Step 1: Create the central page for Second Brain
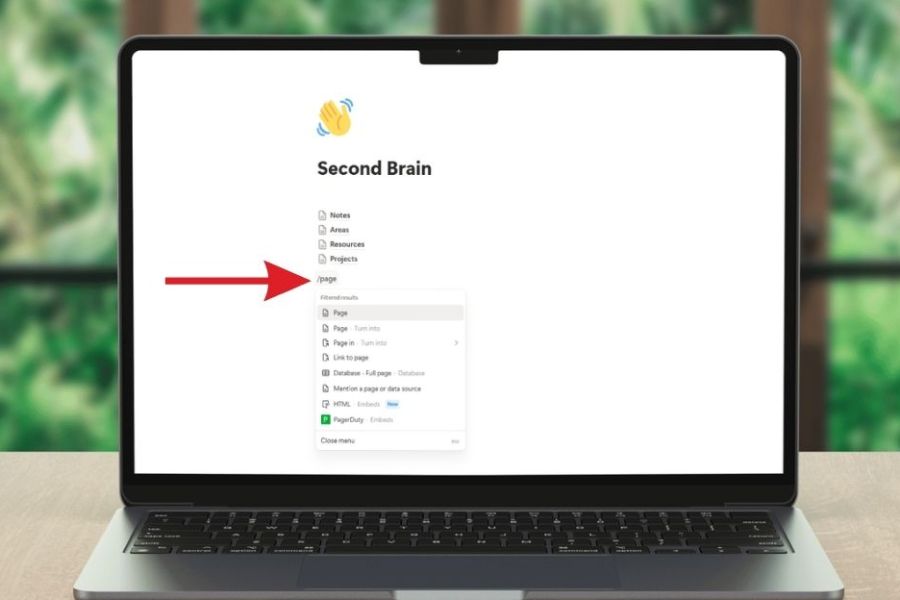
First, access Notion and log in to your account. From the main interface, create a new page and give it an easily recognizable name such as Second Brain , My Knowledge Hub , or simply Home . This page acts as the "control station" for the entire system. You don't need to put too much content here. The main goal is to create links to quickly access Notes, Projects, Areas, Resources, and Inbox.
Next, create the subpages one by one:
-
Notes
-
Projects
-
Areas
-
Resources
-
Inbox
You can click the "+" sign inside the Second Brain page and then select Page to create each page. Once completed, the subpages will appear in the navigation area, making it easier to move between sections.

Step 2: Create a Notes database to manage knowledge.
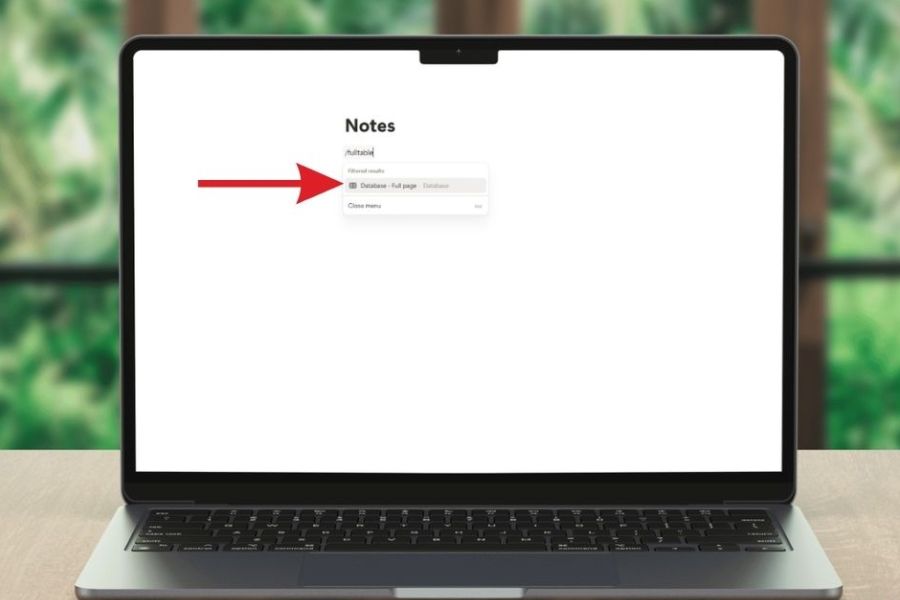
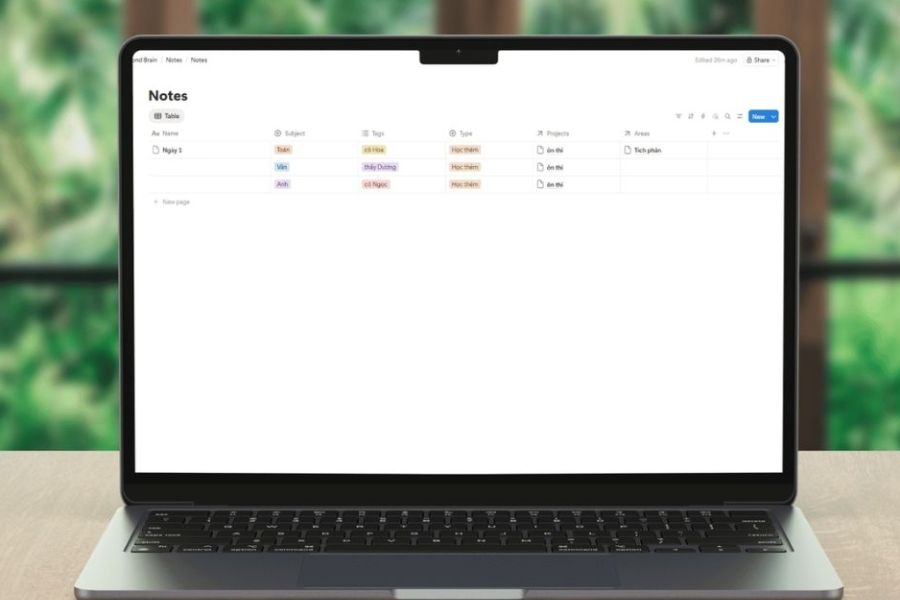
Open the Notes page and create a table database. You can use the /table command or select the Table database option depending on your current Notes interface. Each row in the table will represent a note. To make filtering and searching easier, add the following attributes:
-
Subject: Select, used to categorize subjects.
-
Tags: Multi-select, used to assign smaller topics.
-
Type: Select, which can be divided into Note, Idea, Summary.
-
Related Project: Relation, used to link notes to related projects.
For example, you have a note titled “Factors Influencing Customer Behavior” . In Subject, select Marketing; Type select Note; Tags can include Consumer Behavior. If this content is used for a presentation, you can link it to the corresponding Project. To create a new note, simply select New and enter the content. You can also open each line to write detailed content, add images, tables, links, or related documents.
Step 3: Create a Projects database to manage assignments and goals.
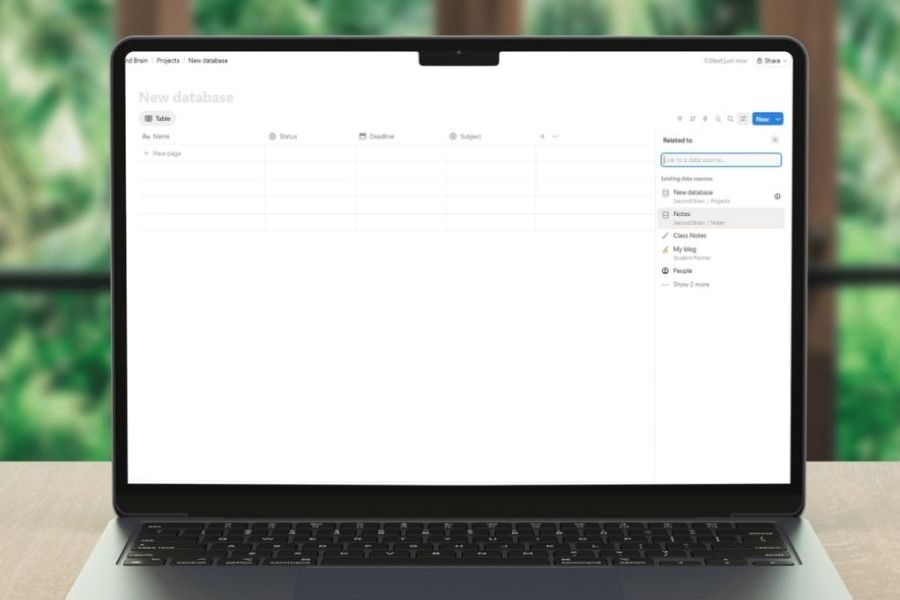
Go back to the Second Brain page and open Projects . Here, create a database in Table format, similar to Notes. Projects should focus on tasks with relatively clear starting points, goals, and deadlines. For example: "Marketing presentation," "Complete essay," "Prepare for midterm exam," or "Work on group project."
You can add the following attributes:
-
Status: Select with the statuses To do, Doing, and Done.
-
Deadline: Date to enter the completion deadline.
-
Subject: Select to specify the subject.
-
Related Notes: Relation to connect to the Notes database.
When creating a Relation property, Notion will ask you to select the database you want to link. Choose Notes . Once completed, a Project can link to multiple related notes. For example, the “Marketing Presentation” Project can connect to notes on customer behavior, brand strategy, and market research. When you open the Project, you can see previously saved knowledge instead of having to search for each file separately.
Step 4: Create database areas for the areas that need to be maintained.
Next, open Areas and create a new database. Unlike Projects, Areas don't have a specific completion deadline. This is where you manage the areas you need to monitor over the long term.
For students, Areas might include:
-
Specialized
-
Foreign Languages
-
Presentation skills
-
Research skills
-
Technology
-
Extracurricular activities
In this database, you can add:
-
Name: Field name.
-
Related Notes: Related to Notes.
-
Related Projects: Relationships linked to other projects.
For example, the "Foreign Languages" area might contain numerous notes on vocabulary, grammar, and study materials. Simultaneously, it could be linked to projects such as "English proficiency test" or "Complete communication course." This setup helps you see the relationship between your current learning and long-term goals, rather than viewing each piece of information as a separate data point.
Step 5: Create Resources to save reference materials.
Open the Resources page and create a database in Table format. This is where you store information sources that you may need to use frequently, such as articles, books, PDFs, videos, or websites.
You can set the following properties:
-
Type: Select, gồm PDF, Video, Article, Book hoặc Website.
-
Link: URL to save the link.
-
Subject: Select to categorize the subject.
-
Related Notes: Use Relation to link documents with notes.
For example, when you find a video that explains microeconomics in an easy-to-understand way, you don't need to open a browser tab and hope to find it again weeks later. Save that source to Resources, tag it with the appropriate Subject, and link it to relevant notes. Over time, Resources will become your personal library of documents. Truly useful resources can be reused for many different subjects, assignments, or projects.
Step 6: Create an Inbox to quickly record any new information.
An effective Second Brain needs a place to quickly receive information. That's where the Inbox comes in . You can create a new Page inside Second Brain and name it Inbox. The Inbox doesn't require a complex database. When studying in class, watching videos, or reading documents, if an idea pops up and you're unsure how to categorize it, just put it here.
You can write:
-
An idea that needs further investigation.
-
I have a question for the lecturer.
-
A link worth reading.
-
A piece of knowledge I just heard.
-
Something needs to be done.
-
An idea for an assignment or project.
Then, at the end of the day or weekend, you dedicate a short time to managing your Inbox. Information that belongs in Notes should be moved to Notes, references should be put into Resources, and tasks with deadlines should be put into Projects. Content that is no longer valuable can be deleted to keep the system tidy.
Step 7: Connect the databases to turn Notion into a knowledge network.
This is where Second Brain truly differentiates itself from a typical notes folder. Instead of creating separate databases, use Relation to connect Notes, Projects, Areas, and Resources. For example, you're working on a project called "Presentation on Consumer Behavior ." This project could link to the Marketing Area, multiple Notes on customer behavior, and several Resources including books, articles, or reference videos.
When data is connected, finding information becomes more intuitive. You don't need to remember the exact folder where the information is located. Simply go from the relevant Project, Area, or Note, and you can trace the linked data. This is the core spirit of Second Brain: not storing knowledge there, but building a system so that knowledge can return to serve learning and work.
5. Workflow using Second Brain every day
A good system isn't about the number of databases, but about how you use it. After finalizing the structure, build a simple process so that all new information is handled. You can start with three familiar operations: quick write, classification, and reuse .
Instead of spending hours each week tweaking the interface, dedicate a few minutes each day to data processing. Once this becomes a habit, Second Brain will naturally function as part of the learning process.
-
Step 1: Capture: When you have new information, immediately record it in the Inbox to avoid losing it.
-
Step 2: Clarify: Review the content and determine if it is truly useful.
-
Step 3: Organize: Put the information into the appropriate Notes, Projects, Areas, or Resources.
-
Step 4: Connect: Link information with related data using Relation or Tags.
-
Step 5: Review: At the end of the week, check the system again and address any remaining issues.
-
Step 6: Use: When doing homework, reviewing for exams, or working on projects, proactively retrieve the saved knowledge to use it.
For example, during a class, you hear the lecturer mention a new concept. You quickly jot it down in your Inbox. In the evening, you read more material, summarize it in your own words, and then transfer it to Notes. If you find a useful article, save it to Resources and link it to the note you just created.
After a few months, you will have a wealth of knowledge built up from your daily learning process. When it comes time to give a presentation or prepare for an exam, instead of starting from a blank page, you will already have a foundation to continue developing.
6. Tips to prevent your Second Brain from becoming an information "dumping ground".
The most common mistake when first using Notion is spending too much time designing it but too little time using it. A beautiful dashboard might be exciting for the first few days, but if entering a note requires too many steps each time, you'll quickly give up.
Think of Second Brain as a learning tool rather than a personal design project. The simpler, clearer, and more convenient it is, the more likely you are to maintain the system in the long term.
-
Don't create too many databases right from the start: Notes, Projects, Areas, Resources, and Inbox are enough to begin with.
-
Prioritize speed of information entry: Note-taking should be quick and convenient.
-
Don't save everything: Only keep content that is likely to be useful in the future.
-
Each note should have a main idea: This makes it easier to search and link to.
-
Rewrite it in your own words: Don't just copy the document verbatim.
-
Leverage Relation: Connect important information to form a knowledge network.
-
Clean out your inbox regularly: Your inbox should only be a temporary place to receive information.
-
Don't overemphasize decoration: Icons, colors, or covers should only enhance usability.
-
Weekly maintenance: Only a short period of time is needed to review and update the system.
-
Adapt to reality: If a part isn't helpful, simplify or remove it instead of trying to maintain it.
A good Second Brain isn't a perfect system from day one. It should change as you learn. By your sophomore or junior year, or when you start your internship, you can absolutely add to your CV, skills, personal projects, or professional documents.
7. Turn Second Brain into your own personal "learning assistant".
Once you have the basic structure, the next important step is to make Second Brain a truly useful part of your learning process. Don't just open Notion to input data. Actively return to the system when you need to review, prepare for lessons, work on projects, or find ideas.
You can start with very small habits:
-
Before each lesson: Review relevant notes to activate prior knowledge.
-
During class: Take notes on the main points instead of trying to copy the entire content.
-
After the lesson: Summarize the knowledge in your own words.
-
When reading documents: Save valuable resources to Resources.
-
When you have assignments: Create a project and set a deadline immediately.
-
When relevant knowledge is discovered: Use Relation to connect it to a Note or Project.
-
Weekend: Take time to check your inbox and update your work status.
-
Before the exam: Find your notes again by Subject and Tags so the system can support your revision process.
-
After completing the project: Mark it as Done and move any data that is no longer frequently used to the Archive.
8. Conclusion
The fascinating thing about Second Brain is that its value increases over time. A note might not be very useful today, but a few months later it becomes an important part of another assignment or project. As small pieces of knowledge are continuously connected, the Note gradually becomes a knowledge repository built from your own learning experiences. For a freshman, this is also a good time to form the habit of managing knowledge. You don't need to start with a complicated system. Just a Second Brain page, a few basic databases, and a habit of regular updates, and you can create a "second brain" to help organize your learning. Most importantly, let the system serve you instead of making yourself the one who has to serve the system.





















VIP Products








Best Selling Products
Upgrade genuine Capture One account
120 USD
MidJourney Account
29 USD
Autodesk All App Account Copyright
120 USD
Plugin Retouch4me
69 USD
Windows 10 & 11 Pro Key
36 USD
Genuine Cheap Canva Pro
39 USD
Adobe Premiere Pro Account
99 USD
Freepik Premium Account
59 USD
Upgrade Duolingo Super
29 USD
Upgrade Genuine Office 365
49 USD
ChatGPT Plus Account (GPT-4)
16 USD
Copyright Adobe Lightroom Account
59 USD
Capcut Pro 1 Year
39 USD
Genuine Adobe Illustrator account
99 USD
Adobe Photoshop Copyright - Full App
120 USD