Best Selling Products

Plugin Retouch4me
69 USD

ChatGPT Plus Account (GPT-4)
16 USD

Freepik Premium Account
59 USD

Autodesk All App Account Copyright
120 USD

Copyright Adobe Lightroom Account
59 USD

Upgrade Duolingo Super
29 USD

MidJourney Account
29 USD

Adobe Photoshop Copyright - Full App
120 USD

Upgrade Genuine Office 365
49 USD

Capcut Pro 1 Year
39 USD

Genuine Cheap Canva Pro
39 USD

Upgrade genuine Capture One account
120 USD

Genuine Adobe Illustrator account
99 USD

Windows 10 & 11 Pro Key
36 USD

Adobe Premiere Pro Account
99 USD
How to Create a Simple Photoshop Action in 4 Steps for Beginners
Nội dung
- 1.Introduction What is Photoshop Action?
- 2. Why Use Actions in Photoshop?
- 3. Steps to Create Action in Photoshop
- 3.1 Step 1: Open Photoshop and Prepare the Image
- 3.2 Step 2: Open the Actions Panel
- 3.3 Step 3: Create New Action
- 3.4 Step 4: Record Editing Actions
- 3.5 Step 5: Stop Action Recording
- 4. Apply Actions to Automate Other Images
- 5. Save and Share Your Action
- 6. Conclusion
Learn how to create Actions in Photoshop to automate repetitive tasks. Discover 4 simple steps to save time and improve your productivity.
While working with Photoshop, sometimes you have to perform some repetitive tasks many times, which will take a lot of time and effort. However, you can solve this problem by using the Action feature . Creating an Action in Photoshop will help you automate operations and save a lot of time. In this article, sadesign will guide you how to create Action in Photoshop simply and easily in just 4 steps.
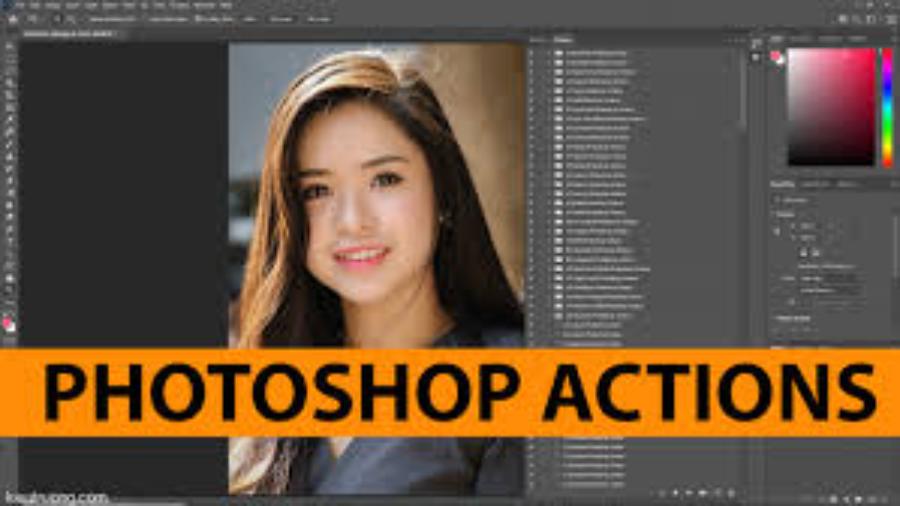
1.Introduction What is Photoshop Action?
Photoshop is a powerful tool and is widely used in graphic design, photo editing and many other fields. However, with tasks that require performing the same operations over and over again, users often find the work tedious and time-consuming. To solve this problem, Actions in Photoshop is a great feature that helps automate repetitive tasks.
.jpg)
Actions in Photoshop are a set of steps or operations that are recorded and automated, helping users quickly perform repetitive editing or design processes. By creating Actions, you can save time and ensure consistency in your work, which is especially useful when processing large amounts of images or performing complex effects. After creating and saving an Action, you just need to run it so that Photoshop automatically performs the recorded steps, bringing convenience and high efficiency in the work process.
Creating Actions not only helps increase work efficiency but also helps reduce errors when having to perform many editing steps. In this article, we will learn in detail how to create Actions in Photoshop with only 4 extremely simple steps, helping you work faster and more effectively.
2. Why Use Actions in Photoshop?
Before we get into the specific steps, let's explore a little bit about Actions and why you need to use this feature in Photoshop.
An action is a set of recorded steps that can be run automatically when you apply it to an image or document. This saves you time and effort by eliminating the need to repeat manual edits.
Benefits of Actions in Photoshop:
Save time : You can perform multiple edits with just one click.
Ensure consistency : Actions help you perform the same editing steps on multiple images without worrying about mistakes.
Automate repetitive tasks : Tasks like color correction, adding watermarks or cropping images can be automated using Actions.
Share and apply to other projects : An Action that has been created can be easily shared and applied to other projects without having to redo the entire editing step.
3. Steps to Create Action in Photoshop
Here are the specific steps to create Actions in Photoshop, from recording the action to applying the Action to other projects.
3.1 Step 1: Open Photoshop and Prepare the Image
First, you need to open Photoshop and prepare an image or document that you want to edit. You can select any file that you want to apply the Action to. If you want to use the Action on multiple photos, just make sure you have the files that you want to edit.
3.2 Step 2: Open the Actions Panel
.jpg)
To create an Action in Photoshop, you need to open the Action Panel . To do this, do the following:
Go to Window in the top menu.
Select Actions from the list. The Actions panel will appear on the right side of the screen.
If you don't see the Actions panel, it may be hidden. Just follow the steps above to turn it back on.
3.3 Step 3: Create New Action
Once you open the Actions panel, you will see some default Actions available in Photoshop. To create a new Action, follow these steps:
Click the New Action icon at the bottom of the Actions panel (the new square icon).
A new window will appear asking you to name your Action. You can name it something easy to recognize and remember, such as “Adjust Photo Color” or “Add Watermark”.
After naming, you can choose a folder to save the Action to, if needed. You can also assign a keyboard shortcut to this Action for easy access in the future.
Click Record to start recording the steps.
3.4 Step 4: Record Editing Actions
Now you can start performing the actions you want to record in the Action. For example, if you want to create an Action that changes the brightness and contrast of an image, you just do the usual steps: go to Image > Adjustments > Brightness/Contrast , adjust the parameters and apply.
.jpg)
As you complete one step, Photoshop automatically records and continues to record the next steps until you have completed the entire editing process. You can apply tools like cropping, resizing, changing colors, or even adding text to your photo.
3.5 Step 5: Stop Action Recording
Once you've completed all the necessary steps, simply tap the Stop button (red square) at the bottom of the Actions panel to stop recording the action. Your action is now saved and ready to be used on other images.
.jpg)
4. Apply Actions to Automate Other Images
One of the strengths of Action is the ability to apply recorded actions to multiple images at once, saving you significant time when working with large numbers of images.
How to Apply Action in order below:
Open the image you want to apply the Action to.
Go back to the Actions panel and select the Action you created earlier.
Click the Play button (the triangle icon) at the bottom of the Actions panel. Photoshop will automatically apply the edits to your image in the order you recorded them.
5. Save and Share Your Action
.jpg)
If you want to save an Action for later use or share it with others, you can follow these simple steps:
In the Actions panel, select the Action you want to save.
Click the menu icon in the upper right corner of the Actions panel and select Save Actions .
Choose where to save and name your Action file.
Actions can be easily shared with friends or colleagues via .ATN files, and they can apply this Action to their own projects.
Buy Cheap Photoshop License
6. Conclusion
Creating Actions in Photoshop is one of the most important skills that can help improve work efficiency and save time for designers, photographers and anyone who uses Photoshop in their daily work. In just 4 simple steps, you can automate repetitive tasks, thereby making the editing process faster and more efficient. Try creating and using Actions today to optimize your work and save valuable time.


VIP Products


Best Selling Products
Plugin Retouch4me
69 USD
ChatGPT Plus Account (GPT-4)
16 USD
Freepik Premium Account
59 USD
Autodesk All App Account Copyright
120 USD
Copyright Adobe Lightroom Account
59 USD
Upgrade Duolingo Super
29 USD
MidJourney Account
29 USD
Adobe Photoshop Copyright - Full App
120 USD
Upgrade Genuine Office 365
49 USD
Capcut Pro 1 Year
39 USD
Genuine Cheap Canva Pro
39 USD
Upgrade genuine Capture One account
120 USD
Genuine Adobe Illustrator account
99 USD
Windows 10 & 11 Pro Key
36 USD
Adobe Premiere Pro Account
99 USD