Best Selling Products
Upgrade genuine Capture One account
120 USD

ChatGPT Plus Account (GPT-4)
16 USD

MidJourney Account
29 USD
Adobe Photoshop Copyright - Full App
120 USD

Capcut Pro 1 Year
39 USD
Copyright Adobe Lightroom Account
59 USD

Freepik Premium Account
59 USD
Genuine Cheap Canva Pro
39 USD

Upgrade Duolingo Super
29 USD

Upgrade Genuine Office 365
49 USD
Adobe Premiere Pro Account
99 USD
Genuine Adobe Illustrator account
99 USD
Plugin Retouch4me
69 USD
Windows 10 & 11 Pro Key
36 USD
Autodesk All App Account Copyright
120 USD
How to naturally slim and reshape your face in Photoshop in just a few steps.
Nội dung
Photoshop is a familiar image editing tool, widely used to perfect beautiful portrait photos. Among its features, face slimming is a popular operation due to its ability to adjust facial features, making the face look slimmer and more balanced without complex editing. With just a few simple steps, you can subtly change the cheeks, chin, or forehead to your liking. If you don''t know where to start, let Sadesign guide you through the detailed steps of face slimming in Photoshop below to achieve the most natural and harmonious results.
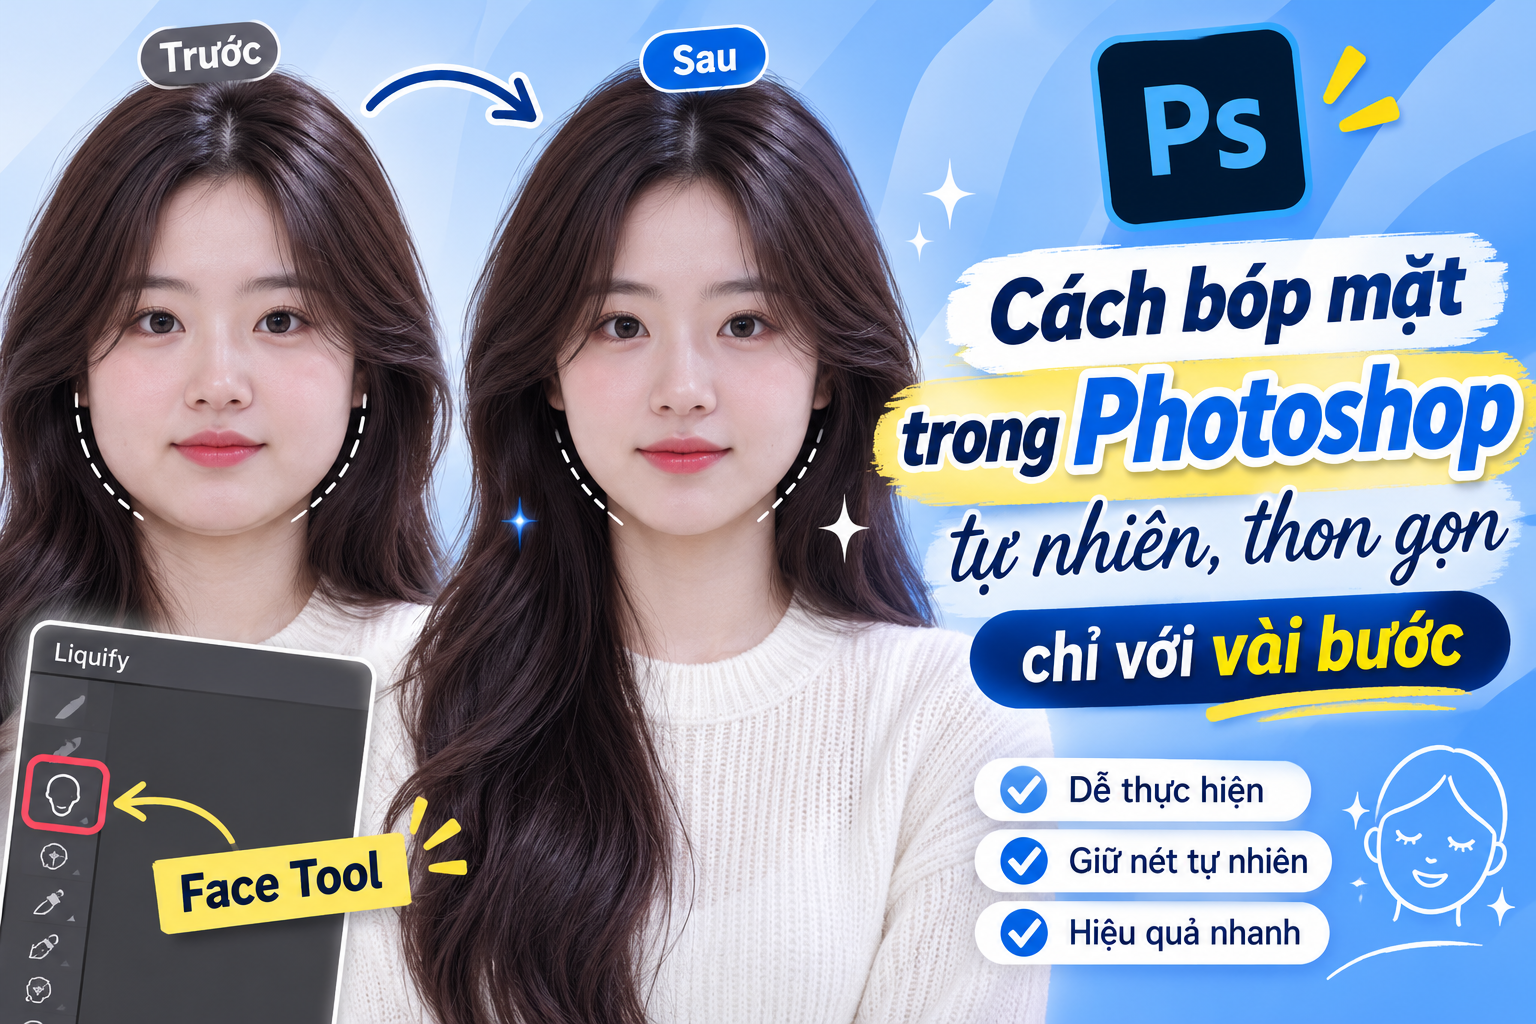
1. Detailed guide on how to resize faces in Photoshop
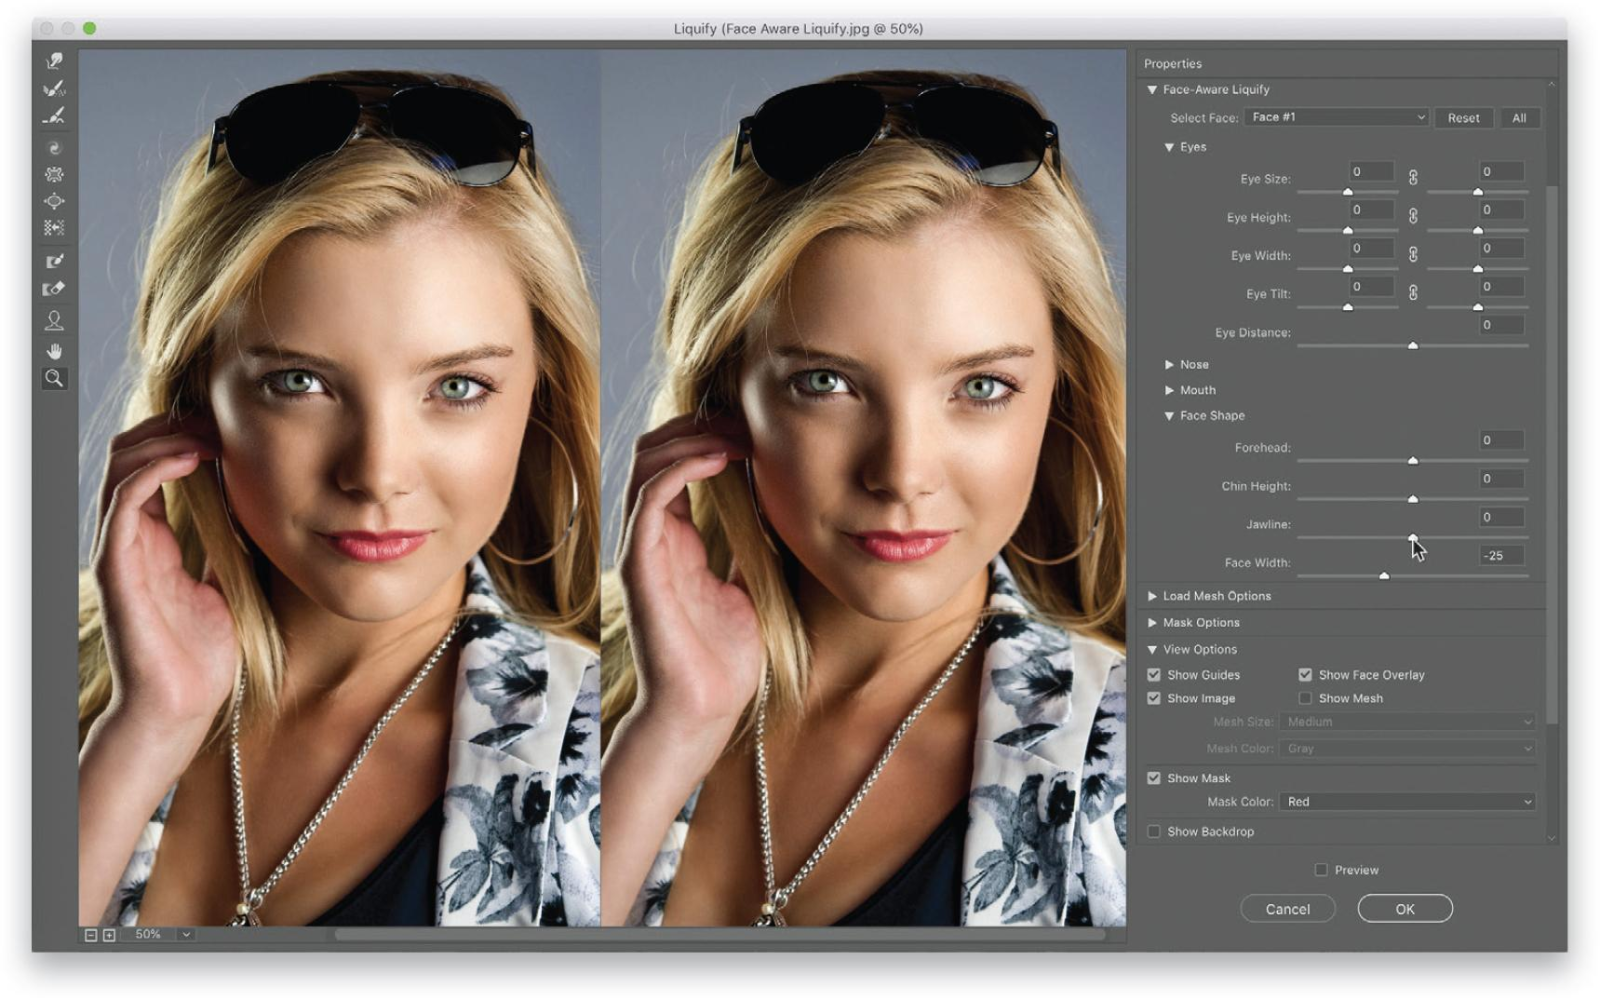
To edit faces in Photoshop, you can use the Liquify tool. This feature allows you to change the shape of areas in an image by dragging, pushing, or adjusting points on the face. In particular, the Face Tool has the ability to automatically recognize faces, making it easy for beginners to use without needing extensive editing experience.
Step 1: Open the image and access Liquify.
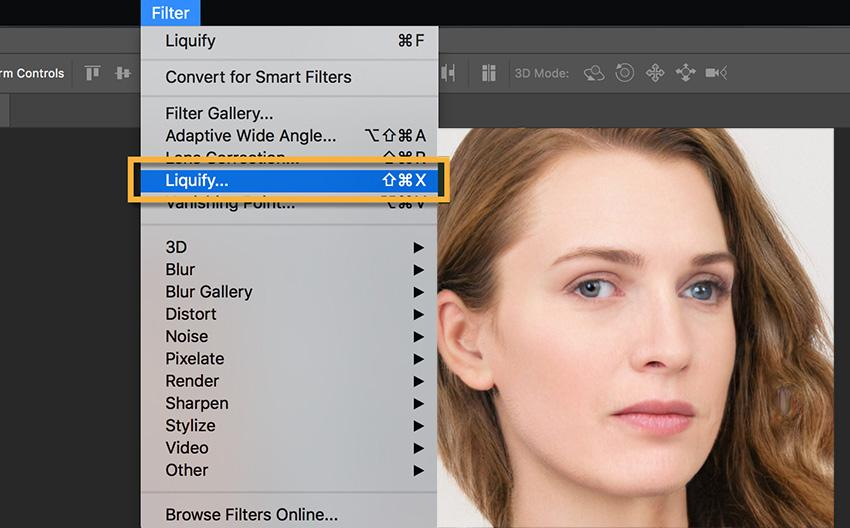
First, launch Photoshop and open the portrait photo you want to edit. You should prioritize images with good resolution, a clear face, and minimal obstruction for more accurate recognition. After opening the image, select the correct layer containing the portrait, then access the Filter option on the toolbar at the top and click Liquify. For faster operation, you can use the keyboard shortcut Shift + Ctrl + X on Windows to directly open the editing interface.
Step 2: Select the Face Tool
When the Liquify interface appears, look at the toolbar on the left side of the screen and select the Face Tool (the face icon). This tool uses Photoshop's recognition capabilities to identify key features such as the eyes, nose, mouth, cheeks, and chin. This allows you to adjust each feature individually without manually identifying the areas to be reshaped. This is a suitable option if you want to quickly reshape your face while still controlling the degree of change.
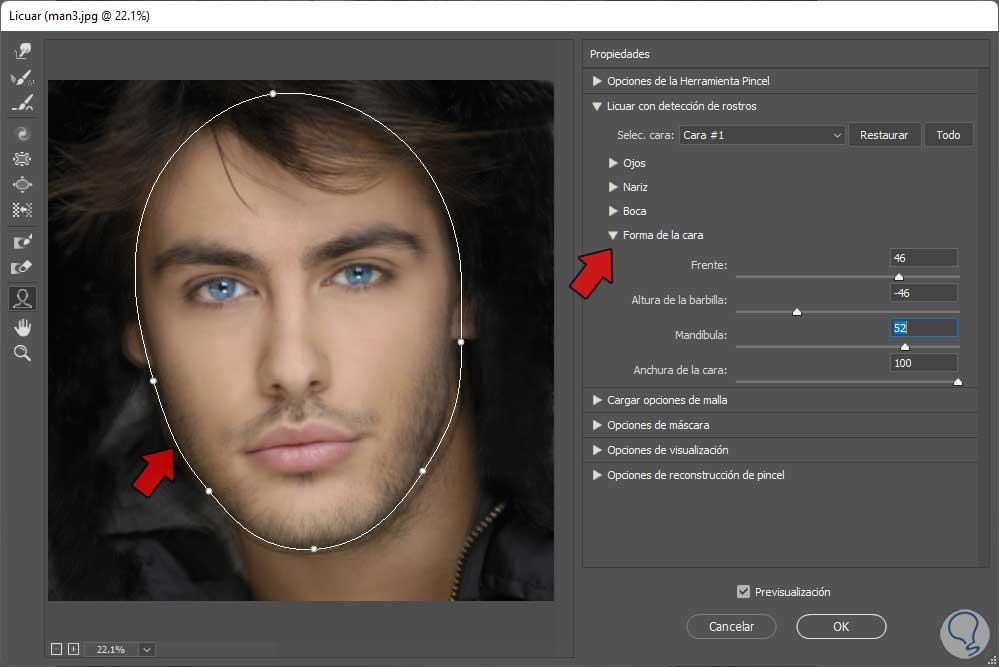
Step 3: Identify the face that needs editing.
After selecting the Face Tool, Photoshop will automatically detect faces and display corresponding adjustment points. These points typically appear on the forehead, cheeks, chin, eyes, and mouth. If the photo contains multiple people, you can use the Select Face option in the Face-Aware Liquify panel on the right to select the specific person you want to edit. Carefully check the detection points before making any changes, especially in photos taken from an angle or where faces are partially obscured.
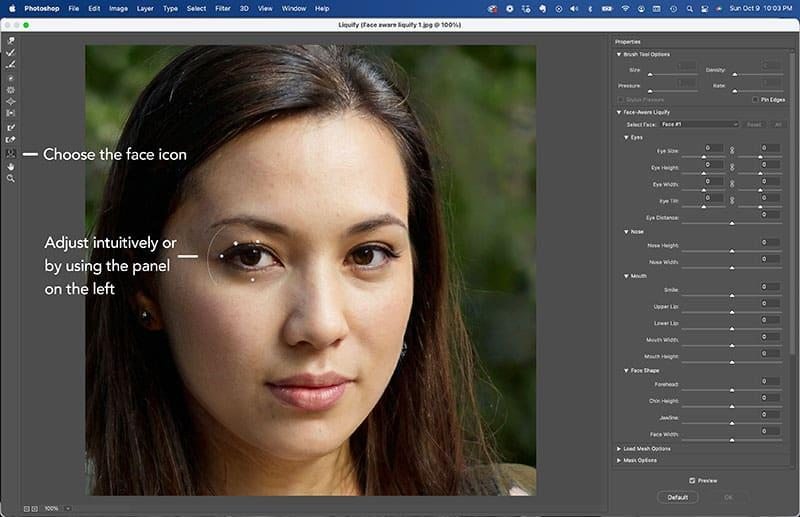
Step 4: Adjust both cheeks to make the face look slimmer.
This is the most important step when reshaping your face in Photoshop. Move your mouse to the adjustment points on both sides of your cheeks, press and hold the left mouse button, then gently drag inwards to reduce the width of your face. Do this one side at a time and observe the changes after each operation to avoid making your face look lopsided. If you want to maintain a natural look, only adjust a moderate amount, especially in the areas near your cheekbones and jawline.

Step 5: Adjust the chin and forehead for overall balance.
After perfecting the cheeks, you can continue adjusting the chin and forehead to create a more harmonious facial appearance. For the chin, gently pull the adjustment points to change the length or width as desired. If you want a softer look, avoid making the chin too pointed or too long, as this can easily disrupt the natural proportions. For the forehead, make gentle adjustments only when necessary, avoiding drastic changes that could make the face look unbalanced.
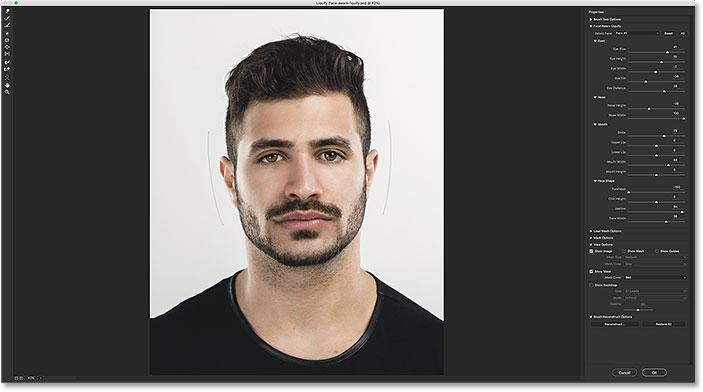
Step 6: Check the results and save the image.
Once you've completed the steps, observe the overall face to check if both sides are symmetrical. In the Liquify interface, you can enable the Show Backdrop option or use the preview function to compare the image before and after editing. If you feel the face is now harmonious, press OK to apply the changes. Finally, select File > Save As or Save a Copy to save the image as a new file, preserving the original image in case further editing is needed.
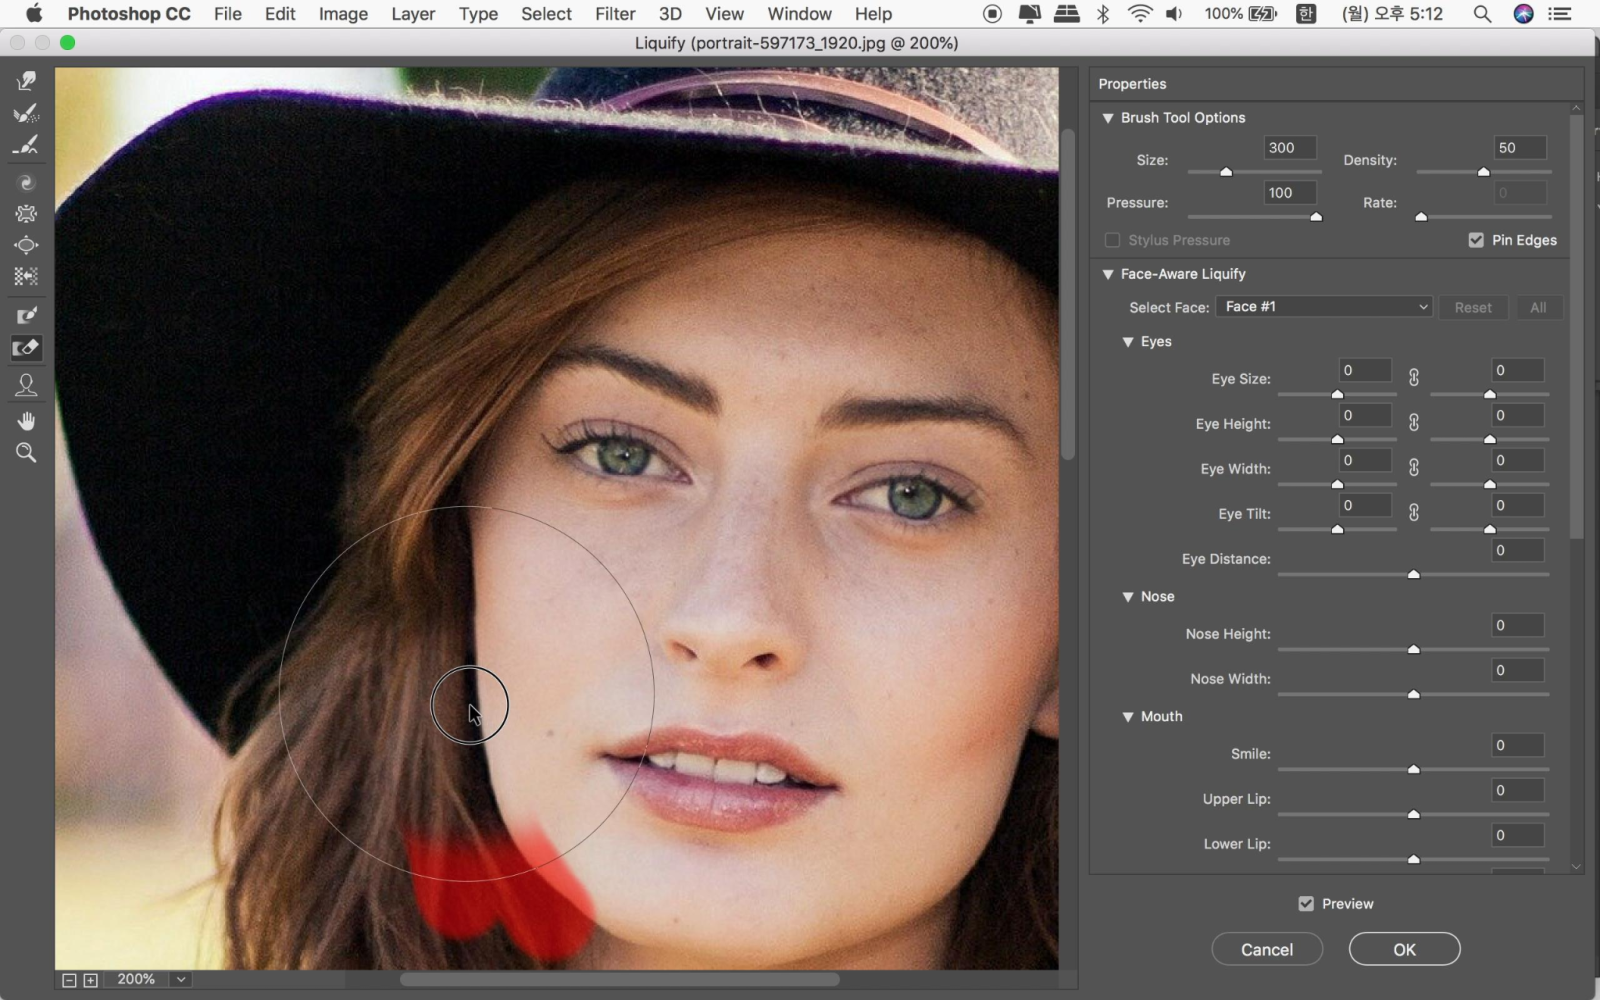
2. Tips for making your face look more natural in Photoshop
Face reshaping isn't simply about reducing the size of the face; it's also about maintaining harmony between the features. A beautiful photo is one where the viewer perceives an improved appearance while retaining the original features. Whether using Photoshop CS6 or later versions, you can apply some of the following tips to minimize errors during editing.
-
Moderate adjustments: Avoid drastically altering the contours from their original positions. You only need to subtly slim down the cheeks, jawline, or chin to make the face look more refined. Making too many drastic changes can cause the face to lose its unique features and appear unnatural.
-
Pay attention to the background: When pinching close to details like table edges, walls, door frames, or straight lines in the background, you need to observe carefully to avoid distorting the scene. You can use the Freeze Mask Tool in Liquify to color over areas you don't want to be affected, thereby minimizing background warping or distortion.
-
Zoom in to fine-tune details: Instead of just observing the entire photo, you should zoom in on specific areas such as the cheeks, chin, and jawline to check for changes. This makes it easier to spot distortions, uneven contours, or unnatural-looking details.
-
Continuous before-and-after comparison: During the editing process, frequently turn the preview on and off to monitor the extent of changes to the face. You can also use the Reconstruct button to revert some or all of the adjustments that don't look right.
-
Maintain the proportions of the features: When slimming the face, don't forget to observe the relationship between the eyes, nose, mouth, and chin. If you only reduce the cheeks without considering the overall proportions, the face may look unbalanced compared to its original state.
3. Some common mistakes when reshaping faces in Photoshop
Although Liquify is a fairly easy-to-use tool, beginners may still encounter some errors that prevent the edited image from achieving the desired results. Recognizing these problems will help you proactively adjust and save time.
-
A distorted or asymmetrical face: This error often occurs when adjusting points too forcefully or only adjusting one side of the face. You should reduce the degree of change and recheck both cheeks to create balance.
-
Background distortion: When dragging the facial contours, details in the background can be affected, especially straight lines near the face. Use the Freeze Mask Tool to protect important background areas before editing.
-
Chin that is too pointed or too long: Trying to create a V-line shape by excessively stretching the chin can make the face look unnatural. You should keep the length and shape of your chin close to its original proportions.
-
Photoshop fails to recognize faces: This can happen if the image is too blurry, underexposed, the face is obscured, or the angle of the shot is too tilted. Try using a sharper image or switch to the manual editing tools in Liquify.
4. Conclusion
Sculpting faces in Photoshop becomes simpler when you know how to utilize the Liquify and Face Tools. With just a few steps, you can adjust the cheeks, chin, and forehead to make your face look slimmer and more harmonious. However, always prioritize a natural look and avoid over-editing that alters your natural features. Hopefully, this guide will help you feel more confident when editing portraits and create beautiful, professional images.














VIP Products


Best Selling Products
Upgrade genuine Capture One account
120 USD
ChatGPT Plus Account (GPT-4)
16 USD
MidJourney Account
29 USD
Adobe Photoshop Copyright - Full App
120 USD
Capcut Pro 1 Year
39 USD
Copyright Adobe Lightroom Account
59 USD
Freepik Premium Account
59 USD
Genuine Cheap Canva Pro
39 USD
Upgrade Duolingo Super
29 USD
Upgrade Genuine Office 365
49 USD
Adobe Premiere Pro Account
99 USD
Genuine Adobe Illustrator account
99 USD
Plugin Retouch4me
69 USD
Windows 10 & 11 Pro Key
36 USD
Autodesk All App Account Copyright
120 USD