Best Selling Products

Adobe Photoshop Copyright - Full App
120 USD

Capcut Pro 1 Year
39 USD

Genuine Cheap Canva Pro
39 USD

Adobe Premiere Pro Account
99 USD

Upgrade Genuine Office 365
49 USD

Copyright Adobe Lightroom Account
59 USD

Upgrade Duolingo Super
29 USD

Windows 10 & 11 Pro Key
36 USD

MidJourney Account
29 USD

Autodesk All App Account Copyright
120 USD

Upgrade genuine Capture One account
120 USD

Genuine Adobe Illustrator account
99 USD

ChatGPT Plus Account (GPT-4)
16 USD

Freepik Premium Account
59 USD

Plugin Retouch4me
69 USD
How to professionally insert background images into videos: Top-notch post-production secrets.
Nội dung
- 1. THE IMPORTANCE OF CHANGING VIDEO BACKGROUNDS
- 2. BASIC CHROMA KEY (GREEN BACKGROUND REMOVAL) TECHNOLOGY
- 2.1. Choosing a background when shooting raw footage
- 2.2. Operating principle of the color separation algorithm
- 2.3. Safe distance between the subject and the background
- 3.1. Using Adobe Premiere Pro Professional
- 3.2. Simple solution with CapCut PC
- 3.3. Optimizing motion with After Effects
- 3.4. Manual Masking and Garbage Matte Techniques
- 4. MOBILE APPLICATIONS THAT SUPPORT QUICK BACKGROUND CHANGE
- 4.1. Overlay Technique on Smartphones
- 4.2. Leverage AI filters on TikTok and Instagram
- 5. VISIT APPVIP.AI TO FIND VIDEO SUPPORT TOOLS
- 6. SECRETS TO MAKING BACKGROUND AND SUBJECT BLEND NATURALLY
- 6.1. Synchronizing the direction of light
- 6.2. Color Grading
- 7. NOTES ON THE SIZE AND RESOLUTION OF THE BACKGROUND IMAGE
- 7.1. Avoid image blurring.
- 7.2. Correlation between focal length and blur
- 8. APPLICATIONS OF BACKGROUND REPLACEMENT IN VARIOUS FIELDS
- 8.1. Video lectures and online workshops
- 8.2. Product Advertising and Reviewers
- 9. CONCLUSION
This guide provides detailed steps on how to add background images to videos on computers and phones.
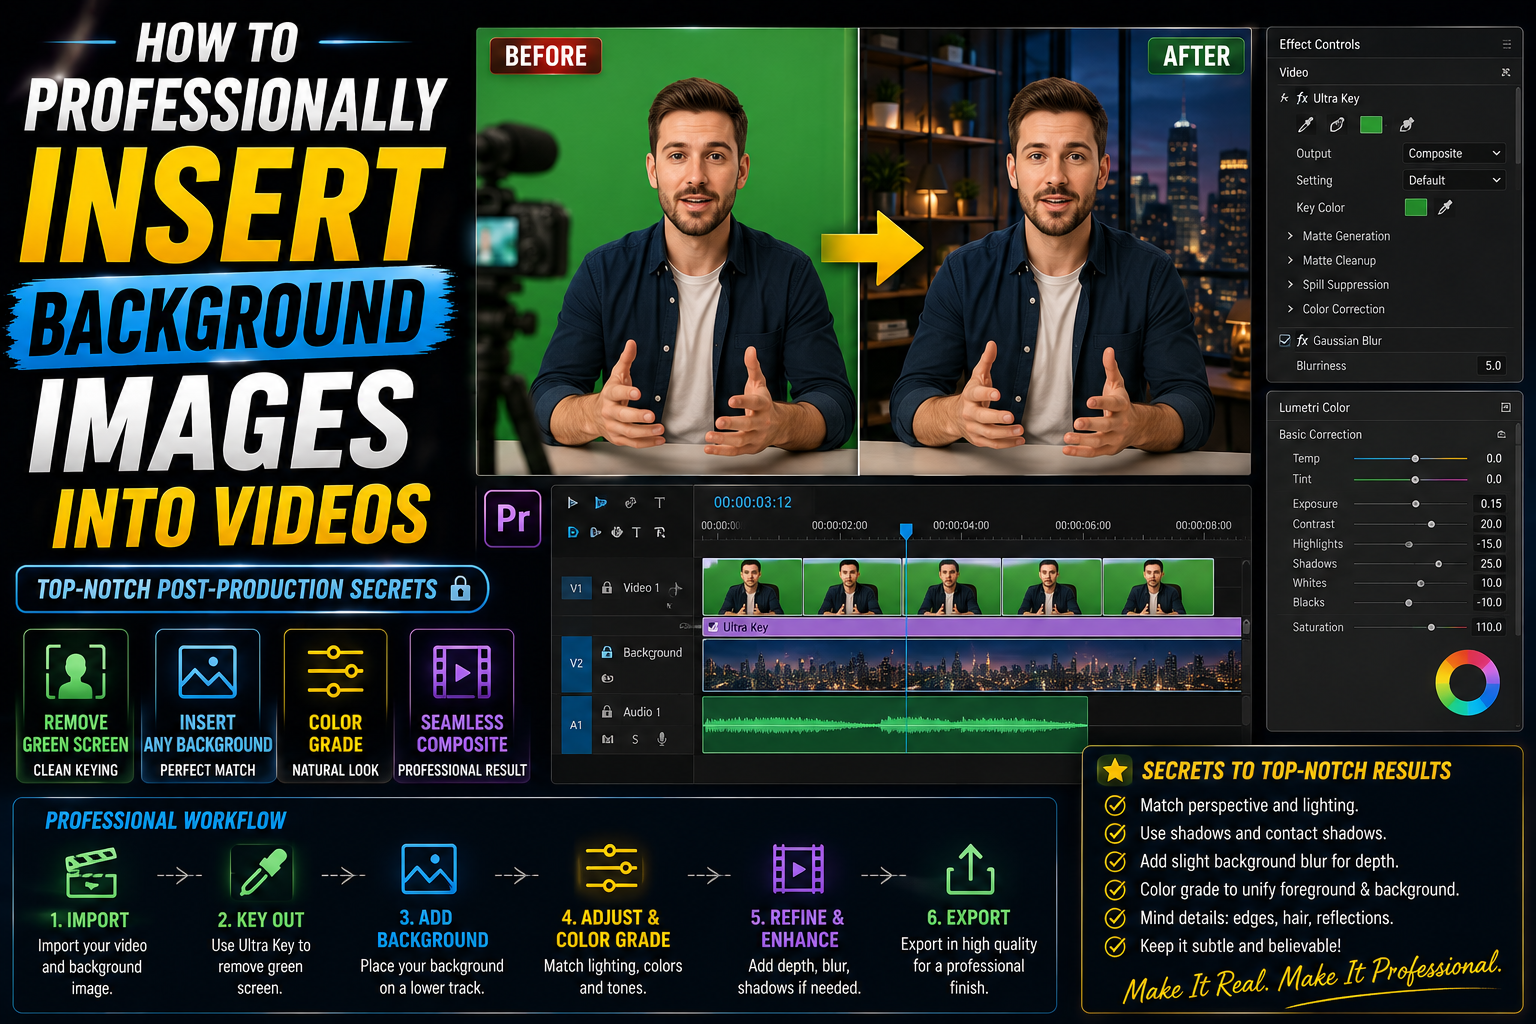
1. THE IMPORTANCE OF CHANGING VIDEO BACKGROUNDS
In the digital content production process, we don't always have the opportunity to film in luxurious or theme-appropriate settings. The technique of inserting background images into videos allows creators to overcome physical spatial barriers and create artistic footage. Replacing a cluttered background with a professional workspace or a majestic natural landscape instantly enhances the product's value. This not only makes the video more visually appealing but also builds trust and credibility with the audience. The ability to flexibly change the background makes the content more diverse, avoids monotony, and creates a strong impression in the first few seconds of the video.
2. BASIC CHROMA KEY (GREEN BACKGROUND REMOVAL) TECHNOLOGY
Chroma Key is the most important technical foundation when you want to seamlessly insert new context.
2.1. Choosing a background when shooting raw footage
To ensure the process of inserting a background image into a video is highly effective, preparing a green screen (either green or blue) is an essential step. Green screens are generally preferred because digital camera sensors are more sensitive to this color channel, allowing the background separation algorithm to work accurately. You need to ensure the background is flat, wrinkle-free, and evenly lit to avoid creating complex shadow areas.
2.2. Operating principle of the color separation algorithm
Post-production software identifies a specific color spectrum (usually blue) and converts it into a transparent (alpha channel). After the background color layer is removed, the new image layer underneath will show through, creating the illusion that the character is actually standing within that setting.
2.3. Safe distance between the subject and the background
One of the secrets to achieving maximum realism when inserting a green screen into a video is maintaining a physical distance between the subject and the green screen. Typically, the subject should stand at least 1.5 to 2 meters away from the background. This distance helps eliminate the "color spill" phenomenon – the reflection of green light from the background onto the subject's skin, hair, or clothing.
3. INSTRUCTIONS ON HOW TO INSERT A BACKGROUND IMAGE INTO A VIDEO ON A COMPUTER
Computer software provides the ability to deeply manipulate each frame, making the boundary between the character and the background perfectly smooth.
3.1. Using Adobe Premiere Pro Professional
Premiere Pro boasts a powerful Ultra Key tool. Simply drag this effect onto your clip, use the eyedropper to select the blue color you want to remove. Then, adjust parameters like Matte Generation and Matte Cleanup to smooth the edges, eliminating jagged edges around hair or clothing.
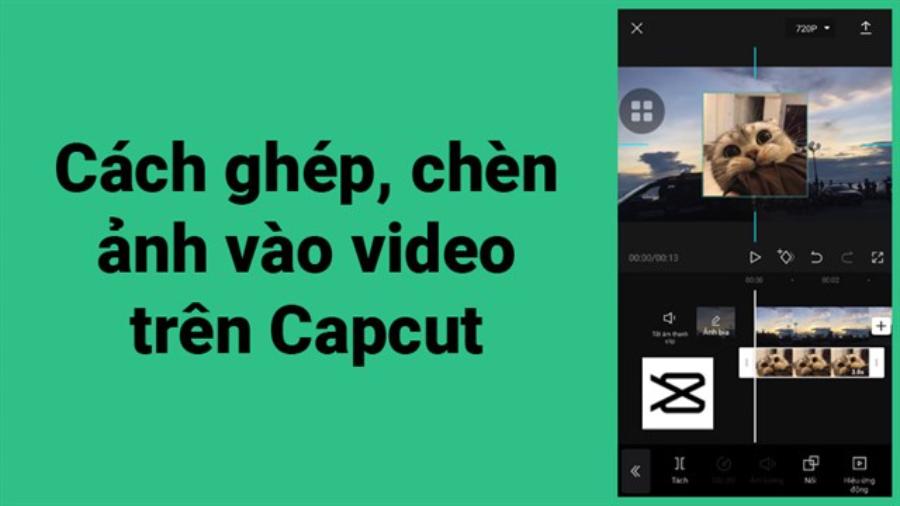
3.2. Simple solution with CapCut PC
For non-professional users, the desktop version of CapCut is a great option. Its AI-powered "Auto Cutout" feature allows you to insert backgrounds into videos without even needing a green screen. The software automatically detects human subjects and removes the background with just one click, significantly saving post-production time.
3.3. Optimizing motion with After Effects
If you need absolute precision for fast-moving scenes or flying hair, After Effects is a necessary upgrade over Premiere Pro. Using the Keylight effect (1.2) , you can control semi-transparent areas extremely well. This tool allows us to handle microscopic details that conventional software often misses. In particular, the addition of Motion Tracking will help the new background move in sync with the panning or zooming of the original camera. This technique makes inserting a background into a video no longer feel forced, but creates spatial cohesion as if the character is actually present in the virtual environment.
3.4. Manual Masking and Garbage Matte Techniques
Sometimes, your green screen doesn't cover the entire frame, or unwanted objects appear at the edges of the video. This is where the Garbage Matte technique in computer software comes in handy. You draw a line around the subject to remove all the extraneous elements outside the green screen area. Combining masking with background removal allows the software to focus on processing the color range more accurately, reducing the burden on the CPU and minimizing errors in the dead corners of the frame.
4. MOBILE APPLICATIONS THAT SUPPORT QUICK BACKGROUND CHANGE
The development of smartphones allows you to perform complex graphic tasks right in the palm of your hand.
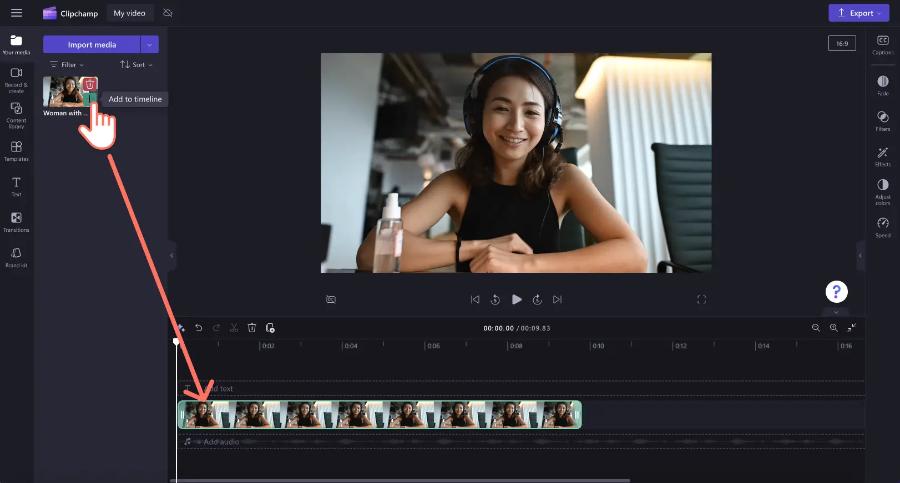
4.1. Overlay Technique on Smartphones
The most common process is to add the desired background image to the main timeline, then use the "Overlay" feature to add the character's video on top. Proper aspect ratio alignment between the background and the subject is key to making the video look as natural as possible.
4.2. Leverage AI filters on TikTok and Instagram
Many social media platforms now offer built-in Green Screen effects. You can insert a background image into your video directly while recording by selecting a photo from your device's library. The app's AI will automatically process the background removal in real time, allowing you to create content instantly.
5. VISIT APPVIP.AI TO FIND VIDEO SUPPORT TOOLS
Staying up-to-date with new technologies is crucial for maintaining creativity in the graphic design industry. The website appvip.ai provides a diverse ecosystem of useful solutions and resources for video editing enthusiasts. At appvip.ai , you can access guides to optimize your workflow, making background image insertion into videos more professional and faster. The combination of manual skills and intelligent tools from appvip.ai will help you elevate the quality of your products, transforming abstract ideas into vibrant and captivating films for your target audience.
6. SECRETS TO MAKING BACKGROUND AND SUBJECT BLEND NATURALLY
The biggest mistake beginners make is that the background and the character look "unrelated" in terms of lighting and color.
6.1. Synchronizing the direction of light
If the background image you insert has a light source coming from the left, but the subject being filmed is illuminated from the right, the video will look very artificial. Always observe the direction of the sunlight or light source in the background image to set up the lighting during filming, or use the flip technique to synchronize the lighting direction.
6.2. Color Grading
Use color correction tools to apply a consistent color tone to both the background and the subject. Adjusting the color temperature to achieve uniformity will create visual harmony, making the viewer believe that both layers of the image belong to the same physical space.
7. NOTES ON THE SIZE AND RESOLUTION OF THE BACKGROUND IMAGE
The quality of the background image directly determines the overall sharpness of the final video.
7.1. Avoid image blurring.
You should use a background image with a resolution at least equal to the video's resolution (e.g., Full HD 1920x1080). Inserting a low-quality image into a 4K video will cause the background to blur, creating an unpleasant quality discrepancy for the viewer.
7.2. Correlation between focal length and blur
To add depth to your video, you can apply a subtle Gaussian Blur effect to the background. This simulates the bokeh effect of professional lenses, making the main subject stand out more and concealing minor imperfections at the edges of the background separation.
8. APPLICATIONS OF BACKGROUND REPLACEMENT IN VARIOUS FIELDS
This technique is not only for entertainment but also has extremely high commercial and educational value.
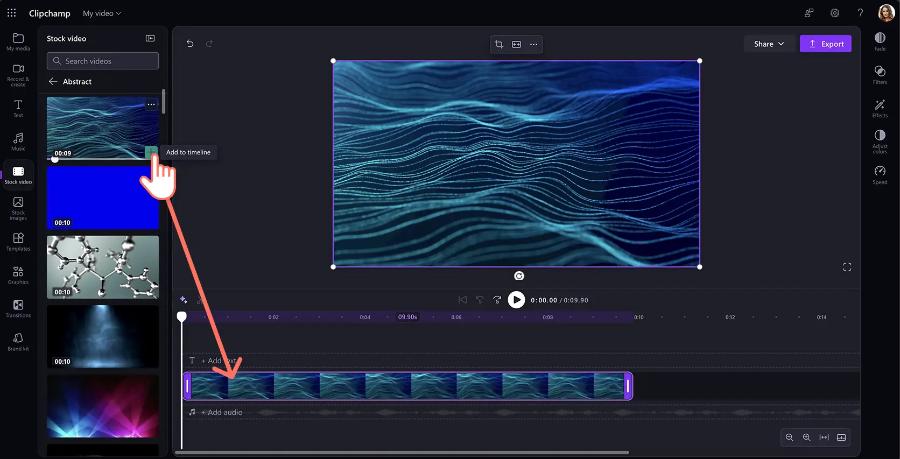
8.1. Video lectures and online workshops
Instructors can insert background images into videos, such as diagrams, maps, or virtual classroom spaces, to increase interactivity. This helps students focus more on the lesson content instead of being distracted by the teacher's surroundings.
8.2. Product Advertising and Reviewers
Product reviewers often use this technique to place products in luxurious settings or in locations directly related to the device's features. This helps increase persuasiveness and stimulate customer demand through vivid visual images.
9. CONCLUSION
Mastering the technique of inserting background images into videos is a crucial step on your journey to becoming a professional content creator. By understanding the process, from preparing the green screen and selecting the right tools to fine-tuning lighting and color, you will create high-quality video products. Remember that technology is just a tool; your meticulousness and creativity are the deciding factors in the success of your work.





















VIP Products








Best Selling Products
Adobe Photoshop Copyright - Full App
120 USD
Capcut Pro 1 Year
39 USD
Genuine Cheap Canva Pro
39 USD
Adobe Premiere Pro Account
99 USD
Upgrade Genuine Office 365
49 USD
Copyright Adobe Lightroom Account
59 USD
Upgrade Duolingo Super
29 USD
Windows 10 & 11 Pro Key
36 USD
MidJourney Account
29 USD
Autodesk All App Account Copyright
120 USD
Upgrade genuine Capture One account
120 USD
Genuine Adobe Illustrator account
99 USD
ChatGPT Plus Account (GPT-4)
16 USD
Freepik Premium Account
59 USD
Plugin Retouch4me
69 USD