Best Selling Products

Copyright Adobe Lightroom Account
59 USD

Adobe Premiere Pro Account
99 USD

Capcut Pro 1 Year
39 USD

Genuine Cheap Canva Pro
39 USD

Upgrade genuine Capture One account
120 USD

ChatGPT Plus Account (GPT-4)
16 USD

Autodesk All App Account Copyright
120 USD

Adobe Photoshop Copyright - Full App
120 USD

MidJourney Account
29 USD

Upgrade Genuine Office 365
49 USD

Windows 10 & 11 Pro Key
36 USD

Genuine Adobe Illustrator account
99 USD

Upgrade Duolingo Super
29 USD

Freepik Premium Account
59 USD

Plugin Retouch4me
69 USD
How to record your computer screen on Windows and Mac
Nội dung
- 1. Reasons why you should use the screen recording feature on your computer.
- 2. Common methods for recording your computer screen today
- 2.1. Instructions on how to record your Windows 10 computer screen
- Some things to keep in mind when spinning with Game Bar.
- 2.2. Instructions on how to record your Macbook (macOS) screen
- 3. Some free, high-quality screen recording software.
- 3.1. OBS Studio
- 3.2. ShareX
- 3.3. FlashBack Express
You don't need to install complicated software to record all screen activity.
From students and teachers to office workers and content creators, the need to record computer activity is increasingly common. Some want to record online lectures, others need to create software tutorial videos, or simply save an important online conversation or meeting.
However, not everyone knows that you can record your computer screen for free, without installing heavy or expensive software. Modern operating systems like Windows and macOS have built-in convenient screen recording tools, allowing users to quickly record with just a few clicks. This article will guide you in detail on how to record your computer screen for free on both Windows and Mac , and also introduce some high-quality screen recording software that you can use if you want more advanced features.
1. Reasons why you should use the screen recording feature on your computer.
Before diving into the specific instructions, let's review the reasons why screen recording is an extremely useful tool for work and study today.
Firstly, screen recording helps to store information in a more visual and understandable way. Instead of having to write down every action or word spoken during a class or meeting, you can record the entire content to review later. This is especially convenient for students studying online, or employees who want to record technical instructions from their superiors.
Secondly, screen recording supports the teaching and training process. Many teachers, lecturers, or online skills instructors now use screen recording videos to illustrate lessons. A visual video is much easier for viewers to understand than a simple text-based instruction.
Thirdly, screen recording is a powerful tool in content creation. If you are a YouTuber, streamer, or work in the field of technology design, recording the process of using tools, providing software tutorials, or illustrating the design process is essential to creating engaging and professional videos.
Finally, screen recording makes it easy to share technical issues with others. When you encounter a computer problem, you can simply record the error process and send it to the technical support team or friends for faster assistance, instead of having to describe it verbally.
In summary, screen recording is a versatile and useful tool in many situations. Whether you're a student, employee, or creator, mastering this skill will make your work more efficient and professional.
2. Common methods for recording your computer screen today
Currently, there are two main groups of methods for recording a computer screen:
Use the built-in tools in your operating system (such as Xbox Game Bar on Windows or Screen Recorder on macOS).
Use third-party screen recording software , which allows you to edit and export high-quality videos.
The following section will provide detailed, step-by-step instructions on how to record your screen for free, easily and without installing any complicated applications.
2.1. Instructions on how to record your Windows 10 computer screen
If you're using Windows 10 or Windows 11, recording screen activity is incredibly simple thanks to the Xbox Game Bar (a feature built in by Microsoft).
The Xbox Game Bar was originally designed to help gamers record in-game moments, but now it can be used for a wide range of other tasks, such as recording software tutorials, learning activities, or technical instruction videos.
Step 1: Open the Game Bar tool.
First, prepare the content you want to record, such as a presentation, a video, or a software tutorial.
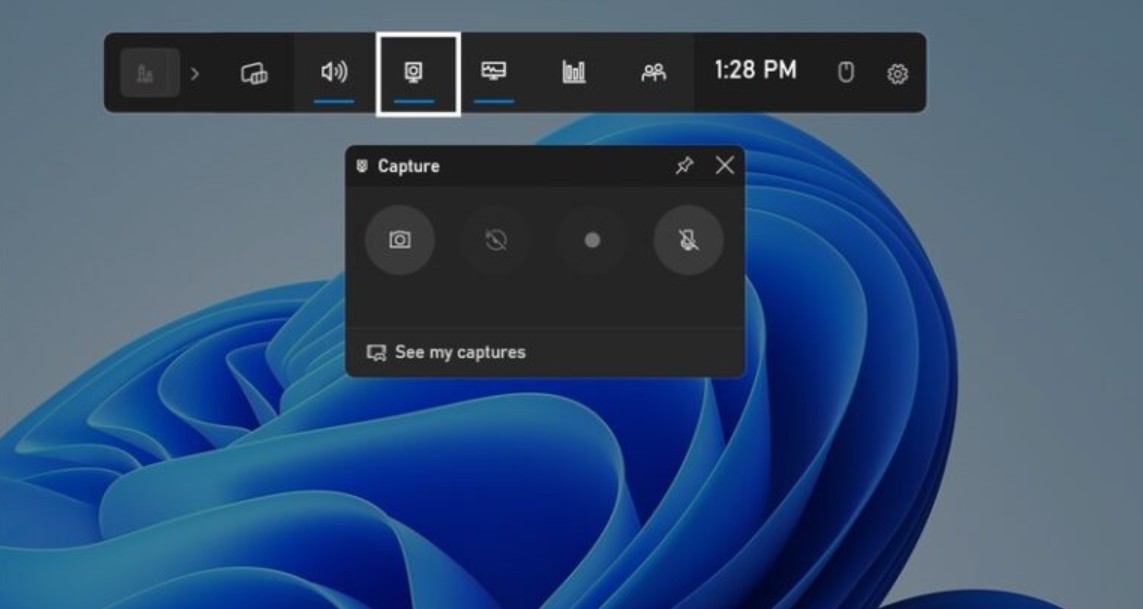
Then, press the Windows + G key combination to open the Xbox Game Bar . A toolbar and Capture control panel will then appear on the screen .
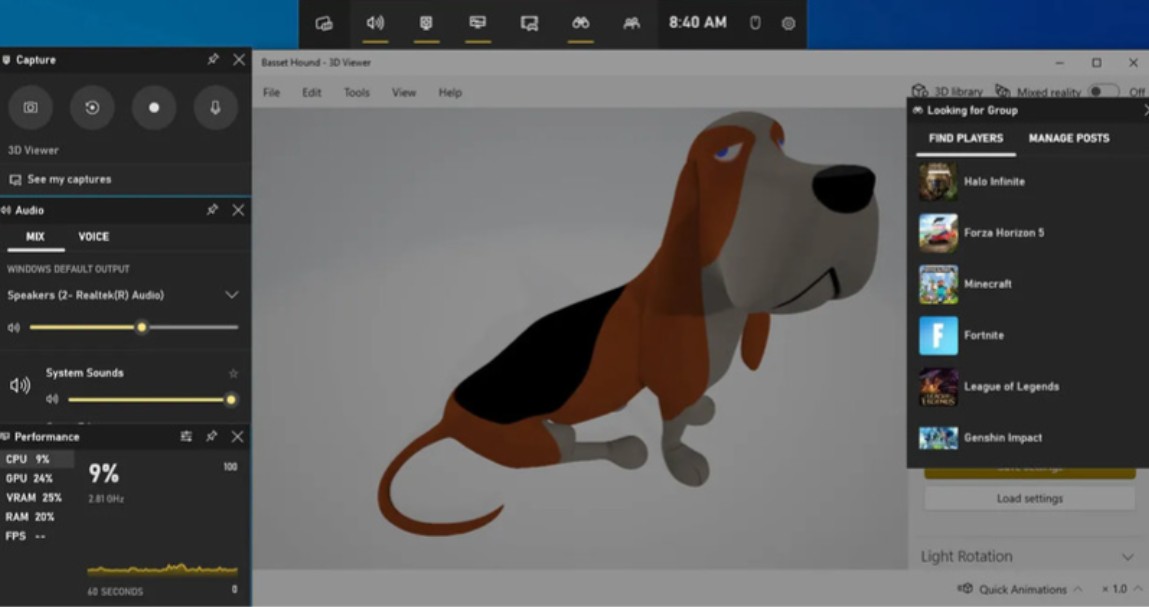
If you're opening it for the first time, Windows might ask for permission; select "Yes, this is a game" to activate it. Don't worry, even if you're not recording a game, this feature will still work normally.
Step 2: Start screen recording
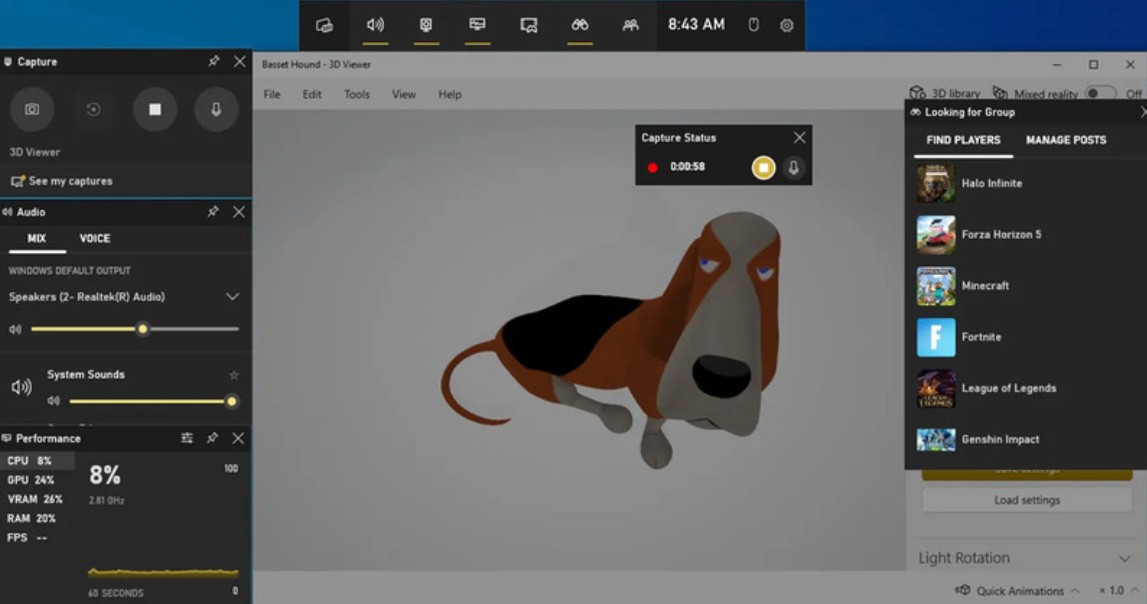
In the Capture panel, you'll see the Record icon (a small circle). Click on it to start recording. Immediately, a small panel will appear in the corner of the screen, indicating that recording is in progress.
Now you can perform all the necessary recording tasks: open the application, present slides, or operate the software as usual.
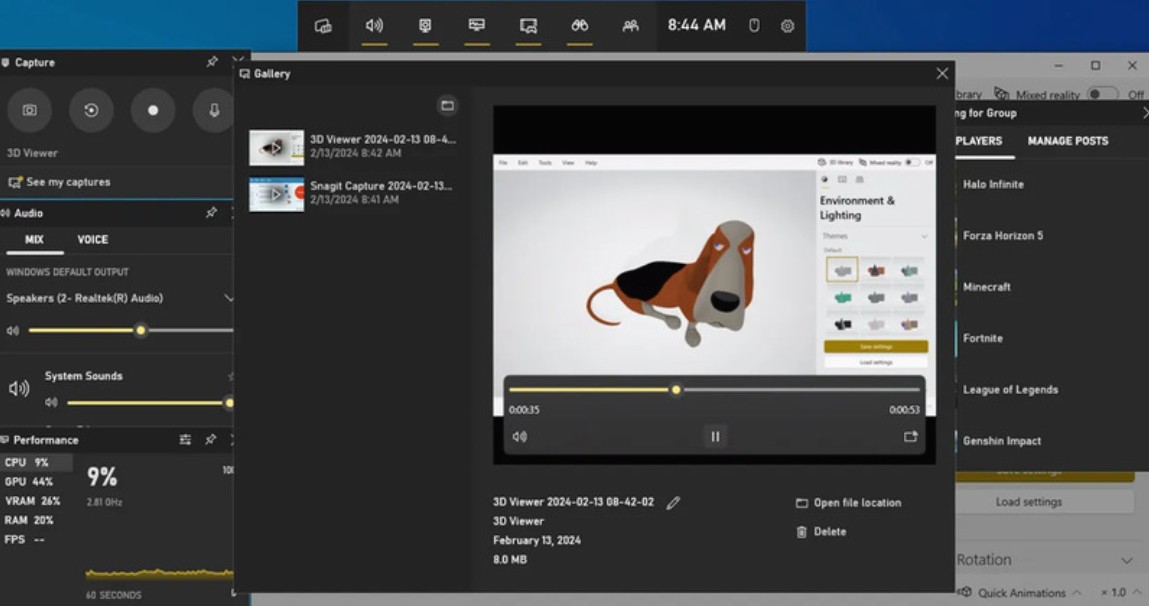
Step 3: Stop recording and review the video.
When finished, press Stop on the small panel or use the Windows + G key combination again to stop recording. A message will appear indicating that your clip has been successfully saved. You can click directly on the message to open the Gallery and review the video you just recorded.
Step 4: Open the folder where the video is saved.
By default, Windows saves videos to the following path: C:\Users[Username]\Videos\Captures
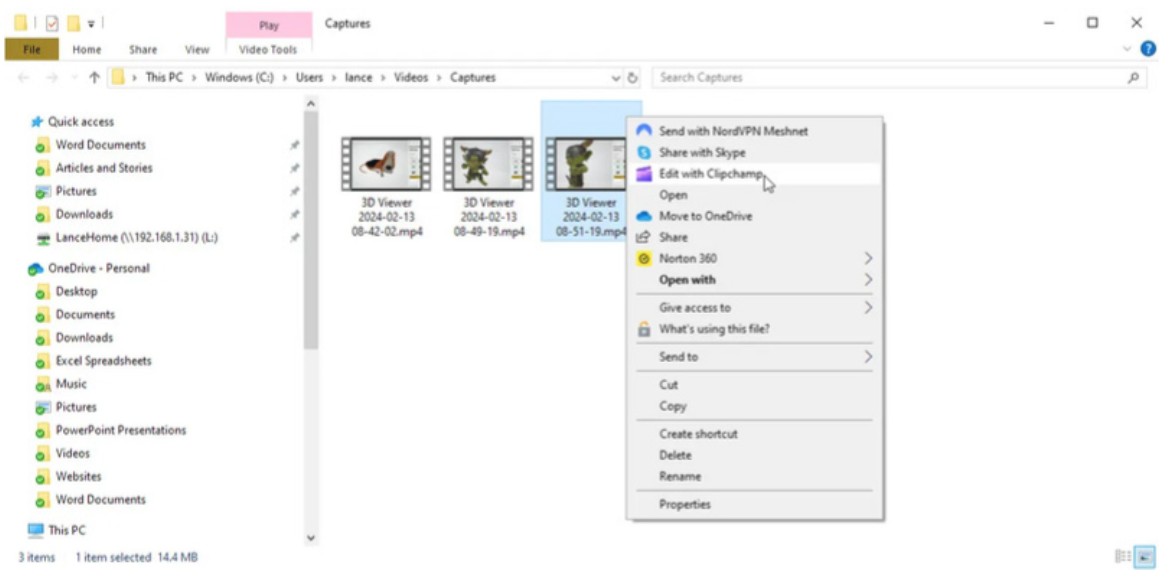
Here, you will find the video file in .mp4 format. You can play it with any video player or open it in editing software such as Adobe Premiere, CapCut, or DaVinci Resolve for further editing.
Some things to keep in mind when spinning with Game Bar.
Xbox Game Bar only supports recording a single active window or application, not the entire desktop.
If you want to record the entire action, open the content you want to record in full-screen mode.
System sound and voice can be turned on or off in the "Audio" settings.
With advantages such as speed, ease of use, and being completely free, Game Bar is the ideal tool for Windows users who need to quickly record their screen without installing any additional applications.
2.2. Instructions on how to record your Macbook (macOS) screen
Mac users are also fortunate to have a powerful screen recording tool built right into the Screen Recorder system . This tool is integrated from macOS Mojave onwards and is very easy to use via keyboard shortcuts.
Step 1: Open the screen recording interface.
Press Shift + Command ( ⌘ ) + 5 simultaneously to open the screen recorder interface . A small toolbar will then appear at the bottom of the screen, allowing you to choose between taking a screenshot or recording a video.
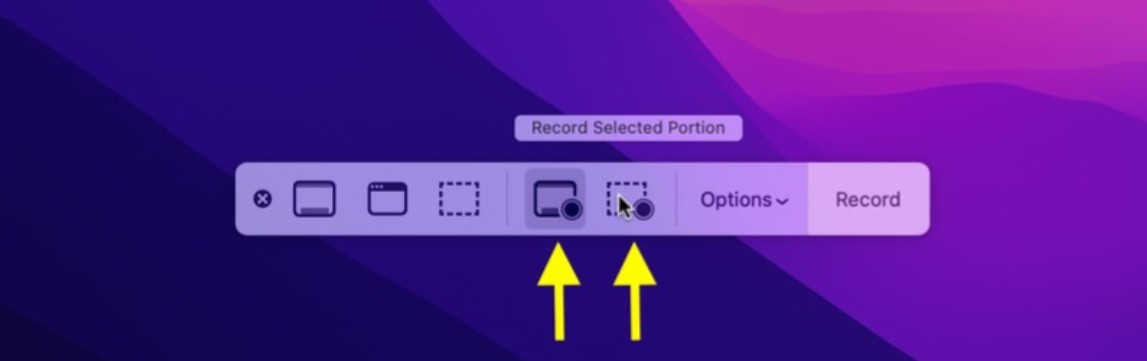
Step 2: Select screen recording mode
You will see two main recording modes:
Full screen recording: the tool will automatically record all content displayed on the screen.
Record a selected portion of the screen: you can use your mouse to drag the selection frame to record the area you want, which is very convenient when you only want to record a specific window or area of work.
Step 3: Customize settings before recording.
Click the Options button on the toolbar to fine-tune the settings. Here you can:
Turn on the microphone if you want to record your voice or surrounding sounds.
Displaying mouse actions helps viewers easily follow when you click on a particular location.
Setting a recording timer , usually 5 or 10 seconds, gives you time to prepare before the system starts recording.
Change the file save location ; the default is Desktop, but you can choose a different folder if you want a more organized system.

Step 4: Start screen recording
When you're ready, simply press the Record button .
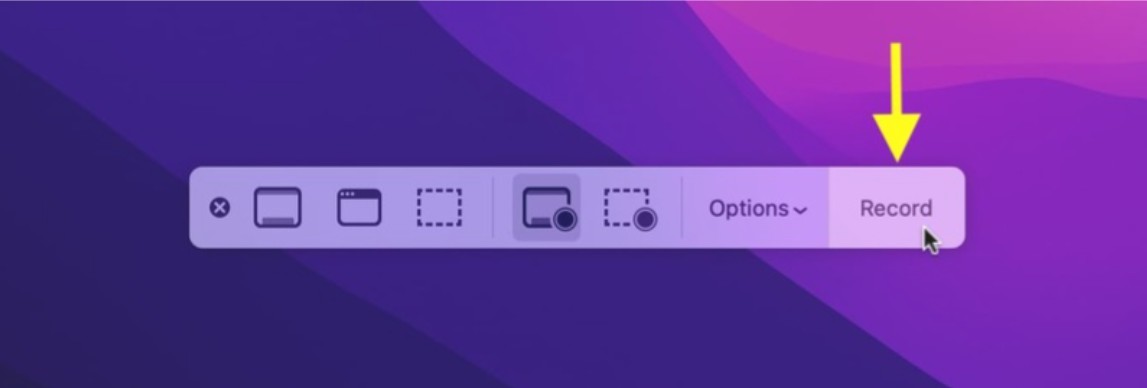
The video will be recorded instantly, and you can continue working on your computer as usual throughout the recording process.
Step 5: Stop recording
When you want to stop, you have two options:
Click the Stop icon in the upper right corner of the menu bar.
Alternatively , use the key combination Command + Control + Esc (Escape) .
Step 6: View and edit the video
After recording stops, the video will appear as a thumbnail in the bottom right corner of the screen.

You can click on it to open macOS's quick editor, allowing you to trim unnecessary parts, rename, or share the video instantly.
If you don't do anything, after a few seconds the video will automatically be saved to your chosen location, which is the Desktop by default .
With its user-friendly interface, clear video quality, and stable performance, Screen Recorder is the ideal tool for Mac users who want to record their screen without installing additional applications.
3. Some free, high-quality screen recording software.
Although the built-in tools are sufficient for basic needs, if you want more advanced options such as multi-window recording, professional editing, or live streaming, you can check out the following free software.
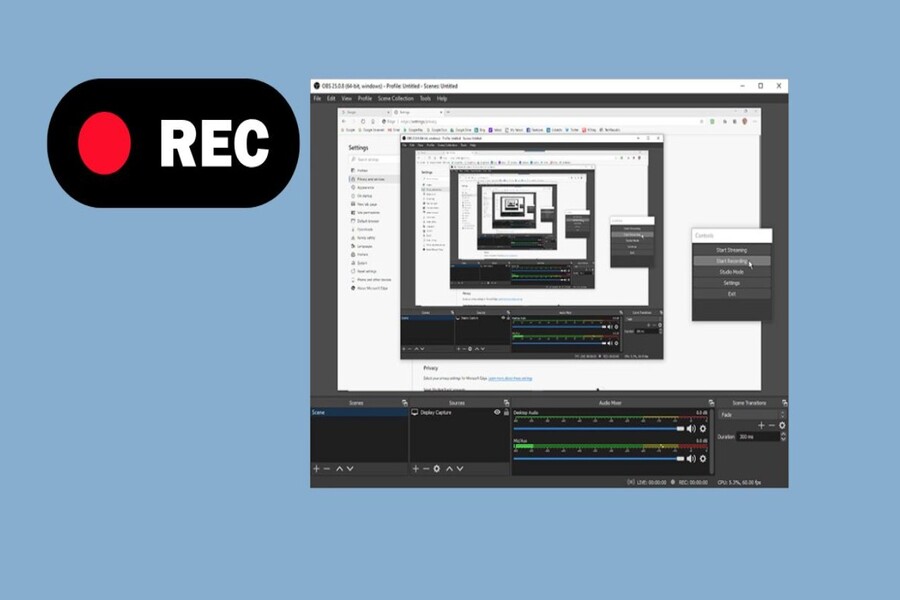
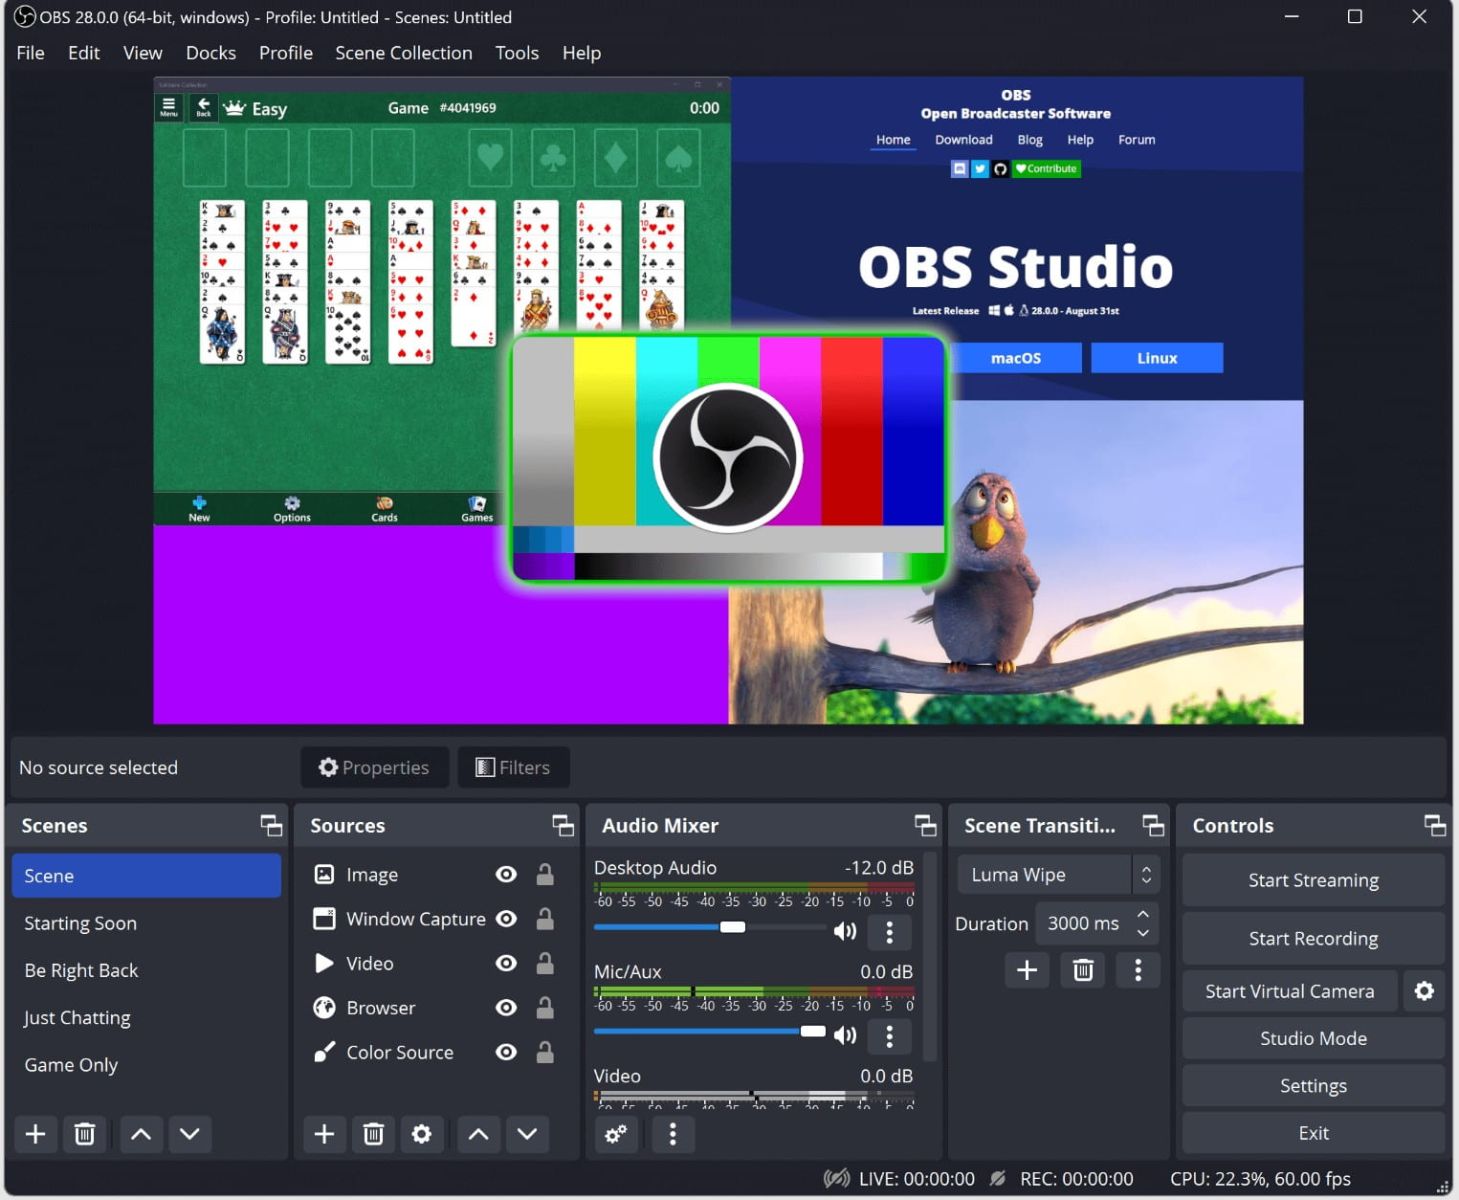
3.1. OBS Studio
OBS Studio (Open Broadcaster Software) is currently the most popular free recording and livestreaming software. It is widely used by streamers, YouTubers, and instructors thanks to its ability to record high-quality video, with no time limit and completely watermark-free.
The biggest advantage of OBS is its flexibility. You can record the entire screen, a specific window, or even your webcam. The Scene and Source system allows you to customize each element of the video.
OBS supports video export in MP4, MKV, and FLV formats, and also allows direct streaming to YouTube, Facebook, or Twitch. With its deep customization capabilities and stable performance, it's the number one choice for those who want to create professional tutorial videos.
3.2. ShareX
ShareX is another open-source software that is completely free and exceptionally lightweight, making it suitable for Windows users.
ShareX not only supports screen recording, but also integrates tools for capturing screenshots, creating GIFs, and quick post-recording editing.
Users can choose to record the entire screen, a specific area, or just a single application window. Additionally, ShareX supports recording system audio, recording with webcam, and automatically uploading videos to sharing platforms like Imgur and Google Drive, making it very convenient for quick sharing.
Despite its somewhat simple interface, ShareX offers incredibly powerful customization options, making it particularly suitable for those working in office environments or needing to create quick and concise technical guides.

3.3. FlashBack Express
FlashBack Express is a free, user-friendly screen recording software that's easier to use than OBS, making it ideal for beginners.
You can record the entire screen, specific windows, or selected areas, while simultaneously recording audio and webcam footage.
A major advantage of FlashBack Express is that it has no recording time limit and no watermark, a common problem with many other free software programs. After recording, you can export the video to MP4, AVI, or WMV format, or quickly edit it before saving.
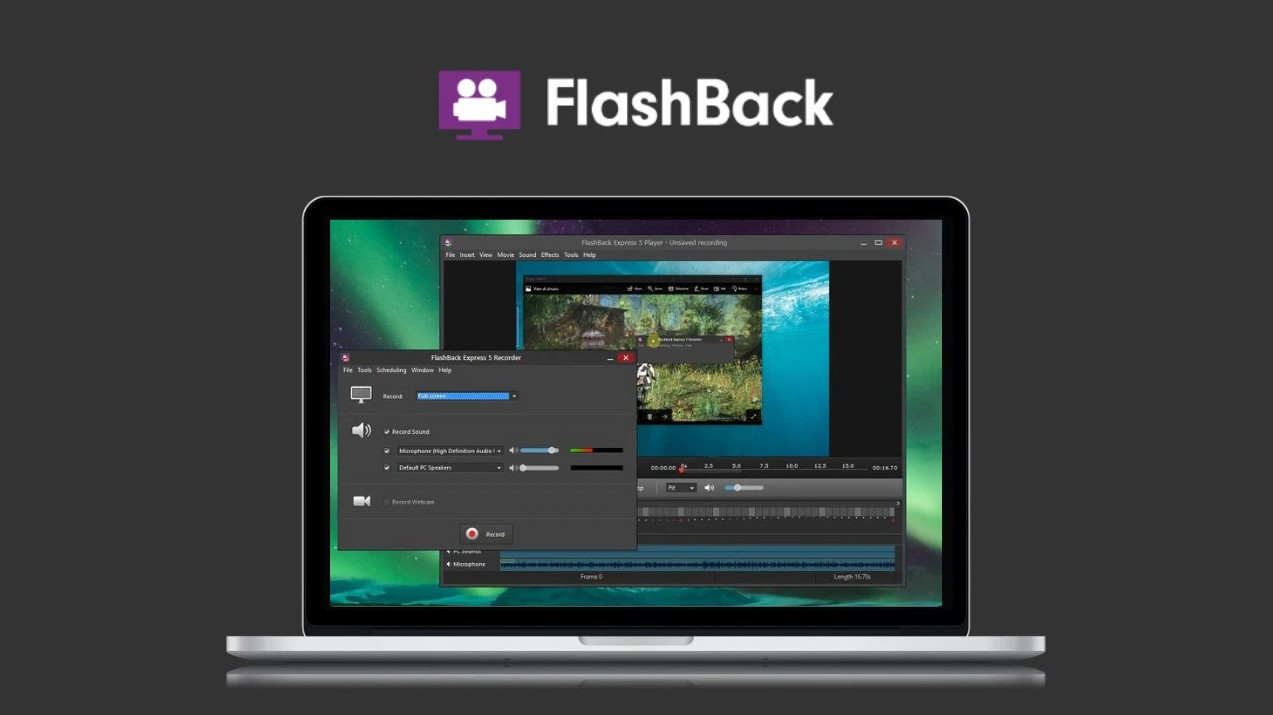
If you need an advanced version with professional editing features, the developer also offers FlashBack Pro; however, for basic needs, the free version is more than sufficient.
Screen recording on computers today is no longer a complicated process or one that requires expensive software like it used to be. Whether you use Windows or macOS, with just a few simple steps, you can record your entire screen for work, study, or content creation.


VIP Products


Best Selling Products
Copyright Adobe Lightroom Account
59 USD
Adobe Premiere Pro Account
99 USD
Capcut Pro 1 Year
39 USD
Genuine Cheap Canva Pro
39 USD
Upgrade genuine Capture One account
120 USD
ChatGPT Plus Account (GPT-4)
16 USD
Autodesk All App Account Copyright
120 USD
Adobe Photoshop Copyright - Full App
120 USD
MidJourney Account
29 USD
Upgrade Genuine Office 365
49 USD
Windows 10 & 11 Pro Key
36 USD
Genuine Adobe Illustrator account
99 USD
Upgrade Duolingo Super
29 USD
Freepik Premium Account
59 USD
Plugin Retouch4me
69 USD