Best Selling Products
How to Use the Liquify Tool in Photoshop
Nội dung
- 1. Where is the Liquify tool in Photoshop?
- 2. Liquify Tools in Photoshop
- 2.1. Forward Warp Tool (W)
- 2.2. Reconstruct Tool (R)
- 2.3. Smooth Effect (E)
- 2.4. Twirl Clockwise Tool (C)
- 2.5. Pucker Tool (S)
- 2.6. Bloat Tool (B)
- 2.7. Push Left Tool (O)
- 2.8. Freeze Mask Tool (F)
- 2.9. Thaw Mask Tool (D)
- 2.10. Face Tool (A)
- 2.11. Hand Tool (H)
- 2.12. Zoom Tool (Z)
- 3. Liquify Tool Settings in Photoshop
- 3.1. Brush Tool Options
- 3.2. Face-Aware Liquify
- 3.3. Load Mesh Options
- 3.4. Mask Options
- 3.5. View Options
- 3.6. Brush Reconstruct Options
- 4. How to Use the Liquify Tool in Photoshop
Liquify is one of Photoshop's most powerful filters. It allows you to modify images in a variety of ways, from enlarging to shrinking, and more. In this tutorial, Sadesign will show you how to use the Liquify tool in Photoshop.
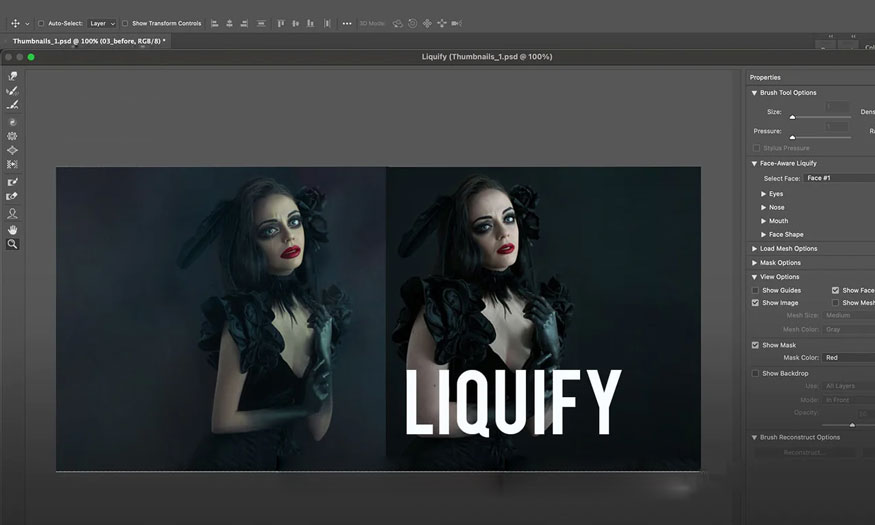
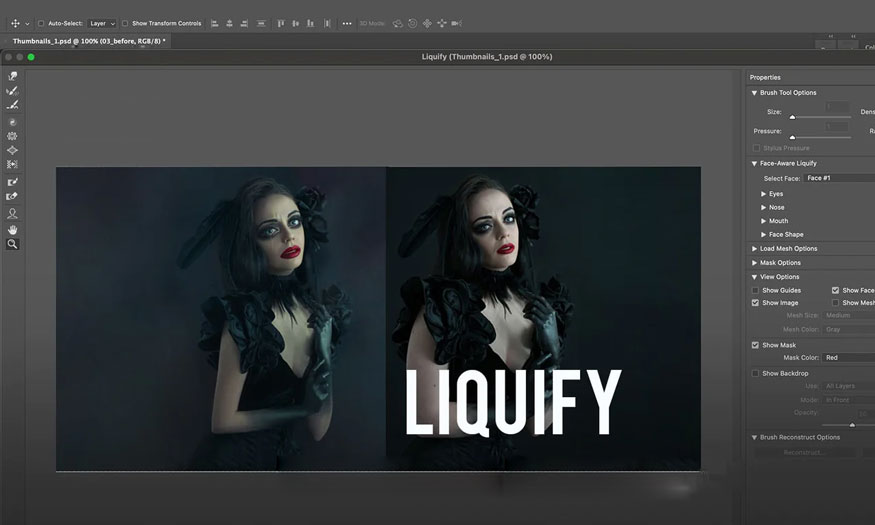
1. Where is the Liquify tool in Photoshop?
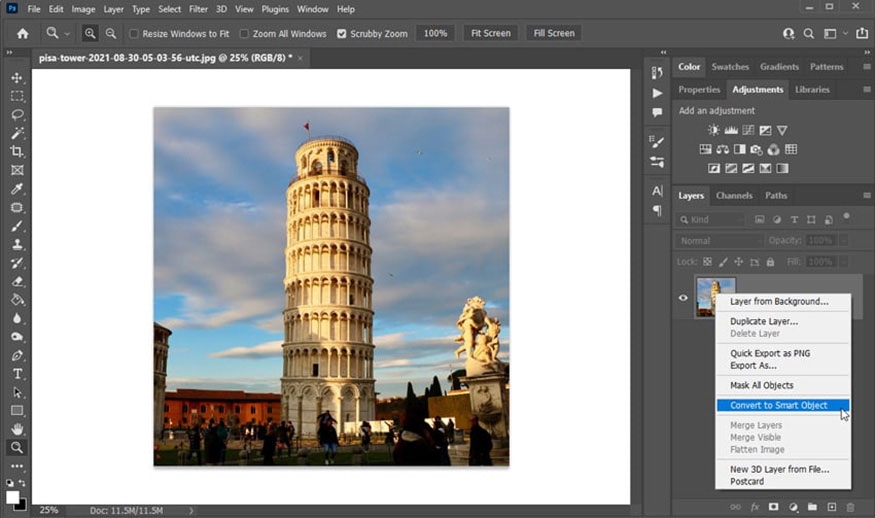
The Liquify tool in Photoshop is located under the Filter section on the menu bar. Before you start modifying your image with the Liquify tool, you should convert it to a Smart Object - this way you'll be able to adjust your edits later. To do this, right-click on the layer and select Convert to Smart Object.
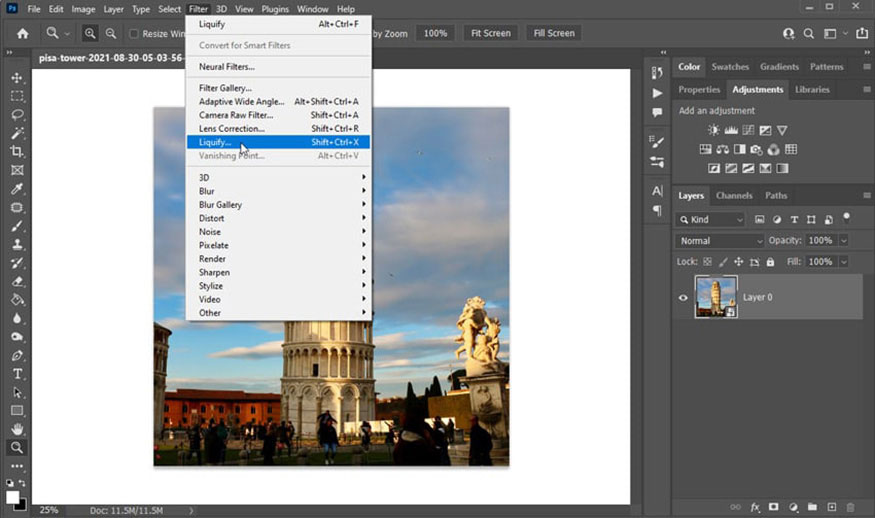
On the menu bar, select Filter => Liquify. You can also use the shortcut Shift-Control-X.
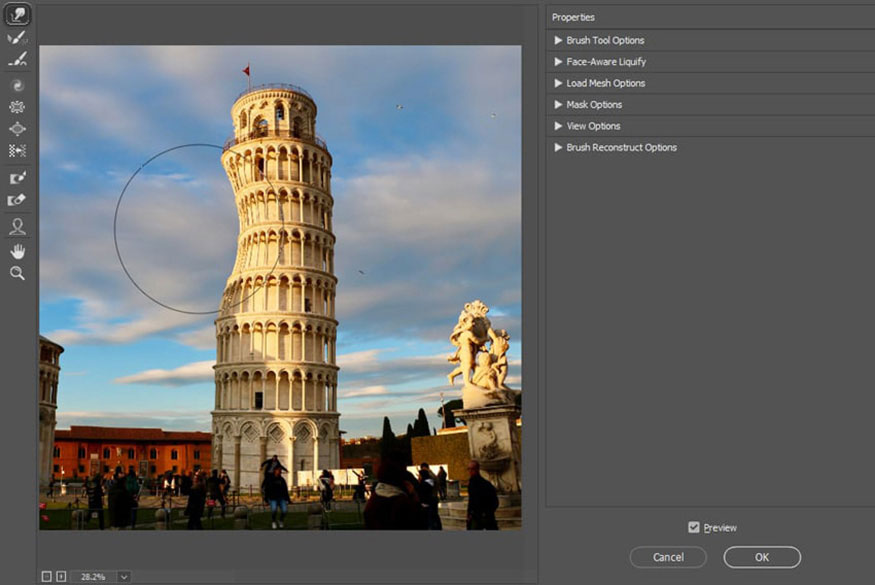
2. Liquify Tools in Photoshop
Liquify has many tools with different functions, helping to edit photos in a variety of ways.
2.1. Forward Warp Tool (W)
This tool allows you to "push" an area of the image in the selected direction. It is perfect for adjusting the shape of something.
2.2. Reconstruct Tool (R)
This tool has the function of undoing Liquify in Photoshop. With the Reconstruct Tool, you can easily get back the original shape with this tool.
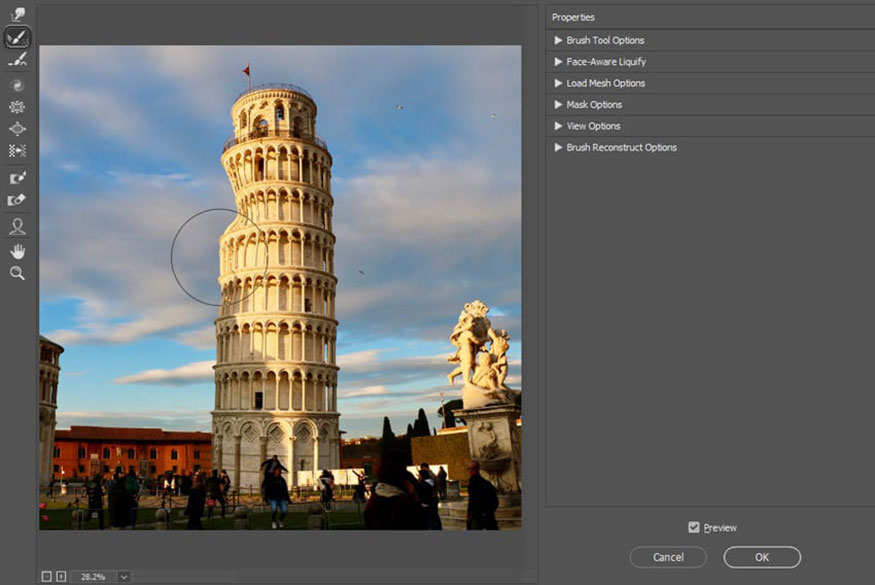
2.3. Smooth Effect (E)
If you feel like you have over-edited and want to adjust it, the Smooth Effect tool can help you reduce the strength of the effect.
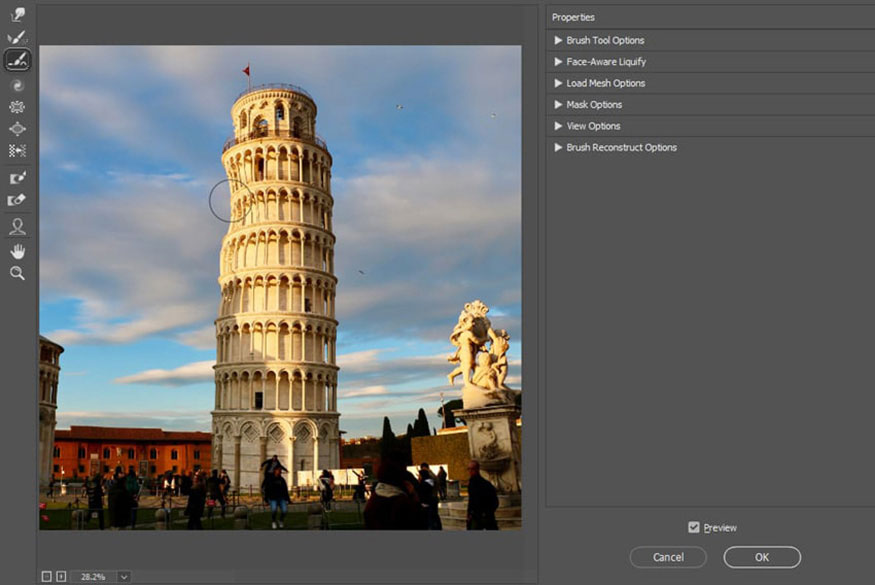
2.4. Twirl Clockwise Tool (C)
This tool allows you to “rotate” a portion of your image. Hold down the Alt key to change the direction of rotation.
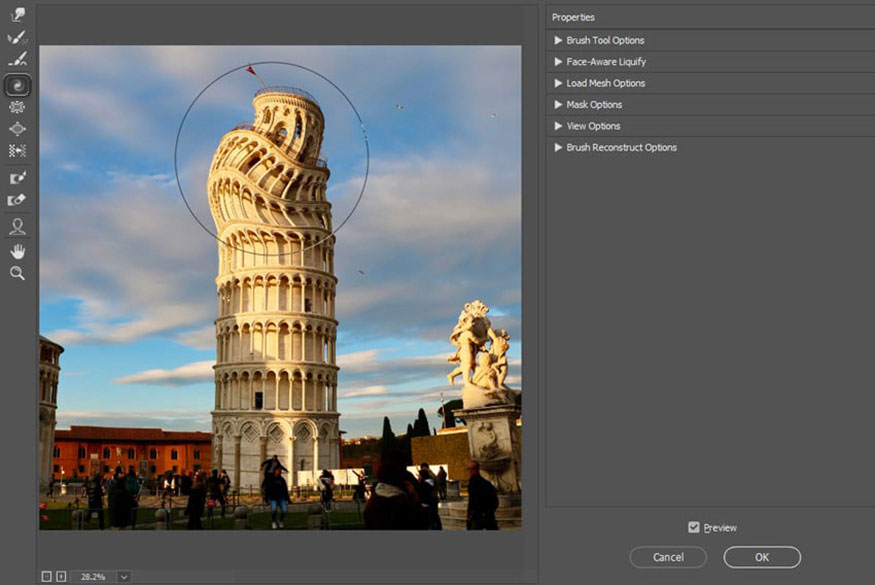
2.5. Pucker Tool (S)
This tool allows you to shrink a selected area. Hold down the Alt key to achieve the opposite effect.
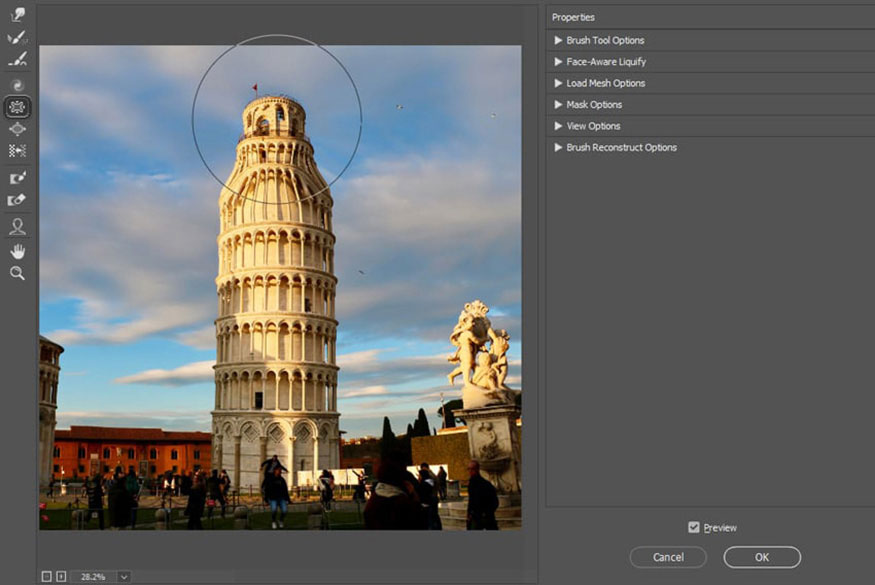
2.6. Bloat Tool (B)
This tool enlarges a selected area. Hold down the Alt key to achieve the opposite effect.
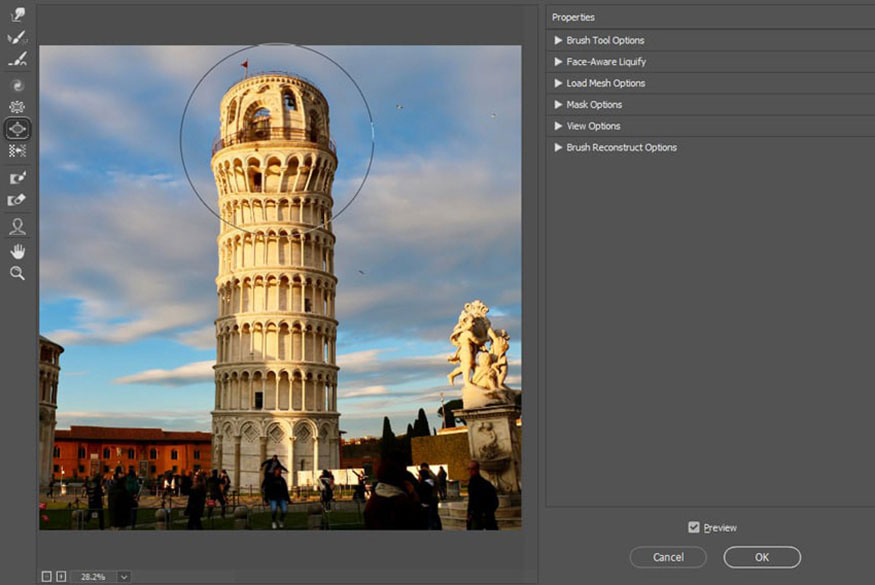
2.7. Push Left Tool (O)
This tool pushes the contents of the selection to the left edge of the brush. Holding down the Alt key will allow you to move to the right side.
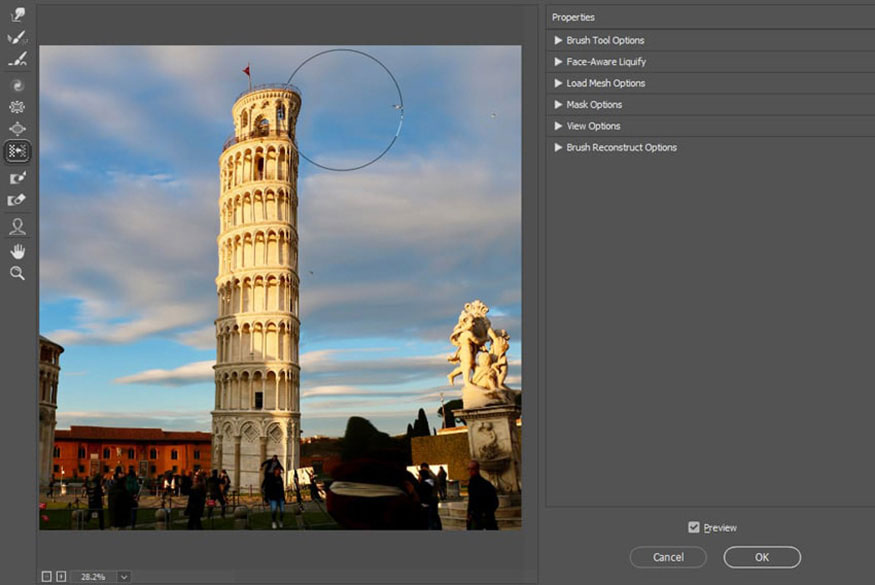
2.8. Freeze Mask Tool (F)
When applying all of these tools, it is easy to affect a portion of the image that you want to keep intact. Now use the Freeze Mask Tool to paint over the area you want to keep. Hold down the Alt key to erase the mask.
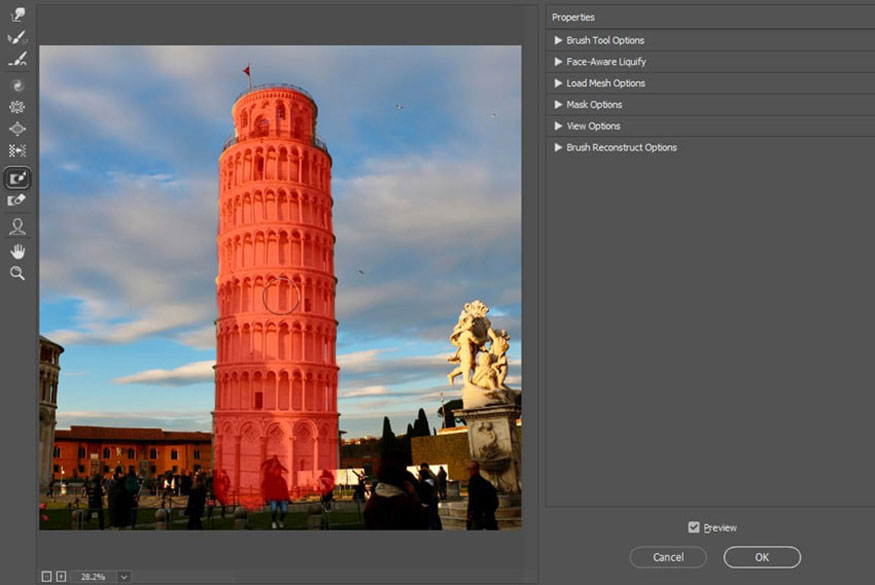
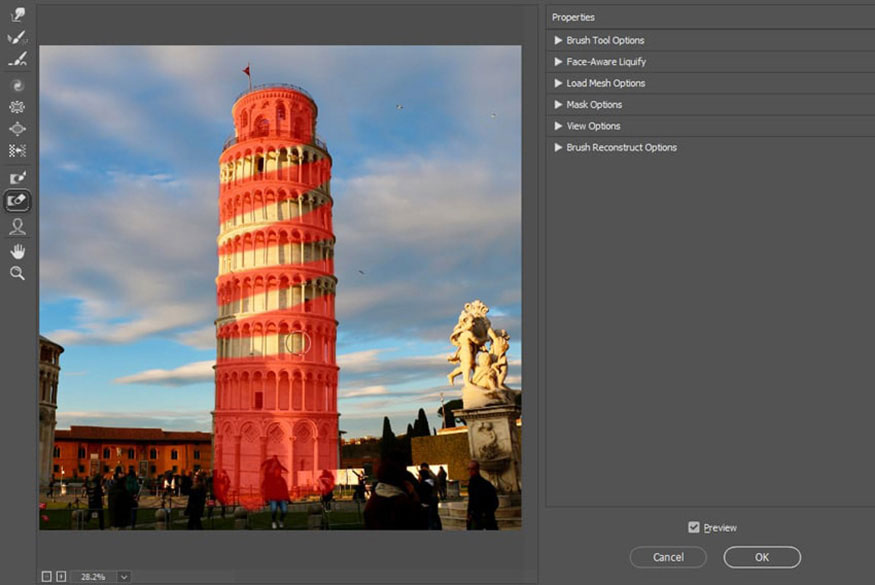
2.9. Thaw Mask Tool (D)
This tool works like an eraser for masks, but if you hold down the Alt key, you can use it to paint over the mask.
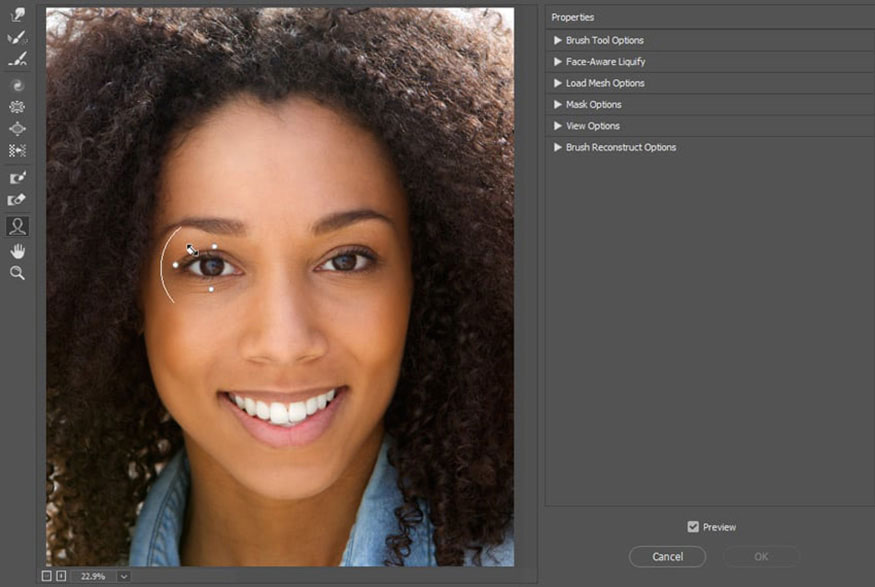
2.10. Face Tool (A)
If your photo has a human face, Photoshop will be able to recognize its features and let you modify them individually. Just hover over the face and click and drag the markers to change the angle, width, and height.
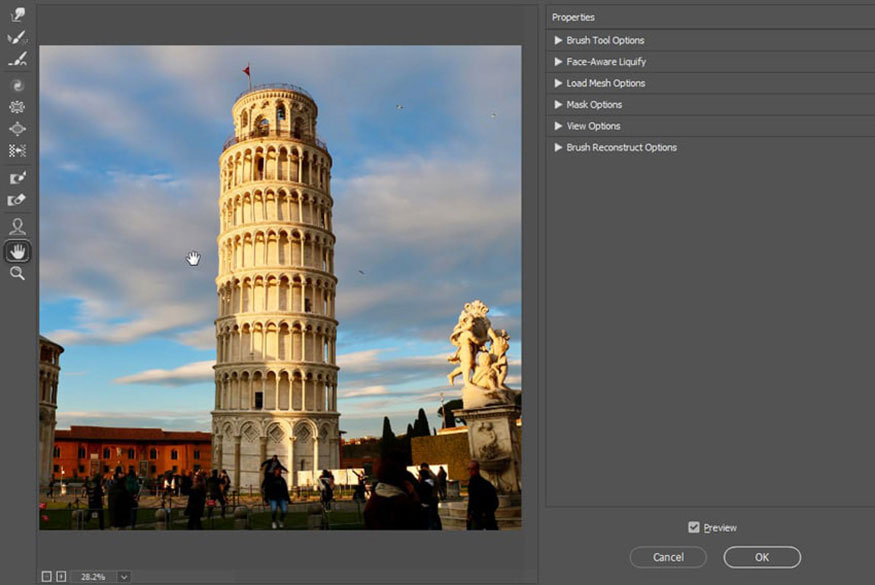
2.11. Hand Tool (H)
This tool lets you move the photo. You can also hold down the Space bar to activate it while using another tool.
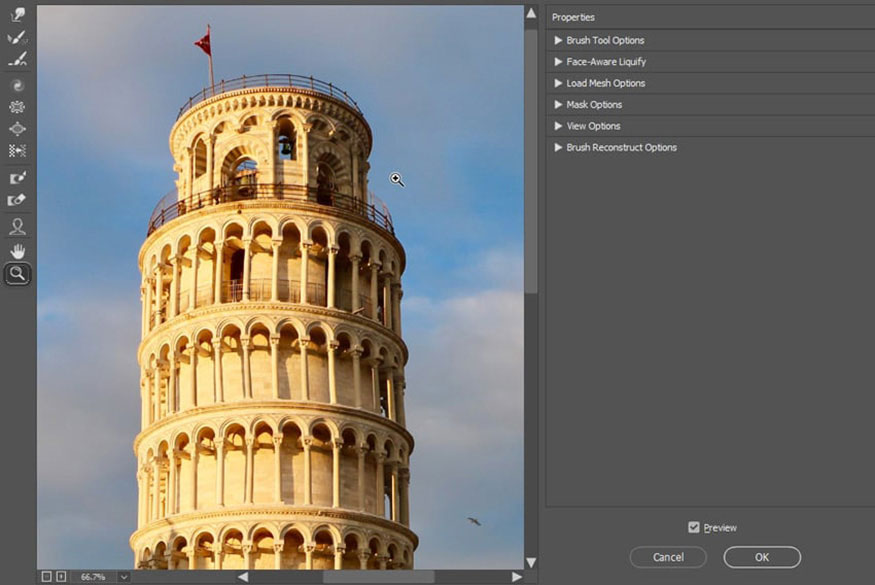
2.12. Zoom Tool (Z)
This tool allows you to zoom in on an image. Hold down the Alt key to zoom out.
3. Liquify Tool Settings in Photoshop
The Liquify tool in Photoshop has more settings that you can find on the right side of the screen. They are related to the tools on the left.
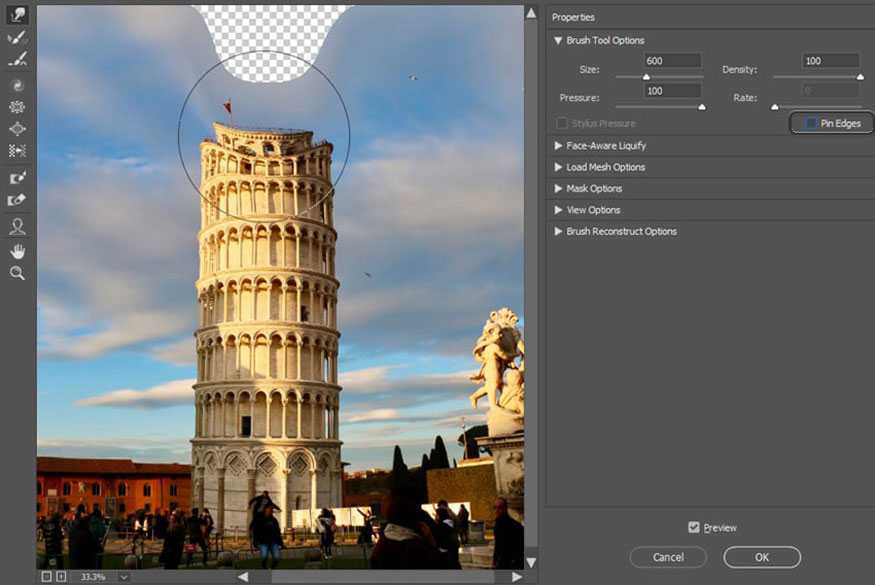
3.1. Brush Tool Options
Most of the tools on the left use the Brush function. Here you can change the settings of this Brush:
You can change the size of the affected area by changing the Size slider (the [ and ] keys will give you the same effect).
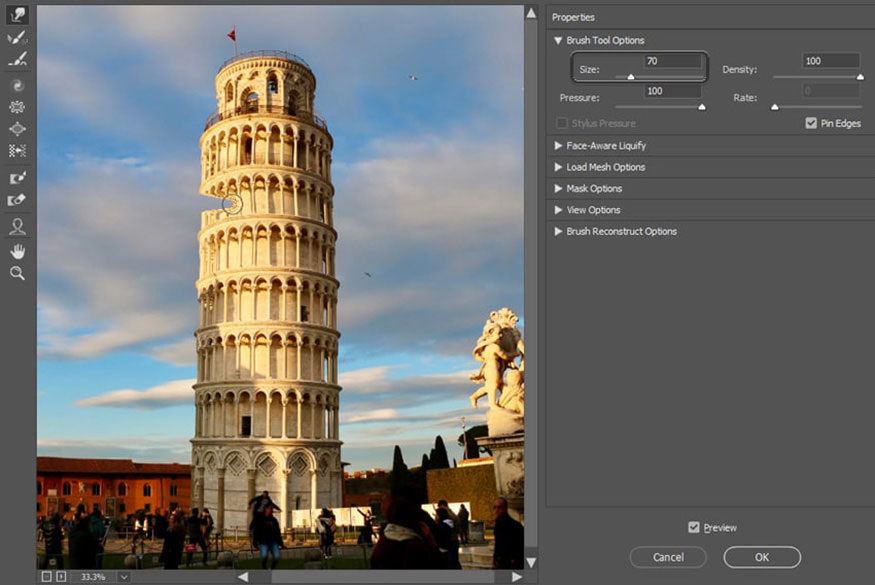
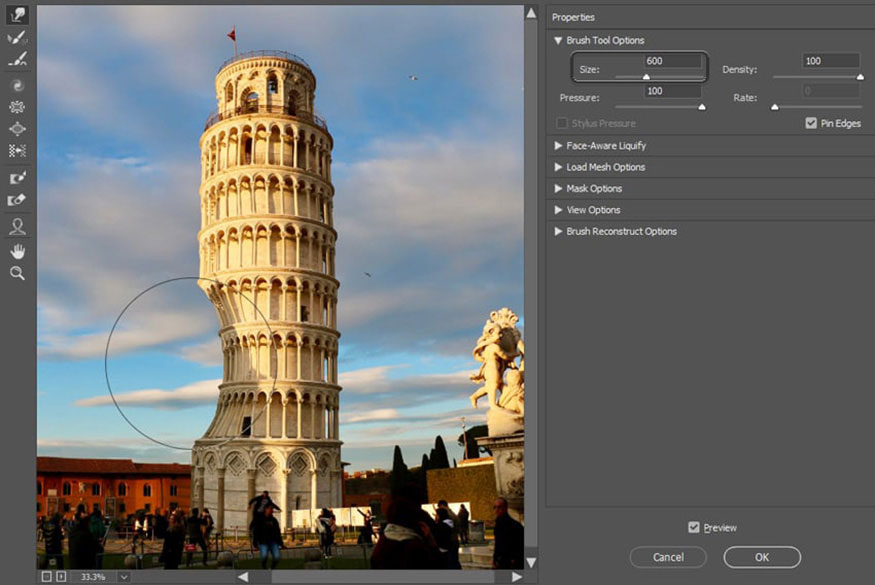
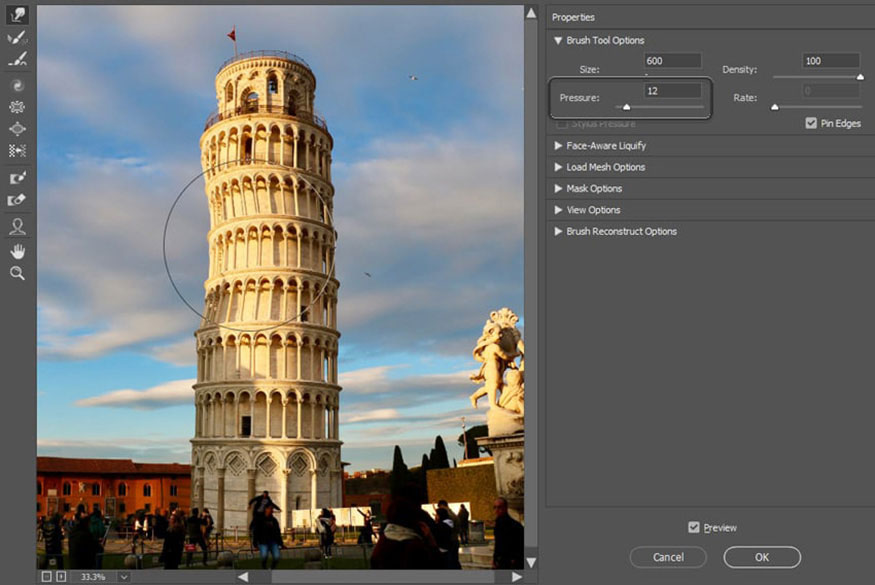
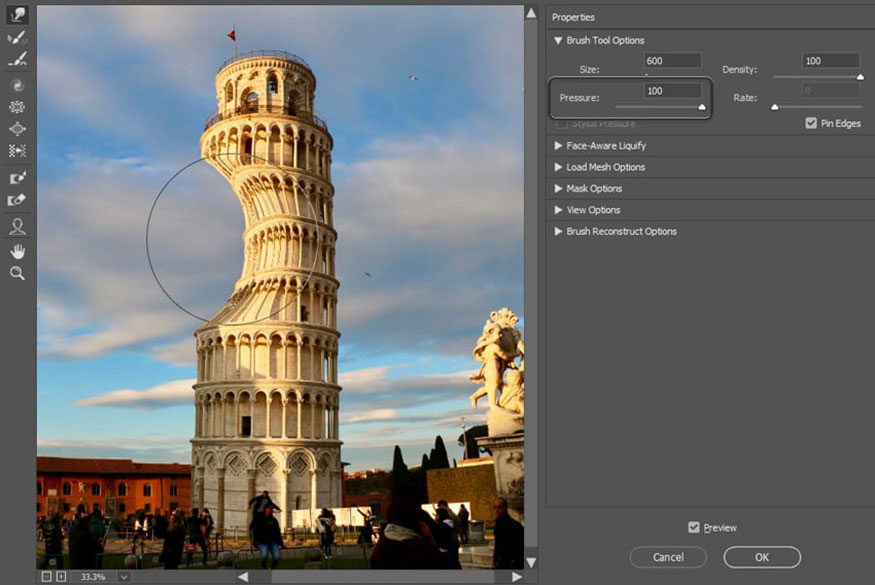
Pressure determines how much the brush affects that area.
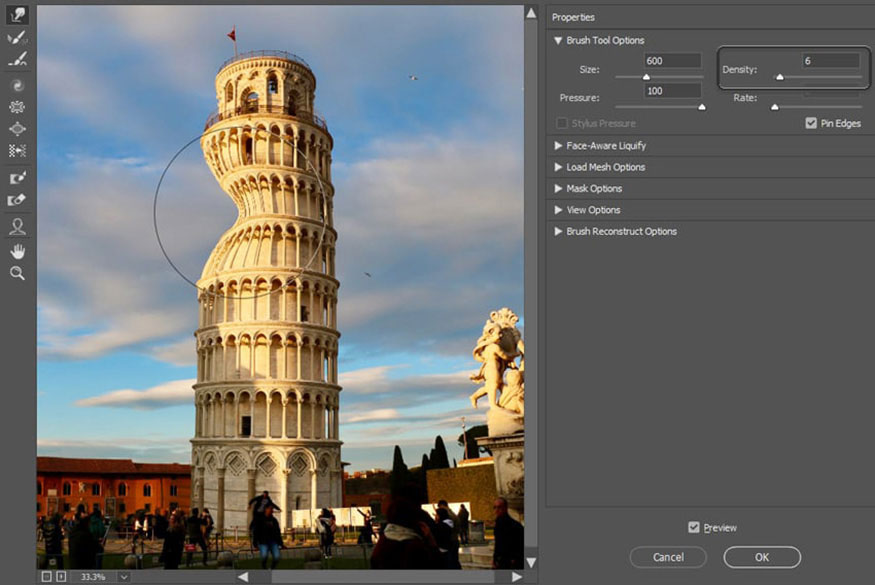
Destiny determines which part of the brush affects the selected area the most. The higher the density, the "wider" the brush feels.
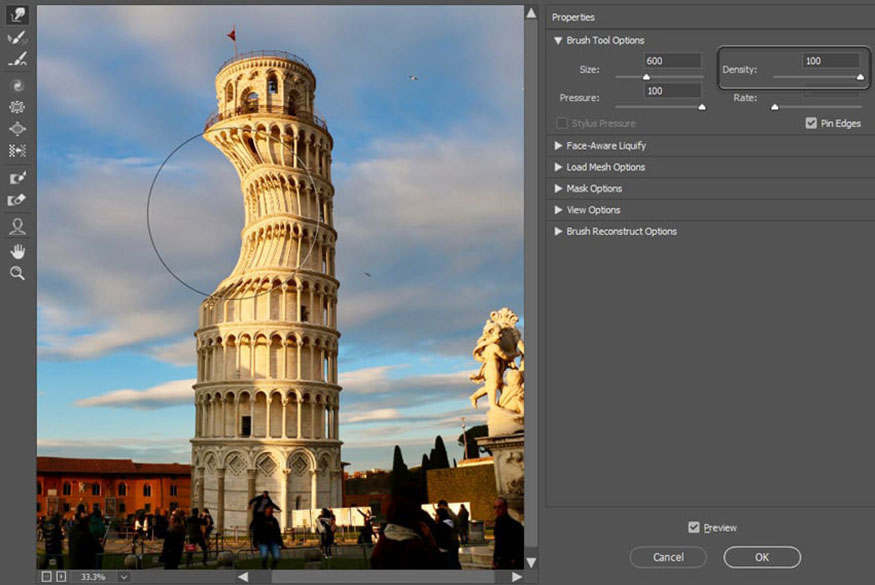
Rate only applies to tools that give you a gradual effect—it determines the speed of that gradual change.
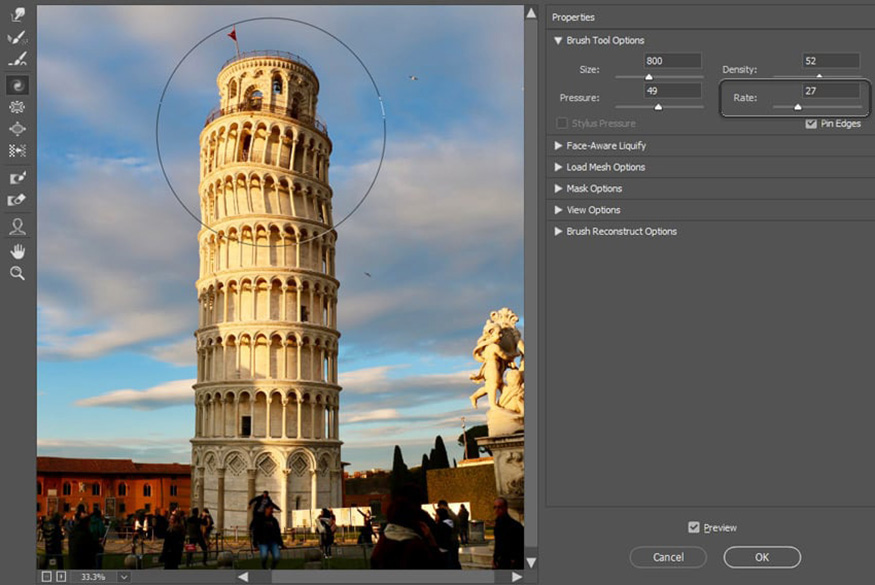
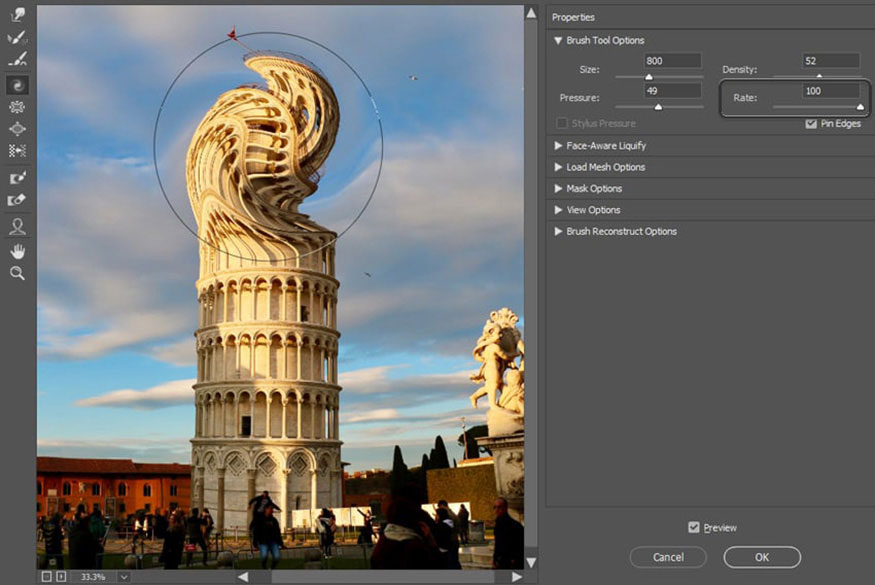
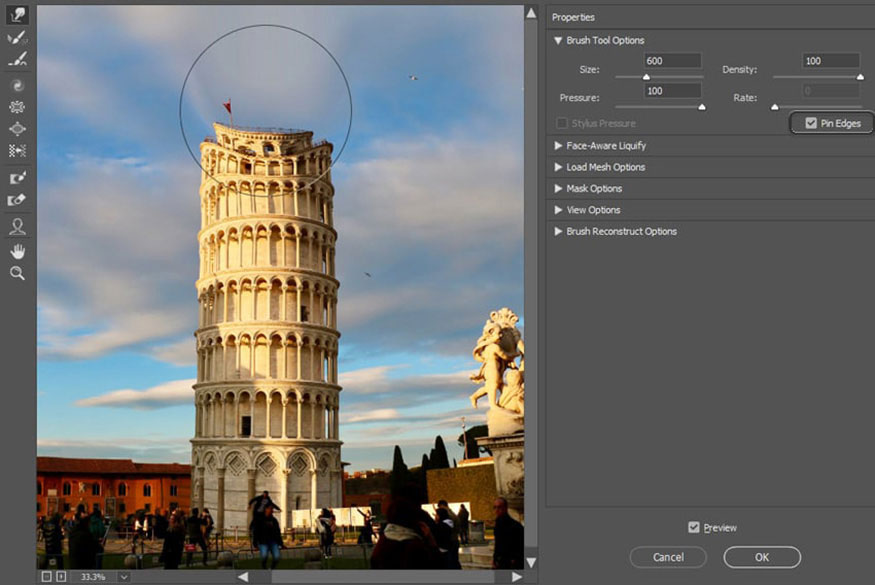
Selecting Pin Edges ensures that the edges of your image stay straight as you edit.
Stylus Pressure allows you to make more precise adjustments if you're using a graphics tablet.
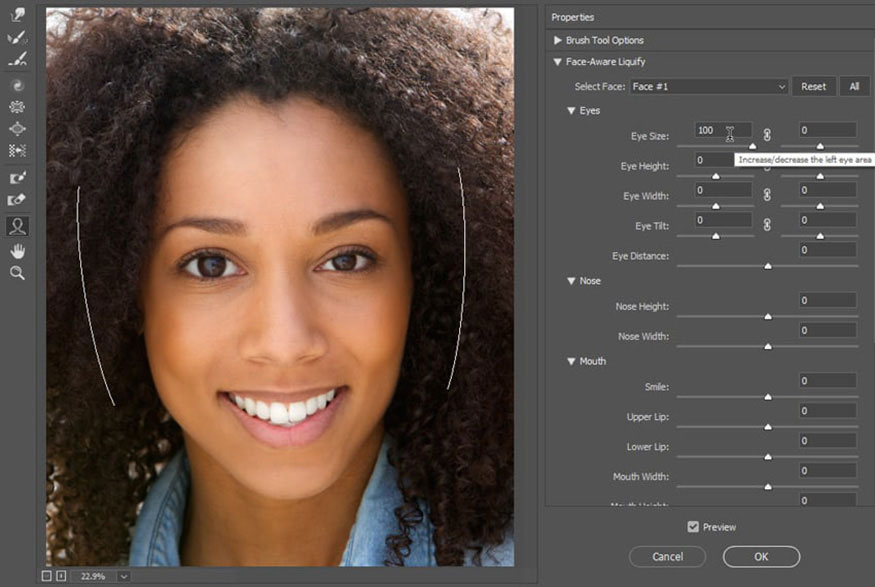
3.2. Face-Aware Liquify
These are the same settings you can adjust using the Face Tool. However, here you can access the actual numerical values of each adjustment, which can help you be more precise.
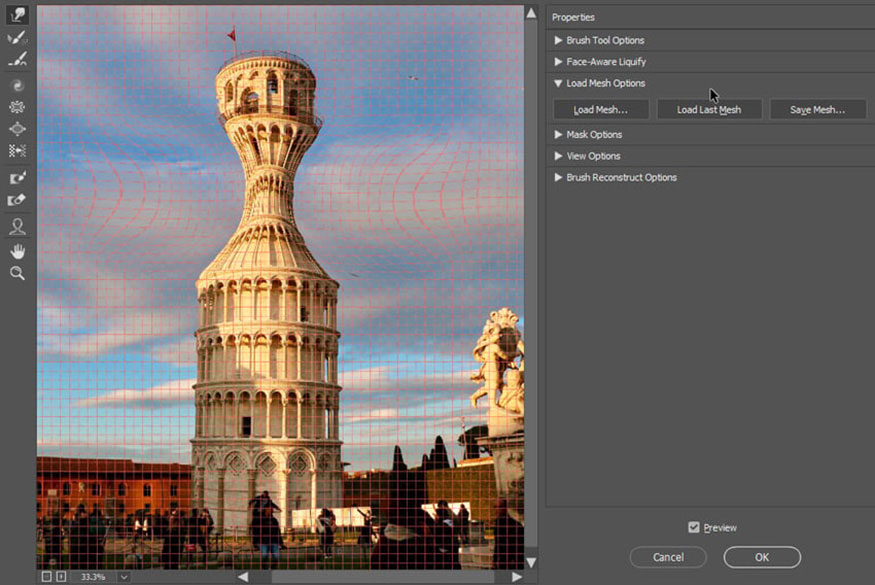
3.3. Load Mesh Options
The Liquify filter places a special mesh on your photo, which is modified as you edit it. This mesh can be saved as a file, so you can edit one photo and then apply the same edits to other photos using the Save Mesh and Load Mesh functions.
3.4. Mask Options
If you have a Layer Mask on your photo, you can use it here too.
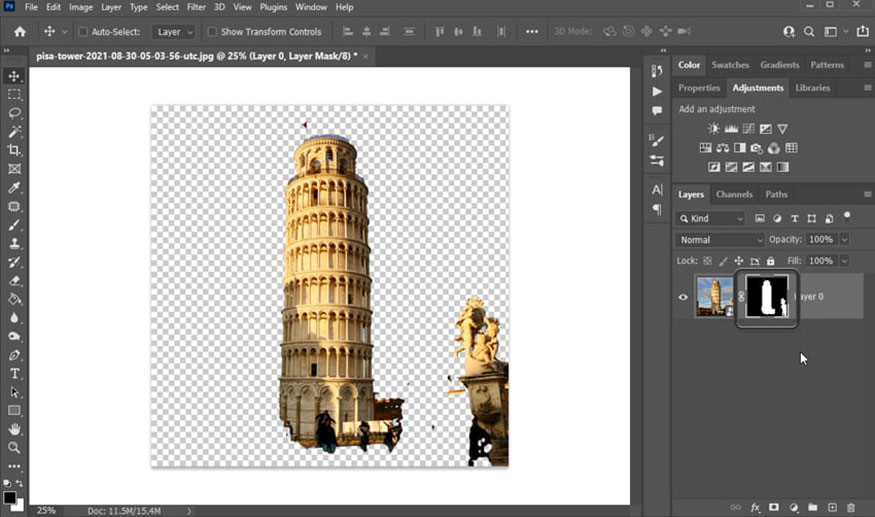
Replace Selection turns the black area of the Layer Mask into a Liquify Mask.
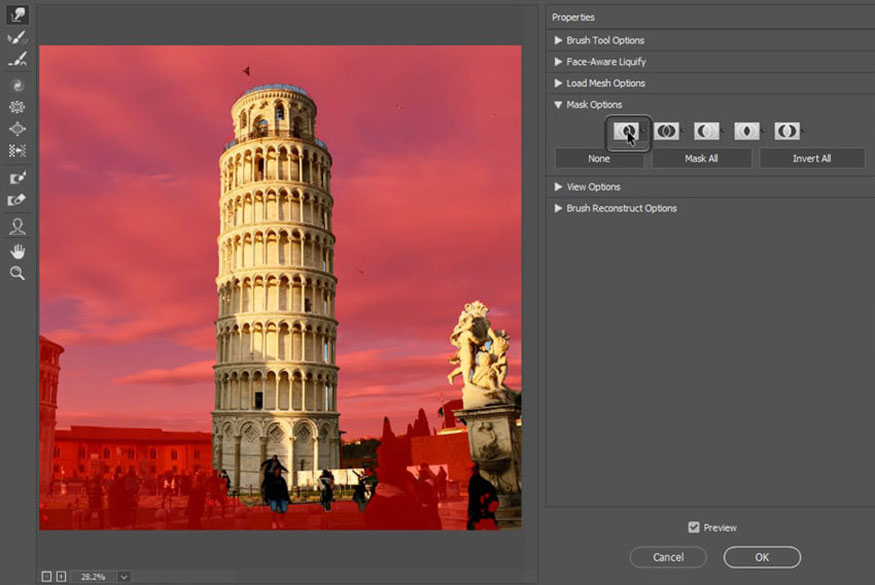
Add to Selection removes the Liquify mask from the white area of the Layer Mask.
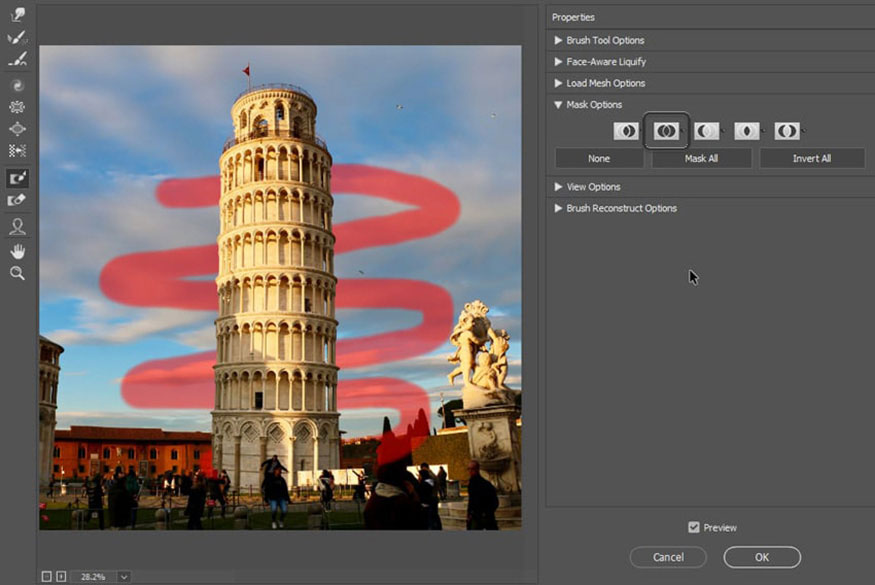
Subtract from Selection turns the white area of the Layer Mask into a Liquify Mask.
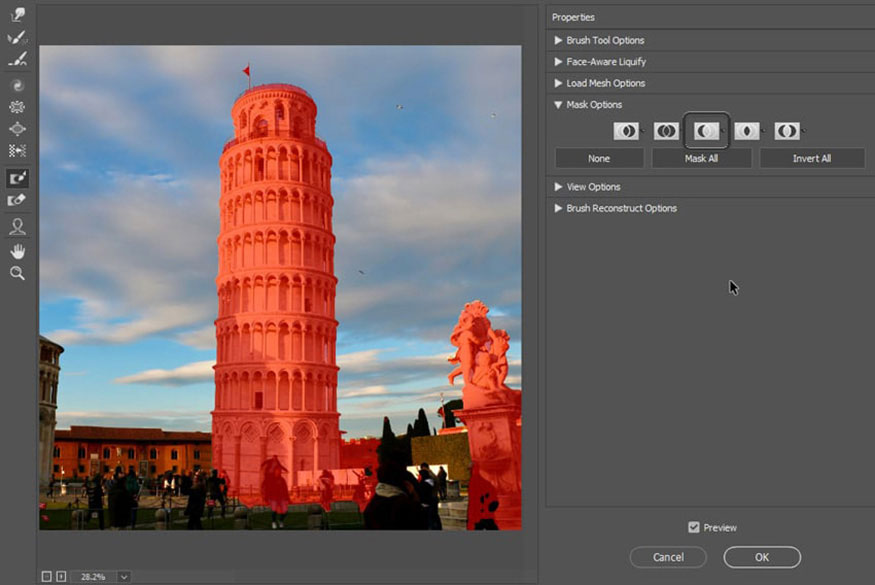
Intersect with Selection adds the black area of the Layer Mask to the Liquify Mask.
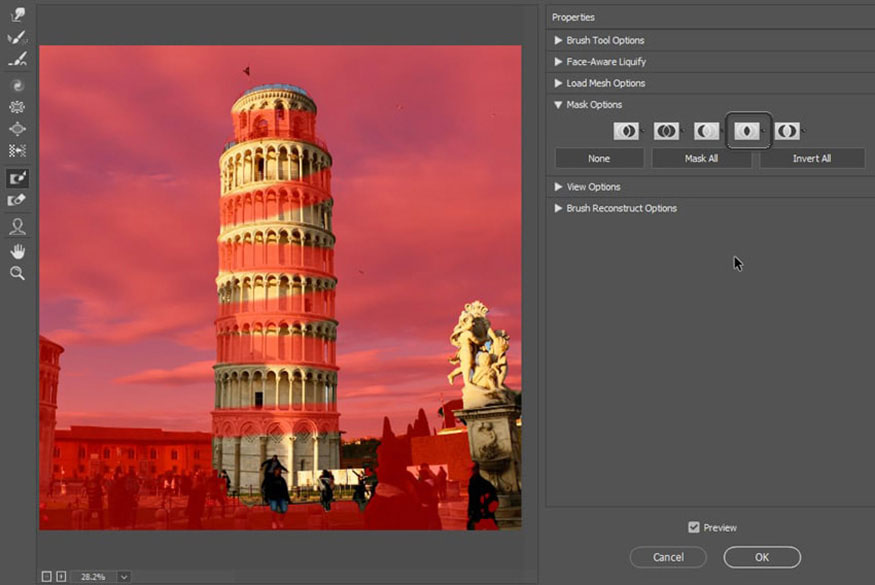
Invert Selection removes the Liquify mask from the white area of the Layer Mask, while keeping that part in the black area.
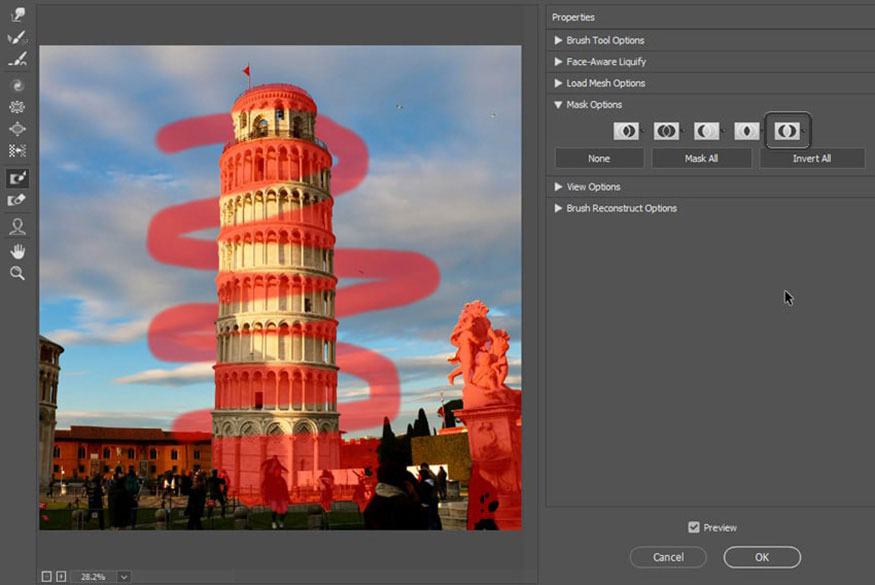
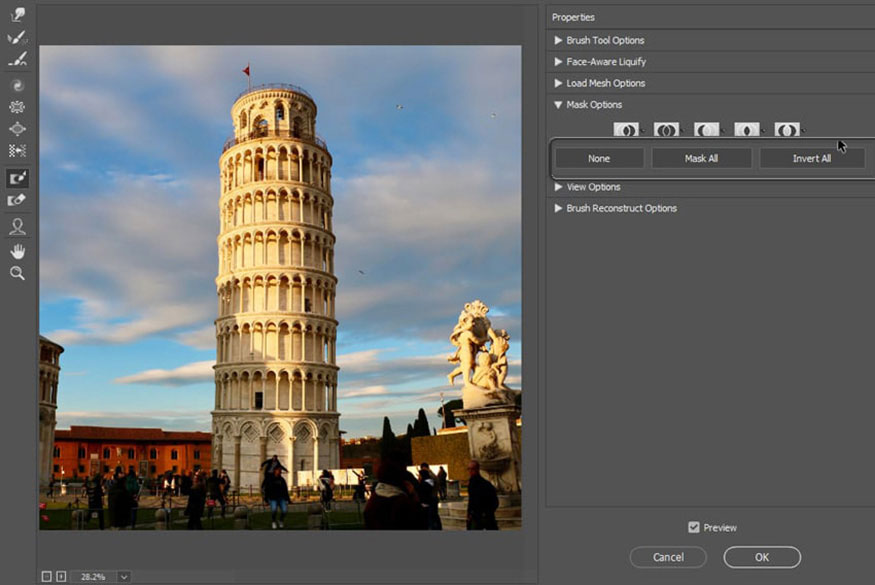
If you don't have a Layer Mask, you might still be interested in the buttons below:
None: removes the mask.
Mask All: turns the entire image into a large mask that you can selectively erase later.
Invert All: turns masked areas into unmasked areas and vice versa.
3.5. View Options
These options don't change anything about the photo, they just help you work with the filter.
Show Guides turns the visibility of the lines in the image on and off.
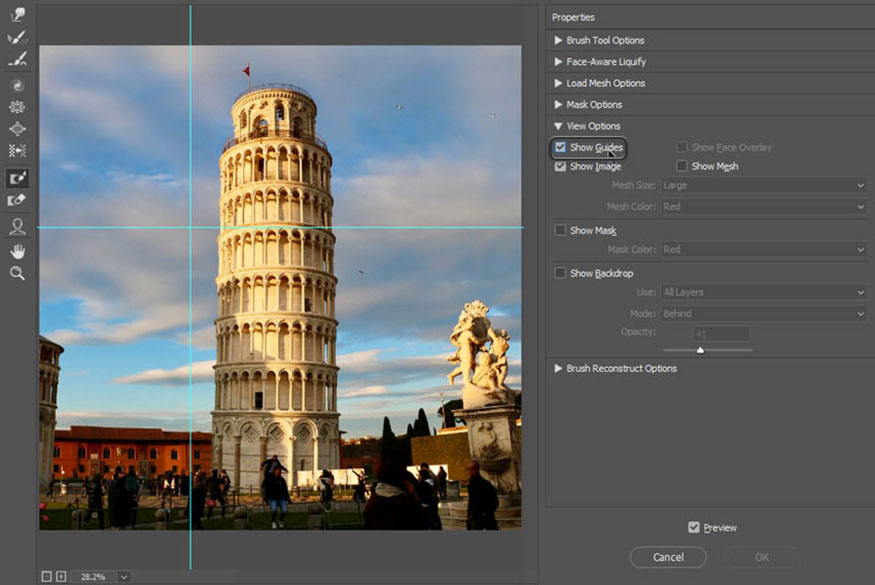
Show Face Overlay shows and hides the visibility of the guides that appear when you use the Face Tool.
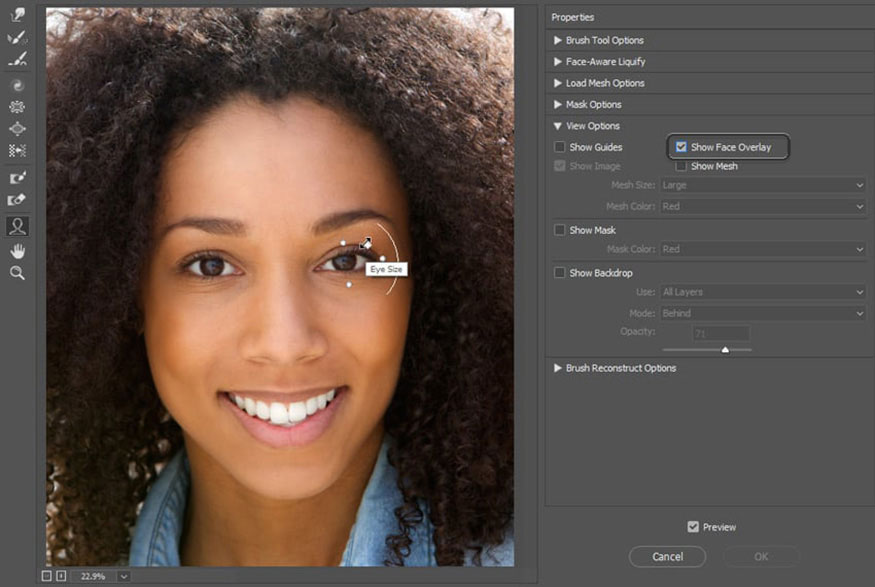
Show Image shows and hides the image, in case you want to take a closer look at the mesh.
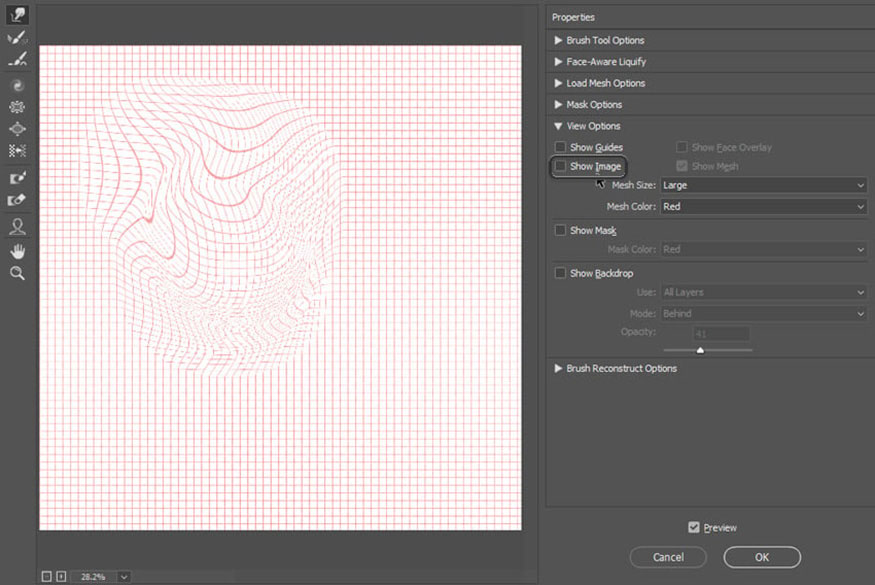
Show Mesh shows and hides the mesh that the edits are linked to.
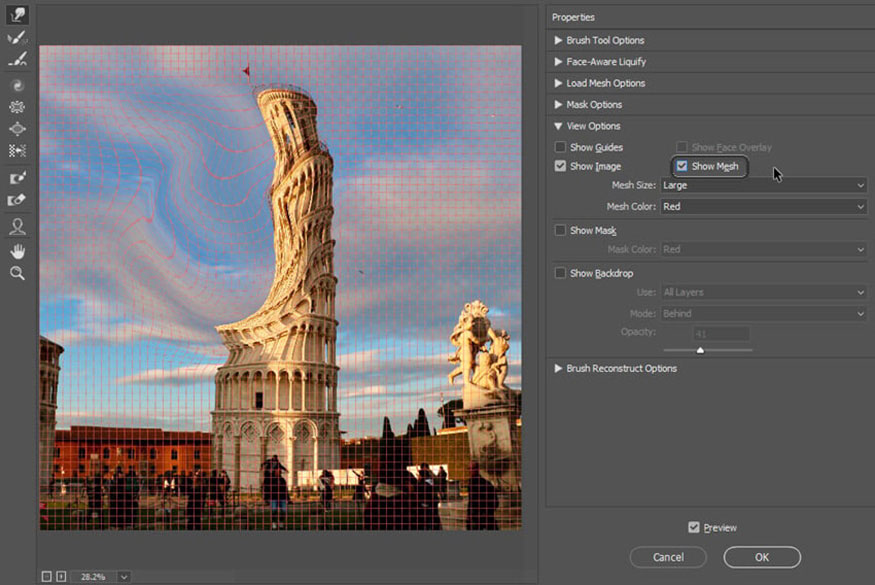
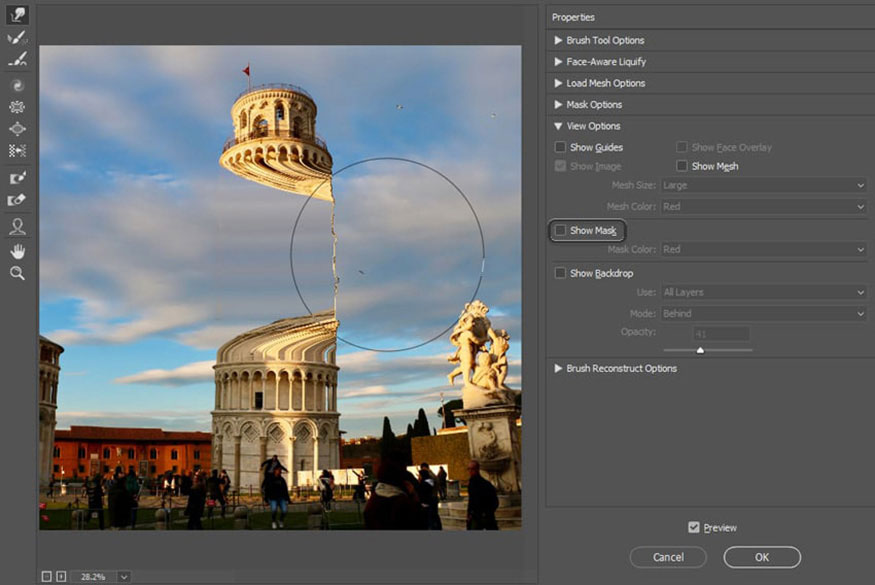
Show Mask shows and hides the mask drawn in the image. Hidden masks do not lose their effect.
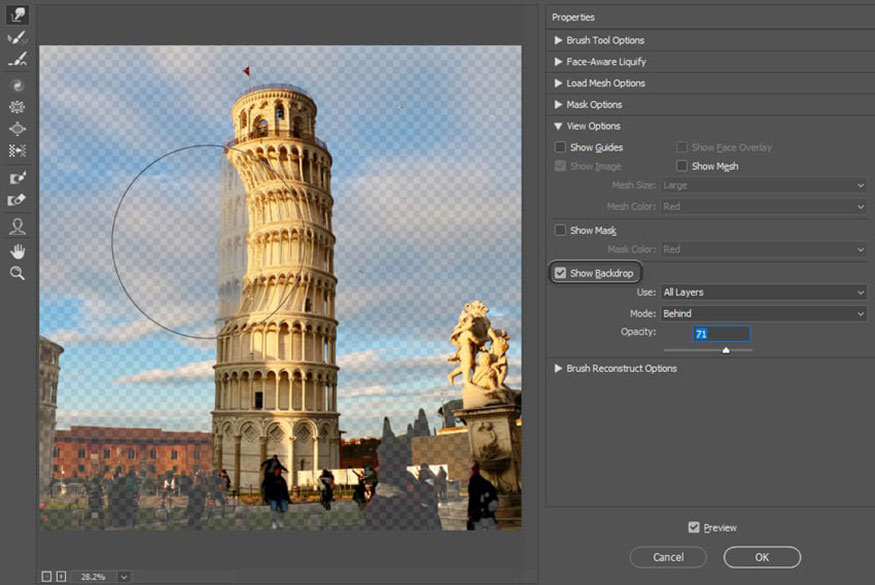
Show Backdrop lets you see the unedited version of the photo. You can change the settings of the overlay to make it more or less visible.
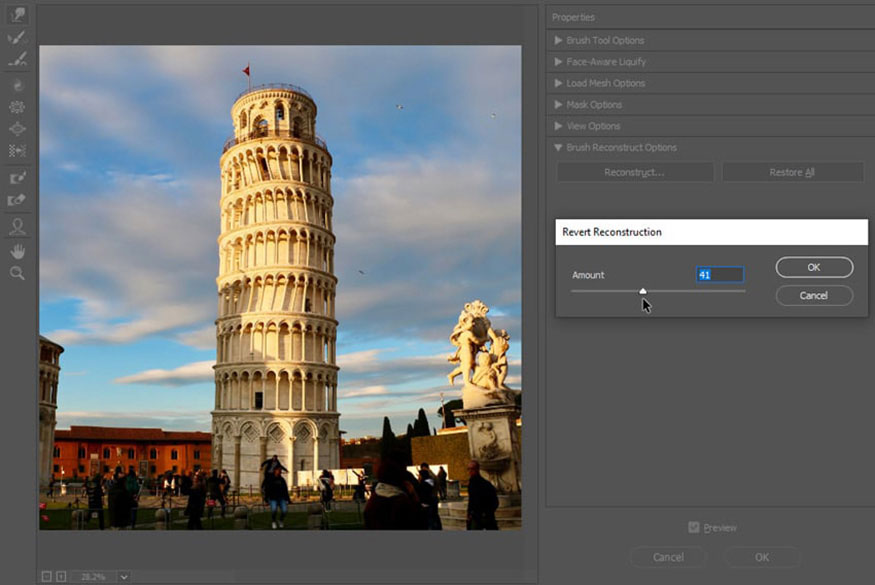
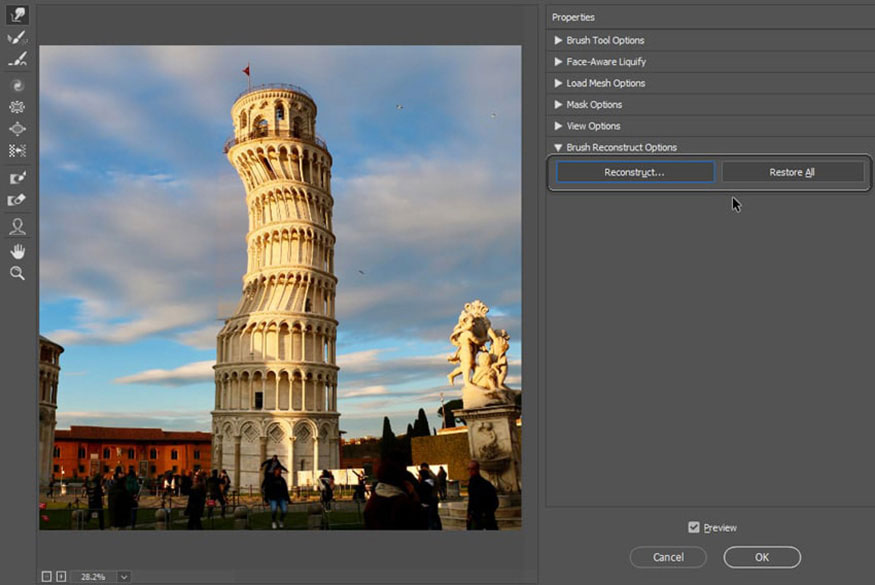
3.6. Brush Reconstruct Options
If you think you've overdone it, you can use the Reconstruct function to gradually reduce the amount of change. But if you just want to go back to the original, press Restore All.
4. How to Use the Liquify Tool in Photoshop
Let's take a closer look at how to use Liquify in Photoshop through the following example steps.
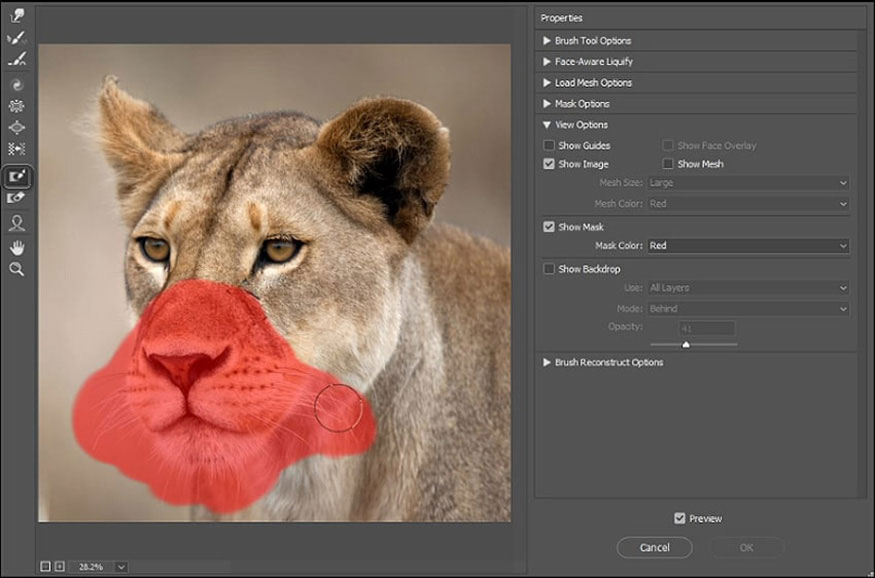
Step 1: Open a photo of a lioness. We'll use Liquify to turn this lion into a cat.
Use the Freeze Mask Tool (F) to paint over the lion's snout. Then hide the mask and invert it.
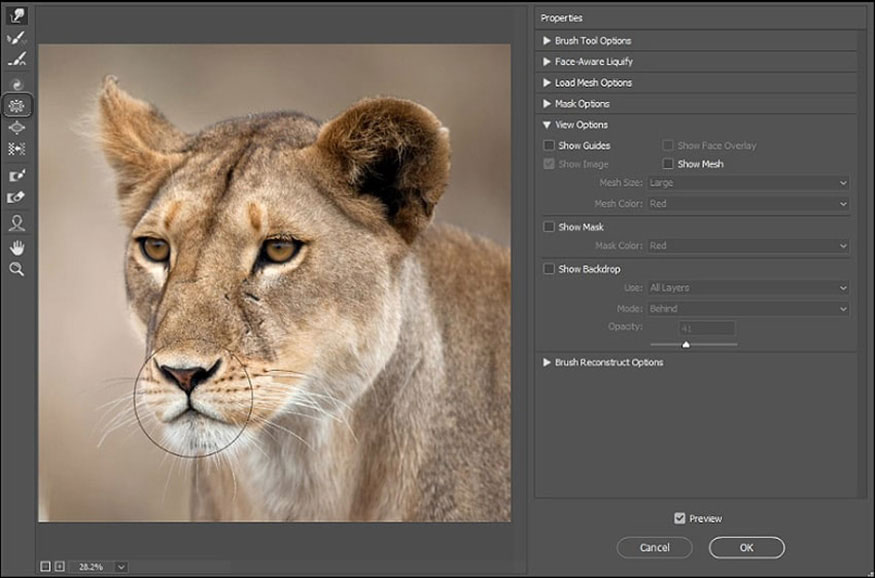
Step 2: Use the Pucker Tool (S) to make the lion's snout smaller.
Step 3: Show the mask again and reduce the size of the area a bit.
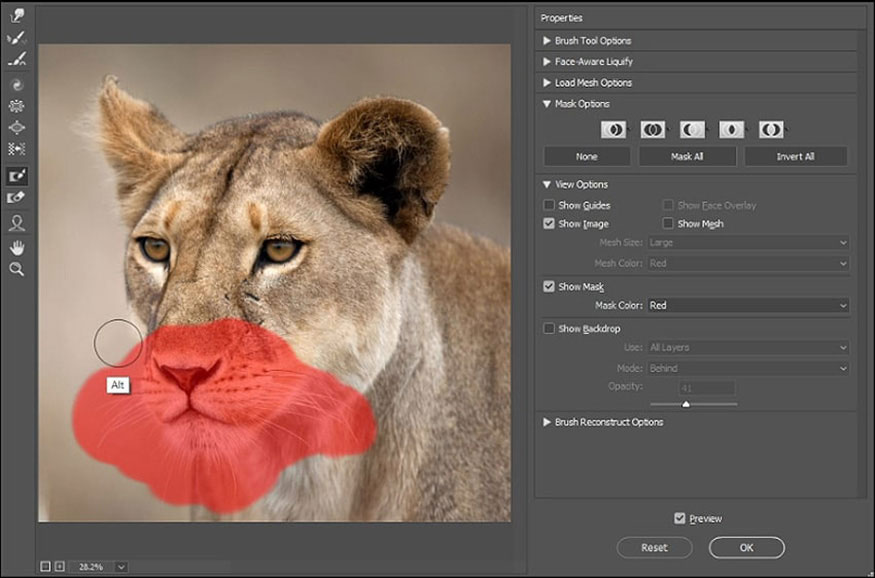
Step 4: Using the Forward Warp Tool (W) with a large brush, pull the entire top of the lion's head down. This will make the snout look short, consistent with a house cat.
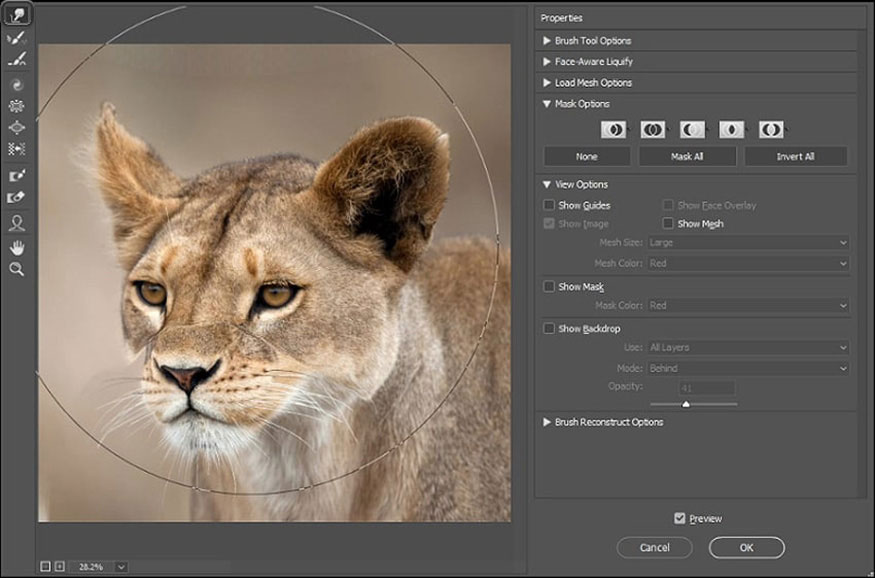
Step 5: Use the Bloat Tool (B) to make the eyes much larger.
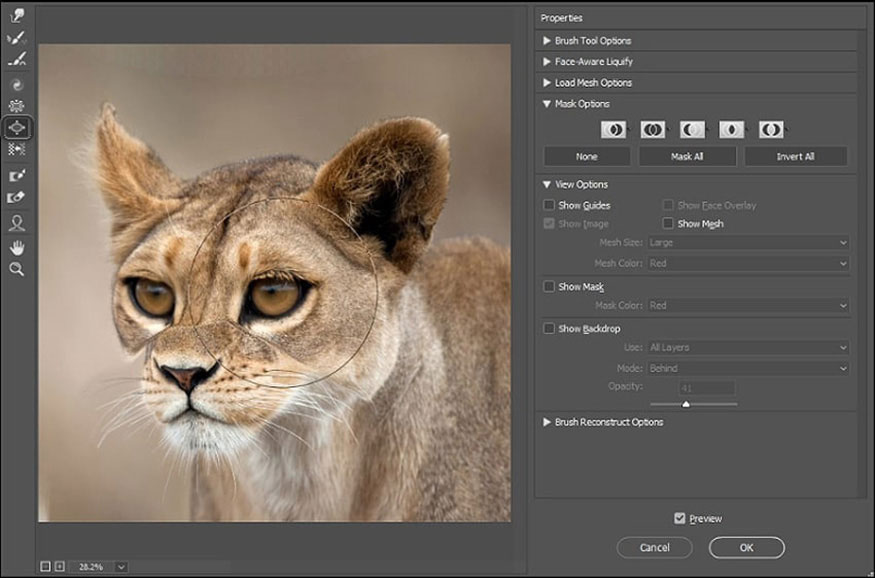
Step 6: Remove the mask and use the Forward Warp Tool (W) to adjust the shape of the rest of the head. Make the ears long and pointed, the forehead lower and the eyebrows bigger. To make the mask's outline less visible, use the Smooth Tool (E) and the Reconstruct Tool (R).
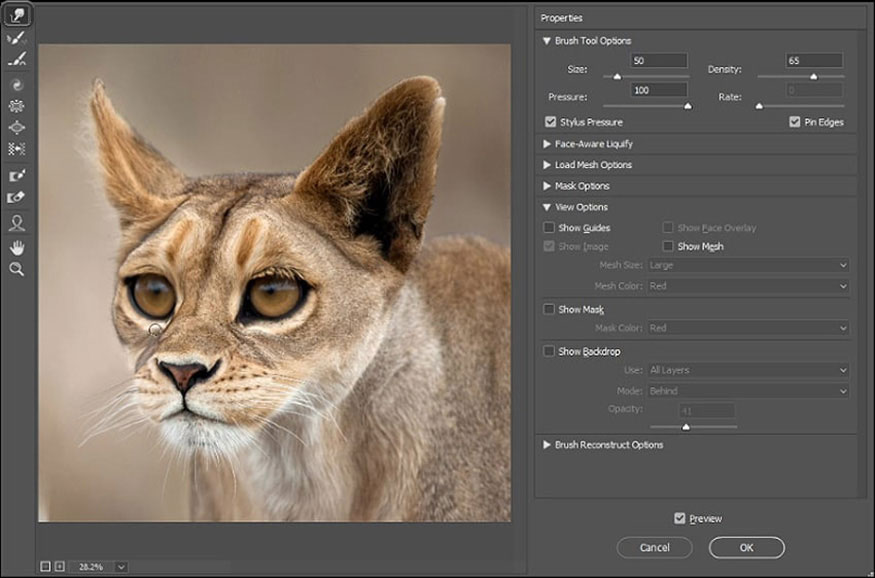
Adjust it so that it looks like a house cat.
The above is a summary of the Liquify tool in Photoshop. Learn more about this tool to make the design process easier.
Installation and support contact information:
🏡 SADESIGN Software Company Limited
📨 Email: phamvansa@gmail.com
🌍 Website: https://sadesign.ai


.png)


