Best Selling Products
Instructions for creating interesting watercolor effects in Photoshop
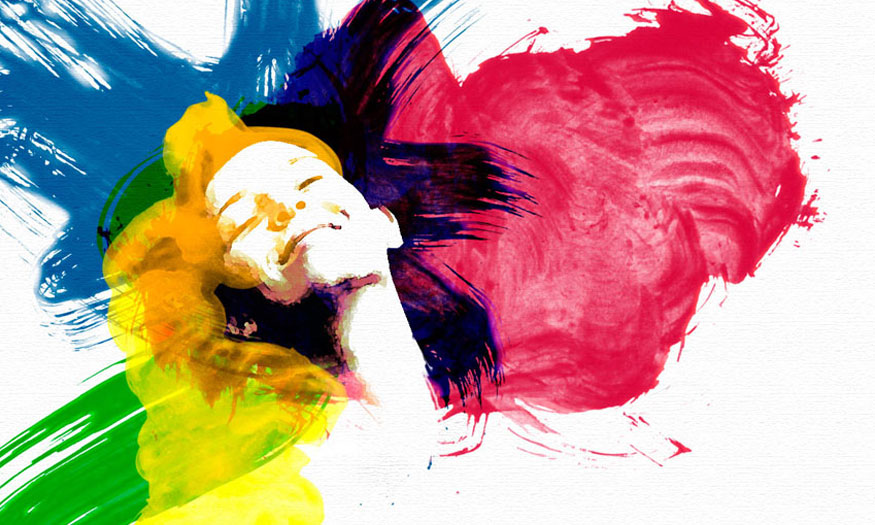
Application Interesting watercolor effects in Photoshop make your design much more impressive. If you don't know how to do it, please read along with Sadesign to find out in the following content!

How to do photo editing
- Step 1: First we need to create a new document and a new layer and name this layer "texture", use white to color them. Make sure the foreground is white and the background is black.
Next, go to Filter => Texture => Texturizer and you can use Canvas or Texture with a ratio of 80% and 2 select relief.
.jpg)
- Step 2: Place an image in your document, then remove the background. You can use the Path Tool (P) or the Polygonal Lasso Tool (L).
.jpg)
- Step 3: Select the girl's image layer and go to Image => Adjustments => Levels. Then go to Image => Adjustments => Hue/Saturation and change the Saturation to -65.
(2).jpg)
- Step 4: Next, go to Filter => Artistic => Watercolor. Use the following settings:
-
Brush Detail: 9
-
Shadow Intensity: 0
-
Texture: 1.
.jpg)
- Step 5: With the girl's layer selected, go to Layer => Layer Mask => Reveal All. Then select the Brush Tool (B) with black color to hide the girl's body.
.jpg)
How to create a watercolor effect
- Step 1: Download Bittbox Water Brush 2. Next, create a new layer. Then, with the Brush Tool (B) selected, select the 7th brush from the BB Watercolor Brushes. Use black for the color, reducing its size to fit the document. Rotate and resize layers, the idea is the watercolor hairstyle for the girl using a brush.
.jpg)
- Step 2: Go to Layer => Layer Style => Blending Options. Change the Fill Opacity to 0, then the Color Overlay option. Use red for color and in Blend Mode select Multiply and set other parameters as follows:
-
Opacity: 70%
-
Choose Satin
-
Use Hard Light for the blending mode
-
Purple (#5d085c) for color
-
Angle: 20°
-
Spacing: 4px
-
Size: 12px.
.jpg)
- Step 3: Create a new layer, then select another brush with the Brush Tool (B). On the new layer, draw some brush strokes in the middle of the screen. Next resize and rotate them until they become more beautiful.
As a result, you will get yourself a stylized hairstyle as shown in the image below.
(1).jpg)
- Step 4: Go to Layer => Layer Style => Blending Options. Set Fill Options to 0. Then add Color Overlay, use Overlay for Blend Mode, Blue (#002cec) for color and set it Opacity 50%.
Next, choose Satin and use the following settings:
-
Color: dark blue code #065795
-
Blend Mode: Linear Burn
-
Opacity 100% ,
-
Angle 19°
-
Distance: 11px
-
Size: 14px.
.jpg)
- Step 5: Let's brush some more hair, this time we will use green color. Create a new layer and select the Brush tool (B), then choose another brush from the watercolor set. Click to select the last one and reduce its size, then draw more hair.
Now go to Layer => Layer Style => Blending Options and make the following settings:
-
Fill Options: 0.
-
Add Color Overlay
-
Select Multiply for the blending mode
-
Color: Green (#18ff00)
-
Opacity: 100%.
Next, select Satin and install as follows:
-
Color: darker blue (#0b9600)
-
Darken for blend mode
-
Opacity: 100%
-
Angle: 19°
-
Spacing: 4px
-
Size: 7px .
.jpg)
- Step 6: Continue repeating step 5 again. Select the new layer, then select the Brush Tool (B), select another brush and reduce its size to draw more hair. Adjust them by resizing and rotating until they look good.
Go to Layer => Layer Style => Blending Options and make the following settings:
-
Fill Options: 0
-
Add Color Overlay
-
Use Hard Light for blending mode
-
Color: yellow (#ffe400)
-
Opacity: 100%.
Next select Satin and use the following settings:
-
Color: darker yellow (#a2a406)
-
Blend mode: Color Burn
-
Opacity:100%
-
Angle: 19°
-
Spacing: 17px
-
Size: 73px.
.jpg)
- Step 7: Select the layer with the girl's face and change the Blend Mode to Screen. Then make some adjustments like fixing the neck with a regular brush of white color.
.jpg)
How to add text
- Step 1: Enter the text you want, in this example we enter the text Psdtuts+. Next, go to Layer => Layer Style => Gradient Overlay. Create a gradient using Red, Yellow, Green and Blue. Use 180° for Angle and the blending mode is Normal.
Create another layer and make sure the text is on this new layer. Next, with the Rectangular Marquee Tool, create a rectangular selection and then fill it with white. Do a merge of these 2 layers to add some text effects, otherwise the filters won't work well.
.jpg)
- Step 2: Apply some filters to the text. First, go to Filter => Brush Strokes => Sprayed Strokes. Use Stroke Length 17, Spray Radius 0, and Stroke Direction Vertical.
Next go to Filter => Artistic => Watercolor and make the following settings:
-
Brush Detail: 11
-
Shadow Intensity: 0
-
Texture 1.
.jpg)
These settings will create beautiful text effects, or you can experiment with different filters until you get the best results.
Above are complete instructions on how to create one Interesting watercolor effect in Photoshop to help you create a for yourself beautiful design. Hope you will be successful with your design!


