Best Selling Products
Make matte painting in Photoshop simple with Sadesign
Nội dung
- 1. What is Matte Painting in Photoshop?
- 2. Modern digital matte painting
- 3. Plan for a matte painting
- 3.1. Sketch
- 3.2. Detailed instructions
- 4. How to select images for Matte Painting in Photoshop
- 4.1. 3D Assets
- 4.2. Image Extraction
- 4.3. Create more objects
- 4.4. How to assess the suitability of matte paintings
- 4.5. Adjust the value
- 4.6. How to add final details to the picture
- 4.7. Blurring the path
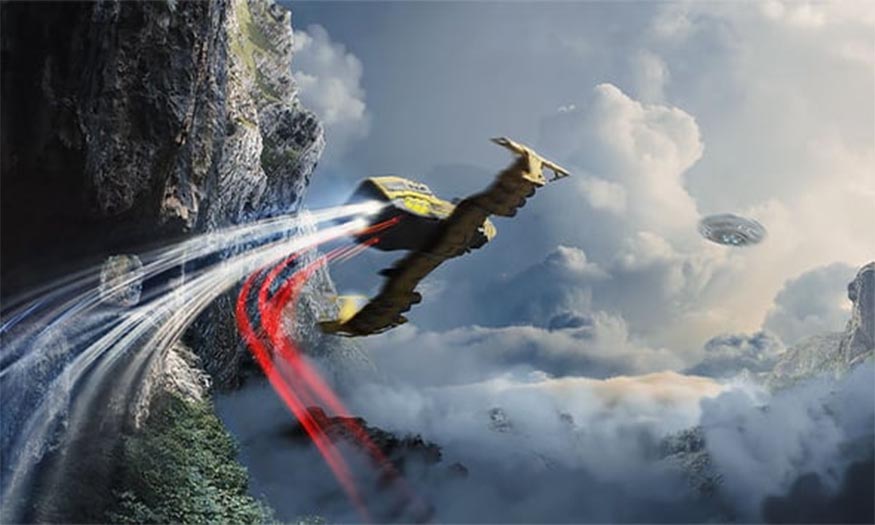
Matte Painting, also known as matte painting, is often used in photos or movies related to science fiction and fantasy. Let's learn how to make Matte Painting in Photoshop with SaDesign through the article below.
1. What is Matte Painting in Photoshop?
Before Photoshop, matte painting was over 1,000 years old. Originally, matte paintings were surrealistic backdrops used in photography and film. The technique allowed filmmakers to create detailed environments of cityscapes and landscapes using a variety of methods.
Sometimes, backgrounds are created by painting directly onto the glass and then placing that glass in front of the camera. Sometimes, they are used as practical backdrops on set, often used to extend the setting or scenery.
So these backdrops and paintings are meant to be hyper-realistic and blend perfectly with the real-life actors and settings. Not too many fantasy or sci-fi movies exist without matte paintings.
2. Modern digital matte painting
As technology has advanced, matte paintings have served the same purpose but have become more digital and a combination of 3D, CGI, animation, photographic elements and hand-drawn art. This has given rise to a newer technique called photomontage or photo manipulation, which uses both traditional painting techniques and photographic textures to add realism.
With the rise of Photoshop, creating matte paintings for conceptual art and digital art has become popular, not just for film. Therefore, in the article below, SaDesign will share with readers some ways to do Matte Painting in Photoshop.
.jpg)
3. Plan for a matte painting
To create Matte Painting in Photoshop, you need to sketch the picture. You just need to sketch simply, it doesn't need to be too beautiful because it only plays the role of guiding the composition of the picture.
3.1. Sketch
When creating a sketch, you should either zoom in on your image so it is small or make sure the Navigator is enabled by going to Window > Navigator.
.jpg)
3.2. Detailed instructions
Here are some other ways you can use to influence and build your composition. You can divide your photo into thirds.
Step 1: We can do this quickly by going to View => Guide => New Guide Layout.
.jpg)
Step 2: Select the Center option in the Preset drop-down list. Continue to change the Column to 2 and Row to 3. This will divide your photo into three parts.
.jpg)
We can turn our guides on and off using Control/Command.
4. How to select images for Matte Painting in Photoshop
Our rough sketch and guide are set up; now let’s get to the image. Try to collect as many high-resolution textures as possible. There can be a lot of trial and error when creating Matte Paintings in Photoshop, so having a large pile of trees, rocks, mountains, and skies ready will make things easier.
4.1. 3D Assets
3D sculpting is an important skill in matte painting. If you want to pursue matte painting, you will definitely want to look into tools like Blender or Cinema 4D.
However, you can also use ready-made resources like this one from Envato Elements. The key is to rotate and angle the images, downloading them at the exact angle we need.
SaDesign will be using this spaceship and a bunch of these clouds. We are downloading them all as PNGs.
.jpg)
4.2. Image Extraction
Next, we definitely need to talk about texture extraction. For the initial extraction, you will most commonly use:
Lasso Tool
Quick Selection Tool
Object Selection Tool
There are other methods, such as using channels to make selections, but most users usually opt for quick, time-saving tools. You just want to make quick, rough selections.
Step 1: Select a part of this cliff using the Object Selection Tool and add a Layer Mask.
.jpg)
Step 2: Now, go ahead and select Select and Mask, which can be found in the options bar above. Select Smart Radius On and increase the Radius until the edges of the rock texture look more natural.
If needed, we can further refine the mask using Global Refinements.
.jpg)
Step 3: We can make any adjustments using a Brush, ideally one with a texture that matches the surface of your layer mask.
.jpg)
4.3. Create more objects
If you want to use Generative Fill to add images or objects, then don't, you can use the blending of images together to create an impression.
Step 1: We can use the Lasso tool and select an area that is not blended or appears to be completely isolated from its surroundings.
.jpg)
Step 2: Now, in the Context bar, press Generate without prompt and Photoshop will attempt to blend the areas together.
4.4. How to assess the suitability of matte paintings
.jpg)
Step 1: Create a new layer at the top of the layer options panel and go to Edit => Fill => 50% Gray.
Now, let's change its layer mode to Color. This will give us a black and white view of the image, which will make it easier for us to see and adjust our photo values.
.jpg)
Step 2: We can turn it on and off as we move and lock the layer to avoid accidentally selecting it.
.jpg)
4.5. Adjust the value
Step 1: Create and Clip a Curves adjustment layer to the frontmost rock face. You need to bring down the right point on the curve to darken it.
.jpg)
Step 2: Do the same for the rock behind it, but this time darken it a little less.
.jpg)
Step 3: For the mountains in the distance, we want to bring out the shadows. Not only are they more brightly lit, but they are also affected by the haze in the atmosphere.
The further away something is, the lighter and less contrasty it tends to be. Understanding atmospheric haze is an important part of a successful matte painting and is much more complex than just creating a flat Curves layer.
Both atmospheric haze and values in general are two topics you'll want to learn about if you're interested in matte paint.
.jpg)
4.6. How to add final details to the picture
We've covered the basics and some of the content, so let's finish with some simple, easy-to-use special effects you can add to your idea. First, let's focus on your ship's tracks.
Step 1: First, we need to take a photo of some light trails. In this article, SaDesign will use a long exposure photo from a highway. Place the image on the canvas and set it to Screen.
Now we can use the Transform tool to shape and Warp the lights so they appear to be coming from behind the ship.
.jpg)
Step 2: Add some blur using Filter => Blur Gallery => Path Blur. Create and build paths to add movement to the light streams. Set the Speed to around 80%.
.jpg)
Step 3: Finish the light tails by going to Image => Adjustments => Curves, reducing the shadows of the image. This will remove any excess background from the lights.
If you need to clean them up further, add a Layer Mask and use a soft round Brush set to black to remove any unwanted areas.
.jpg)
Step 4: Repeat the steps and duplicate the lights to get double light streaks
.jpg)
Step 5: Finally, add some dots of light to the back of the ship as light sources. You can use layers set to Screen, Overlay, and Color Dodge to create small, simple lights.
.jpg)
4.7. Blurring the path
We can use the Motion Blur filter to add some motion blur to our ship. In this article, SaDesign will use Path Blur for this.
Step 1: Select the ship and right click then choose Smart Object. This is very important because we will use Smart Filter Mask.
Go to Filter => Blur Gallery => Path Blur. Again, place and blend a path to match the shape of our ship. Set the Speed to 20%.
.jpg)
Step 2: Next, take the default soft round Brush and click on Smart Filter Mask.
You can mask out the middle of your ship and any areas where you don't want Path Blur. Focus on the movement effect on the wings and bottom of the ship.
.jpg)
So SaDesign has introduced to readers how to do Matte Painting in Photoshop. Now let's get started and create unique matte photos.


