Best Selling Products

Adobe Premiere Pro Account
99 USD

MidJourney Account
29 USD

Upgrade genuine Capture One account
120 USD

Capcut Pro 1 Year
39 USD

Upgrade Genuine Office 365
49 USD

Freepik Premium Account
59 USD

Copyright Adobe Lightroom Account
59 USD

ChatGPT Plus Account (GPT-4)
16 USD

Upgrade Duolingo Super
29 USD

Genuine Cheap Canva Pro
39 USD

Plugin Retouch4me
69 USD

Autodesk All App Account Copyright
120 USD

Windows 10 & 11 Pro Key
36 USD

Adobe Photoshop Copyright - Full App
120 USD

Genuine Adobe Illustrator account
99 USD
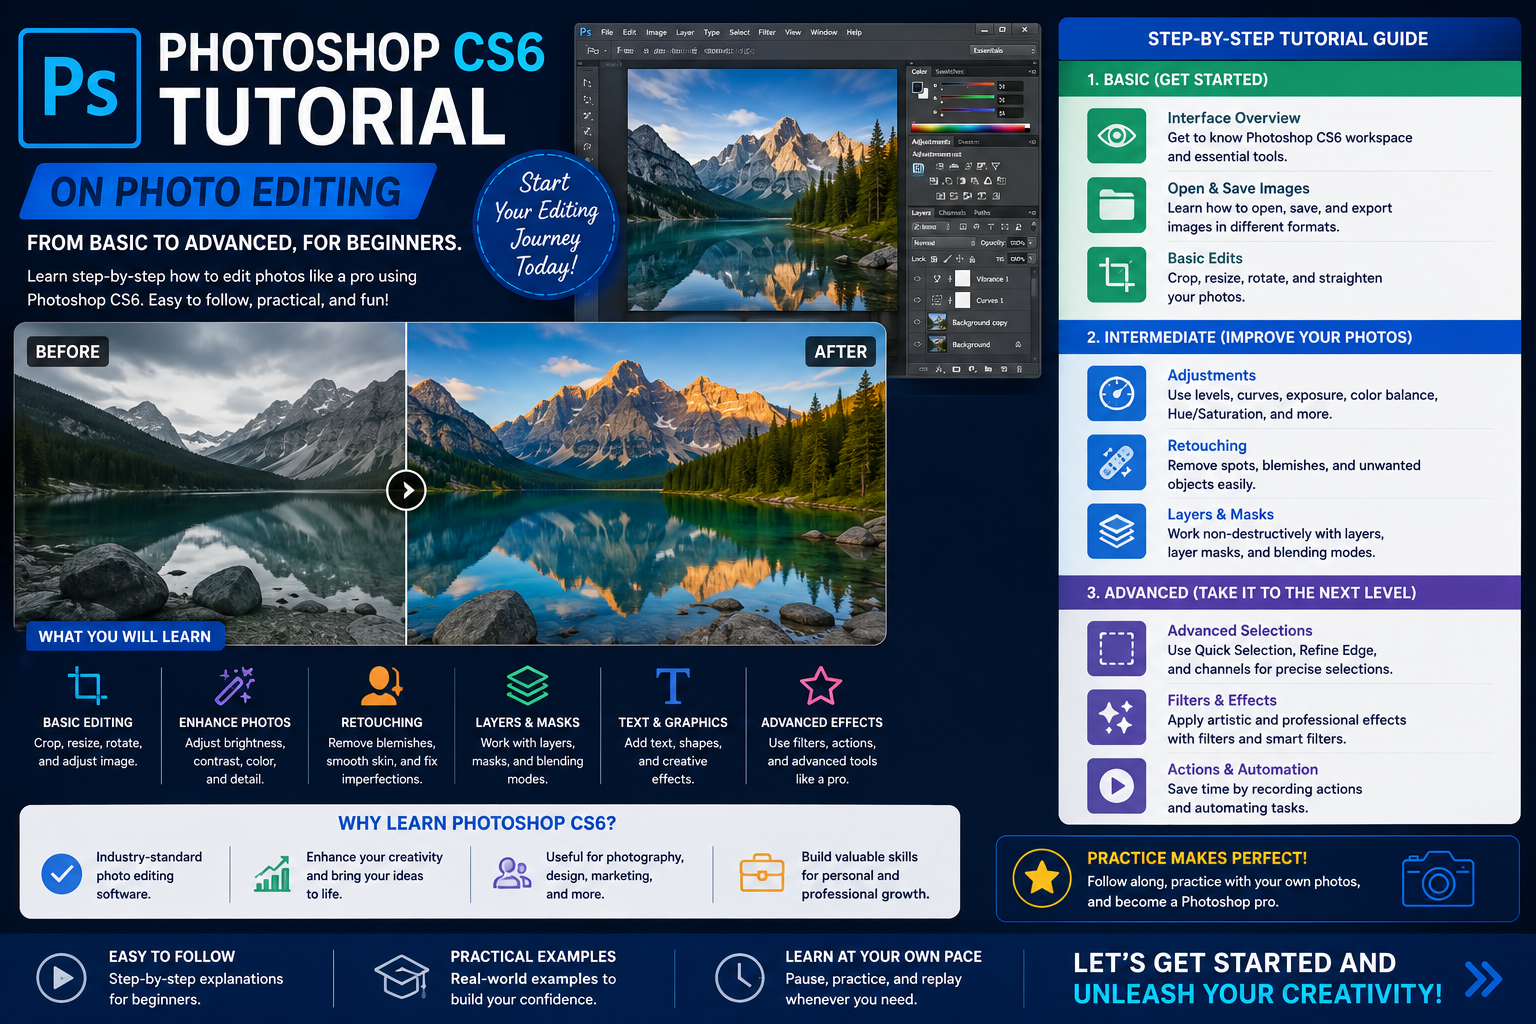
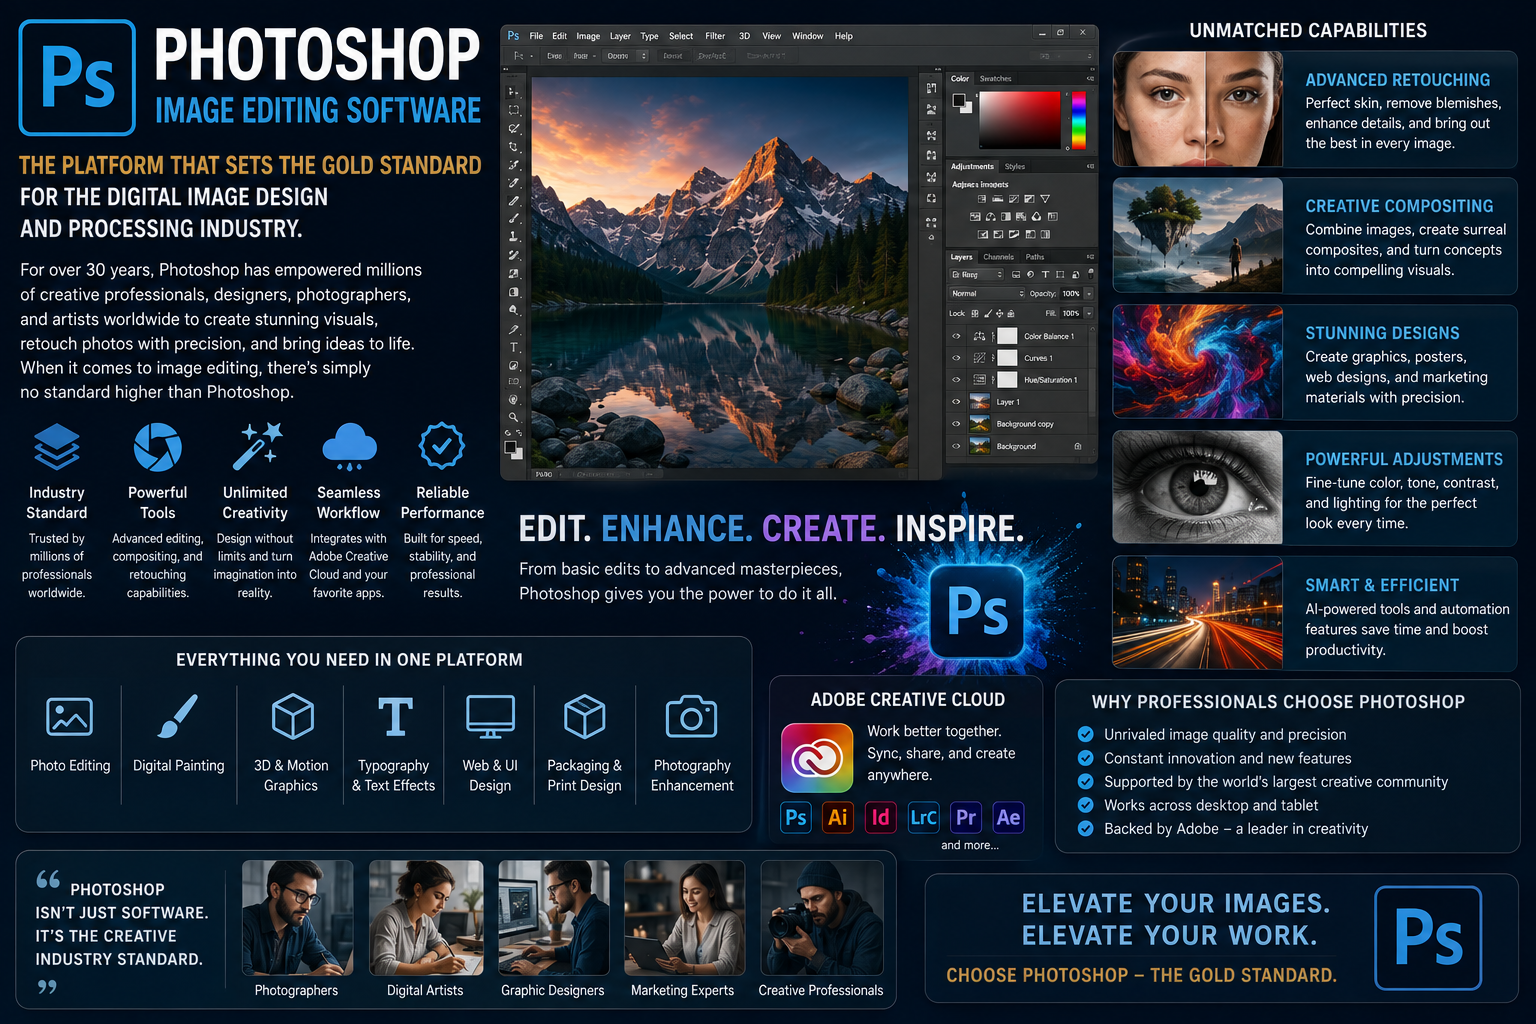
Photoshop image editing software: The platform that sets the gold standard for the digital image design and processing industry.
Nội dung
- 1. The historical evolution of Photoshop image editing software.
- 1.1. The journey of shaping global graphics standards
- 1.2. Reasons why the application maintains its market leading position
- 2. Mastering the user interface architecture and core functional areas is essential.
- 2.1. Options Bar and Customization System
- 2.2. Toolbar and shortcuts to increase productivity
- 2.3. Layers Control Panel and History Management Space
- 3. Fundamental toolkits in professional image processing workflows
- 3.1. Data Isolation and Smart Selection Tools
- 3.2. Tools for restoring and removing unwanted details
- 3.3. Direct Light and Tone Control Tools
- 4. Advanced color management techniques and overall lighting coordination.
- 4.1. Harnessing the Power of Histograms Through the Levels Tool
- 4.2. Bending the Curves graph to create artistic contrast.
- 5. Utilize masks and blending modes to create special effects.
- 5.1. The philosophy of non-destructive editing of Layer Masks
- 5.2. Exploring the popular Blend Mode groups
- 6. Appvip.ai - A reputable source providing a wealth of resources and solutions for installing professional graphic design software.
- 7. CONCLUSION
Discover the power of Photoshop image editing software in professional image processing, optimizing design interfaces, and elevating artistic creativity.
1. The historical evolution of Photoshop image editing software.
1.1. The journey of shaping global graphics standards
Beginning as a personal research project by the Knoll brothers at the end of the last century, this tool quickly caught the eye of the giant Adobe. Through decades of continuous improvement and updates to its core structure, the application transformed from a rudimentary black-and-white image viewer into a super-software graphics management system. This development not only created a working tool but also gave birth to a new term in modern language, denoting any action of altering and refining image structure.
1.2. Reasons why the application maintains its market leading position
This platform boasts excellent compatibility with most existing file formats worldwide, including raw image data from professional cameras. Its independent layer management system, combined with intelligent blending algorithms, allows users to deeply manipulate individual pixels without degrading the original quality of the product. The support from a massive user community and a rich library of learning resources also provides a strong foundation for designers to remain within this ecosystem.
2. Mastering the user interface architecture and core functional areas is essential.
2.1. Options Bar and Customization System
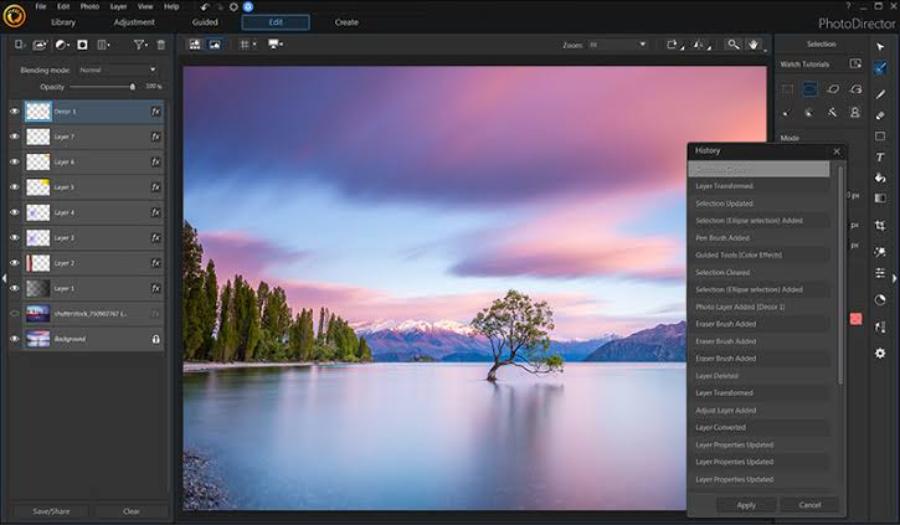
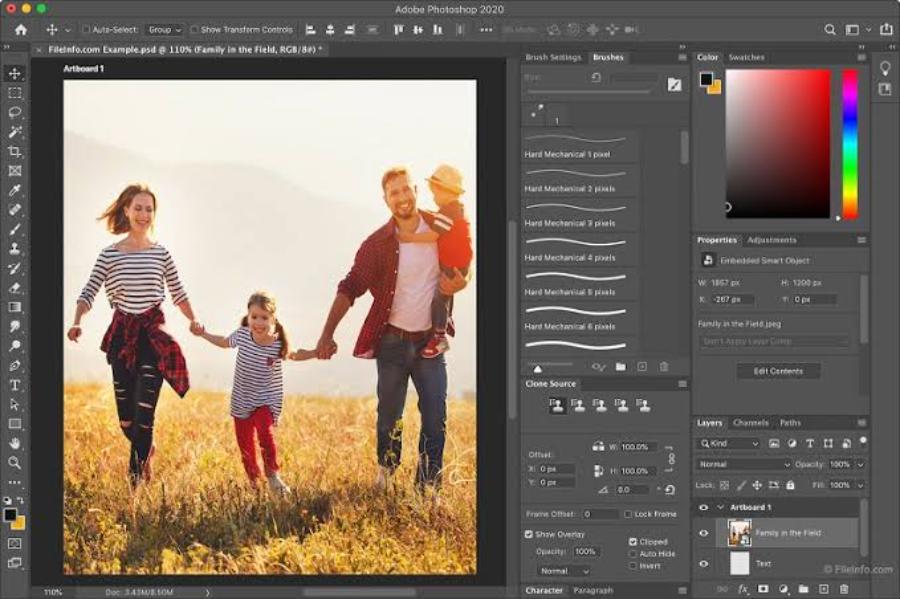
The top tier of the interface houses the strategic navigation commands for the entire system. Users can find art filters, layer management tools, and display formatting settings in this menu bar. Just below, the Options Bar acts as a dynamic display panel, constantly changing detailed parameters such as brush size, opacity, and blending mode corresponding to each tool currently active.
2.2. Toolbar and shortcuts to increase productivity
On the left side of the screen is the Toolbar, containing all the editing tools from basic to advanced. The icons are arranged into clear functional groups such as selection tools, drawing tools, editing tools, and spatial navigation tools. Memorizing and mastering the keyboard shortcuts corresponding to these tools is key to helping designers cut post-production time in half.
2.3. Layers Control Panel and History Management Space
The right side of the interface is dedicated to the functional panels, the most important of which is the Layers management panel. This is where the layered structure of the image is defined, allowing users to stack, group, or hide/show design elements independently. Simultaneously, the History panel records the entire operation process, acting like a time machine, allowing users to easily undo previous steps if errors occur during the idea testing process.
3. Fundamental toolkits in professional image processing workflows
3.1. Data Isolation and Smart Selection Tools
Limiting the editing area is a crucial step to ensure effects don't spill over into surrounding areas. The Marquee Tool and Lasso Tool support manual selection, from basic shapes to contoured lines that follow the user's swipe. For complex scenarios, the Quick Selection Tool and Magic Wand Tool's automatic algorithms analyze tonal contrast to group similar elements, optimizing the speed of object background removal.
3.2. Tools for restoring and removing unwanted details
The ability to clean up data clutter in images is realized through powerful restoration tools such as the Spot Healing Brush and the Clone Stamp Tool. The Clone Stamp tool requires the user to select a standard sample area to overlay on the flawed area, creating absolute uniformity in surface texture. Meanwhile, the Spot Healing Brush works more automatically by analyzing and borrowing surrounding details to naturally repair scratches, blemishes, or foreign objects without leaving any traces.
3.3. Direct Light and Tone Control Tools
Adjusting the brightness and darkness of specific areas in an image is done using a trio of tools: Dodge, Burn, and Sponge. The Dodge tool brightens underexposed dark areas, highlighting details in hidden corners. Conversely, the Burn tool reduces overexposed areas, increasing depth and contrast, while the Sponge tool is responsible for locally increasing or decreasing color saturation with a brush stroke.
4. Advanced color management techniques and overall lighting coordination.
4.1. Harnessing the Power of Histograms Through the Levels Tool
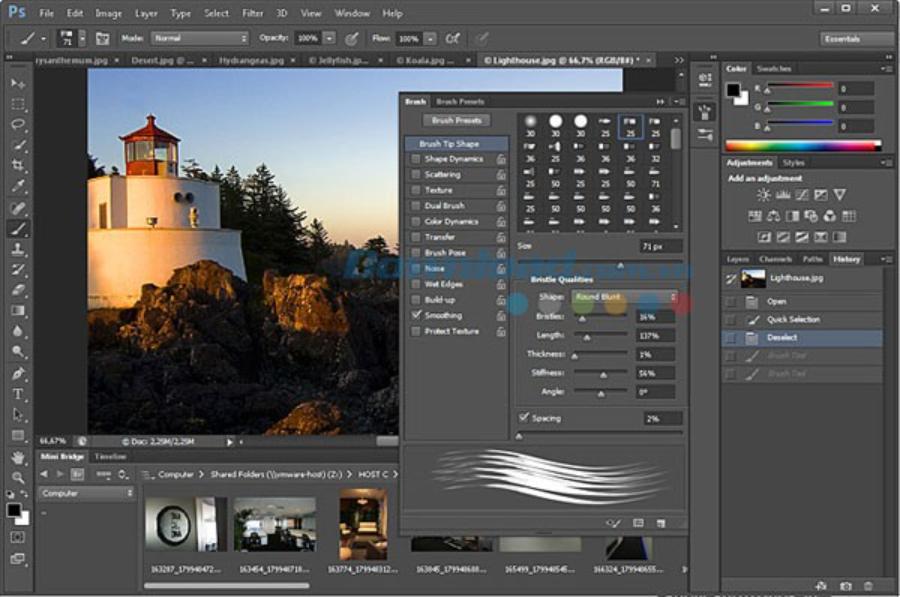
The histogram provides a scientific view of the distribution of light photons in an image file. Through the Levels panel, users can drag sliders representing shadows, highlights, and midtones to correct underexposed or overexposed images. This helps restore details hidden in heavily dark or brightly lit areas.
4.2. Bending the Curves graph to create artistic contrast.
The Curves tool is considered one of the most sophisticated features of Photoshop for handling light. Instead of adjusting only three fixed areas like Levels, Curves allows users to place a series of nodes on the graph to customize the brightness of each tiny tonal range. The classic S-shaped curve enhances contrast smoothly, creating depth and visual impact in the artwork.
5. Utilize masks and blending modes to create special effects.
5.1. The philosophy of non-destructive editing of Layer Masks
Layer Masks are a revolution in image post-processing, completely eliminating the need for the traditional Eraser Tool. Using only two primary colors—black and white—Layer Masks allow users to hide or show elements on a layer at any time. Black acts as a veil, concealing details, while white reveals them, preserving the original data and ensuring absolute safety throughout the design process.
5.2. Exploring the popular Blend Mode groups
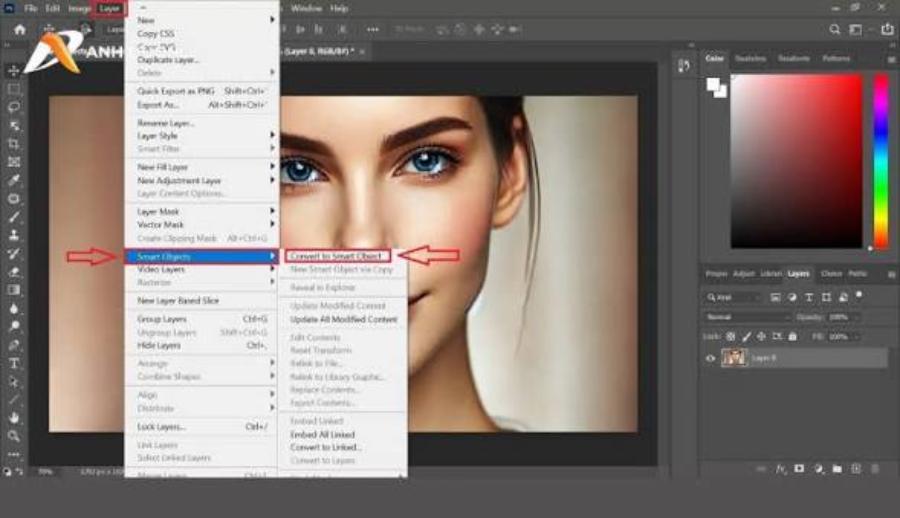
The Blend Mode system dictates how color pixels in the upper layer mathematically interact with color pixels in the lower layer to produce a new display result. The Multiply group filters out white areas, retaining dark areas, often used for shadow blending or smoke effects. The Screen group works in the opposite way, filtering out black to retain bright areas, setting the stage for sparkling light effects or fireworks. The Overlay group balances both of these approaches to increase color richness and overall contrast.
6. Appvip.ai - A reputable source providing a wealth of resources and solutions for installing professional graphic design software.
In the journey to conquer the world of graphic design, owning a stable software version and quality support resources is a decisive factor in the success or failure of learners. The information system at appvip.ai is built to provide comprehensive solutions for the creative design community. The website provides secure software download links, along with detailed installation instructions to help users optimize their computer system configuration. In addition, this platform shares thousands of trendy color presets, artistic brush sets, and a rich variety of ready-made design templates. Effectively utilizing the learning resources and support tools from this site will help designers accelerate their workflow and significantly improve their skills.
7. CONCLUSION
Mastering Photoshop, the image editing software, is not just about memorizing buttons or shortcuts; it's a process of cultivating aesthetic thinking and visual language. This tool acts as a bridge, transforming abstract ideas in the designer's mind into visually impactful works of art. Through persistent practice, from managing workspace and optimizing layer systems to improving color coordination skills and utilizing reputable supporting technology platforms, anyone can confidently master this powerful tool, creating a solid foundation for breakthroughs and establishing their personal mark in the graphic design industry.





















VIP Products








Best Selling Products
Adobe Premiere Pro Account
99 USD
MidJourney Account
29 USD
Upgrade genuine Capture One account
120 USD
Capcut Pro 1 Year
39 USD
Upgrade Genuine Office 365
49 USD
Freepik Premium Account
59 USD
Copyright Adobe Lightroom Account
59 USD
ChatGPT Plus Account (GPT-4)
16 USD
Upgrade Duolingo Super
29 USD
Genuine Cheap Canva Pro
39 USD
Plugin Retouch4me
69 USD
Autodesk All App Account Copyright
120 USD
Windows 10 & 11 Pro Key
36 USD
Adobe Photoshop Copyright - Full App
120 USD
Genuine Adobe Illustrator account
99 USD