Best Selling Products
Share the fastest way to remove dark circles under the eyes with photoshop
Nội dung
- 1. 2 Ways to remove dark circles under the eyes in Photoshop
- 1.1. Use the Patch Tool to remove dark circles under the eyes with Photoshop
- 1.2. Using High Pass to remove dark circles in Photoshop
- 2. Frequently Asked Questions
- 2.1. How to remove dark circles in Photoshop?
- 2.2. Is it easy to remove dark circles in Photoshop?
- 2.3. What should I do if I can't find the Path Tool in Photoshop?
- 2.4. What is the most natural way to remove dark circles?
Dark circles under the eyes are a common problem when taking portrait photos that reduce the aesthetic factor of the photo. To deal with this problem, we can apply 2 simple and effective ways to remove dark circles under the eyes using Photoshop that Sadesign brings below to help you have many more beautiful photos.
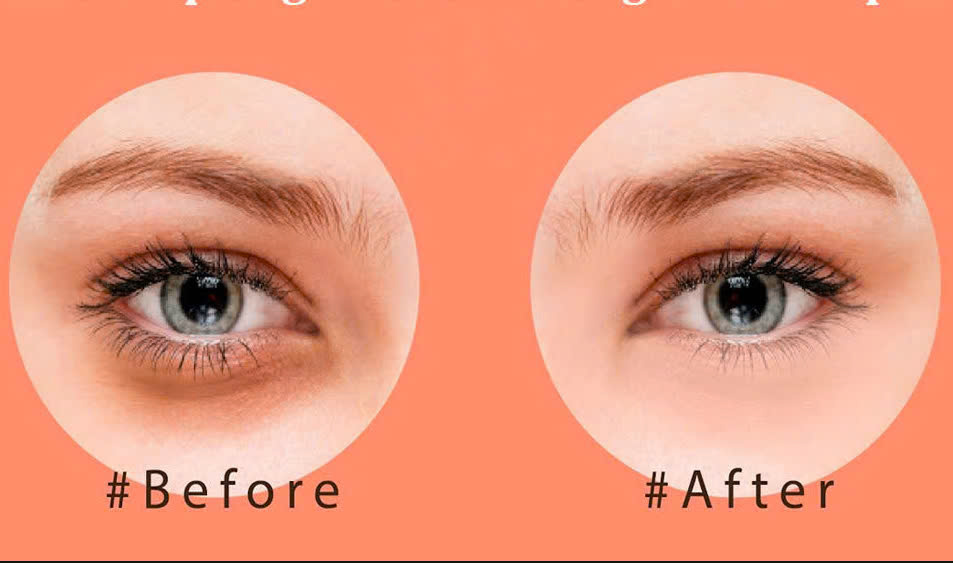
Dark circles under the eyes are a common problem when taking portrait photos, reducing the aesthetic factor of the photo. To deal with this problem, we can apply 2 simple and effective ways to remove dark circles under the eyes with Photoshop that Sadesign brings below to help you have many more beautiful photos.
.jpg)
1. 2 Ways to remove dark circles under the eyes in Photoshop
1.1. Use the Patch Tool to remove dark circles under the eyes with Photoshop
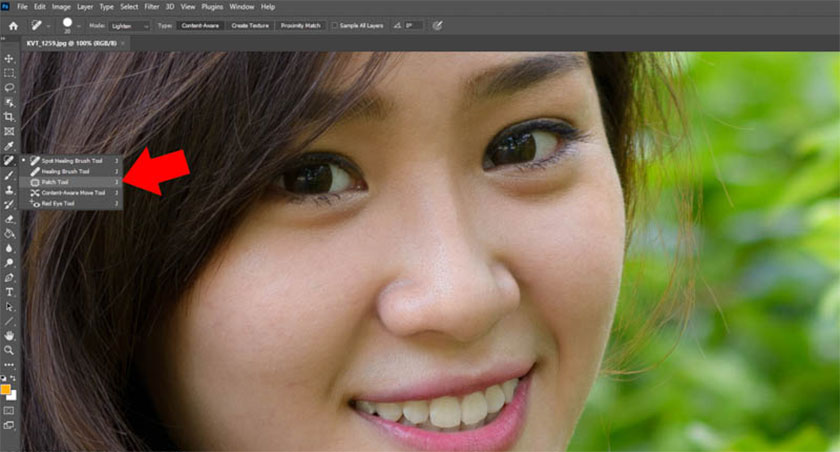
With the following way to remove dark circles with Path Tool, we will do it on Photoshop 2023. First, you need to select Path Tool or press the shortcut Shift + J -> select Source then create a selection around the location where you want to remove dark circles under the eyes.
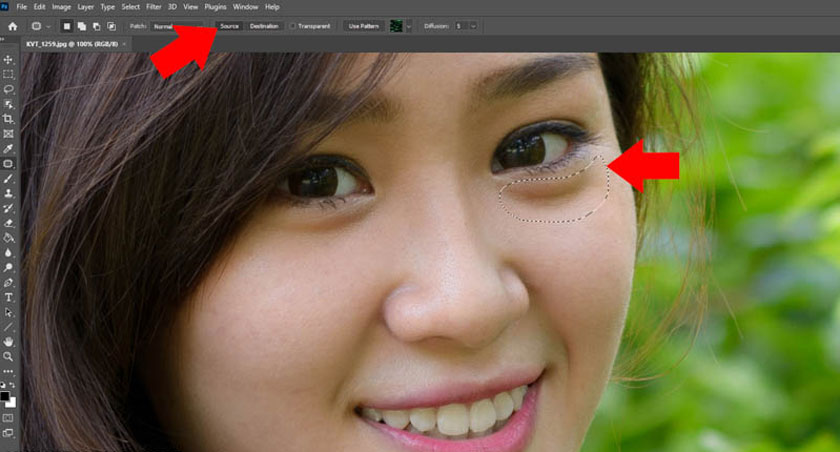
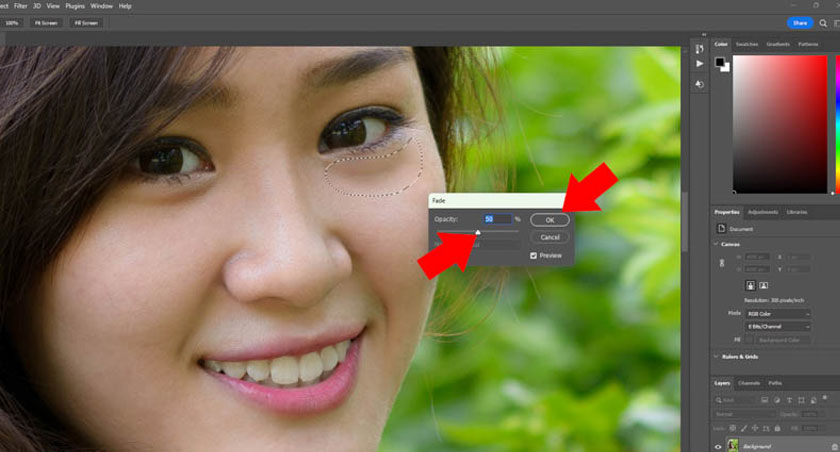
Next, press and hold the left mouse button, and drag it down to make the skin area more beautiful, Photoshop will immediately erase the dark circles to replace them with new skin. In fact, the Path Tool blends the brightness and color of these two areas, so you will see that the eye bags are too flat, and no longer natural. To handle this problem, click Edit => select Fade Path Selection to help the photo become more natural.
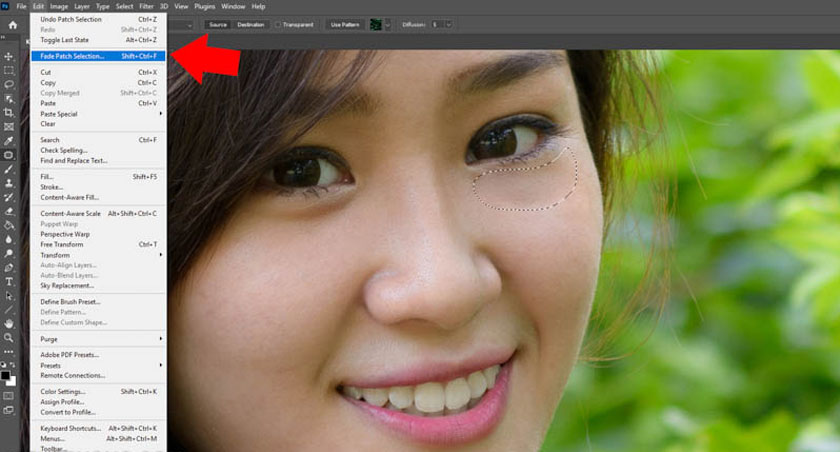
Next, adjust the Opacity in the Fade Path Selection and observe the changes in the model's eyes. The dark circles have been reduced while still ensuring to maintain the inherent naturalness without being flat like with Opacity 100%.
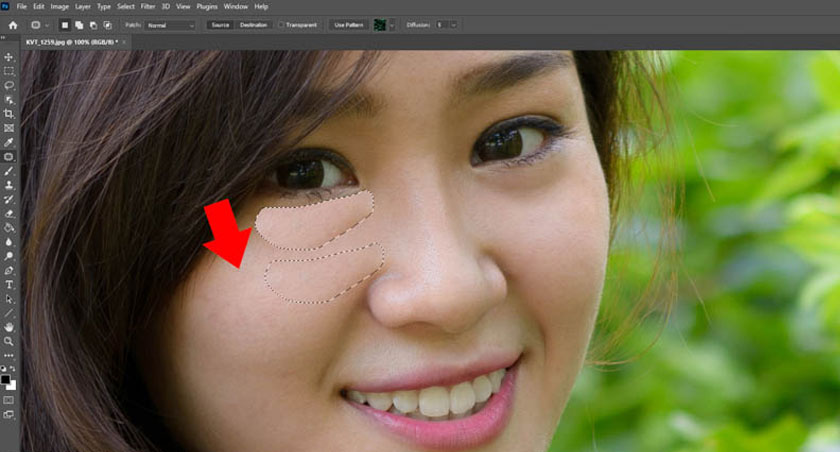
Similarly, with the other eye, we also select the Path Tool -> create a selection on the other eye and then drag it down to the more beautiful skin area. You can drag through any area, but you should prioritize selecting the closest skin areas, because these skin areas have similar features, helping the photo to be more natural.
Similarly, we also click on Edit -> select Fade Path Selection or press the shortcut Shift + Ctrl + F -> adjust the Opacity parameter to create a natural look for the photo.
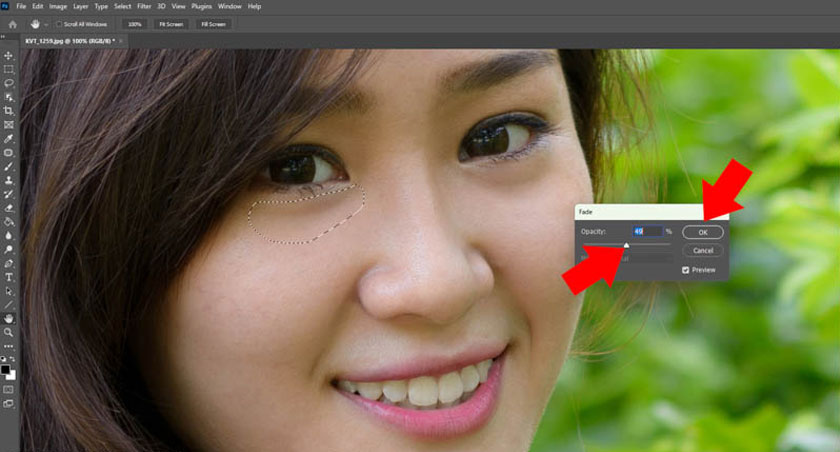
Thus, we have completed the ways to remove dark circles under the eyes using Photoshop with the Path Tool. You just need to do it a few times when you get used to it and you will have a beautiful photo.
1.2. Using High Pass to remove dark circles in Photoshop
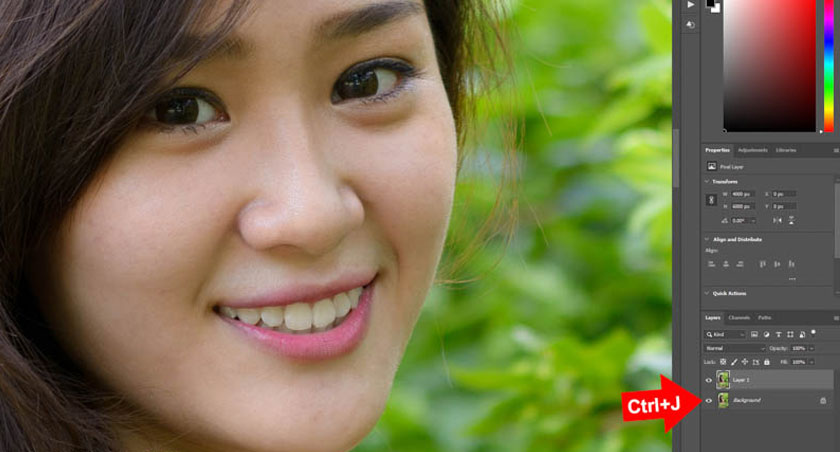
This method is more difficult but will be more beautiful than the above method. First, we select the Background Layer, then press Ctrl + J to duplicate the layer. We will immediately have a layer 1 as illustrated.
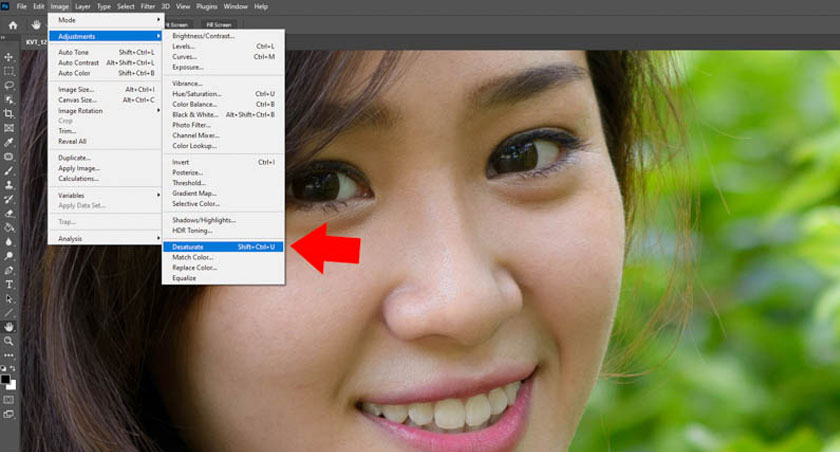
Next, we will click on Image -> Adjustments -> select Desaturate to help desaturate the color. The image will immediately turn black and white.
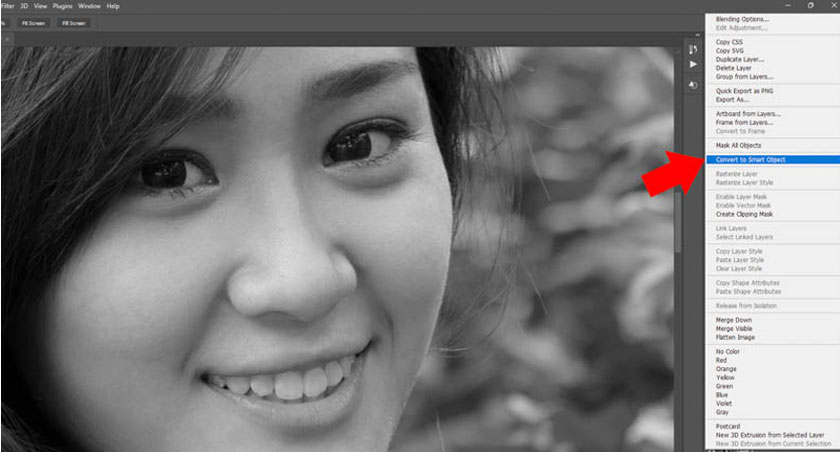
Next, right-click on Layer 1 -> select Convert to Smart Object to record the Filters applied to the Layer, as well as to adjust the parameters on the Filter more easily.
Select Layer 1, then click on Blending Mode -> select Overlay. To continue, click on Filter -> Other -> select High Pass.
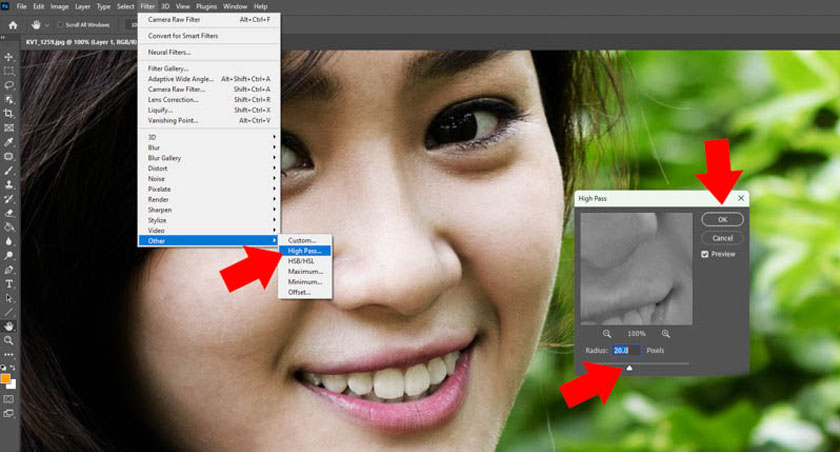
Adjust the High Pass parameter to about 20-30 -> select OK. You can adjust the High Pass in the following section to suit your photo.
Click on the Create a new layer icon to create a new layer, we will have 2 Layer 2 -> hold down the Alt key, move the mouse between Layer 1 and Layer 2 -> click to create Clipping Mask, then you will see a down arrow appear. Using Clipping Mask, Layer 1 only affects Layer 2 below it without affecting the Background Layer.

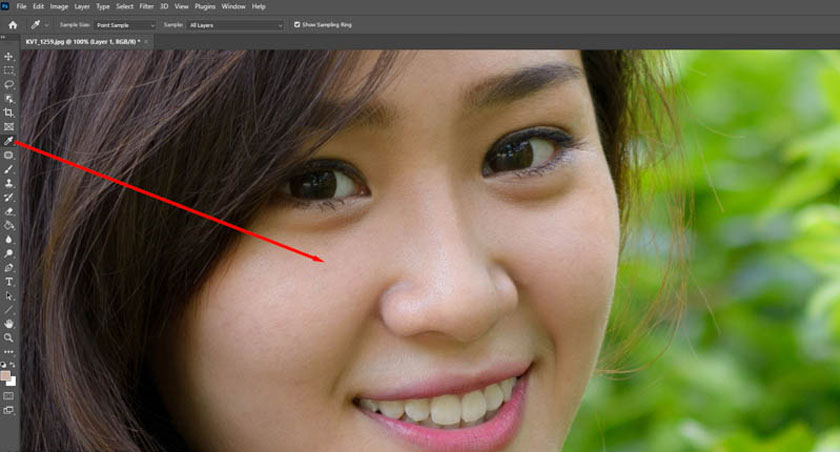
Next, use the Eyedropper Tool (I) -> click on the skin area next to the dark circles to sample the skin color at this location.
Click on the Brush tool or use the shortcut key (B) to reduce Flow to 2-4%. The Flow parameter depends on the photo you are using. There is no specific parameter for every case. You should adjust it yourself to get the most reasonable parameter for your photo.
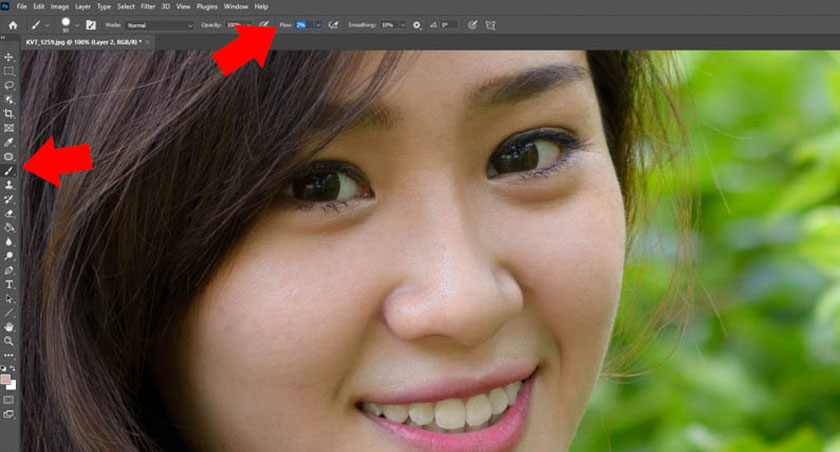
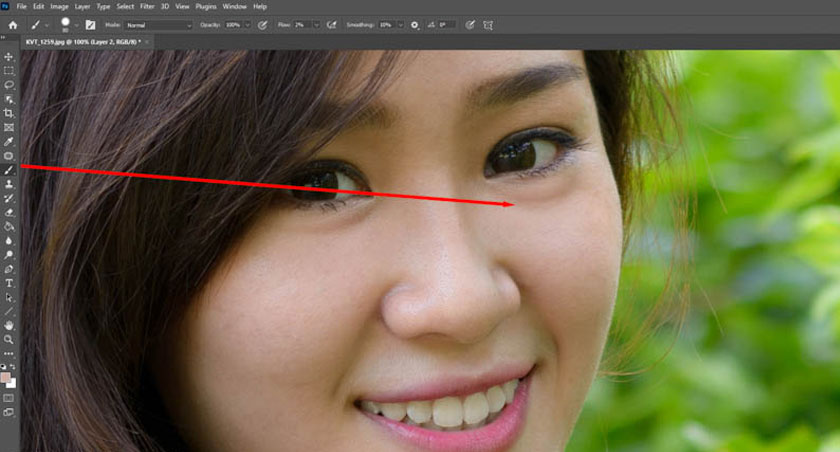
Continue using the Brush, change the size with the shortcut [ ], then paint the Brush on the dark circles on the model's eyes. Photoshop will remove the dark circles. If this area is dark, you can increase the Flow or take a lighter skin sample.
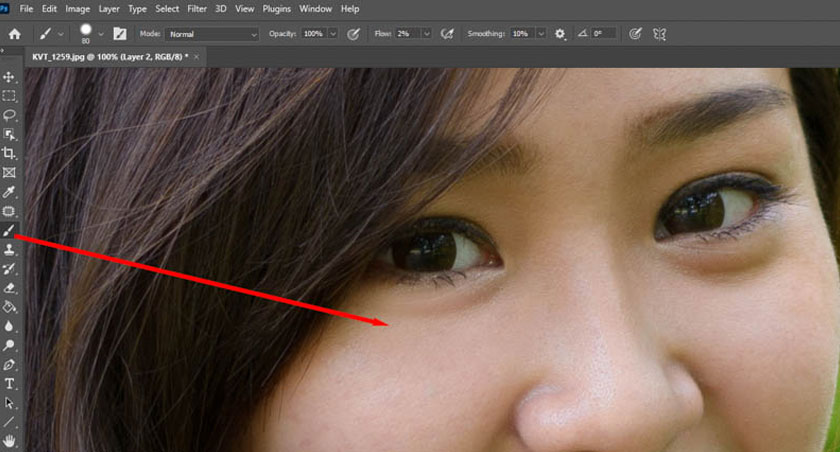
Change the size of the Brush and paint on the other eye to make the dark circles brighter while still ensuring to keep the skin details as in the original image. You can click on the High Pass Filter below Layer 1 to change the Radius to increase or decrease the details of the dark circles.
2. Frequently Asked Questions
2.1. How to remove dark circles in Photoshop?
To remove dark circles in Photoshop, you can use the Path Tool to create a selection around the dark circles. Then replace it with a more beautiful skin area. Photoshop will help blend these two areas to remove dark circles.
2.2. Is it easy to remove dark circles in Photoshop?
It's quite easy, you can remove dark circles with the Patch Tool or High Pass.
2.3. What should I do if I can't find the Path Tool in Photoshop?
You should restore Photoshop settings, then press the shortcut Shift+J until you see the Path Tool. Note that you should not use Vietnamese typing while pressing the shortcut.
2.4. What is the most natural way to remove dark circles?
To remove dark circles naturally, you should use the High Pass feature and then adjust the parameters to match the photo you are using to help create the most natural photo. Above are 2 ways to remove dark circles with Photoshop, the simplest and most effective, even for those who do not know much about Photoshop. Wish you success!

Installation and support contact information:
🏡 SADESIGN Software Company Limited
📨 Email: phamvansa@gmail.com
🌍 Website: https://sadesign.ai

Installation and support contact information:
🏡 SADESIGN Software Company Limited
📨 Email: phamvansa@gmail.com
🌍 Website: https://sadesign.ai


.png)


