Best Selling Products

Adobe Photoshop Copyright - Full App
120 USD

Windows 10 & 11 Pro Key
36 USD

ChatGPT Plus Account (GPT-4)
16 USD

Autodesk All App Account Copyright
120 USD

Genuine Adobe Illustrator account
99 USD

Capcut Pro 1 Year
39 USD

Genuine Cheap Canva Pro
39 USD

MidJourney Account
29 USD

Freepik Premium Account
59 USD

Upgrade Genuine Office 365
49 USD

Upgrade Duolingo Super
29 USD

Plugin Retouch4me
69 USD

Adobe Premiere Pro Account
99 USD

Copyright Adobe Lightroom Account
59 USD

Upgrade genuine Capture One account
120 USD
Secrets to Brighten Night Photos in Photoshop Easily and Effectively
Nội dung
- 1. The importance of processing night photos with specialized software
- Balancing dynamic range and color
- 2. Using Camera Raw Filter – The first breakthrough for underexposed images
- Adjusting Exposure and Shadows sliders intelligently
- Controlling noise with Denoise AI
- 3. Techniques using Curves and Levels for precise light control
- Mastering the Histogram with Levels Adjustment
- Creating artistic contrast with Curves
- 4. The power of Blend Modes in brightening images
- Duplicating layers and using Screen mode
- Combining with Layer Mask for local brightness
- 5. Color processing after brightening to enhance night photo aesthetics
- Enhancing vibrance with Vibrance and Saturation
- Adjusting White Balance for emotional tone
- 6. Tips to minimize noise when heavily brightening night photos
- Using Luminosity Mask technique
- Leveraging advanced noise reduction plugins
- 7. Optimizing sharpness after brightening
- Using High Pass filter
- Enhancing local sharpness with Sharpen Tool
- 8. Critical notes to keep night photos natural
- Preserving true blacks
- Maintain contrast and depth.
- Paying attention to direct light sources
- 9. Techniques for magical lighting with Glow and Bloom effects
- Creating halos around light sources
- Using Light Trails to enhance motion
- 10. Local white balance and Split Toning
- Applying Split Toning for highlights and shadows
- Enhancing light reflections
- 11. Conclusion Brightening night photos in Photoshop is an art combining technical skills and aesthetic vision. From Camera Raw adjustments to advanced noise control and sharpening, each step contributes to creating high-quality images. With patience and practice, you can transform dark scenes into vivid, emotional works of art.
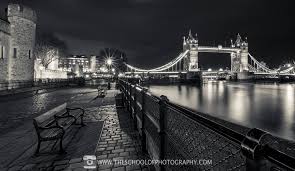
Discover how to brighten night photos in Photoshop naturally without causing noise. A detailed guide to using Camera Raw, Curves, Levels, and Blend Modes to professionally rescue underexposed images.
1. The importance of processing night photos with specialized software
Night lighting is often unstable, making it difficult for cameras to capture accurate colors and brightness. Digital processing empowers photographers to compensate for these limitations.
Restoring details in shadow areas
In underexposed photos, shadow details are often invisible on camera screens. However, digital files, especially RAW, contain hidden data. Proper brightening reveals textures and details, enhancing artistic depth.
Balancing dynamic range and color
Night images often have color casts from artificial lights. Brightening allows adjusting temperature and contrast to achieve balance.
2. Using Camera Raw Filter – The first breakthrough for underexposed images
Adjusting Exposure and Shadows sliders intelligently
Increase Exposure moderately and use Shadows to brighten dark areas without affecting highlights.
Controlling noise with Denoise AI
Denoise AI removes noise while preserving detail, making images cleaner.
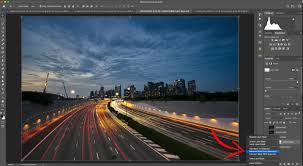
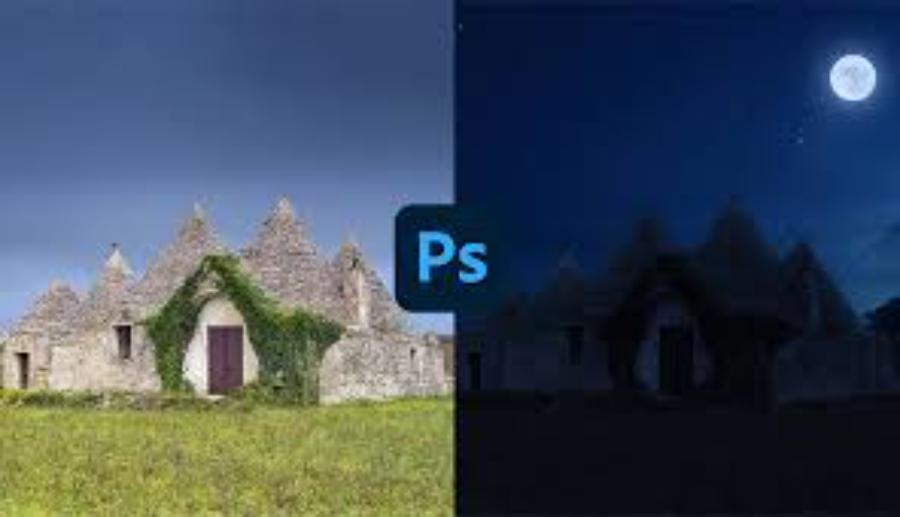
3. Techniques using Curves and Levels for precise light control
.jpg)
Mastering the Histogram with Levels Adjustment
Adjust white points to improve brightness while maintaining depth.
Creating artistic contrast with Curves
Use S-curve to enhance contrast and maintain shadow richness.
4. The power of Blend Modes in brightening images
Duplicating layers and using Screen mode
Duplicate layer and set to Screen mode to brighten naturally.
Combining with Layer Mask for local brightness
Use masks to brighten specific areas.
5. Color processing after brightening to enhance night photo aesthetics
Enhancing vibrance with Vibrance and Saturation
Increase color intensity carefully.
Adjusting White Balance for emotional tone
Use cool or warm tones depending on desired mood.
6. Tips to minimize noise when heavily brightening night photos

Using Luminosity Mask technique
Target specific brightness areas to reduce noise.
Leveraging advanced noise reduction plugins
Use tools like Topaz Photo AI or DxO PureRAW.
7. Optimizing sharpness after brightening
Using High Pass filter
Enhance details without halos.
Enhancing local sharpness with Sharpen Tool
Sharpen important areas selectively.
8. Critical notes to keep night photos natural
Preserving true blacks
Maintain contrast and depth.
Paying attention to direct light sources
Avoid blown highlights.
9. Techniques for magical lighting with Glow and Bloom effects
Creating halos around light sources
Use soft brush and blend modes.
Using Light Trails to enhance motion
Create dynamic light effects.
10. Local white balance and Split Toning
Applying Split Toning for highlights and shadows
Removing color cast in important details
Adjust skin tones and key elements.
Enhancing light reflections
Add reflections for realism.
11. Conclusion
Brightening night photos in Photoshop is an art combining technical skills and aesthetic vision. From Camera Raw adjustments to advanced noise control and sharpening, each step contributes to creating high-quality images. With patience and practice, you can transform dark scenes into vivid, emotional works of art.


VIP Products


Best Selling Products
Adobe Photoshop Copyright - Full App
120 USD
Windows 10 & 11 Pro Key
36 USD
ChatGPT Plus Account (GPT-4)
16 USD
Autodesk All App Account Copyright
120 USD
Genuine Adobe Illustrator account
99 USD
Capcut Pro 1 Year
39 USD
Genuine Cheap Canva Pro
39 USD
MidJourney Account
29 USD
Freepik Premium Account
59 USD
Upgrade Genuine Office 365
49 USD
Upgrade Duolingo Super
29 USD
Plugin Retouch4me
69 USD
Adobe Premiere Pro Account
99 USD
Copyright Adobe Lightroom Account
59 USD
Upgrade genuine Capture One account
120 USD