Best Selling Products

Adobe Premiere Pro Account
99 USD

Autodesk All App Account Copyright
120 USD

Genuine Adobe Illustrator account
99 USD

Upgrade genuine Capture One account
120 USD

ChatGPT Plus Account (GPT-4)
16 USD

Adobe Photoshop Copyright - Full App
120 USD

Capcut Pro 1 Year
39 USD

Plugin Retouch4me
69 USD

MidJourney Account
29 USD

Genuine Cheap Canva Pro
39 USD

Upgrade Genuine Office 365
49 USD

Upgrade Duolingo Super
29 USD

Copyright Adobe Lightroom Account
59 USD

Freepik Premium Account
59 USD

Windows 10 & 11 Pro Key
36 USD
Should you use Adobe RGB or sRGB for photography? Things photographers need to know.
Nội dung
Are you wondering whether to set your camera to Adobe RGB or sRGB? The difference between the two color spaces can affect the entire image processing workflow. This article explains the key points to help you make the right choice.
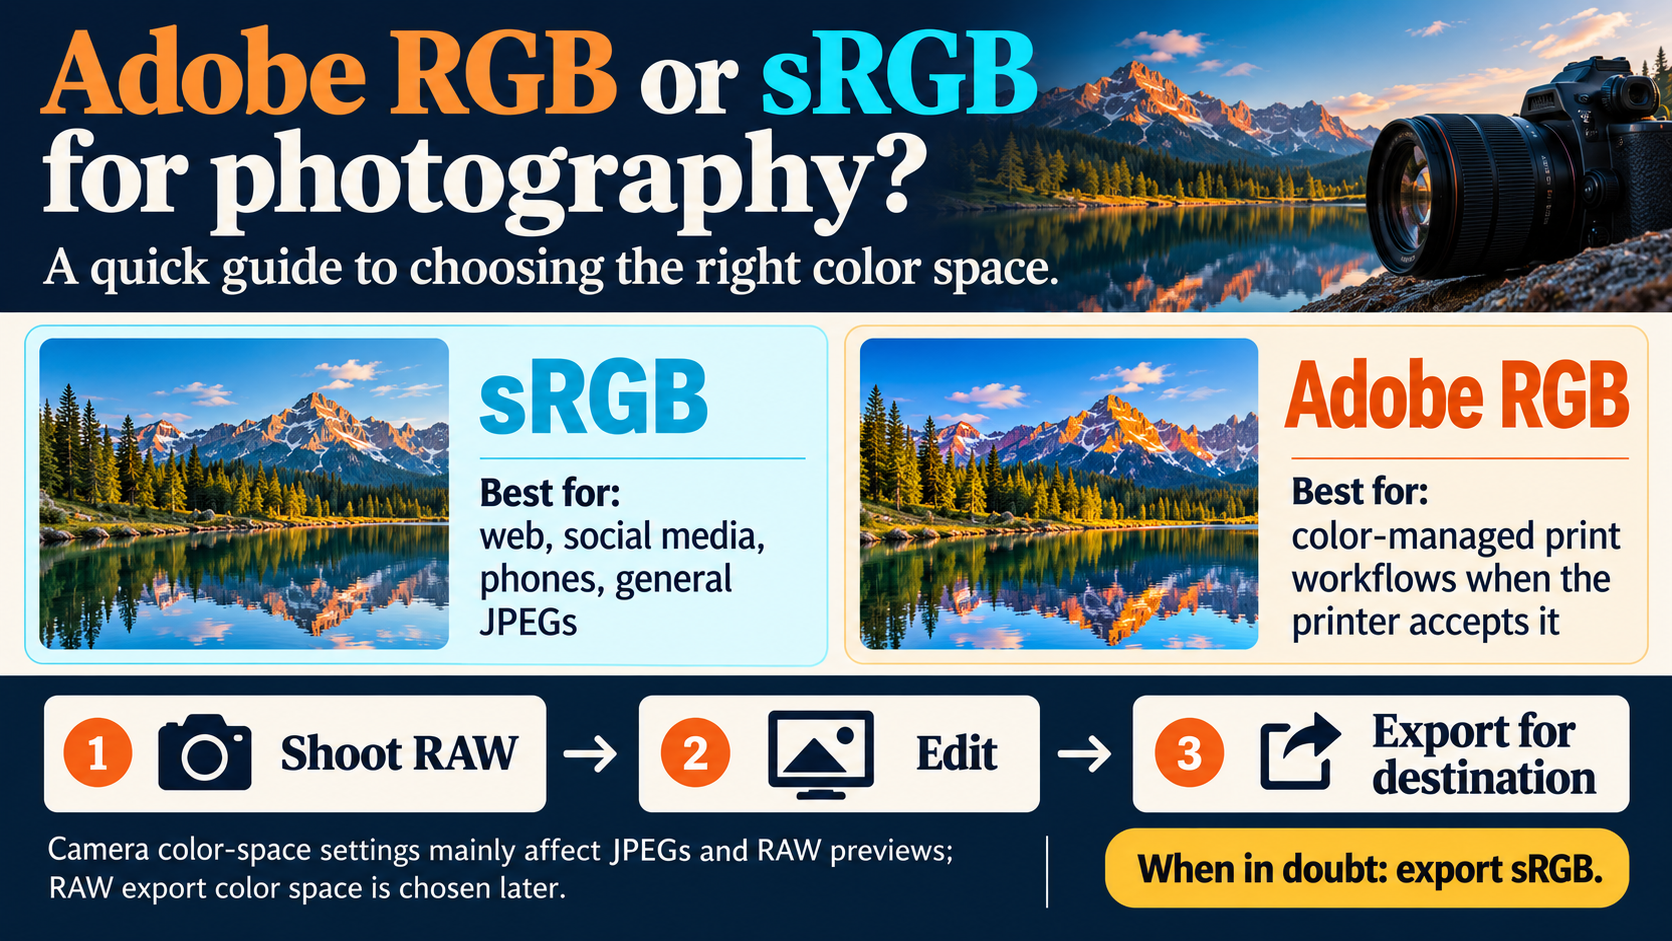
1. Shoot in RAW: Start with the original color data.
When shooting in RAW format, the camera only records the raw data that the sensor receives. At this stage, the image is not yet assigned to any color space. You will decide on the color space when you open the file in RAW processing software, both during editing and during export. This is one of the main reasons why RAW is highly valued: you are not locked into the camera's choice from the start, and you can go back and export the same original file to many different color spaces for different purposes.
If you shoot JPEG or both RAW and JPEG simultaneously, the camera will allow you to select the color space for the JPEG file. In this case, Adobe RGB should be chosen so that the JPEG retains a wider color range. However, if you only shoot RAW, the camera's color space settings will not affect the original data. They mainly affect the preview image on the camera screen and the JPEG embedded within the RAW file, so you don't need to worry too much about them.
Here's how to set the color space in each of the popular RAW editing tools.
1.1 Lightroom
In Lightroom Classic, open the Lightroom Classic menu, select Preferences, and then switch to the External Editing tab. Here, you'll see the color space options applied when transferring images to external editors like Photoshop. Common options include sRGB, Adobe RGB, and ProPhoto RGB. It's recommended to use 16-bit color depth, as a wider color gamut requires more gradation to avoid color banding in areas with smooth transitions, such as the sky or studio background.
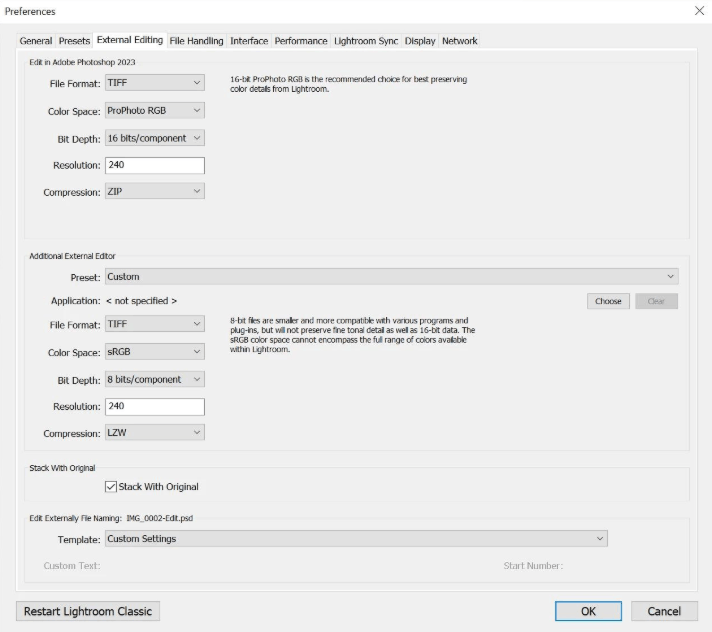
Additionally, when exporting images using the Export dialog box, you'll find the Color Space option in the File Settings. This is where you switch to sRGB when the image is for the web. It's worth noting that within the Develop module, Lightroom operates with a very large internal workspace, close to ProPhoto RGB, so your editing operations are always performed on a wealth of color information, and only when exporting the image does the data shrink to the target space.
1.2 Camera Raw
With Camera Raw, you'll see a small line of text at the bottom of the main window displaying information about the color space, color depth, size, and resolution being used. Simply click on this text to open the options dialog box, which contains a list of color spaces to choose from.
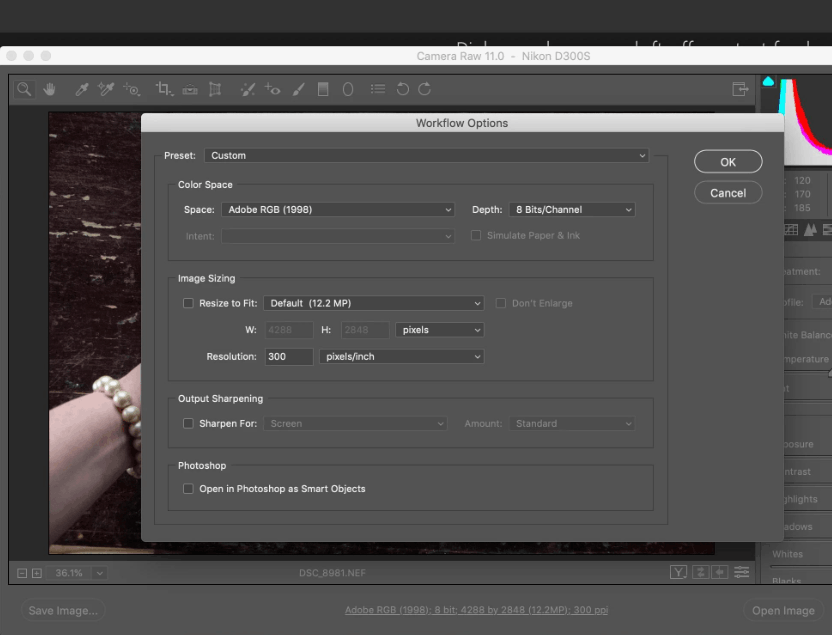
When you open an image from Camera Raw to Photoshop, the color space you select will determine the color profile your Photoshop document receives. Therefore, if you want to maintain color quality for advanced post-processing, choose Adobe RGB or ProPhoto RGB combined with 16-bit. You should double-check this information every time you start a new project, especially if the computer is shared or you've changed settings for a previous project.
1.3 Capture One
In Capture One, when transferring an image to Photoshop using the external editing function, a dialog box will appear allowing you to select the color space for the intermediate file. During the export phase, you can also select the desired color profile directly within the processing formula, called the Process Recipe.
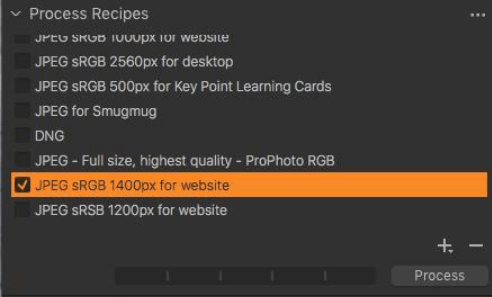
The advantage of this organizational method is that you can create multiple formulas in advance for different purposes. For example, one formula can be exported to sRGB for web and social media posting, another to Adobe RGB or ProPhoto RGB in 16-bit TIFF format for printing or archiving. Once neatly set up, you simply select the formulas you need and export them simultaneously, saving time while avoiding color space confusion.
1.4 Photoshop
If you're working in Photoshop and aren't sure which color space your image is in, open the Edit menu and select Convert to Profile. The dialog box that appears will display the document's current color profile in the Source Space section and allow you to switch to a different profile in the Destination Space section.
It's important to distinguish between the two operations. Convert to Profile is a conversion, meaning the color values are recalculated so that the image looks as similar as possible in the new space. Assign Profile, on the other hand, only assigns a different profile label without changing the numerical values, resulting in noticeable color shifts. You'll almost always need to use Convert to Profile when you want to change the color space. Additionally, you can use the Proof Setup function in the View menu to preview how the image will look in sRGB or on a specific paper type, even when editing in a larger space.
2. Color space: Three color systems, three different limits
The topic of color space can get complicated very quickly, but at a basic level, you can understand a color space as a system that defines how colors are organized and represented on a particular device or system. Many color spaces exist, but in photography, the three most commonly used are sRGB, Adobe RGB, and ProPhoto RGB. All three are based on the RGB color model, which consists of red, green, and blue.
sRGB has the smallest and most limited color range of the three spaces. However, it is the standard color space for the web, and most display devices can only reproduce colors within sRGB. That's why you need to convert your finished image to sRGB when exporting it online. This also helps ensure more consistent image display across browsers, phones, and applications, as not all environments manage color well. Some social media platforms even automatically convert or ignore your color profile, so exporting to sRGB is the safest approach.
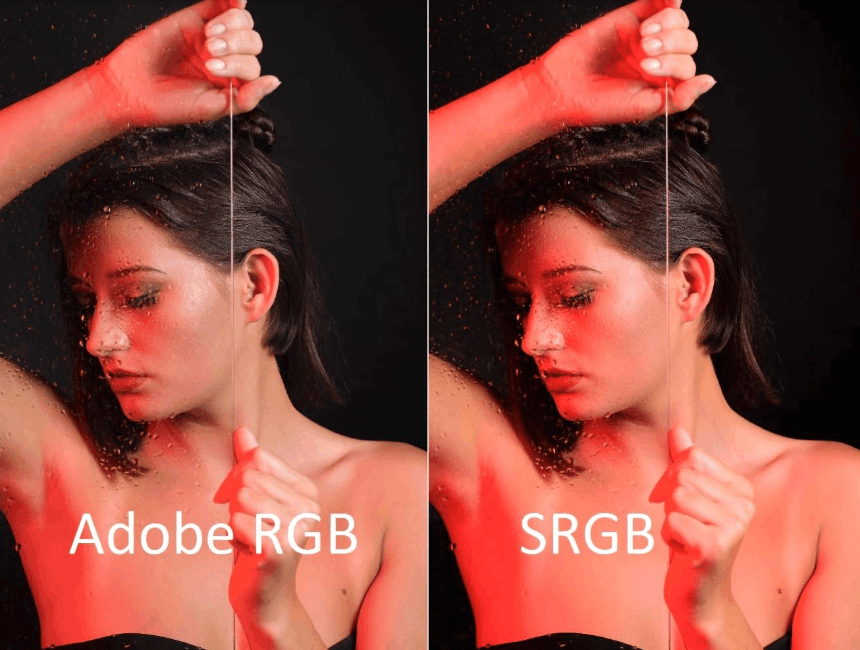
Adobe RGB and ProPhoto RGB are both developed specifically for photography. They have a significantly wider color gamut, especially in saturated greens and blues, which are frequently found in landscape, seascape, and nature photography. ProPhoto RGB has the widest color gamut, so wide that it almost exceeds the capabilities of real-world equipment, as neither monitors nor printers can reproduce the entire spectrum of colors. ProPhoto RGB even includes some colors beyond the human eye's perception. You only really need it in specific situations, such as when printing on printers and paper capable of reproducing a very wide color range. Even so, editing with ProPhoto RGB remains a good choice, as it retains the most color information, as long as you work at 16-bit depth.
Adobe RGB also contains colors that most devices can't display, but a key strength is that it covers almost the entire CMYK color gamut used in printing. This is a very compelling reason to keep your edits in Adobe RGB: you can print photos with the greatest amount of color information. While your monitor may not display all the vibrancy of these colors, they are still present in the file and will come into play when you print or upgrade your equipment. There are now dedicated monitors that can reproduce most or all of the Adobe RGB color gamut, so it's very likely you'll own one someday, and your old files will display more fully than ever before.
3. When should you use sRGB for editing?
There's one case where editing directly in sRGB makes perfect sense: when you're certain the final product will only be viewed on a screen and will never be printed. For example, you're creating images for a website, product images for an e-commerce platform, images for social media posts, or presentation materials. In that case, you can stay in sRGB throughout the entire process. This is simple, reduces the risk of color inaccuracies due to conversion, and what you see on the screen will be quite close to what the viewer will receive.
However, think carefully before deciding. If you think you might print photos, create albums, hold exhibitions, or sell prints in the future, editing from the start using sRGB will cause you to lose certain colors that cannot be recovered. You can always narrow the color space down to sRGB, but you cannot expand it back to reproduce the colors that were cut off.
Regardless of which color space you choose for editing, don't forget to convert the final output to sRGB when publishing to the web. The truth is, sRGB is almost the default and only color space that the web environment can rely on, and images that retain the Adobe RGB profile often look paler and duller on the web or in software that doesn't support Adobe RGB. In most cases, the option to convert to sRGB is already enabled in the export dialog, but you should still double-check to be sure.
4. Conclusion
In short, shoot in RAW to maintain full control over the color space, edit in Adobe RGB or ProPhoto RGB to preserve maximum color information, and only convert to sRGB when exporting images for the web. Only when the final product is certain to look good on a screen should you consider working entirely in sRGB. Mastering this process will help you avoid inexplicable color discrepancies, protect image quality in the long term, and give you more confidence at every stage, from editing and printing to sharing online.





















VIP Products








Best Selling Products
Adobe Premiere Pro Account
99 USD
Autodesk All App Account Copyright
120 USD
Genuine Adobe Illustrator account
99 USD
Upgrade genuine Capture One account
120 USD
ChatGPT Plus Account (GPT-4)
16 USD
Adobe Photoshop Copyright - Full App
120 USD
Capcut Pro 1 Year
39 USD
Plugin Retouch4me
69 USD
MidJourney Account
29 USD
Genuine Cheap Canva Pro
39 USD
Upgrade Genuine Office 365
49 USD
Upgrade Duolingo Super
29 USD
Copyright Adobe Lightroom Account
59 USD
Freepik Premium Account
59 USD
Windows 10 & 11 Pro Key
36 USD