Best Selling Products

Genuine Cheap Canva Pro
39 USD

Freepik Premium Account
59 USD

Genuine Adobe Illustrator account
99 USD

Copyright Adobe Lightroom Account
59 USD

Upgrade Genuine Office 365
49 USD

Adobe Photoshop Copyright - Full App
120 USD

Plugin Retouch4me
69 USD

MidJourney Account
29 USD

Upgrade Duolingo Super
29 USD

Windows 10 & 11 Pro Key
36 USD

Autodesk All App Account Copyright
120 USD

Capcut Pro 1 Year
39 USD

Upgrade genuine Capture One account
120 USD

ChatGPT Plus Account (GPT-4)
16 USD

Adobe Premiere Pro Account
99 USD
Simple video editing tutorials on a computer for beginners.
Nội dung
- 1. Popular video editing apps for computers
- 1.1 CapCut PC
- 1.2 Canva Video
- 2. Basic steps to edit videos on a computer
- 2.1 Step 1: Download and install the software
- 2.2 Step 2: Create a new project and import video
- 2.3 Step 3: Cut and merge videos on the Timeline
- 2.4 Step 4: Add effects, text, and sound
- 2.5 Step 5: Export video
- 3. Some tips for editing videos on a computer for beginners.
- 4. How to choose the aspect ratio when editing videos
- 5. Common mistakes beginners make when editing videos
- 6. How to improve your video editing skills quickly on a computer.
- 7. Conclusion
While video editing used to be challenging for beginners due to the need to familiarize themselves with numerous tools, it''s now much simpler. With just a computer and the right software, you can easily cut and splice clips, add music, insert text, create effects, and export a complete video without needing professional experience. This article from Sadesign will provide detailed instructions on how to edit videos on a computer using the easiest-to-understand process for beginners.
1. Popular video editing apps for computers
To start editing videos, the first step is choosing a tool that suits your abilities and purpose. Beginners don't necessarily need professional software with a plethora of complex features. An application with an intuitive interface, drag-and-drop support, and readily available basic tools will make the learning process much easier. Some popular applications today include CapCut PC, Canva Video, Adobe Premiere Pro, DaVinci Resolve, and Clipchamp. If you mainly create TikTok videos, Reels, Shorts, or short videos for social media, you can prioritize tools that are easy to use. Once you are familiar with cutting, splicing, and processing videos, you can move on to more advanced software to improve your skills.
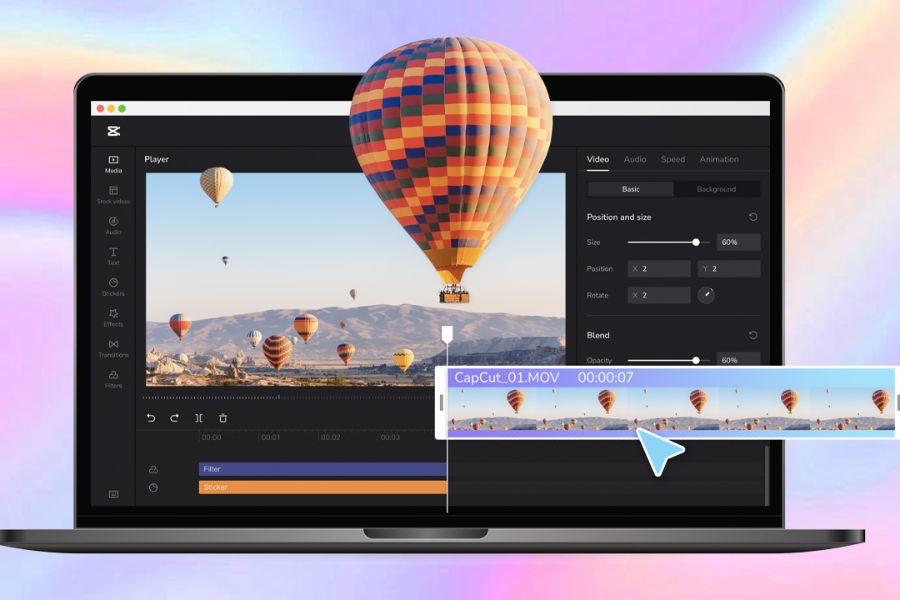
1.1 CapCut PC
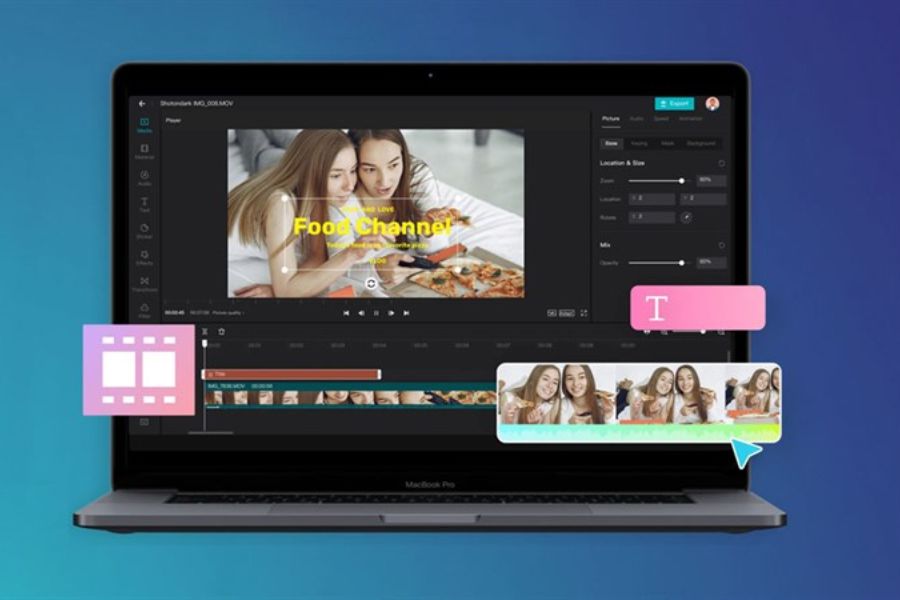
CapCut PC is a popular choice for beginners in video editing. Its interface is intuitive, the tools are clearly organized, and the drag-and-drop functionality is easy to learn. You can perform basic tasks such as cutting videos, merging multiple clips, adding text, background music, stickers, effects, and transitions.
The advantage of CapCut PC is that beginners can start with very simple operations and gradually explore more advanced features. It's also a suitable choice if you want to create short, fast-paced videos with lots of text and effects to post on social media platforms.
1.2 Canva Video
Canva Video is suitable for those who prefer visual editing and want to combine video with design elements. This tool works online, so you can edit directly in your browser without needing to install professional software.
Besides videos, Canva also offers a wide variety of design templates, fonts, images, and graphic elements to use. Therefore, this tool is particularly suitable for product introduction videos, social media content, presentation videos, or products that require a lot of text and images.
2. Basic steps to edit videos on a computer
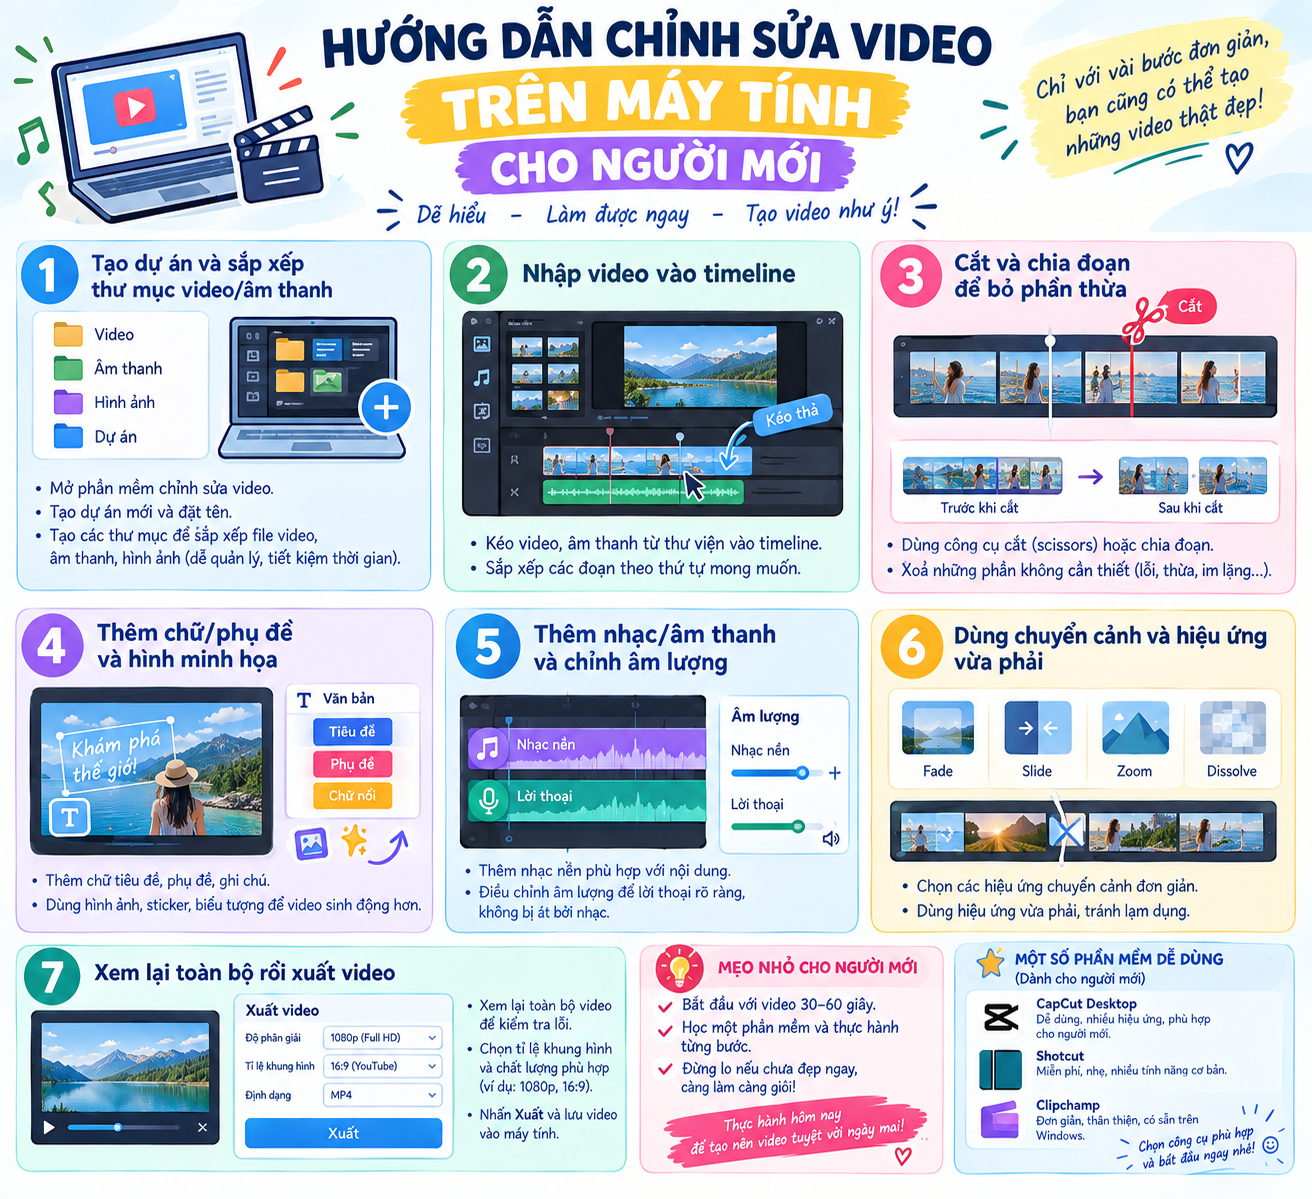
After choosing the right application, you can begin the editing process. Basically, video editing on a computer usually revolves around a process of creating a project, importing resources into the software, cutting and splicing, adding necessary elements, and exporting the video. Understanding this sequence will help you easily visualize what you need to do instead of being overwhelmed by the many tools on the interface. To make it easier, you can divide the entire process into the 5 steps below. Don't use too many effects right from the first video; focus on doing a good job of cutting, splicing, and arranging the content first. Once you are familiar with the timeline, you will easily learn more advanced editing techniques.
2.1 Step 1: Download and install the software
First, choose the software that suits your needs. If you want to edit short videos with many intuitive tools, you can start with CapCut PC. If you want to edit online and utilize pre-made design templates, Canva Video is also an accessible option for beginners.
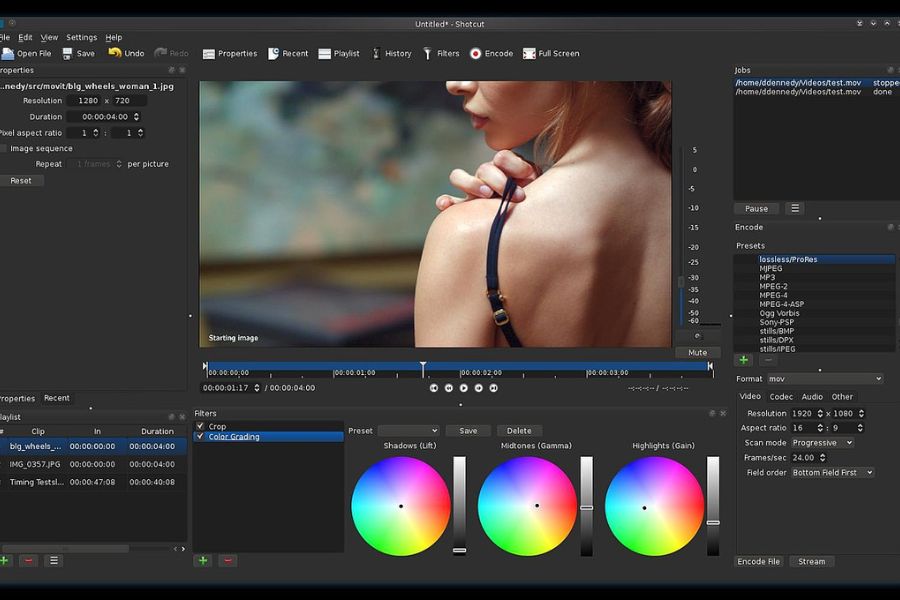
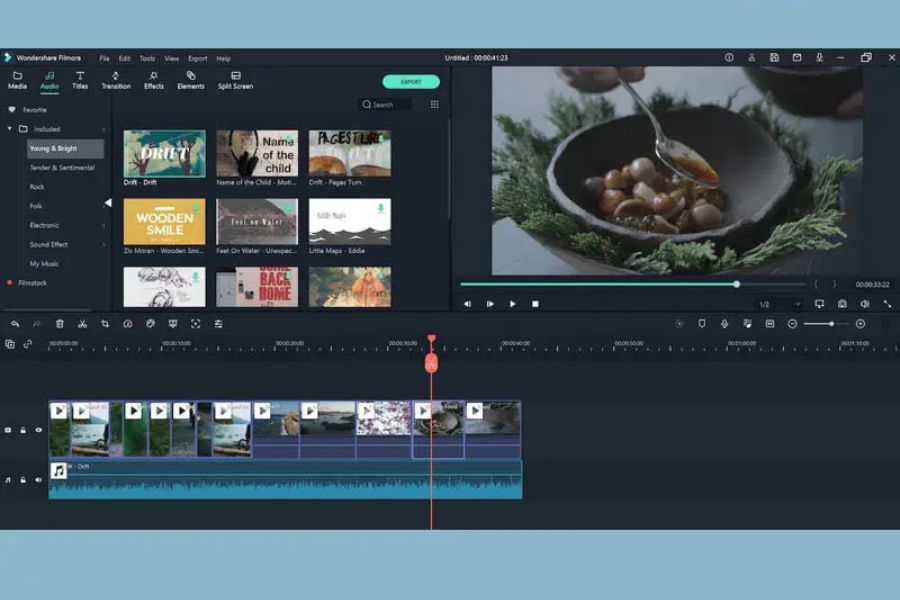
After installing and opening the software, take some time to familiarize yourself with the interface. You should identify the resource area, the preview window, and the timeline. You don't need to memorize all the features immediately; just knowing where the main areas are located will allow you to start your first project.
2.2 Step 2: Create a new project and import video
Open the software and select New Project or the corresponding option to create a new project. Next, you need to import the files you want to use into the software, such as videos recorded with your phone, images, background music, or audio files. Most applications support drag-and-drop functionality or using the Import button to add resources.
Before adding everything to the timeline, you should review the clips and select the scenes that are truly necessary. Preparing the content from the start makes the editing process faster and more efficient. If you have many videos, identify the main scenes, supporting scenes, and segments that can be omitted so that you don't waste too much time searching when you start editing.
2.3 Step 3: Cut and merge videos on the Timeline
After importing the video, drag the clips down to the Timeline in the editing area. This is where you arrange all the content in the order it appears in the video. Review each segment and remove unnecessary parts such as shaky scenes, waiting times, faulty speech, or details that don't serve the main content.
To trim a video, you can use the scissors icon or adjust the ends of the clip depending on the software. After trimming, drag the segments closer together and arrange them in the correct order. For short videos, prioritize scenes with clear content and avoid overly long opening sequences to maintain a natural viewing pace.
2.4 Step 4: Add effects, text, and sound
Once the video footage is complete, it's time to start adding emphasis to your video. You can add a title, subtitles, background music, stickers, or some transition effects. The text should be clearly presented, appropriately sized, and positioned so as not to obscure the subject or important information in the video.
Sound is also an important factor to consider when editing. If the video has dialogue, adjust the background music volume to a suitable level so that the voices remain clear. For transition effects, beginners should prioritize simple effects and use them selectively. A video doesn't need too many effects to be engaging if the content, visuals, and sound are combined effectively.

2.5 Step 5: Export video
After completing the editing process, look for the Export or Deliver button to start exporting the video. Depending on the software, you can choose the resolution, format, and other settings before saving the file to your computer. For videos posted on social media, 1080p is usually the familiar resolution and adequately meets display needs.
Don't rush to upload the video immediately after exporting. Open the final file and review it from beginning to end to check the image, sound, subtitles, and transitions. If you find any incorrect text, too low sound, or a clip that hasn't been cut properly, you can go back to the project to edit and re-export. This final check, though simple, significantly improves the quality of the final product.
3. Some tips for editing videos on a computer for beginners.
When you're just starting out in video editing, the most important thing isn't using a lot of effects, but knowing how to tell a clear story. Begin by defining what your video wants to convey, then choose scenes that directly serve that message. A short, coherent video is usually easier to watch than one with too many effects but lacking coherence. You should also pay attention to the pacing. Sections lacking important information or action can be shortened to make the video more concise. For spoken videos, you can cut down on pauses between sentences. For product introduction videos, prioritize camera angles that clearly showcase the product instead of dragging out unnecessary scenes.
4. How to choose the aspect ratio when editing videos
The aspect ratio should be chosen based on where you plan to post the video. If you're making vertical videos for TikTok, Reels, or Shorts, a vertical frame will make the most of the display space on a phone. Conversely, videos posted to YouTube as long content or displayed on a computer screen are usually better suited to a horizontal frame.
Choosing the aspect ratio from the start also helps you avoid having to readjust the layout later. In particular, if the video has text or subjects close to the edge of the frame, check beforehand to avoid the content being obscured or cut off when uploading to other platforms.
5. Common mistakes beginners make when editing videos
A common mistake is trying to cram too many effects into a video. When you're new to it, you might think the more effects, the better the video, but in reality, they can easily make the content look cluttered. Prioritize clarity first, then add effects where they really need to create emphasis.
Another problem is neglecting the audio and final product review. A video might have great visuals, but if the music is too loud, the voiceover is too quiet, or the audio is out of sync, it will still create a poor viewing experience. Therefore, before publishing, review the entire video at least once and check both the image and the audio.
6. How to improve your video editing skills quickly on a computer.
The most effective way for beginners to learn is to start with short videos. Instead of immediately creating a multi-minute video with layers of content, you can try editing a clip of about 30 seconds to 1 minute. Focus on basic operations such as trimming unnecessary parts, arranging scenes, adding music, and inserting a few lines of text.
After each video, you can review it yourself and identify areas for improvement. Try making the opening shorter in the next video, and focus on the cutting rhythm or text placement in the following video. Practicing each skill individually will help you progress naturally and remember the tool longer than learning too much theory at once.
7. Conclusion
Editing videos on a computer isn't too difficult if you start the right way. Instead of trying to create a super-complex video right away, master the basic process: creating a project, importing resources, cutting and splicing on the timeline, adding text, sound, and effects, then checking and exporting the final product. Once you're familiar with these steps, you can explore more techniques such as color correction, speed adjustment, creating motion effects, audio processing, or building your own intro. With consistent practice through each video, your editing skills will gradually become faster, more accurate, and more creative.





















VIP Products








Best Selling Products
Genuine Cheap Canva Pro
39 USD
Freepik Premium Account
59 USD
Genuine Adobe Illustrator account
99 USD
Copyright Adobe Lightroom Account
59 USD
Upgrade Genuine Office 365
49 USD
Adobe Photoshop Copyright - Full App
120 USD
Plugin Retouch4me
69 USD
MidJourney Account
29 USD
Upgrade Duolingo Super
29 USD
Windows 10 & 11 Pro Key
36 USD
Autodesk All App Account Copyright
120 USD
Capcut Pro 1 Year
39 USD
Upgrade genuine Capture One account
120 USD
ChatGPT Plus Account (GPT-4)
16 USD
Adobe Premiere Pro Account
99 USD