Best Selling Products

Windows 10 & 11 Pro Key
36 USD

ChatGPT Plus Account (GPT-4)
16 USD

Upgrade Duolingo Super
29 USD

Plugin Retouch4me
69 USD

Freepik Premium Account
59 USD

Genuine Cheap Canva Pro
39 USD

Adobe Premiere Pro Account
99 USD

Genuine Adobe Illustrator account
99 USD

Adobe Photoshop Copyright - Full App
120 USD

MidJourney Account
29 USD

Autodesk All App Account Copyright
120 USD

Upgrade Genuine Office 365
49 USD

Upgrade genuine Capture One account
120 USD

Copyright Adobe Lightroom Account
59 USD

Capcut Pro 1 Year
39 USD
The 30-Day Handwriting Improvement Challenge
Nội dung
- Day 1: Decide why you want to improve handwriting
- Day 2: Look at your own handwriting
- Day 3: Know what to look for
- Day 4: Identify your imperfections
- Day 5: Get the right documents
- Day 6: Inspired by handwriting that impresses you
- Day 7: Practice writing with the air
- Day 8: Stretch your arms and wrists
- Day 9: Learn to hold a pen or pencil properly
- Day 10: Learn body position properly
- Day 11: Understand that it's not about your fingers
- Day 12: Get acquainted with how to write basic shapes
- Day 13: Take the time to doodle
- Day 14: Reconsider your use of loops
- Day 15: Tilt your handwriting, but only a little
- Day 16: Review what you've learned so far
- Day 17: Avoid ambiguity: Close the top of your letters
- Day 18: Connect your letters with straight lines instead of curves
- Day 19: Escape from Tangling
- Day 20: Train Consistency
- Day 21: Try different paper positions
- Day 22: Writing Larger than first
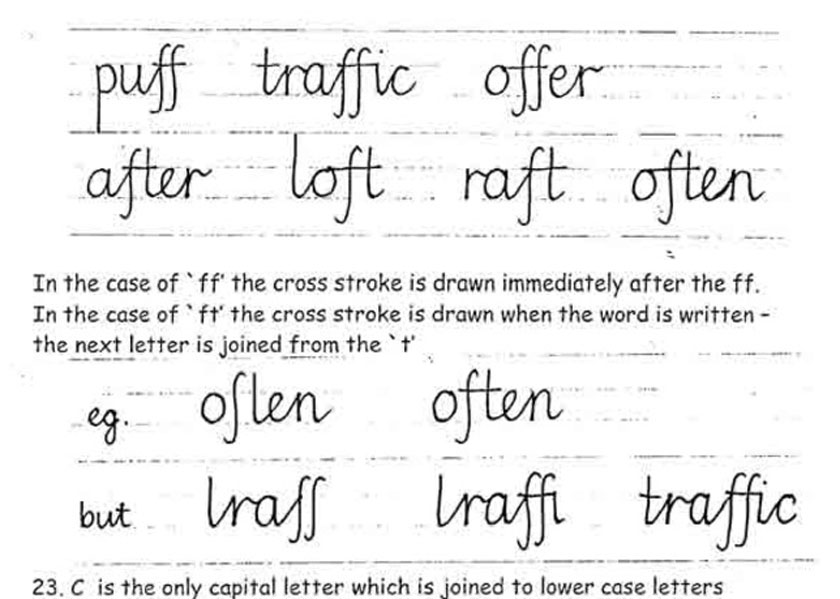
- Day 23: Write each letter correctly
- Day 24: Don't put too much pressure on
- Day 25: Buying Handwritten Course Books
- Day 26: Speed up your writing
- Day 27: Make time for continuous practice
- Day 28: Make handwriting a daily part of your life
- Day 29: Copy the handwriting you admire
- Day 30: Self-examination of handwriting
For creative types who want to get better handwriting, a very fun way is to join the 30-day handwriting improvement challenge. Over a period of one month, you will learn a new technique or strategy each day that will serve you well in your quest to become a cursive master. If you want to improve your handwriting in 30 days please join this challenge according to the roadmap below.
the 30-Day Handwriting Improvement ChallengeDay 1: Decide why you want to improve handwriting
Everyone wants beautiful handwriting. So the practice to improve your writing ability is extremely important. Because it helps you feel powerful at work, especially those in management positions. You can make your goal of improving your writing more precise and consistent, it is like a well-focused laser beam.
 Decide why you want to improve handwriting
Day 2: Look at your own handwriting
Improving your handwriting starts with what you should be doing, that's how you are currently writing cursive. Choose a subject, any subject, or write lines of consciousness on a pad.
Day 3: Know what to look for
Check the passage you just wrote to see how much your handwriting skills are. For a meaningful impression, look for the following attributes and elements in your handwriting:
 Know what to look for
- Shapes (contours, curves, hard angles, etc.)
- Tilt (angle at which you write letters)
- Alignment
- Spacing
- Size
- Line quality (difficult to read, heavy pressure on paper , ...)
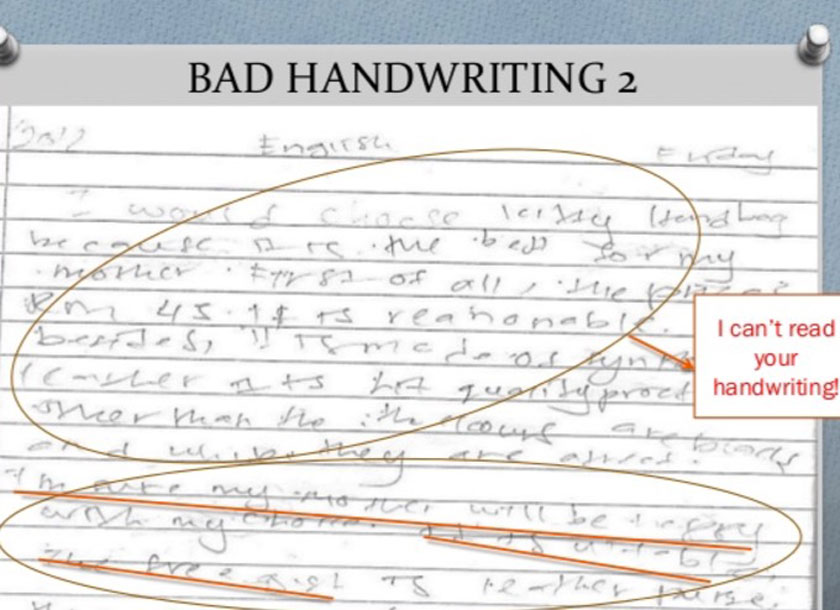
Day 4: Identify your imperfections
No one is perfect, so chances are you will spot a few. Some ideas for mistakes to look for might include:
- Letters that are too far apart or put together
- Curved alignment
- Too steep angles in your letters
- Letter shapes that are difficult to read or even illegible
- The letters too dim or forced into hard paper
- Preparation
 Identify your imperfections
Day 5: Get the right documents
Let's start with the very basics: the writing tool that you are going to use. Write whatever feels most comfortable on a piece of paper. This can be a machine pen, a regular pen, or even just a basic pencil of yours. Then, buy a notebook so you can chart your improvement over the days.
Day 6: Inspired by handwriting that impresses you
The site is the perfect place for your inspiration. Simply visit typical websites like Google Fonts, Typewolf, or the Creative Market font catalog to sift through a wide selection of different typical styles and get the inspiration you're looking for.
Day 7: Practice writing with the air
When you use your finger to "write" sentences in the air, you are really training the complex muscle group in your hand and the entire arm to support you when you are actually handwritten.
 Practice writing with the air
Day 8: Stretch your arms and wrists
Although handwriting is not an exercise, it can ultimately affect your hands and wrists, if you do it long enough. That is why it is a smart idea to start getting used to heating your hands and wrists before each handwriting session.
Day 9: Learn to hold a pen or pencil properly
Like many things in life, the correct form is important for success in any effort, even handwriting. When writing, learn how to hold a pen or pencil in the middle of your thumb, index finger, and middle finger.
Day 10: Learn body position properly
The way you sit and the position of the body when handwriting has a great influence on the good of the manuscript on paper. Sit upright, then use your non-written hand to keep your balance. This will give you more control during the handwriting process. Always sit at a table and a good chair (with a hard back) instead of a couch or other seat with a backrest and poor support.
Day 11: Understand that it's not about your fingers
Now that you've come a third of the way to achieving your goals, it's time to re-train your mind: It's not fingers in handwriting. It's really about how to use your forearms and shoulders, as professional callees artists already know all too well.
To get into this good habit, you just have to hold a pencil or pencil, but write the letters growing up in the air, which will activate your forearms and shoulders more.
Day 12: Get acquainted with how to write basic shapes
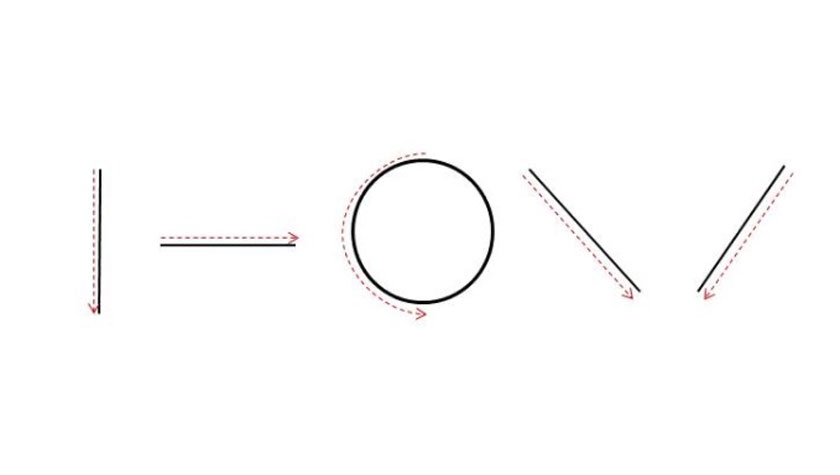 Get acquainted with how to write basic shapes
A core aspect of handwriting is shape. Before you start creating letters, get back to the basics of coloring your lines with simple vertical and diagonal lines, circles and semicircles.
Day 13: Take the time to doodle
Don't think that doodle is the way to use your time? Do you still think doodling is moderable because you may have been blamed for doing so in school? However, reconsider the value of doodling to improve your handwriting.
Day 14: Reconsider your use of loops
Naturally, you'll want to keep the use of loops to a minimum to improve the readability and legibility of your handwriting. If you're not 100% willing to sacrifice your loops, then keep them around only in the lower parts of the letters, like the descending sign in "p" and "j".
 Reconsider your use of loops
Day 15: Tilt your handwriting, but only a little
Some people abuse the degree of tilt or tilt they apply to their handwriting. This is a mistake that you definitely want to avoid. The reason you want to avoid this is because excessive italics are harder to read.
Day 16: Review what you've learned so far
At this point, it's time to conduct an important mid-range assessment so you can make sure you're still using and getting the most out of all these skills that you've had in the last two weeks and beyond. If you are still on the right track, then congratulations. Otherwise, it's never too late to review and resolve to apply what you've learned in the last 15 days.
Day 17: Avoid ambiguity: Close the top of your letters
Handwriting without clarity is not good. One of the worst culprits of ambiguity is when you do not completely close the beginning of your letters.
 Avoid ambiguity
Day 18: Connect your letters with straight lines instead of curves
You want to use curved connections between letters instead of straight letters. When this happens, the shape of the letters can get scrambled, sometimes resulting in unreadable handwriting.
Day 19: Escape from Tangling
In handwriting, confusion occurs when sharps and your handwriting are not written properly. The front part is the length of a letter that rises above the body of lower case letters while the latter is the lower part of the lower case body.
Day 20: Train Consistency
Consistency will give you an aesthetic look to your handwriting, as it creates a uniform look and feel for your workmanship.
Day 21: Try different paper positions
Even the position of your paper can be an important factor in your handwriting. How you position your paper depends on your dominant handwriting.
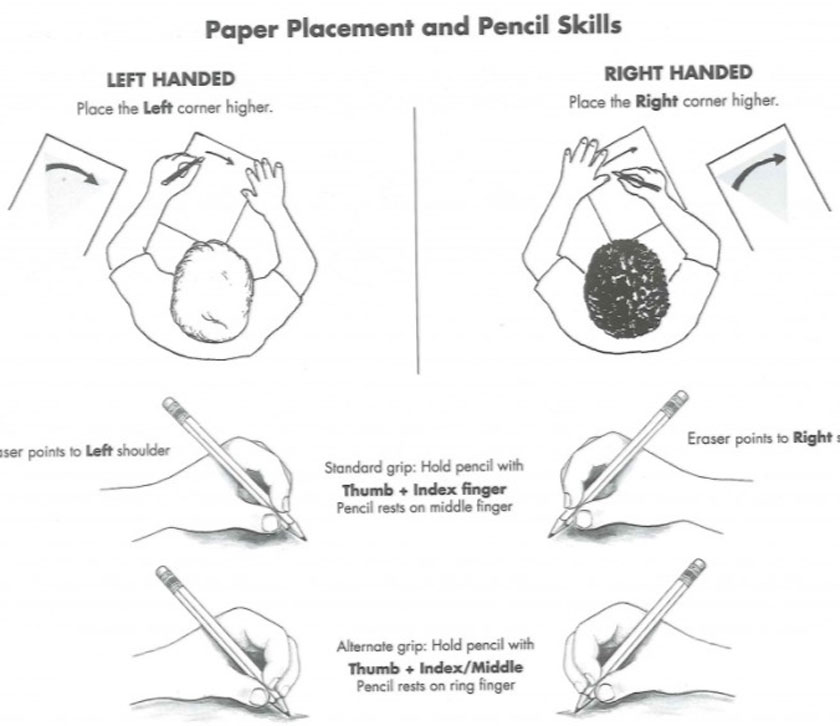 Try different paper positions
Day 22: Writing Larger than first
The problem is that writing larger letters means they are easier to see for you. The letters that pop out on you are easier to analyze: If you write larger, it's easier to spot something wrong in your form or consistency.
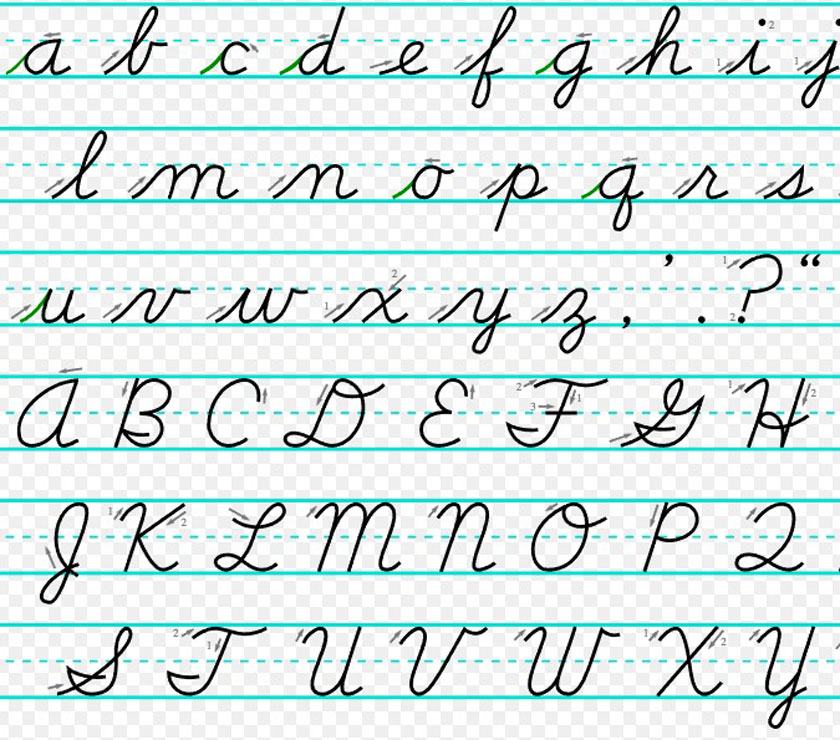
Day 23: Write each letter correctly
The proper way is to start at the top of the loop in reverse to the end of the letter. When you write each letter correctly, you improve everything from readability to legibility.
Day 24: Don't put too much pressure on
It's best to avoid giving yourself too much pressure when writing on paper. Save yourself your bad handwriting and your damaged hand and wrist by writing more openly. This means that you should loosen the grip of the pen or pencil to create a more graceful pen stroke on the paper.
Day 25: Buying Handwritten Course Books
To keep the sharp handwriting skills you have just learned, it is important that you continuously apply them. A handwritten book should have pages after the daily homework pages that you can try.
Day 26: Speed up your writing
As you speed up your writing, your handwriting improves automatically. That is because you are stopping yourself from in a hurry to form your different letters.
 Speed up your writing
Day 27: Make time for continuous practice
The old saying that practice makes perfect can be a cliché, but it's true, especially in cursive. It takes a set amount of time each day to improve to the point that you are proficient and good at.
Day 28: Make handwriting a daily part of your life
You can get into the habit of writing more handwriting by actually writing things more by hand in your daily activities. For example, instead of journaling electronically on your computer or tablet, switch permanently to an old, fine notebook.
Day 29: Copy the handwriting you admire
Doing something as basic as copying handwriting that you admire will help you succeed in handwriting. The more you train yourself in this style, the more your handwriting will eventually show off the graceful, cursive-like properties that you currently admire.
Day 30: Self-examination of handwriting
 Self-examination of handwriting
Now that you have mastered handwriting (or at least greatly improved cursive), you should check back periodically to see if you are still loyal to each of the tips and tricks you have choose not last month.
Once you've passed the challenge of improving your handwriting in 30 days, your handwriting can certainly be significantly improved by now. SaDesign Retouching wishes you all with success.


VIP Products


Best Selling Products
Windows 10 & 11 Pro Key
36 USD
ChatGPT Plus Account (GPT-4)
16 USD
Upgrade Duolingo Super
29 USD
Plugin Retouch4me
69 USD
Freepik Premium Account
59 USD
Genuine Cheap Canva Pro
39 USD
Adobe Premiere Pro Account
99 USD
Genuine Adobe Illustrator account
99 USD
Adobe Photoshop Copyright - Full App
120 USD
MidJourney Account
29 USD
Autodesk All App Account Copyright
120 USD
Upgrade Genuine Office 365
49 USD
Upgrade genuine Capture One account
120 USD
Copyright Adobe Lightroom Account
59 USD
Capcut Pro 1 Year
39 USD