Best Selling Products

Upgrade Duolingo Super
29 USD
Windows 10 & 11 Pro Key
36 USD
Genuine Adobe Illustrator account
99 USD
Adobe Premiere Pro Account
99 USD
Adobe Photoshop Copyright - Full App
120 USD
Autodesk All App Account Copyright
120 USD
Upgrade genuine Capture One account
120 USD
Capcut Pro 1 Year
39 USD

Freepik Premium Account
59 USD
Copyright Adobe Lightroom Account
59 USD

ChatGPT Plus Account (GPT-4)
16 USD

MidJourney Account
29 USD
Plugin Retouch4me
69 USD
Genuine Cheap Canva Pro
39 USD
Upgrade Genuine Office 365
49 USD
The quickest and easiest way to convert YouTube music to CapCut.
Nội dung
Want to use your favorite YouTube music in your CapCut video but don''t know where to start? Actually, converting YouTube music to CapCut isn''t too complicated if you know how to download the audio in the correct format and import it into the application. With just a few simple steps on your phone or computer, you can use the MP3 music file to edit your video as you wish. In this article, let''s explore with Sadesign how to quickly and easily convert YouTube music to CapCut, and what to keep in mind to get a perfect finished product!
1. What is the CapCut application?
CapCut is a popular video editing app thanks to its intuitive interface and diverse tools. Users can easily cut and splice clips, add effects, insert text, adjust colors, add voiceovers, and combine music to create engaging videos. CapCut supports both phones and computers, suitable for a wide range of needs from personal video editing to creating content for TikTok, Facebook Reels, and YouTube Shorts. Some of CapCut's standout features include:
-
Video editing: Cut, merge, change speed, and arrange clips as desired.
-
Add sound: Insert background music, sound effects, or voice recordings.
-
Diverse effects: Provides filters, transition effects, and animations to make videos more lively.
-
Insert text: Add subtitles, headings, and a variety of eye-catching fonts.
-
Video export: Supports multiple resolution and video quality options.
Thanks to these features, CapCut becomes a useful tool for both beginners and experienced video creators.
2. Does CapCut support transferring music from YouTube?
Currently, CapCut does not offer a feature to directly convert YouTube video links into MP3 files for use in editing projects. Therefore, if you want to extract audio from a YouTube video, you need to prepare a compatible audio file on your device before importing it into CapCut. MP3 is usually the preferred format because of its relatively small file size, ease of storage, and convenience. The basic process involves two steps: preparing the audio file from an authorized source and importing that file into CapCut.
Here are some things you should keep in mind before proceeding:
-
Verify the rights to use the audio, especially when the video is being posted publicly or used for commercial purposes.
-
Prioritize music that is licensed or has appropriate usage permits.
-
Do not upload to unreliable conversion websites or websites that require the installation of software from unknown sources.
-
Check the format and quality of your audio files before importing them into CapCut.
3. How to convert YouTube music to CapCut using your phone
If you frequently edit videos using your phone, you can prepare MP3 files and import them directly into your CapCut project. The steps below guide you on how to obtain the video link, prepare audio files from a permitted download source, and insert them into the video.
Step 1: Open YouTube and find the video containing the audio.
First, open the YouTube app on your phone, then search for the video containing the music you want to use. You should identify the song or audio segment beforehand to save editing time. Check the copyright information and choose an audio source that allows downloading and use suitable for your purpose.
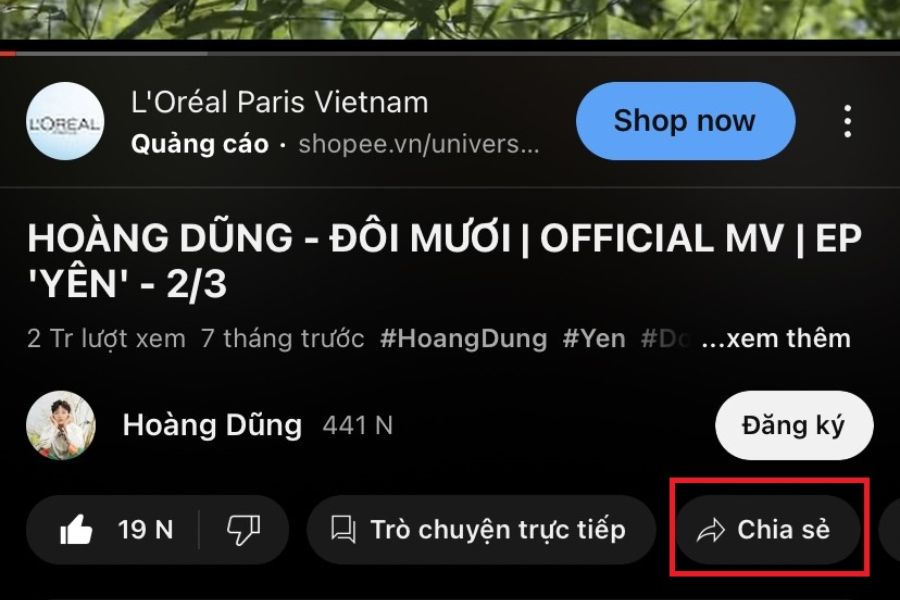
Step 2: Click the Share button
After finding a suitable video, tap the Share button located just below the video playback frame. This allows you to send the video link to other applications or copy the link for use in subsequent steps. The YouTube interface may vary slightly depending on the version, but the Share button is usually quite easy to find.
Step 3: Copy the YouTube video link
In the options menu that appears, find and tap " Copy link" . The video link will now be saved to your phone's clipboard. You can use this link to access the content or check information about the music you need to prepare. Make sure you've copied the correct video to avoid any mistakes.
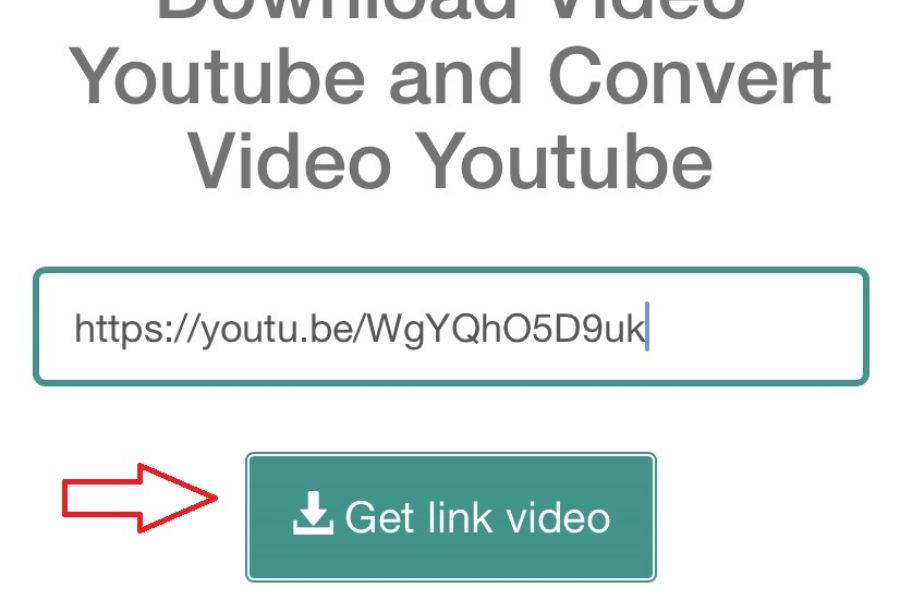
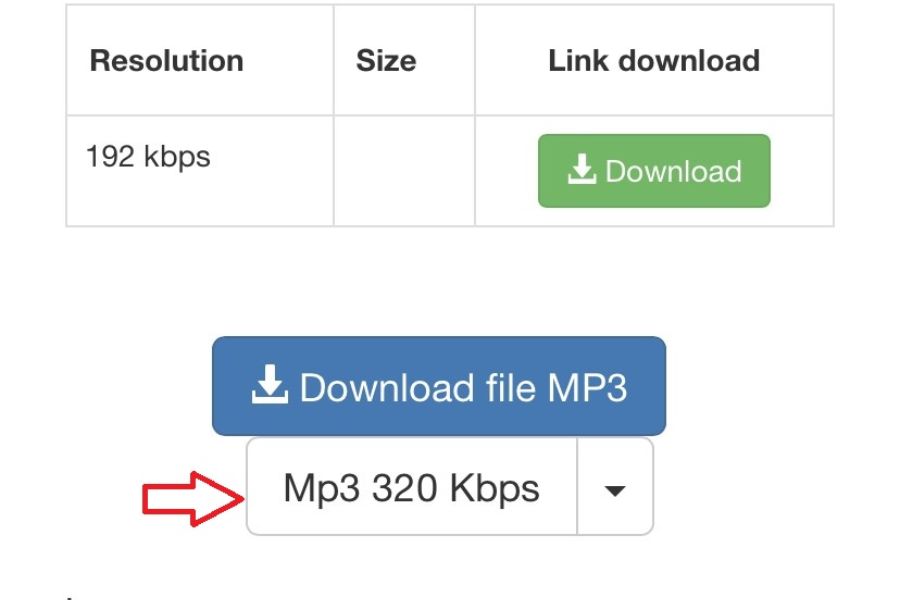
Step 4: Prepare the MP3 audio file.
Next, use a legitimate audio download source or a tool authorized by the content owner to prepare the music file. If the source supports MP3 downloads, choose this format for convenience when importing into CapCut. If using a copied link, follow the download instructions of the licensed service. Avoid accessing conversion websites of unknown origin as you may encounter misleading advertisements or security risks.
Step 5: Check the quality of the MP3 file.
After downloading the audio to your phone, open your Files folder or File Manager to check the saved file. Pay attention to the file name, format, and duration to ensure it's the music you need. If there are multiple quality options, choose the one with clear sound, free from distortion or interruptions. Preparing the file well from the start will make the video editing process smoother.
Step 6: Open CapCut and create a new project.
Once you have the audio file, open the CapCut app on your phone and tap " New Project" on the main interface. Next, select the video or image you want to use as the main content and tap " Add" to add it to the editing area. You can choose one or more clips depending on your idea. After the video is uploaded, the timeline interface will appear so you can start adding music.
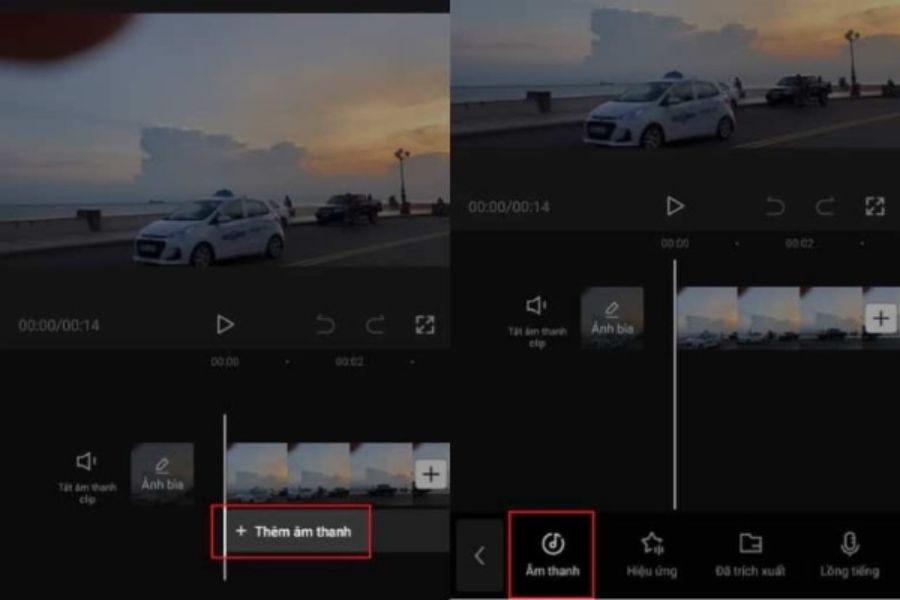
Step 7: Select the Add Sound feature.
In the editing interface, look at the toolbar at the bottom of the screen and tap " Add sound" . CapCut will display various sound options for you to choose from. Depending on the application version, the location and names of some features may vary slightly. Find the section for importing audio from your device to continue using the prepared MP3 file.
Step 8: Access the folder containing the audio file.
After opening the add audio section, find the Audio option or the option to import audio from your device. Next, tap the folder icon if it appears to open the list of files saved on your phone. This is where you can find previously downloaded music. If you don't see the file, check your Downloads folder or Audio folder on your device.
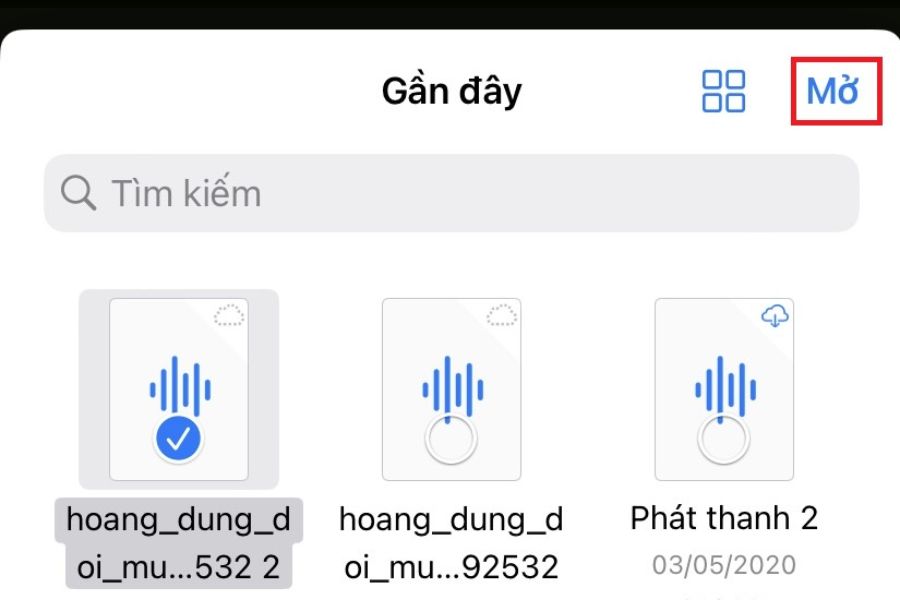
Step 9: Select the From File option.
In the list of options, tap From Files and then select Import from Files to open the data manager on your phone. Here, you can browse through the storage folders to find the MP3 music file you need. This allows CapCut to access the audio file already available on your device instead of having to search through the app's music library again.
Step 10: Select the MP3 file you want to use.
When the list of files appears, locate the previously prepared music file and select it. If using an iPhone, you may need to access the Files app to find its storage location. On Android phones, the file is usually located in the Downloads folder or a folder selected by your browser. After identifying the correct music file, tap Open or the corresponding confirmation button to proceed to the next step.
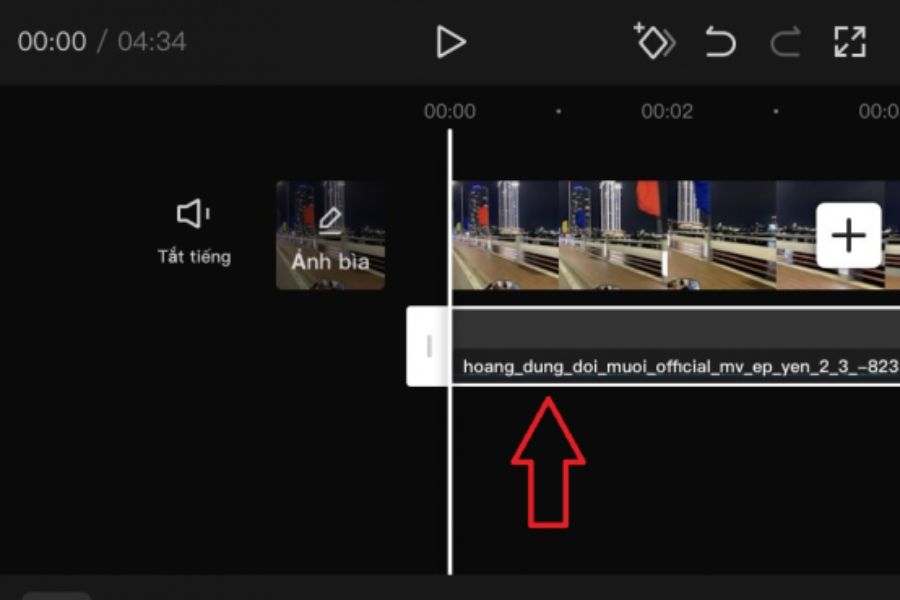
Step 11: Add audio to the CapCut video
After successfully selecting the file, CapCut will display the music in a list of usable sounds. Click the plus icon next to the file or select the add button to add the audio to the timeline. The music will then appear below the video, allowing you to easily adjust its position and duration. Play a test track to check if the audio has been added correctly.
Step 12: Adjust the audio and export the video.
Finally, tap the newly added audio bar on the timeline to open the editing tools. Here, you can drag the ends of the music track to shorten it, move the playback position, or adjust the volume to suit the video content. If you want the music to start and end more naturally, you can use the fade-in/fade-out feature. Once finished, tap the arrow icon or the Export button in the upper right corner of the screen to save the video to your device and share it on suitable platforms.
4. Some things to note when converting YouTube music to CapCut.
To ensure a smooth music addition process and minimize editing errors, you should pay attention to a few important issues. In particular, choosing the right sound will directly affect the quality and the viewer's experience.
-
Check music copyright: Not all songs on YouTube are allowed to be downloaded or reused. You should prioritize royalty-free music, licensed music, or audio with permission from the copyright holder.
-
Choose a compatible format: MP3 is a popular format, convenient for storage and import into CapCut.
-
Ensure sound quality: Use clear music files that are free from static, distortion, or missing segments.
-
Adjust the volume appropriately: If the video has dialogue, reduce the background music volume so that the speech isn't drowned out.
-
Check your storage capacity: Your phone needs enough memory to save audio files and export videos after editing.
-
Use trusted websites: Avoid clicking on fake download ads or installing apps from unknown sources.
5. Reliable CapCut upgrade service at Sadesign
If you frequently use CapCut for content creation, you might want to explore upgrade packages to experience more editing features. Sadesign is a good option for users who want to upgrade CapCut, offering affordable prices and convenient support.
When choosing an upgrade at Sadesign, you can receive support during registration, usage, and troubleshooting depending on the service package. The dedicated support team also helps users easily understand the features that best suit their video editing needs. If you want to utilize CapCut more effectively, you can explore Sadesign's services to choose an upgrade package that fits your budget and intended use.
6. Conclusion
Above is a guide on how to quickly and easily convert YouTube music to CapCut for mobile phone users. Simply prepare a valid audio file, import it into the application, and adjust it on the timeline. You can then create lively videos with your favorite background music. Hopefully, this information will help you easily perform the operation and give you more creative ideas when using CapCut. Don't forget to pay attention to the audio quality and music usage rights so that your finished video can be shared smoothly!













VIP Products
Best Selling Products
Upgrade Duolingo Super
29 USD
Windows 10 & 11 Pro Key
36 USD
Genuine Adobe Illustrator account
99 USD
Adobe Premiere Pro Account
99 USD
Adobe Photoshop Copyright - Full App
120 USD
Autodesk All App Account Copyright
120 USD
Upgrade genuine Capture One account
120 USD
Capcut Pro 1 Year
39 USD
Freepik Premium Account
59 USD
Copyright Adobe Lightroom Account
59 USD
ChatGPT Plus Account (GPT-4)
16 USD
MidJourney Account
29 USD
Plugin Retouch4me
69 USD
Genuine Cheap Canva Pro
39 USD
Upgrade Genuine Office 365
49 USD