Best Selling Products
Windows 10 & 11 Pro Key
36 USD
Upgrade Genuine Office 365
49 USD

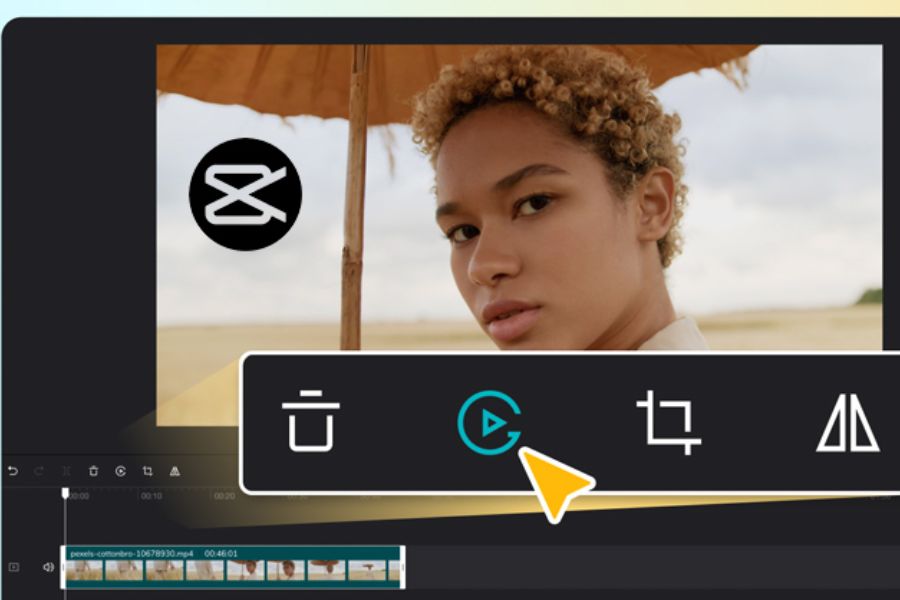
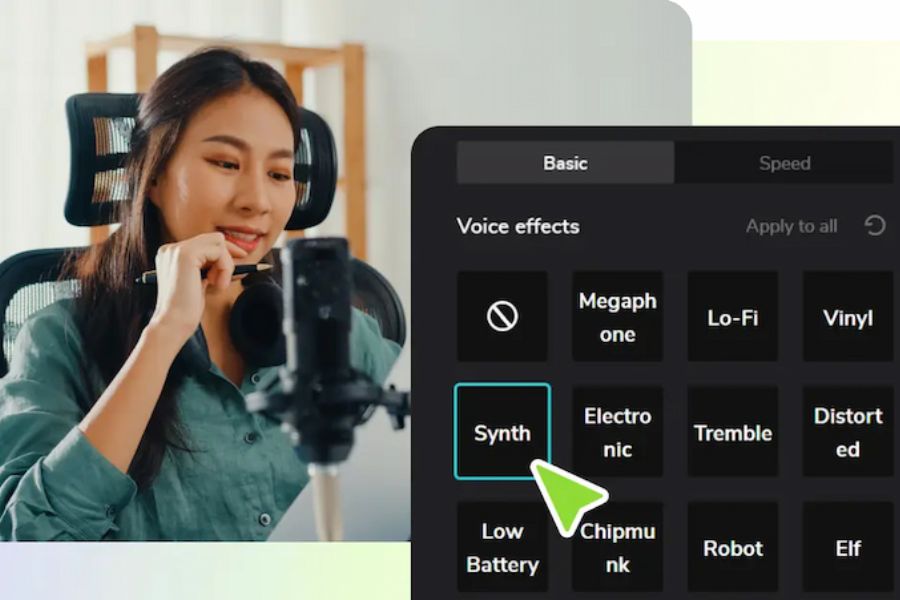
Capcut Pro 1 Year
39 USD

Freepik Premium Account
59 USD

ChatGPT Plus Account (GPT-4)
16 USD

Genuine Adobe Illustrator account
99 USD
Adobe Photoshop Copyright - Full App
120 USD

Adobe Premiere Pro Account
99 USD

Upgrade Duolingo Super
29 USD
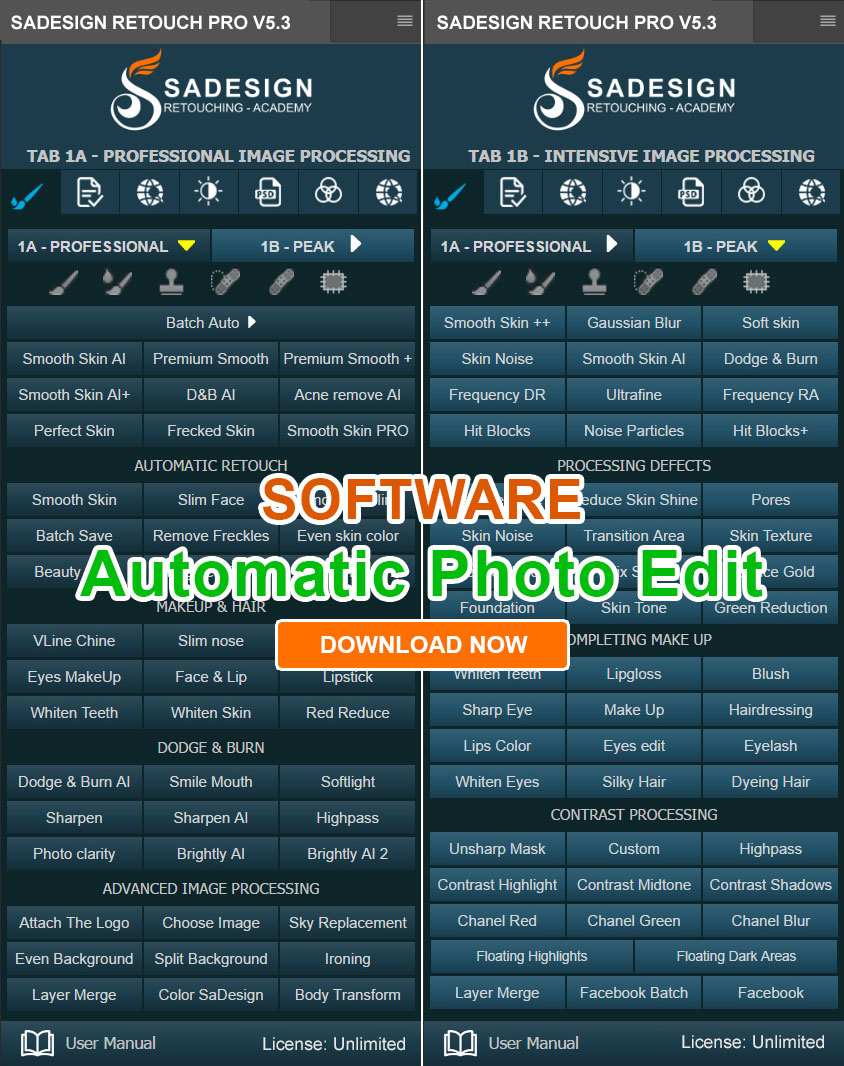
Plugin Retouch4me
69 USD

Copyright Adobe Lightroom Account
59 USD

Genuine Cheap Canva Pro
39 USD

MidJourney Account
29 USD
Autodesk All App Account Copyright
120 USD
Upgrade genuine Capture One account
120 USD
The secret to beautifully removing video backgrounds in CapCut, making your videos look more professional.
Nội dung
- 1. Why remove the video background in CapCut?
- 2. How to quickly remove the background from a video in CapCut
- 3. Simple and effective ways to separate and merge video backgrounds using CapCut.
- 4. Tips for removing video backgrounds in CapCut for a more beautiful and natural look.
- 5. Some notes on using the background removal feature in CapCut
- 6. Upgrade CapCut at Sadesign to create more professional videos.
- 7. Conclusion
During video editing, the background can sometimes make the overall frame look cluttered, lacking focus, or unsuitable for the content you want to convey. Instead of having to reshoot to change the background, you can use CapCut''s background removal feature to eliminate unwanted backgrounds and keep only the main subject. With simple, easy-to-use operations and many convenient supporting tools, CapCut helps you unleash your creativity to create visually appealing, professional videos without needing complex editing software. Let''s explore it with Sadesign!

1. Why remove the video background in CapCut?
Removing the background from a video is the process of eliminating the background behind the subject, such as people, objects, or any detail appearing in the frame. After removing the background, you can keep the main subject and place it in a completely new setting according to your creative ideas. This is an editing technique used by many content creators for TikTok videos, advertising videos, product introduction clips, or knowledge-sharing content.
Removing the background not only changes the scenery but also offers many practical benefits in the video editing process:
-
Highlighting the subject: Eliminate unnecessary details in the background so that the viewer can focus more on the main character or object.
-
Freedom to create your own background: You can replace the original background with images, videos, or colors that match the theme.
-
Increased professionalism: Videos have a neat layout, harmonious visuals, and a more appealing presentation.
-
Saves filming and editing time: No need to prepare a green screen or find a new filming location when you want to change the setting.
-
Versatile application: Suitable for sales videos, tutorial videos, entertainment content, presentations, and many other formats.
In particular, CapCut integrates a very intuitive background removal tool, making it easy for even beginners to use in video editing. You don't need a lot of experience to create videos with your own unique style.
2. How to quickly remove the background from a video in CapCut
If you want to remove unwanted backgrounds and keep the main subject, you can do so directly on your phone using the CapCut app. The operations are quite simple and don't require advanced editing skills. First, download CapCut from the App Store if you're using an iPhone or Google Play for Android phones. After installation is complete, open the app and follow the instructions below.
Step 1: Create a new editing project.
Open the CapCut app on your phone. On the main interface, find and select the " New Project" option . This is where you can add videos or images from your device's library to begin the editing process.
Step 2: Select the video you want to remove the background from.
In your photo and video library, find the video you want to remove the background from. Prioritize videos where the subject is clearly visible and not too obscured, as this will make it easier for the app to recognize and remove the background. After selecting a suitable video, tap Add to add the content to the editing timeline.
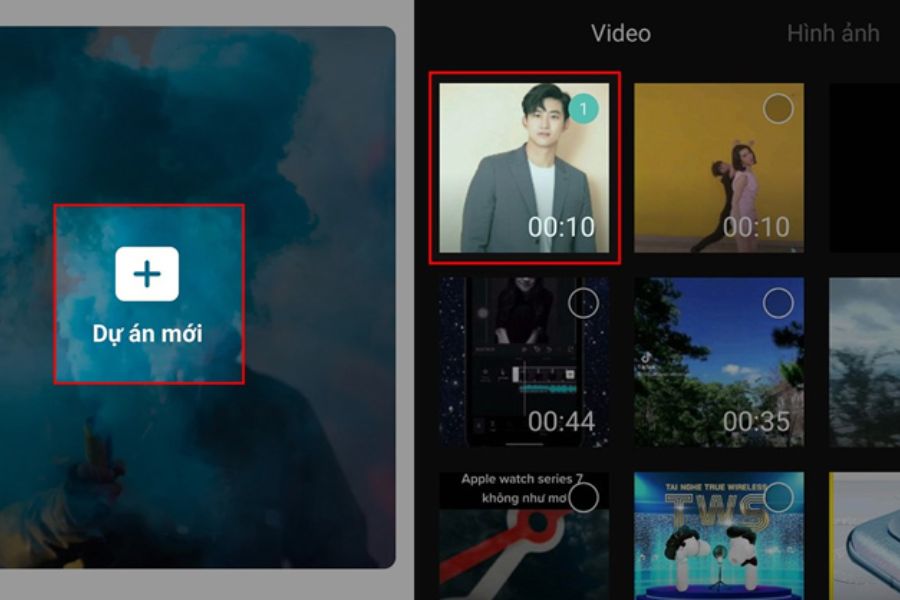
Step 3: Use the background removal tool.
Once the video appears in the editing interface, select the video segment in the timeline to open the toolbar. Next, find the "Remove Background" option and choose the appropriate background removal method if the application displays multiple options. CapCut will automatically analyze the image, identify the subject, and remove the background.
Step 4: Review and adjust the video.
After the background removal process is complete, review the entire image to check details such as hair, clothing, body contours, or small objects surrounding the subject. If the result doesn't look natural, you can try again or use additional editing tools provided by the application.
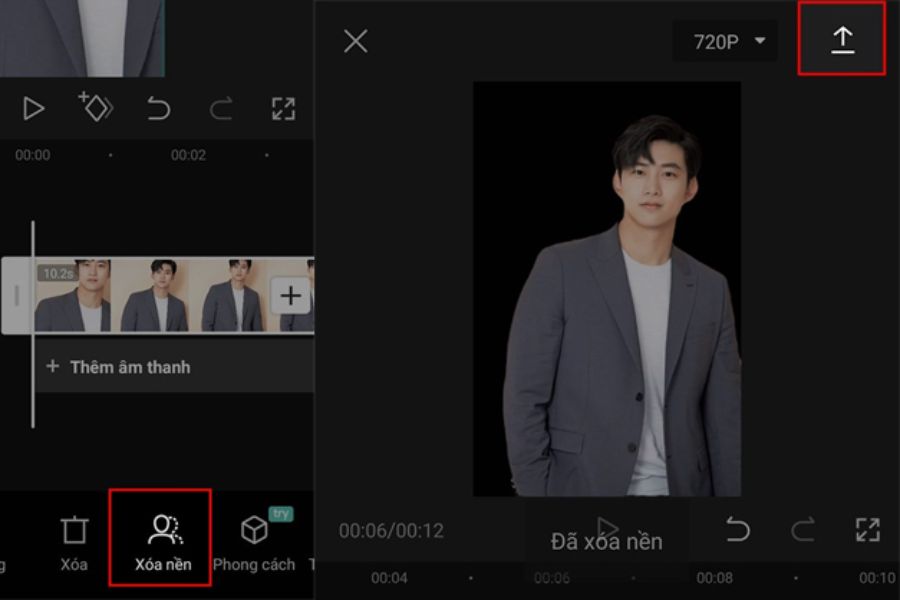
Step 5: Save the video with the background removed.
Once you're satisfied with the result, tap the export video icon in the upper right corner of the screen. Next, select the appropriate resolution and frame rate, then wait for CapCut to process it. The exported video will be saved to your device for use or upload to social media platforms. With just a few basic steps, you can remove the original background without having to re-record the video. This is also an important preparation step if you want to combine the subject with a different background to create more dynamic content.
3. Simple and effective ways to separate and merge video backgrounds using CapCut.
After removing the background, you can combine the separated subject with another video or image to create a new frame. For example, you can replace the studio setting with an outdoor space, superimpose a presenter onto an illustrative video clip, or create a unique multi-layered effect. To do this, use the Overlay feature in CapCut following these steps:
Step 1: Add a video as background.
First, open CapCut and click on " New Project" in the main interface. Next, select the video or image you want to use as the new background. This will be the layer of content beneath the subject after merging.
Step 2: Add background video to the project
After selecting suitable content from the library, tap Add to add the video to the timeline. You can use a landscape video, decorative images, or any background that suits the theme you are working on.
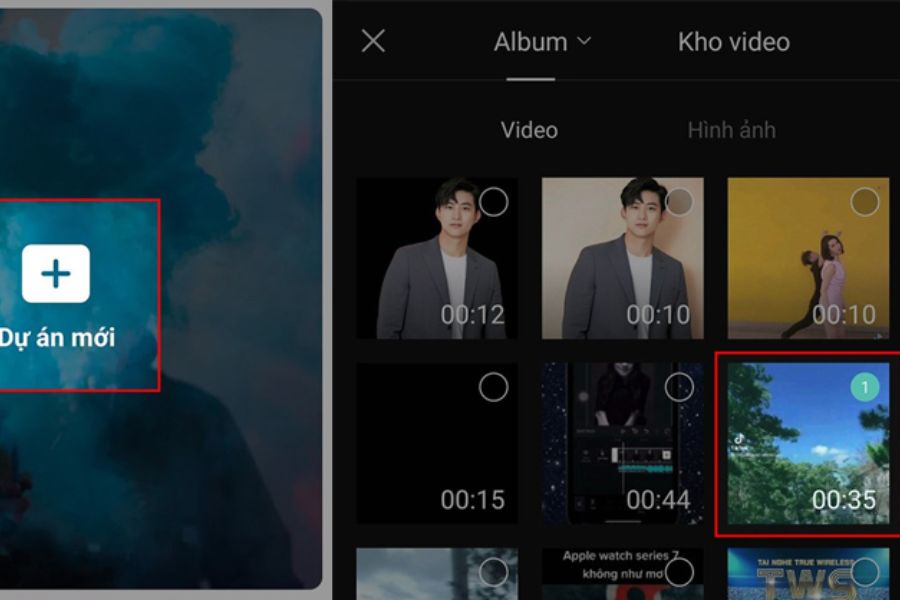
Step 3: Add an overlay to the video.
In the toolbar at the bottom of the screen, find and select the Overlays option , then click Add Overlay . This feature allows you to place an additional video or image on top of the original background content, enabling you to combine multiple image layers within a single frame.
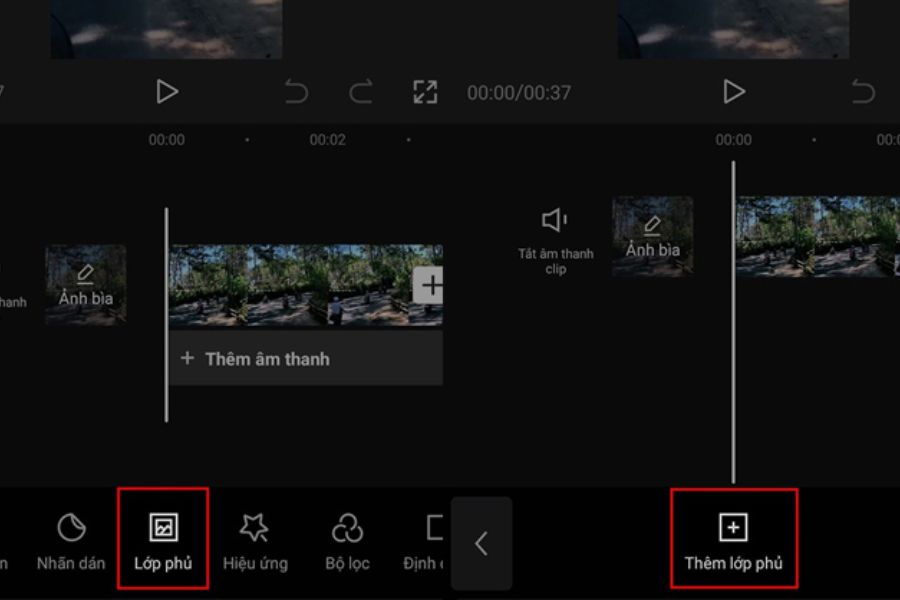
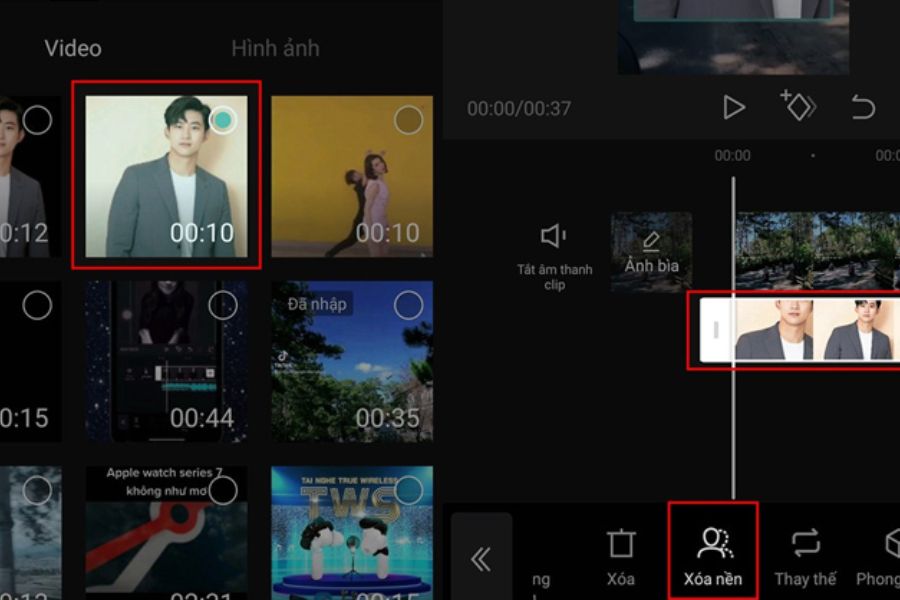
Step 4: Select the video you want to remove the background from.
In your device's library, find the video containing the character or object you want to keep and tap Add . The new video will then appear as an overlay on top of the background video in the editing timeline.
Step 5: Proceed to remove the background.
You select the newly added video layer, then find the "Remove Background" option on the toolbar. CapCut will then identify the subject and remove the original background. When complete, the subject will remain on the overlay, while the video or image below becomes the new background.
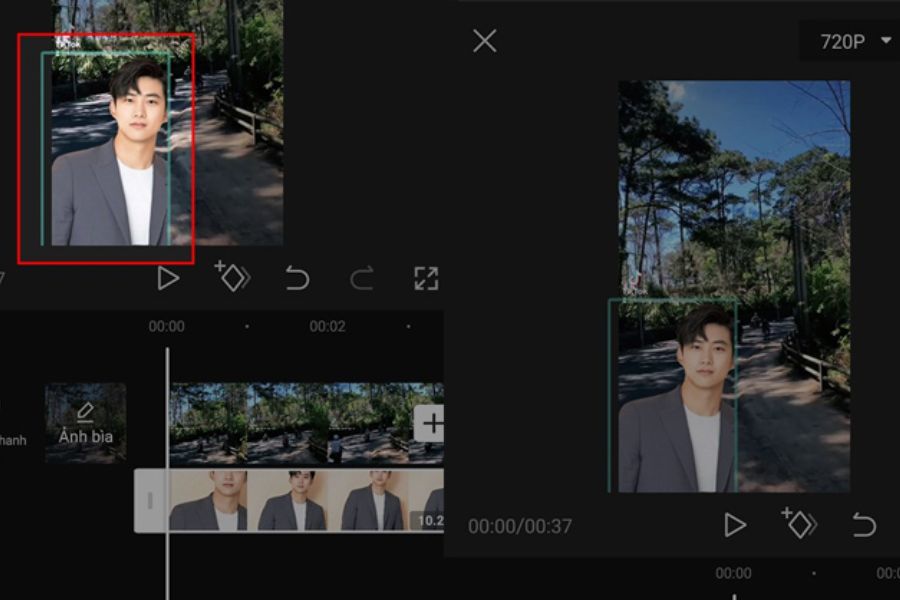
Step 6: Adjust the position and size of the subject.
After separating the background, you can use drag-and-drop functionality on the screen to change the position, zoom in, or zoom out the subject. Adjust it so that the subject doesn't obscure important details of the background video. Additionally, pay attention to the aspect ratio and duration of both video layers to ensure synchronized display.
Step 7: Export the completed video
Once you've finished the background merging process, play back the video to check the harmony between the subject and the new background. If everything looks right, tap the export video icon in the upper right corner of the screen, select your desired quality, and save it to your device. With the Overlay feature combined with the Background Removal tool, you can transform a video shot in a simple setting into content with a completely different background. This method is especially useful when producing product introduction videos, knowledge-sharing videos, or creative clips for TikTok and Facebook Reels.
4. Tips for removing video backgrounds in CapCut for a more beautiful and natural look.
Not every video will achieve perfect results the first time after background removal. In some cases, the edges may not be smooth, the subject may lose detail, or some parts of the background may remain. To make your edited video look more natural and professional, you should pay attention to the following tips:
-
Choose videos with a clear subject: Footage where the subject is separated from the background is often easier for CapCut to identify.
-
Prioritize adequate lighting: Good lighting helps to clearly define the subject's features, minimizing blurring or loss of detail when separating the background.
-
Avoid overly complex backgrounds: Videos with many moving objects or colors that match the character's clothing can make identification less accurate.
-
Adjust the size appropriately: Avoid enlarging the subject too much compared to the background, as this can easily create an unnatural feel.
-
Choose a suitable background: Prioritize colors and space that complement the lighting and camera angle of the subject.
-
Check each movement segment: Don't just watch a static frame. You should play back the entire video to detect any errors where the character moves.
Additionally, you can incorporate effects, color filters, sound, and text to enhance the content. However, use these elements sparingly to create a visually appealing video without making it cluttered.
5. Some notes on using the background removal feature in CapCut
To ensure a smooth editing process and minimize unwanted errors, you should familiarize yourself with a few things before you begin. Although CapCut offers convenient background removal, the actual results still depend on the quality of the input video, the complexity of the background, and the version of the application being used.
-
Update your application regularly: Using the latest version of CapCut gives you access to the newest enhancements and editing tools.
-
Ensure your device has enough storage space: High-quality videos often take up a lot of memory, especially when you're doing multiple editing tasks at once.
-
Check for availability: Depending on the app version, device, and region, the location or display of some tools may vary.
-
Save your project during editing: If your video has many overlays and effects, you should save frequently to avoid losing the changes you've made.
-
Choose the appropriate resolution: Consider the output video quality based on your intended use, avoiding outputting video at a resolution that is too low, which will result in blurry images.
-
Check content copyright: If using images, videos, or audio from external sources for your background, make sure you have the rights to use them.
An important note is that the automatic background removal feature may not perfectly handle small details such as flying hair, transparent objects, or subjects with colors similar to the background. Therefore, take the time to review the final product before exporting the video to get the best results.
6. Upgrade CapCut at Sadesign to create more professional videos.
If you frequently edit videos for work, business, or social media content creation, using the right version of CapCut will give you more options for editing tools and resources. Especially when creating videos with multiple overlays, effects, filters, or requiring advanced image editing, you can explore paid CapCut packages to access additional features.
Sadesign offers affordable CapCut upgrade support with a convenient process and dedicated consulting team. When you choose to upgrade here, you can receive advice on the service package that best suits your needs and get ongoing support whenever necessary. Instead of spending time researching different options, you can contact Sadesign for information on upgrade packages, costs, and included benefits. This is a great option for those who want to invest more seriously in content creation and optimize their video editing experience on CapCut.
7. Conclusion
Removing the background from a video in CapCut is a simple editing technique that significantly improves image quality. With just a few steps, you can remove an unsuitable background, keep the main subject, and replace it with a new background according to your own ideas. Hopefully, these instructions will help you use CapCut more effectively, creating beautiful, polished videos with a strong personal touch.
















VIP Products






Best Selling Products
Windows 10 & 11 Pro Key
36 USD
Upgrade Genuine Office 365
49 USD
Capcut Pro 1 Year
39 USD
Freepik Premium Account
59 USD
ChatGPT Plus Account (GPT-4)
16 USD
Genuine Adobe Illustrator account
99 USD
Adobe Photoshop Copyright - Full App
120 USD
Adobe Premiere Pro Account
99 USD
Upgrade Duolingo Super
29 USD
Plugin Retouch4me
69 USD
Copyright Adobe Lightroom Account
59 USD
Genuine Cheap Canva Pro
39 USD
MidJourney Account
29 USD
Autodesk All App Account Copyright
120 USD
Upgrade genuine Capture One account
120 USD