Best Selling Products

Genuine Adobe Illustrator account
99 USD

Genuine Cheap Canva Pro
39 USD

Adobe Premiere Pro Account
99 USD

Capcut Pro 1 Year
39 USD

Adobe Photoshop Copyright - Full App
120 USD

Upgrade Duolingo Super
29 USD

MidJourney Account
29 USD

Copyright Adobe Lightroom Account
59 USD

ChatGPT Plus Account (GPT-4)
16 USD

Freepik Premium Account
59 USD

Windows 10 & 11 Pro Key
36 USD

Plugin Retouch4me
69 USD

Autodesk All App Account Copyright
120 USD

Upgrade genuine Capture One account
120 USD

Upgrade Genuine Office 365
49 USD
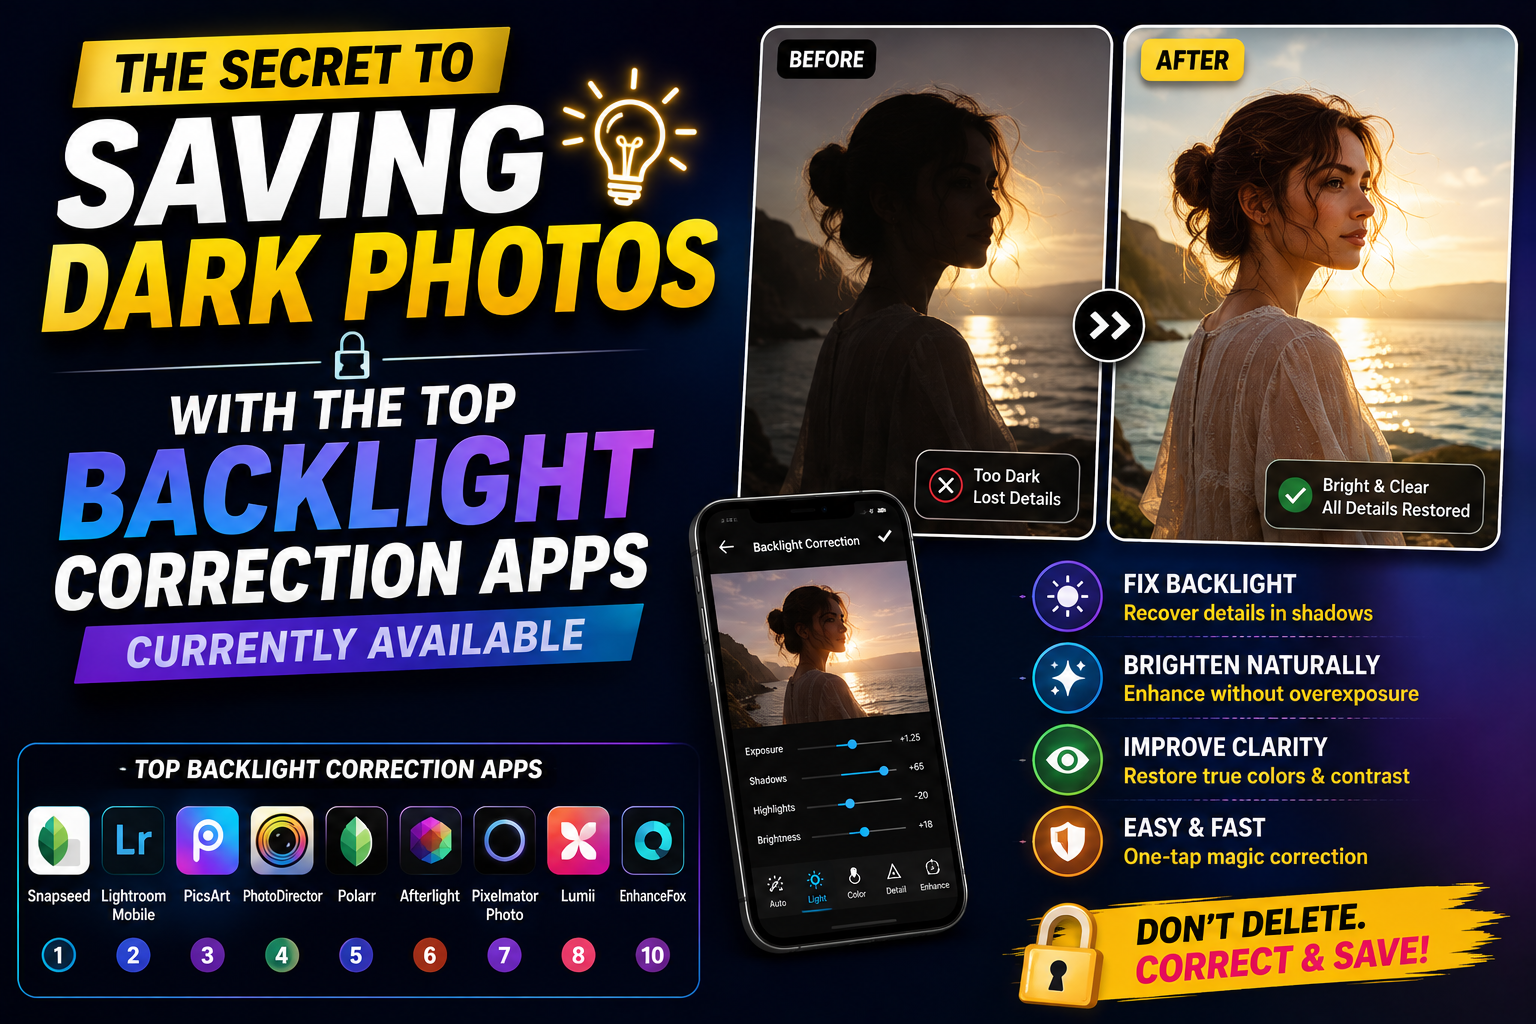
The secret to saving dark photos with the top backlight correction apps currently available.
Nội dung
- 1. Understanding backlighting and image recovery principles
- 2. Detailed review of the best backlight correction apps currently available.
- 2.1 Snapseed - The free local editing wizard
- 2.2 Adobe Lightroom Mobile - Professional-level darkroom experience
- 2.3 Meitu - Brighten your portraits with AI in one touch
- 2.4 Picsart - Unlimited creativity with HDR tools
- 2.5 VSCO - Art from cinematic color palettes
- 3. Step-by-step guide to the amazing formula for correcting backlit photos.
- 4. Golden tips for shooting and editing to get the perfect photo.
- 5. Conclusion
Instead of deleting that cherished photo, you can revive it in just a few moments. This article from AppVip.
1. Understanding backlighting and image recovery principles
Backlight photography occurs when a strong light source is behind the subject instead of in front. In this case, the phone's sensor will prioritize metering based on the sky or the strong light source, causing the subject to be severely underexposed and appear as a silhouette.
To fix this problem without causing color distortion or reducing image quality, modern photo editing applications typically employ two core principles:
-
Enhance Shadows/Blacks: This tool only affects shadowed areas, brightening details hidden in the shadows without affecting already bright areas.
-
Reduce highlights/whites: When you increase the brightness of the entire photo, the already bright sky will be overexposed (completely white). Lowering the highlights helps to regain detail in the clouds and sunlight, creating a harmonious balance.

2. Detailed review of the best backlight correction apps currently available.
2.1 Snapseed - The free local editing wizard
If you're looking for a powerful, completely free, and ad-free tool, Snapseed is the top choice. Owned by Google, this app boasts incredibly intelligent algorithms for handling dark areas.
-
Key features: Selective and Brush tools . These two features allow you to select only the darkest face or subject to increase brightness, without changing the color or brightness of the surrounding sky. Additionally, the White Balance feature helps eliminate the blue and gray tints often seen in underexposed photos.
-
Strengths: Maintains image sharpness, intuitive interface, no account maintenance fees.
-
Weakness: Beginners may need some time to get used to the swipe-to-adjust mechanism for parameters.
2.2 Adobe Lightroom Mobile - Professional-level darkroom experience
Lightroom Mobile is a scaled-down version of the legendary PC photo editing software. For those who are particular about detail and color, this is an irreplaceable app for correcting backlighting.
-
Key features: The Light section includes detailed sliders for Exposure, Contrast, Highlights, Shadows, White, and Black. By combining raising the Shadows slider to approximately +40 to +70 and lowering the Highlights slider to -30, your backlit photos will instantly regain a perfect dynamic range, just like those taken with a professional camera.
-
Strengths: Excellent ability to recover detail in dark areas without causing significant noise. Supports high-quality image output.
-
Weakness: Some advanced features, such as AI-powered region selection (Masking), require recurring fees.
2.3 Meitu - Brighten your portraits with AI in one touch
If you don't want the headache of figuring out which slider to adjust, let Meitu's AI handle it. This is a popular app, especially loved by women for its ability to understand facial structure.
-
Key features: The AI Editing feature (AI Illustration/Smart HD) automatically recognizes what is a person and what is a scene. The app will automatically adjust the brightness of the skin, brightening dark faces while still preserving the natural vibrancy of the sunset in the background.
-
Strengths: Extremely fast and simple operation, built-in color filters, and light effects such as shimmering sunbeams, making backlit photos more artistic.
-
Weakness: If overused, the image may lose its realism and look somewhat like a painting.
2.4 Picsart - Unlimited creativity with HDR tools
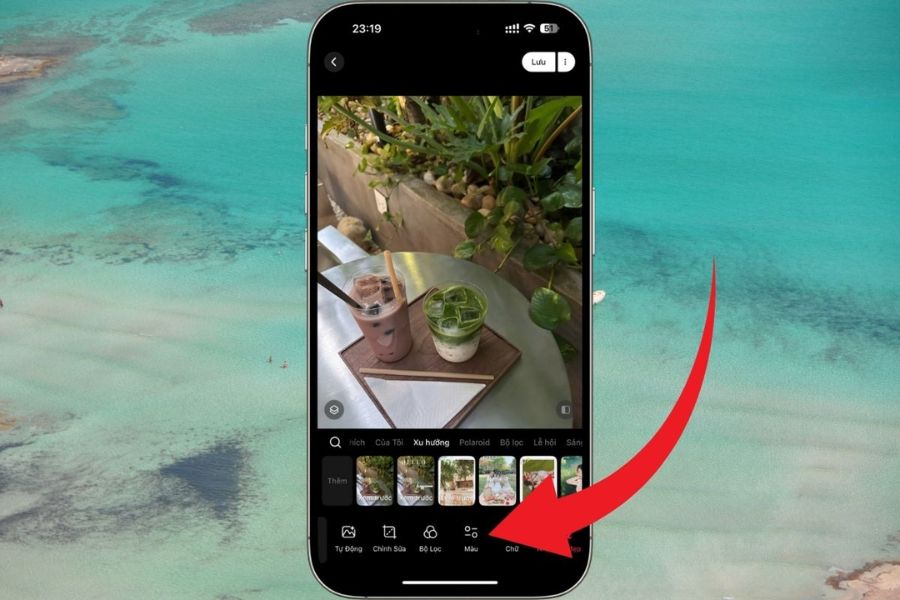
Picsart is not just an editing app, but also a mini art studio on your phone. For backlit photos, Picsart offers a range of solutions from basic to advanced.
-
Key features: HDR (High Dynamic Range) filters powerfully enhance contrast and color saturation, making dark areas more detailed. Additionally, the Blend feature allows you to add a simulated light overlay to create the illusion of natural sunlight filtering through the subject.
-
Strengths: Numerous supplementary tools, capable of removing unwanted objects or adding a new sky background if the old one is overexposed.
-
Weakness: The free version contains quite a lot of ads and frequently suggests upgrading to the Premium package.
2.5 VSCO - Art from cinematic color palettes
VSCO is famous for its film-simulating filters, but few people know that the app's customizable Toolkit handles backlit photos with incredible finesse.
-
Key feature: VSCO's Shadows tool works very smoothly. It doesn't artificially brighten the subject but gradually enhances the brightness, preserving a warm, artistic tone. When combined with the Tone tool , you can completely control the brightness range of the image.
-
Strengths: The colors after editing have depth, a cinematic and nostalgic feel, and don't look cheap or gaudy.
-
Weakness: Most of the beautiful color filters and advanced tools are included in the paid X-member subscription package.
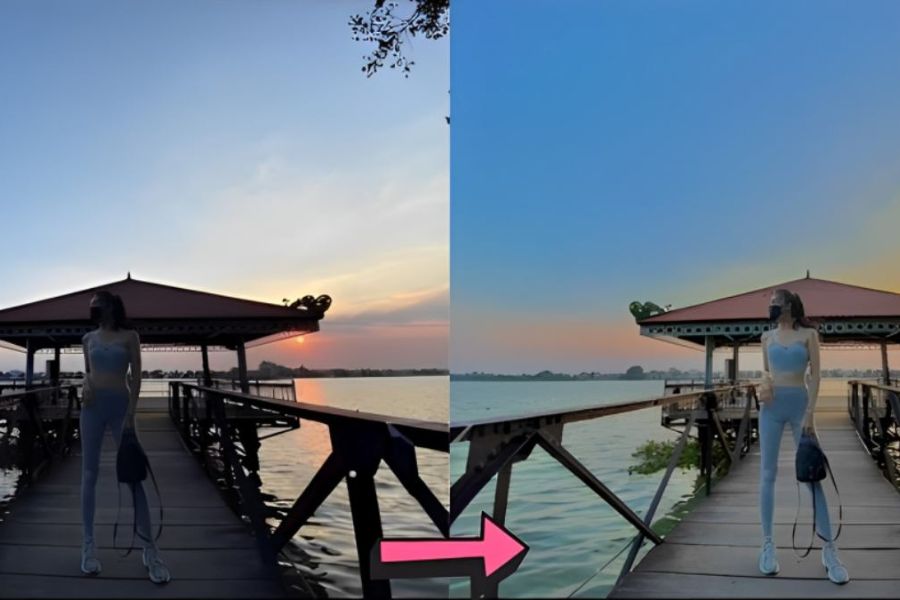
3. Step-by-step guide to the amazing formula for correcting backlit photos.
To help you visualize this better, here's a standard procedure you can apply to most backlight correction apps currently available, especially Snapseed or Lightroom:
Step 1: Restore subject details (Drag shadows)
Open the darkened photo in the app. Go to Tools > Image Adjustment (or Light). Find the Shadows slider and slowly drag it to the right (usually between +50 and +70). You will see the face or subject gradually become clearer, as if a pop-up light has just been turned on.
Step 2: Rescue the burnt-out background (Remove Highlights)
After step 1, if the sky appears completely white, find the Highlights slider and drag it to the left (from -30 to -50). This will help the clouds and the golden hues of the sunset become visible again.
Step 3: Increase transparency and sharpness (Clarity & Contrast)
After brightening the dark areas, the image often tends to be slightly blurry or have a light hazy effect. Try increasing the Contrast by about +10 and increasing the Clarity/Struktur so that the subject's features are clearly separated from the background.
Step 4: Balance the color temperature.
Backlit photos often have a cool, bluish tint because they are in the shadows. Try shifting the Color Temperature (Temp) slider slightly towards a warm yellow to make your skin look healthier, more vibrant, and blend in with the sunlight behind it.
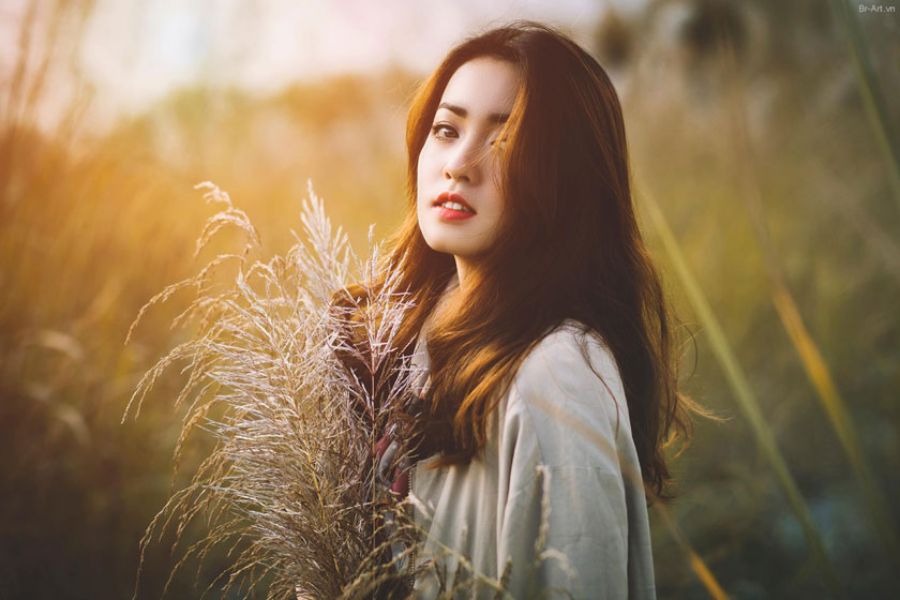
4. Golden tips for shooting and editing to get the perfect photo.
Although modern backlight correction apps are incredibly smart, the final image quality depends heavily on your original image file. Keep these points in mind:
-
Always enable HDR mode when shooting: Most newer phones have an Auto HDR feature. This mode automatically takes multiple photos at different brightness levels and combines them, helping your original image retain maximum detail in both bright and dark areas.
-
Tap to lock focus and meter in the intermediate area: When shooting, don't tap in areas that are too dark (making the background look washed out) and don't tap in areas that are too bright (making the subject look completely black). Tap in an area with medium brightness, then drag the sun icon slider up or down slightly to your liking.
-
Avoid over-brightening, which causes noise: When you force a dark area to brighten, digital noise will appear. If you see the image starting to become grainy and showing red and blue spots, stop and reduce the Shadows setting. An image with some natural shadows will look more profound and realistic than one that is overexposed but suffers from image distortion.
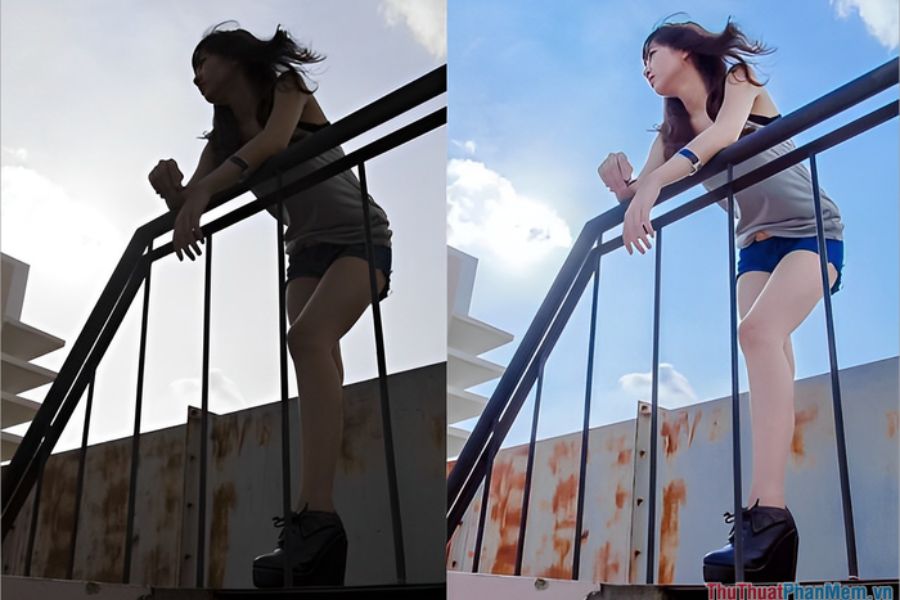
5. Conclusion
A backlit photo is no longer a failed work of art if you know how to use the right backlight correction app. Whether you're a busy person who loves the convenience of AI on Meitu or BeautyPlus, or a photography enthusiast who wants to meticulously adjust every parameter on Lightroom or Snapseed, today's technology can fully meet your needs. Don't hesitate to capture those backlit moments, because sometimes the interplay of light and shadow, combined with a little skill in post-processing, will create the most profound and moving photos. Good luck and may your photos get millions of likes on social media!





















VIP Products








Best Selling Products
Genuine Adobe Illustrator account
99 USD
Genuine Cheap Canva Pro
39 USD
Adobe Premiere Pro Account
99 USD
Capcut Pro 1 Year
39 USD
Adobe Photoshop Copyright - Full App
120 USD
Upgrade Duolingo Super
29 USD
MidJourney Account
29 USD
Copyright Adobe Lightroom Account
59 USD
ChatGPT Plus Account (GPT-4)
16 USD
Freepik Premium Account
59 USD
Windows 10 & 11 Pro Key
36 USD
Plugin Retouch4me
69 USD
Autodesk All App Account Copyright
120 USD
Upgrade genuine Capture One account
120 USD
Upgrade Genuine Office 365
49 USD