Best Selling Products

Windows 10 & 11 Pro Key
36 USD

Adobe Photoshop Copyright - Full App
120 USD

Freepik Premium Account
59 USD

Capcut Pro 1 Year
39 USD

Autodesk All App Account Copyright
120 USD

Copyright Adobe Lightroom Account
59 USD

Genuine Cheap Canva Pro
39 USD

ChatGPT Plus Account (GPT-4)
16 USD

Genuine Adobe Illustrator account
99 USD

Adobe Premiere Pro Account
99 USD

Upgrade genuine Capture One account
120 USD

MidJourney Account
29 USD

Upgrade Duolingo Super
29 USD

Upgrade Genuine Office 365
49 USD

Plugin Retouch4me
69 USD
Tips for Brightening Videos with Adobe Premiere Pro
Nội dung
Adobe Premiere Pro, you can easily brighten videos with just a few simple steps. Let's explore with SaDesign the secret to quickly and effectively brightening videos to help images become sharp and attractive at first sight.
You just shot a great video, but when you play it back, it's dark, grainy, and lifeless? Don't worry! With Adobe Premiere Pro, you can easily brighten your video with just a few simple steps.
In this article, SaDesign will guide you step by step to improve video brightness professionally and quickly. Whether you are a beginner or an expert, let's explore these secrets!
1.Why Is Video Brightening Important?
Better Viewer Experience
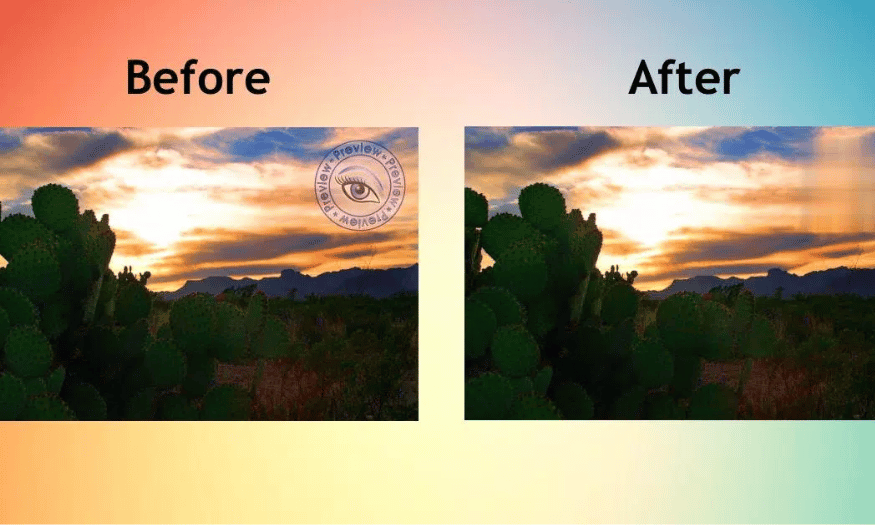
Lighting plays an important role in conveying video content. A video with the right brightness will help viewers easily see details, grasp information quickly and not feel tired eyes when watching for a long time. On the contrary, a video that is too dark will make viewers strain their eyes to see clearly, easily causing discomfort and loss of concentration.
Professional and Attractive
Good lighting not only makes your video easy to watch, but it also makes it look professional and trustworthy. Poorly lit videos often come across as sloppy or poorly thought out, especially in areas like advertising, education, or personal vlogging.
(1).jpg)
Rescue For Low Light Scenes
You can't always shoot video in ideal lighting conditions. Sometimes you have to shoot at night, indoors with low light, or against a backlight. In these situations, Adobe Premiere Pro is the perfect "savior."
Adobe Premiere Pro Upgrade
2. Detailed Adobe Premiere video brightening guide
Premiere Pro offers a Three-Way Color Corrector that helps users correct color. So if you want to brighten your video, use this feature.
2.1. Three-Way Color Corrector feature in Premiere
The Three-Way Color Corrector effect helps you adjust the color of your video in Adobe Premiere with three color circles in real time to get the video you want.
The three color adjustment circles are Shadows, Midtones and Highlights, representing the darkest, middle and brightest parts of the frame. When you customize one of the three areas, you will see the corresponding changes for each light - dark area in the video.
.jpg)
2.2. How to adjust video brightness in Premiere
Now let's see in detail how I use the Three-Way Color Corrector to brighten dark scenes.
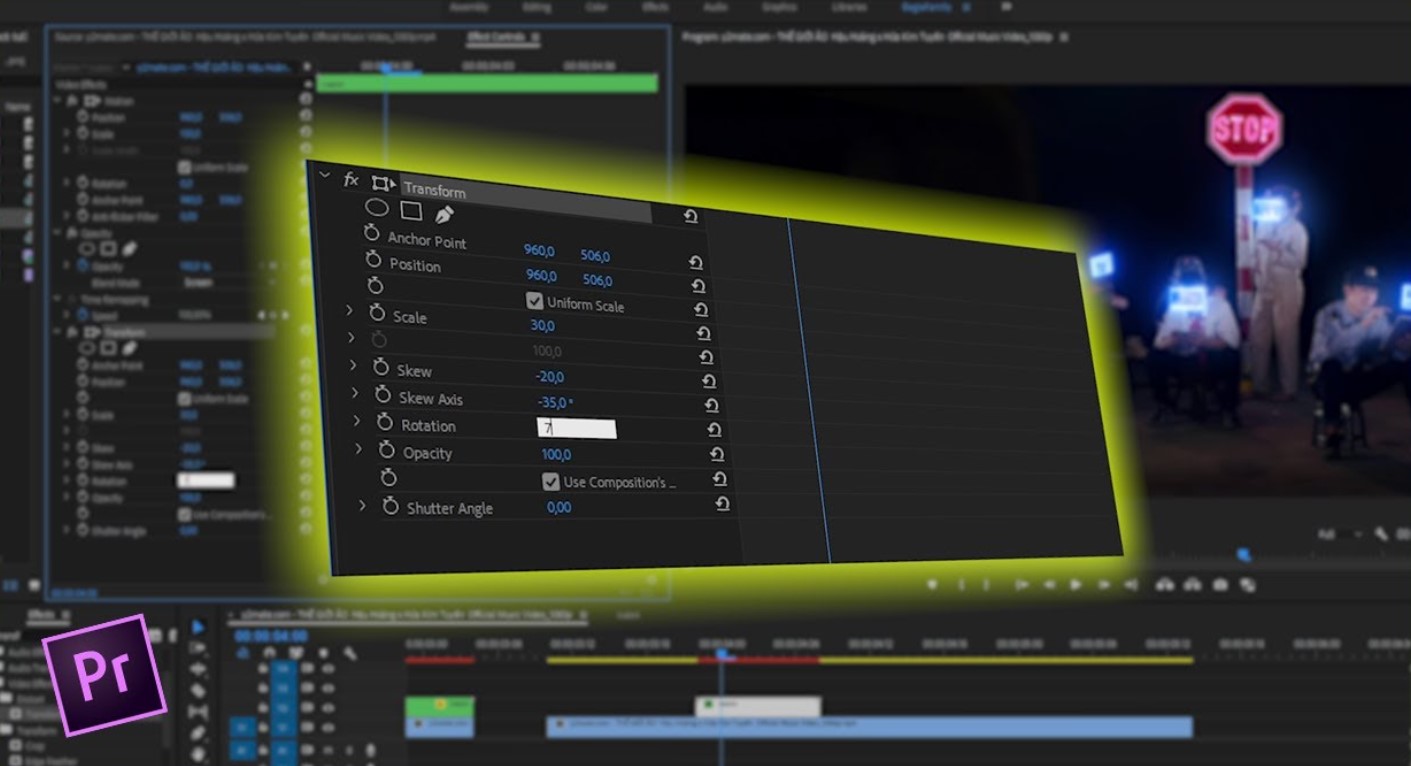
Step 1: Open the video you are editing on Premiere, open the Effects workspace.
.jpg)
In the effects search bar in Premiere on the right, type Three-Way Color Corrector.
.jpg)
Immediately, you will see the Three-Way Color Corrector effect appear, hold down the mouse and drag it to the video frame on the timeline bar.
.jpg)
Step 2: Now, you can see the Three-Way Color Corrector effect has appeared in the Effect Controls adjustment frame with 3 color wheels and 2 corresponding custom sliders below.
Let's pay attention to the Input slider:
Midtones: Slide the needle in the middle to increase the brightness of the midtones. Adjust until you find something that suits your video, usually it should be between 1.2 - 1.8.
Highlight Area: we need to drag the right slider down to reduce the brightness of the highlight area.
.jpg)
Shadows: The previous steps reduced the contrast, so you need to drag the left slider up to about 5.0 to get the contrast back.
.jpg)
Step 3: When adjusting the brightness for each area, you may have lost the saturation of the video clip. Therefore, you need to adjust the saturation of the video by expanding the Saturation option and adjusting the Master Saturation item to 150.
.jpg)
Tip: If you just want to brighten the video without worrying about the video quality, you can customize the brightness in the Shadow slider on the left. But this will make the video feel washed out because the bright areas are not balanced.
Brightening videos in Adobe Premiere Pro is not complicated if you master the basic steps. With just a few simple steps, your videos will become brighter, more professional and more attractive than ever.


VIP Products


Best Selling Products
Windows 10 & 11 Pro Key
36 USD
Adobe Photoshop Copyright - Full App
120 USD
Freepik Premium Account
59 USD
Capcut Pro 1 Year
39 USD
Autodesk All App Account Copyright
120 USD
Copyright Adobe Lightroom Account
59 USD
Genuine Cheap Canva Pro
39 USD
ChatGPT Plus Account (GPT-4)
16 USD
Genuine Adobe Illustrator account
99 USD
Adobe Premiere Pro Account
99 USD
Upgrade genuine Capture One account
120 USD
MidJourney Account
29 USD
Upgrade Duolingo Super
29 USD
Upgrade Genuine Office 365
49 USD
Plugin Retouch4me
69 USD