Best Selling Products
Tips for Creating Double Exposure Photo Effects in Photoshop
Nội dung
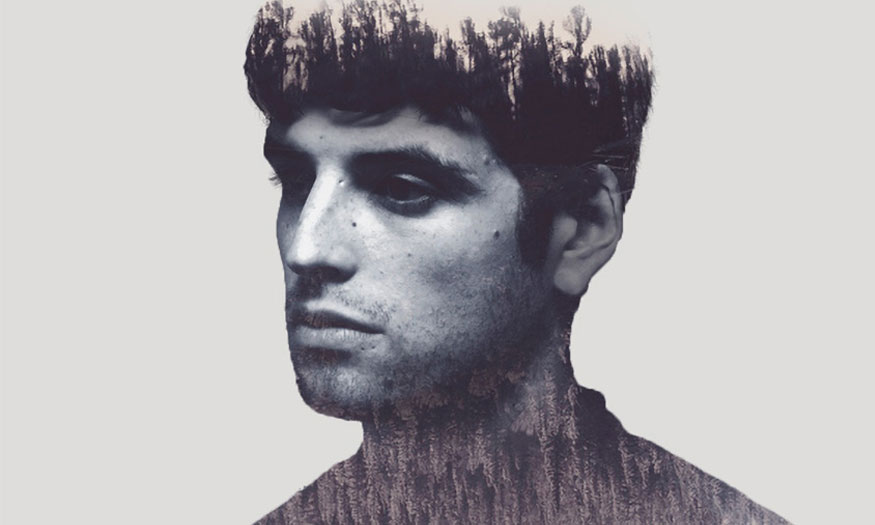
The double exposure effect is the combination of two or more exposures to create a single image. This is an extremely impressive technique that helps create impressive design works. If you are interested in how to create a double exposure photo effect in photoshop, let's find out right away in the following article that SaDesign brings!
1. Prepare the main background image for the double exposure effect
To create a double exposure photo effect in photoshop, you first need to prepare the main image for the effect as follows:
Step 1: We will use a background image of a guy, you can use any image you like. However, make sure the background is neutral, without distracting elements like grass or leaves, so it will be easier to work with. Use the crop tool (C) to make the image less wide by erasing the sides of the image.
.jpg)
Step 2: Next, let's make the image brighter and add contrast. Go to Image > Adjustments > Levels or press Ctrl-L to open the Levels menu. Move the brightest slider to the left to brighten the image and add contrast by moving the left black slider to the right. Or you can set a specific value as shown in the image below. Click OK to apply the adjustments.
.jpg)
Step 3: You need to fix the guy's ear with the Spot Healing Brush tool (I). Just click and move your mouse, drawing above the area you want to fix, and the marked area will be clean and perfect instantly. This is a very handy tool for photo editing, when you need to remove some small blemishes and bumps on the skin.
.jpg)
Step 4: Now we need to remove the background. Use the Magic Wand Tool (W) and click anywhere on the background to select it. Then go to Select > Inverse to select the man.
.jpg)
Step 5: While you are still using the Magic Wand Tool (W), look for the Refine Edge button in the control panel to help bring up the Refine Edge options window. Here, you can change the view of the image under View Modes. Then place the selected element on a white, black, transparent, and other backgrounds to make them easier to see and edit.
Slightly increase the Radius value in Edge Detection, set to 1.5 to make the edges less harsh. This will reveal fine details, such as individual hair strands.
In the Output section of the options window set Output To to New Layer with Layer Mask. This will automatically create a copy of your original image with the background hidden by the Clipping Mask.
You can also use the other Refine Edge options to make the edges smoother or more blurred. This is useful if you are cutting out an element that is surrounded by other elements, or if the image has a complex background and the edges of the main object are messy.
.jpg)
Step 6: Create a new layer below the cropped portrait and fill it with a neutral gray (color code #dcdbd9) using the Paint Bucket Tool (G).
.jpg)
2. How to create a double exposure effect by combining 2 images
To create a drag exposure effect in photoshop by combining 2 images, we do the following:
Step 1: Let's choose a second photo for our composition. You can choose a flower image or a high-rise building image,... as you wish. For this photoshop double exposure tutorial we will use this monochrome nature scene of a forest.
.jpg)
Step 2: Place the forest image above the man's portrait. Keeping the forest layer selected, hold down the Ctrl key and click on the Layer Clipping Mask of the layer below (the layer with the portrait). You will see the man's silhouette on the forest layer.
.jpg)
Step 3: Click the add vector mask button at the bottom of the Layers panel to hide unnecessary parts of the forest image. Click the chain icon between the image thumbnail and the mask thumbnail in the Layers panel to unlink the layer and the layer mask. This will allow you to move and rotate the image inside the mask without having to move the entire layer.
In this case, let's place the forest image upside down so that the dark reflection of the trees is at the top of the silhouette as shown below:
.jpg)
Step 4: Select the layer containing the cutout portrait with the clipping mask. Make a copy (Ctrl-J) and drag and drop it above the forest layer.
Let's make the portrait monochrome to match the color scheme of the forest image. Keeping the portrait layer selected, go to Image > Adjustments > Desaturate or simply press Shift-Ctrl-U, converting our image to grayscale.
.jpg)
Step 5: Open the Levels options window (Ctrl-L) and make the image much darker by moving the black slider to the right or setting the value manually to 117.
Apply the effect then go to Image > Adjustments > Hue/Saturation. Check the Colorize checkbox in the lower right corner of the options window to change the entire color range of the image.
.jpg)
Then set the Hue value to 212, move the slider to the right. Set the Saturation level to 10, reduce the vibrancy of the photo and click OK to apply the created effect.
Step 6: Right click on the portrait layer mask, Apply Layer Mask in the drop down menu. Change the Blending Mode of the portrait layer to Screen in the Layers panel. We can see the desired double exposure effect has appeared.
.jpg)
3. How to add finishing touches to your double exposure
To add finishing touches to your double exposure we need to do the following:
Step 1: Let's make the image more surreal by editing the head of the portrait. Use the Brush tool (B) and select the Airbrush Soft Round 17 from the standard Round Brushes with Size set (you can find it in the brush drop-down menu if you right-click or in the Brushes panel (F5)).
Select the Layer Mask of the forest layer, set the Fill color to black and lightly paint over the top of the head area. This will erase unwanted parts of the head and add a little air to the top of the image. This will make it look like the tree is growing directly from the man's head.
.jpg)
Step 2: Some parts of the image look too noisy, for example the eye area - where the trees in the forest image create a distracting effect. You need to remove this and make these parts clearer and more contrasty.
Create a New Layer below the portrait layer, use the Brush Tool (B) again and change the Fill color to a dark blue (color code #2f2c35), you can pick this color directly from the portrait's hair using the Eyedropper Tool (I).
Start painting over the eyes to make them more defined. For added convenience, you can hold Ctrl and click on the portrait layer's layer mask to create a selection, which allows you to paint within the selected area without going over the boundaries of the area.
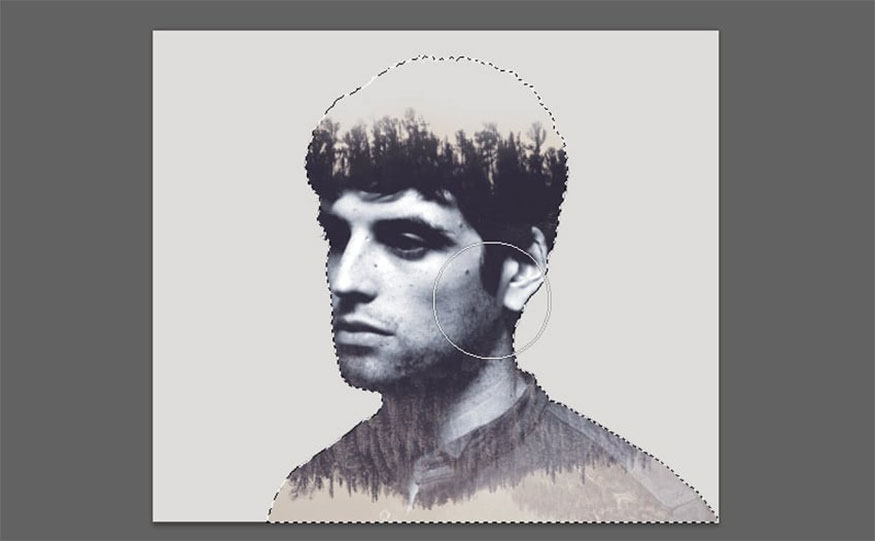
Step 3: To add the finishing touch to the image, select the desaturated portrait layer and Layer Mask by clicking on the mask icon at the bottom of the Layers panel. Select the Brush tool (B) and change the Fill color to black. Since the layer mask is set to white by default, black will help us erase the unwanted parts of the image. Paint over the man’s neck area, creating the illusion of his face sticking out of the tree.
And this is the result we get, impressive right?
.jpg)
With the simple steps above, we have successfully created a double exposure photo effect in photoshop. Wish you success in applying it to your images and don't forget to follow Sadesign to update more interesting knowledge!


