Best Selling Products

Upgrade Genuine Office 365
49 USD

Upgrade genuine Capture One account
120 USD

Adobe Photoshop Copyright - Full App
120 USD

Adobe Premiere Pro Account
99 USD

Windows 10 & 11 Pro Key
36 USD

Genuine Adobe Illustrator account
99 USD

Freepik Premium Account
59 USD

ChatGPT Plus Account (GPT-4)
16 USD

Capcut Pro 1 Year
39 USD

Copyright Adobe Lightroom Account
59 USD

Genuine Cheap Canva Pro
39 USD

Upgrade Duolingo Super
29 USD

Plugin Retouch4me
69 USD

MidJourney Account
29 USD

Autodesk All App Account Copyright
120 USD
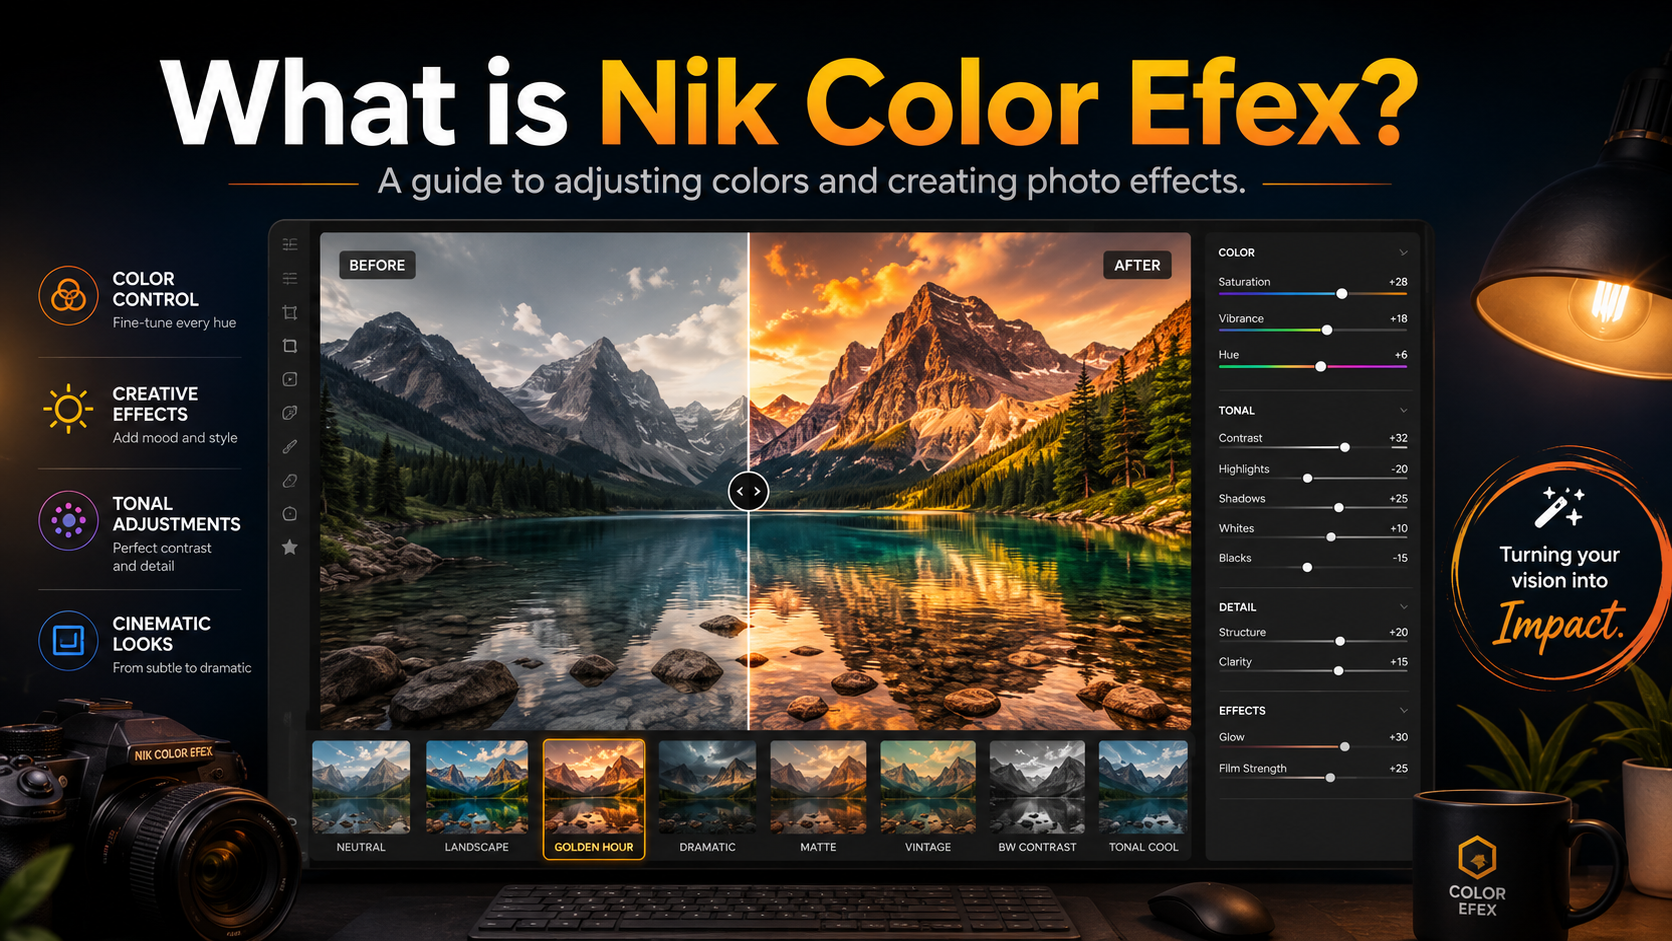
What is Nik Color Efex? A guide to adjusting colors and creating photo effects.
Nội dung
- 1. What is Nik?
- 2. Nik Color Efex opens up a world of color.
- 3. Create stunning images in three steps.
- Step 1: Create your own style
- Step 2: Use Photo Stylist
- Step 3: Enhance detail with Detail Extractor
- 4. Control editing with U Point
- 5. Designed for speed
- 6. Turn back time with Nik Analog Efex
- 7. Noise reduction with Nik Dfine
- 8. Combine images with Nik HDR Efex
- 9. Combining Nik Color Efex with Photoshop
Nik Color Efex is a powerful tool for those who want to enhance their color correction skills and create their own unique style for their photos.
1. What is Nik?
Nik is a system of advanced photo editing tools designed to help photographers and image editors make rapid changes while maintaining control over detail.
Within this ecosystem, each tool handles a specific set of tasks. Nik Color Efex focuses on color and creative effects, Nik Analog Efex is geared towards film and analog photography styles, Nik Dfine supports noise reduction, and Nik HDR Efex specializes in HDR image processing and contrast range.
A notable feature of Nik is its ability to integrate these tools with existing photo editing workflows. Users can use Nik alongside Photoshop to create more complex edits without necessarily having to perform all the operations manually.
2. Nik Color Efex opens up a world of color.
Nik Color Efex brings advanced color correction tools to the image processing workflow, especially when used with Photoshop. The software integrates many customizable settings, allowing users to take images in a completely new direction.
Instead of just adjusting basic parameters like brightness or saturation, Color Efex offers a variety of filters built upon traditional photographic techniques.
Basic controls such as level, tone, and contrast are provided for users to control the effects. In addition, there are many creative filters that can significantly change the appearance of a photograph.
One effective approach is to apply a relatively strong effect first to determine the desired image orientation. Then, the user can reduce the intensity using the Opacity slider or further adjust the parameters.
This approach makes the creative process more intuitive. Instead of visualizing the result from scratch, you can try an effect, observe the changes in the image, and then continue to refine it until you achieve the desired look.
3. Create stunning images in three steps.
One of the appealing aspects of Nik Color Efex is its ability to give photos a completely new look without requiring complex operations.
Step 1: Create your own style
Nik Color Efex offers 61 filters , many of which mimic traditional photography techniques.
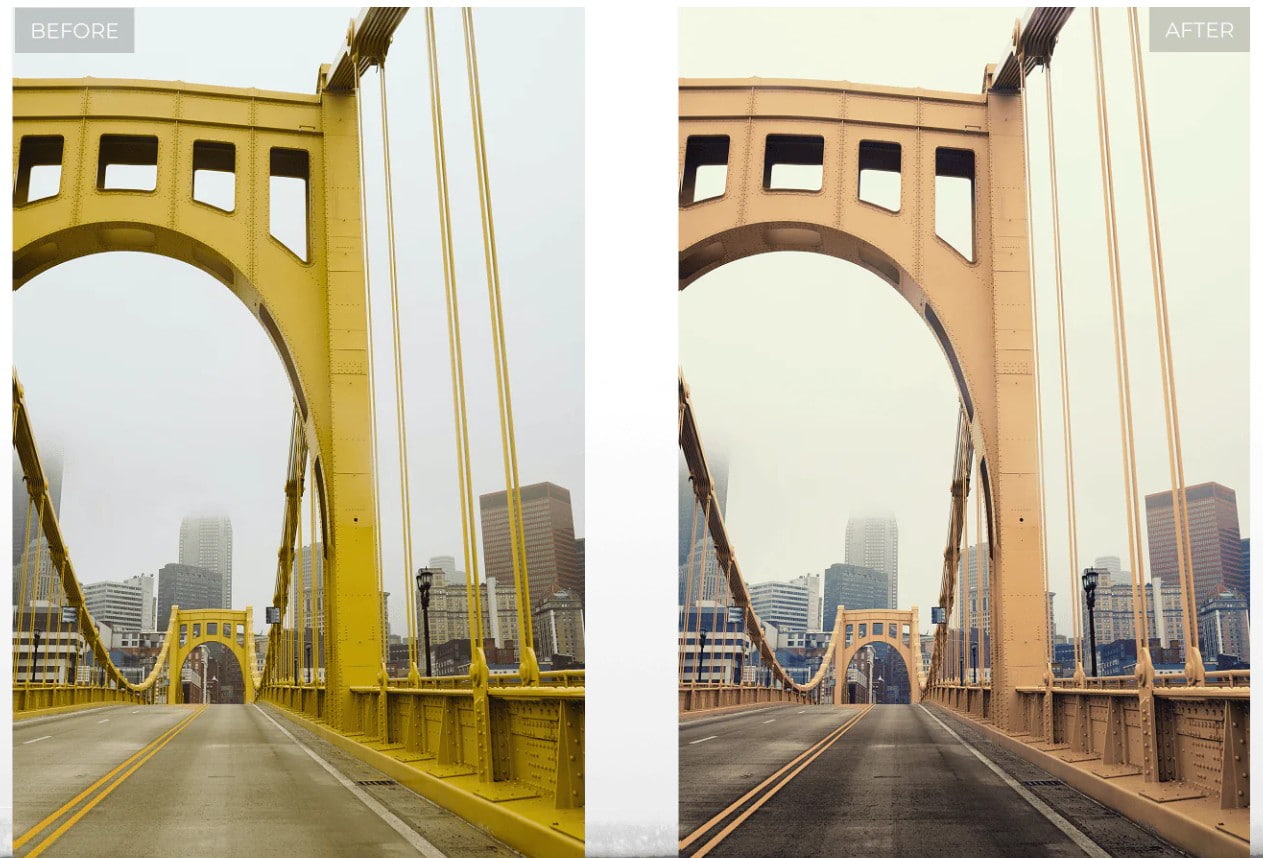
This allows users to quickly experiment with different styles. In just seconds, an ordinary photo can take on a vintage look, strong contrast, or feel like it was processed using a traditional photographic technique.
Instead of starting with a bunch of technical specifications, you can choose a filter that suits your initial idea, and then fine-tune the level of impact.
This method is especially useful when you haven't yet decided on your final style. Quickly trying out different filters helps you find the right editing direction before delving into the parameters.
Step 2: Use Photo Stylist
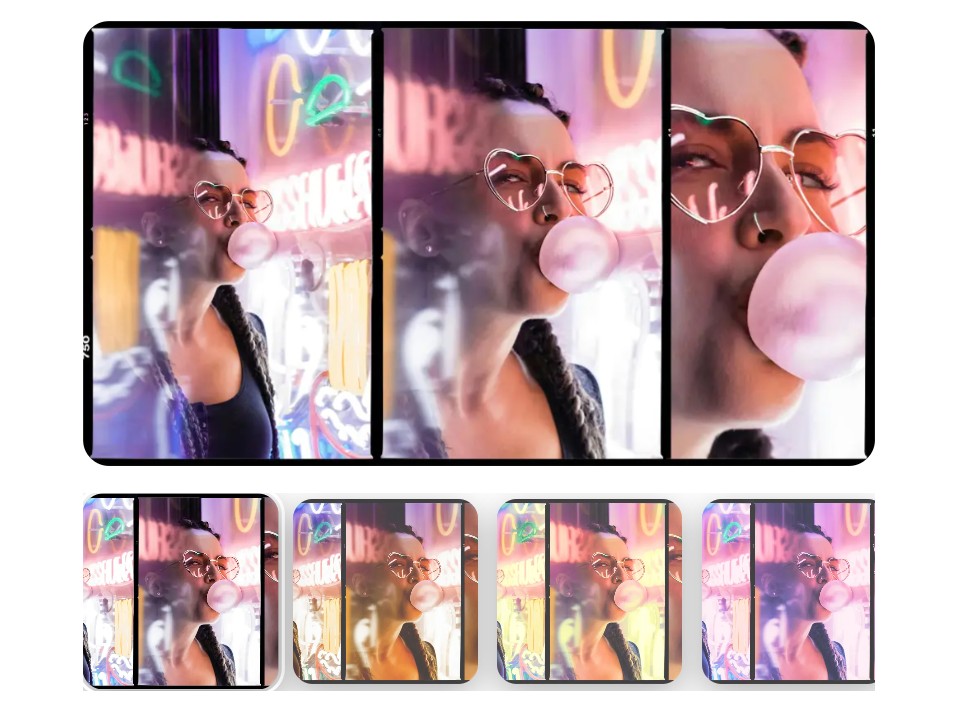
Once the color foundation has been established, Photo Stylist can be used to take images in a completely new direction.
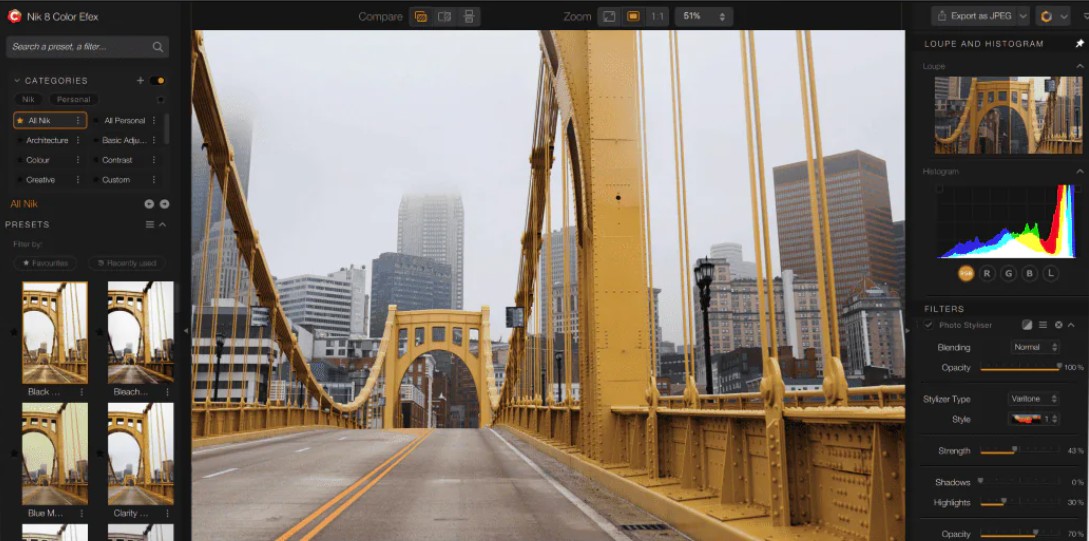
This filter gives the feeling of stepping back in time, creating an analog atmosphere reminiscent of the visual style of the 90s.
The strength of this approach lies in its ability to change the overall feel without manually adjusting each element. Color, contrast, and image quality are combined to create a deliberate visual effect.
For fashion, street, portrait, or projects aiming to evoke a sense of nostalgia, this style can be a worthwhile option to try.
Step 3: Enhance detail with Detail Extractor
The final step can involve using Detail Extractor to add more detail and a rough texture to the image.
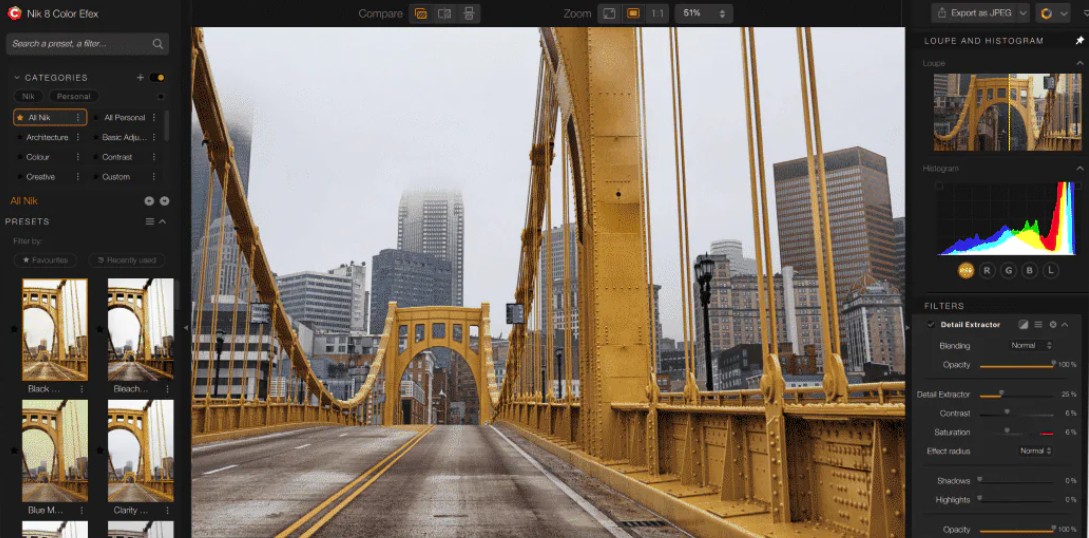
The key point is that the effect doesn't necessarily have to be applied to the entire image. With local adjustments using U Point™ , users can precisely select the area they want to affect.
For example, you can increase the detail in the lower half of the image while keeping the rest softer. This creates a contrast in texture and helps the viewer focus on the important areas.
The three-step process of styling, shaping the image texture, and adding detail demonstrates the flexible creative capabilities of Nik Color Efex.
4. Control editing with U Point
One of the highlights of the Nik ecosystem is U Point™ technology .
In many cases, applying the same effect to the entire image can disrupt the balance. An area needing increased contrast may not necessarily need increased sharpness. Similarly, the subject's skin may require less processing than the background or objects with more texture.
U Point allows users to make quick and intuitive local adjustments. You can target a specific area, adjust parameters, and observe the results live.
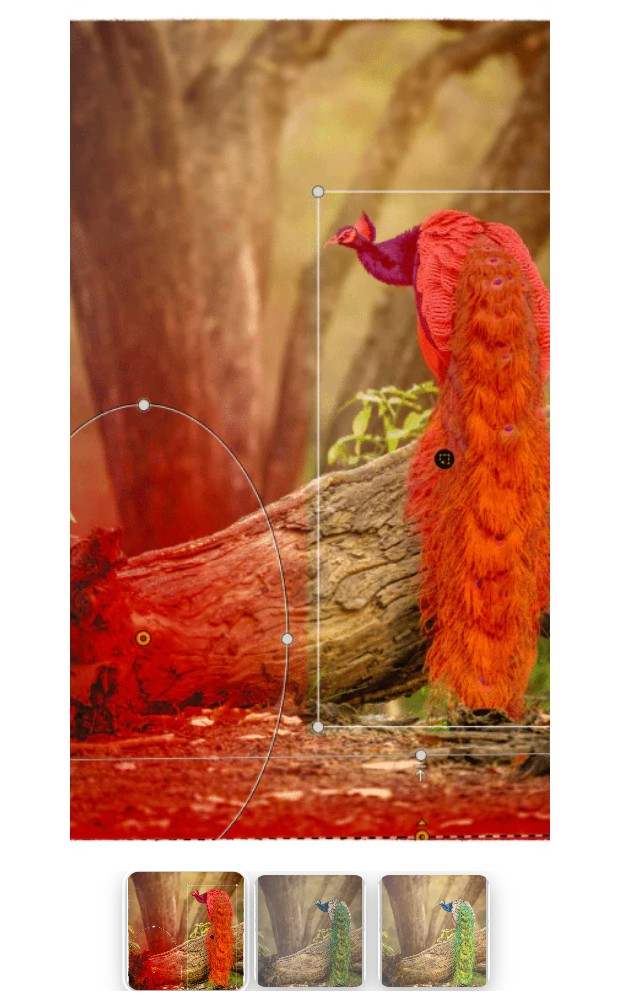
This technology is particularly useful when processing images with multiple subjects or complex scenes.
In newer versions, local editing capabilities are further enhanced with AI Masks and Depth Masks . These tools make it easier to identify the subject or area that needs editing.
The basic process is very intuitive: click on the area to be edited, adjust the parameters, and observe the image change right at the desired location .
As a result, users don't need to create too many manual selections but can still control the effects at a detailed level.
5. Designed for speed
Nik aims for a fast editing process but without sacrificing in-depth control.
Instead of performing a series of manual operations in Photoshop, users can start with a pre-set filter and then adjust the parameters to achieve the desired result.
This is especially useful when you have to process many images or need to quickly experiment with different styles.
Speed comes not only from applying filters but also from the ability to make local edits. When U Point and masking tools are used correctly, you can precisely affect the area you need to adjust without spending a lot of time creating complex selections.
6. Turn back time with Nik Analog Efex
Although Color Efex focuses on color and effects, the Nik ecosystem also includes Nik Analog Efex , a tool geared towards film and analog photography styles.
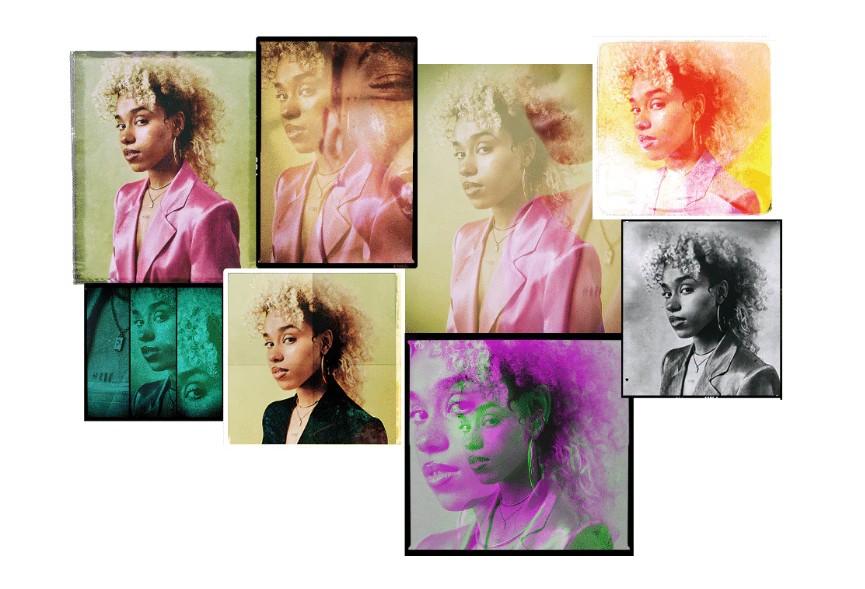
Analog Efex combines a variety of creative effects with film-inspired looks, light leaks, and vintage motifs.
Users can explore a large library of presets, tools, and filters to give their images a vintage feel.
This is a suitable option when the goal isn't to create an overly clean or modern image, but rather to retain a sense of authenticity, texture, and the hallmarks of analog photography.
By combining Analog Efex with Color Efex, users can build a more comprehensive color and style editing workflow.
7. Noise reduction with Nik Dfine
A photograph may have beautiful colors, but excessive noise can still degrade its overall quality. Nik Dfine is designed to address this problem.
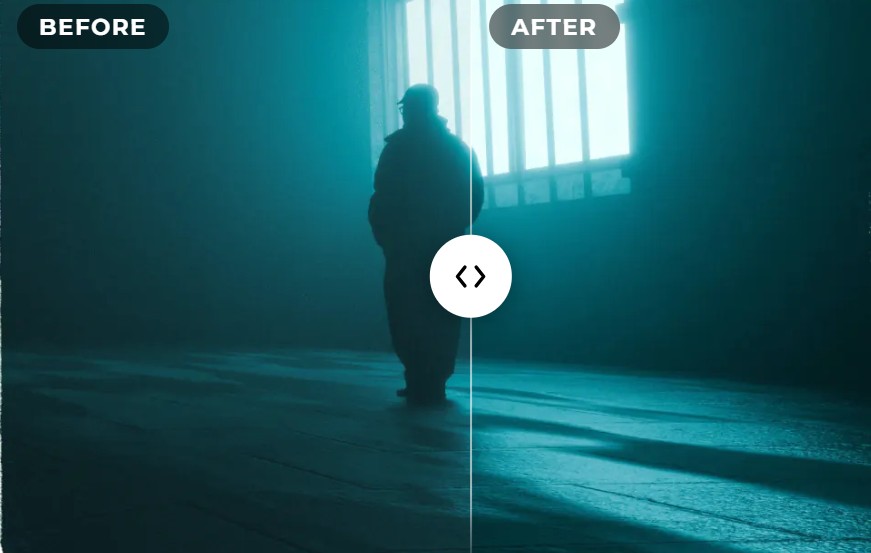
The tool focuses on digital noise reduction techniques, which help eliminate noise while striving to maintain image quality and detail.
Dfine's strength lies in its ability to use U Point to focus processing on the truly essential parts.
This is especially useful when noise levels are not uniform across the entire image. For example, areas of the sky or shadows might require more noise reduction, while the main subject needs to retain more detail.
Thanks to its selective editing capabilities, Dfine helps users avoid applying excessive noise reduction to the entire image.
8. Combine images with Nik HDR Efex
Nik HDR Efex focuses on creating and processing HDR images.
Users can combine multiple images with different exposure levels to create natural or artistic HDR images. Additionally, the tool allows for tone adjustment on individual files.
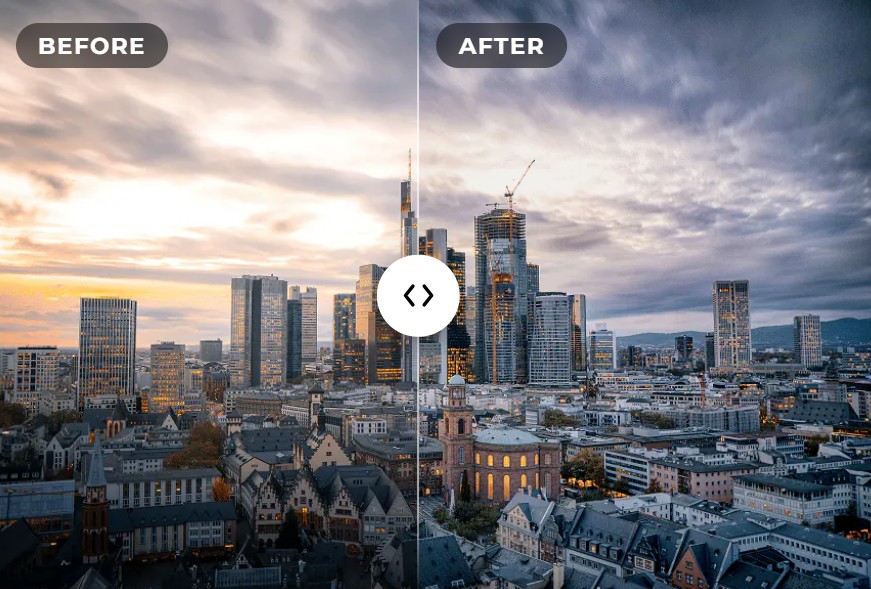
One of the key aspects of HDR is dynamic range control. When an image has both very bright areas and deep dark areas, retaining detail in both can become challenging.
HDR Efex provides tools such as advanced tone compression, exposure blending, and intelligent contrast adjustment . This allows users to control dynamic range while maintaining fine detail and color fidelity.
This tool is particularly useful for landscape photos, architecture, or scenes with high contrast in lighting.
9. Combining Nik Color Efex with Photoshop
Nik Color Efex works well when integrated into the Photoshop editing process.
Photoshop can handle in-depth image editing tasks, while Color Efex supports quick color and effect creation.

A logical process might begin with basic editing in Photoshop, then use Color Efex to build the color style. After applying the effect, users can further refine it using U Point or masking tools to control each area.
This combination helps to limit the uniform application of the effect across the entire image and produces a more controlled result.
While Photoshop provides a powerful image editing platform, Nik Color Efex can serve as a creative toolset that makes the process of color creation, styling, and image refinement faster and more intuitive.
The most important thing isn't to use as many filters as possible, but to know how to choose the right effects, control the intensity, and apply them to the right areas. When used correctly, Nik Color Efex can help ordinary photos become more distinctive, have depth, and convey clear emotion.





















VIP Products








Best Selling Products
Upgrade Genuine Office 365
49 USD
Upgrade genuine Capture One account
120 USD
Adobe Photoshop Copyright - Full App
120 USD
Adobe Premiere Pro Account
99 USD
Windows 10 & 11 Pro Key
36 USD
Genuine Adobe Illustrator account
99 USD
Freepik Premium Account
59 USD
ChatGPT Plus Account (GPT-4)
16 USD
Capcut Pro 1 Year
39 USD
Copyright Adobe Lightroom Account
59 USD
Genuine Cheap Canva Pro
39 USD
Upgrade Duolingo Super
29 USD
Plugin Retouch4me
69 USD
MidJourney Account
29 USD
Autodesk All App Account Copyright
120 USD